Create sample is The Section where you can cadd items to your database.
Follow the step-by-step instructions:
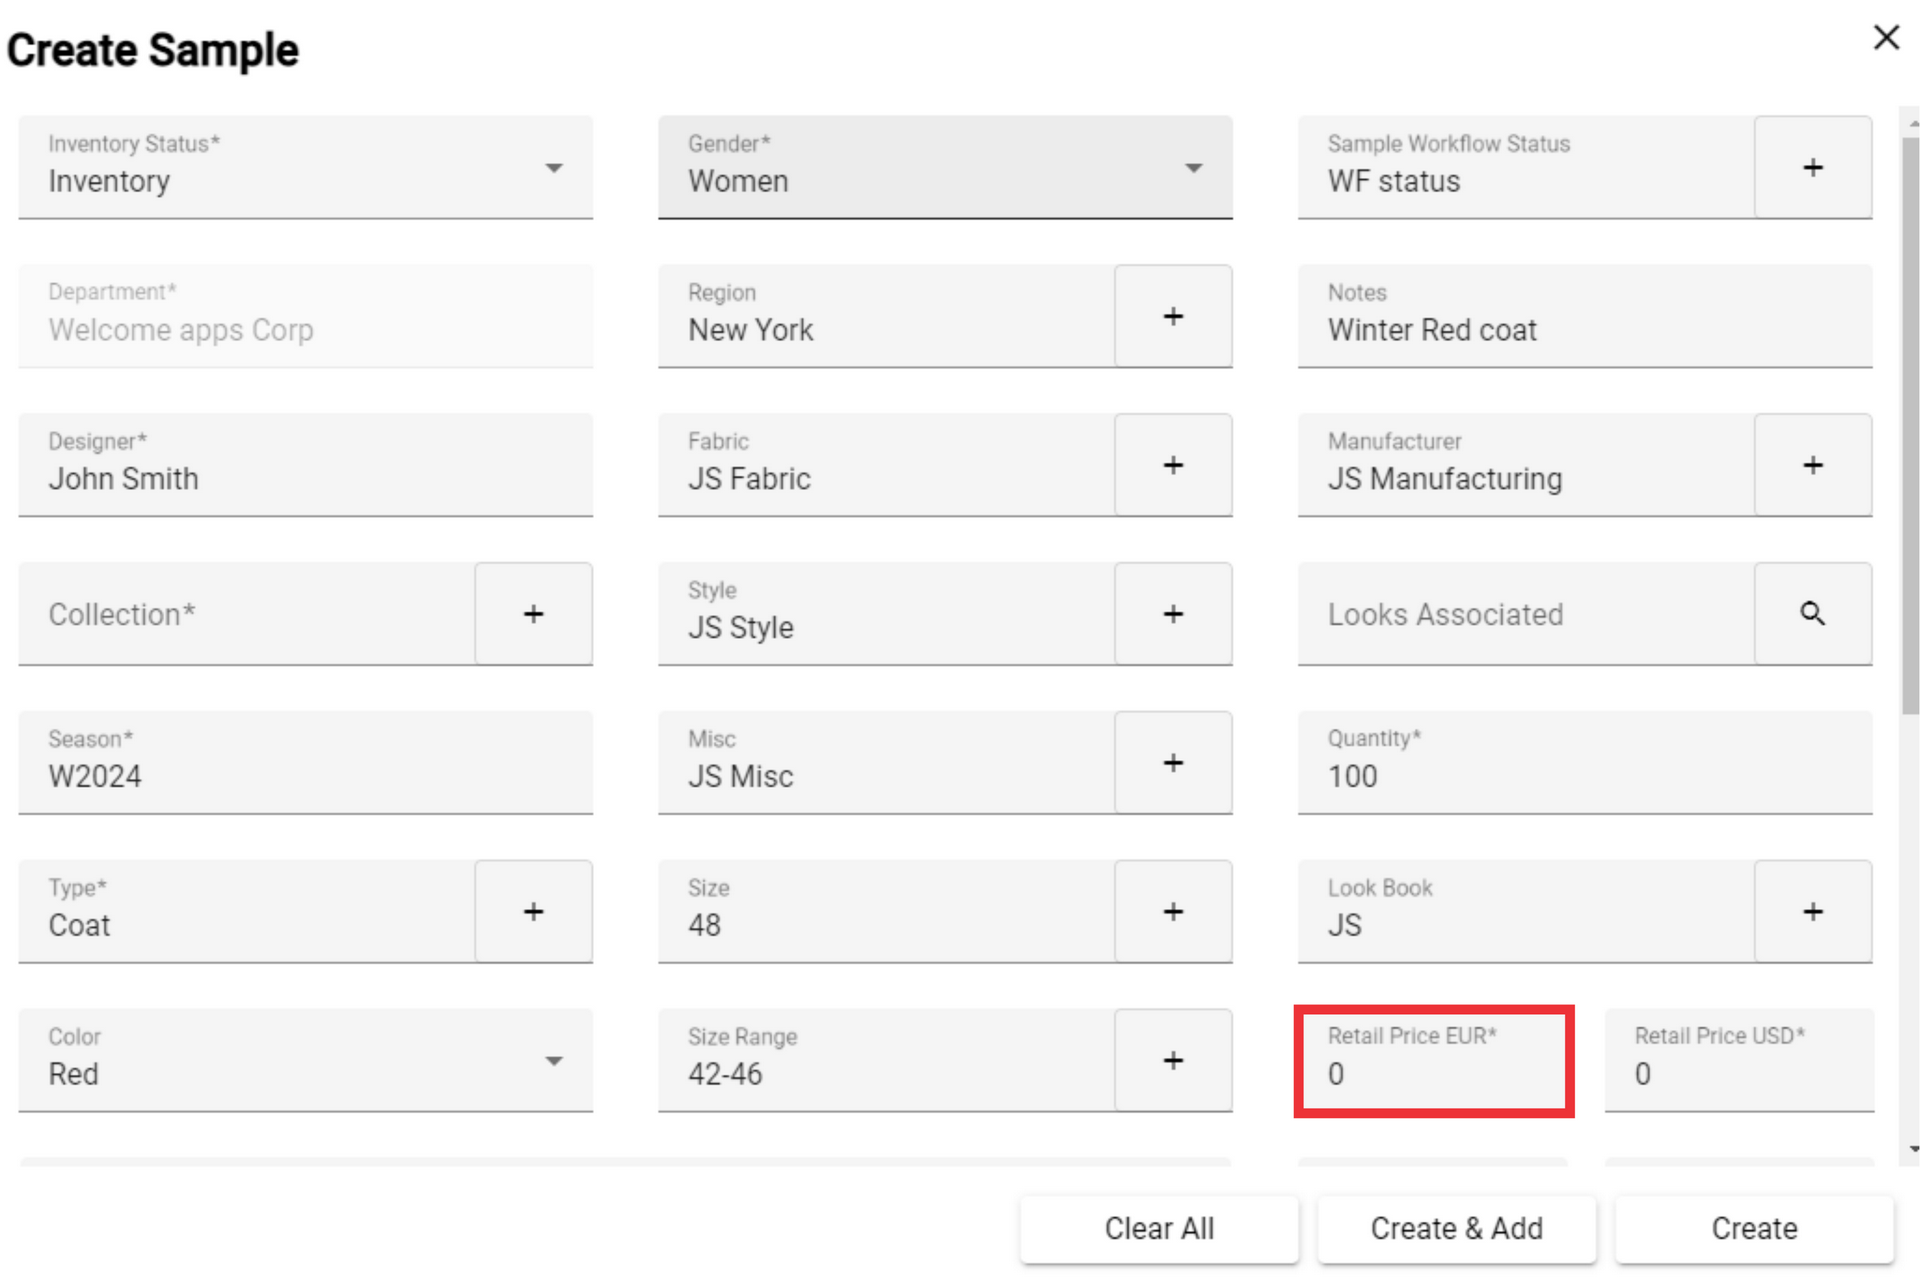
It is necessary to fill all the fields marked with the asterisk *.
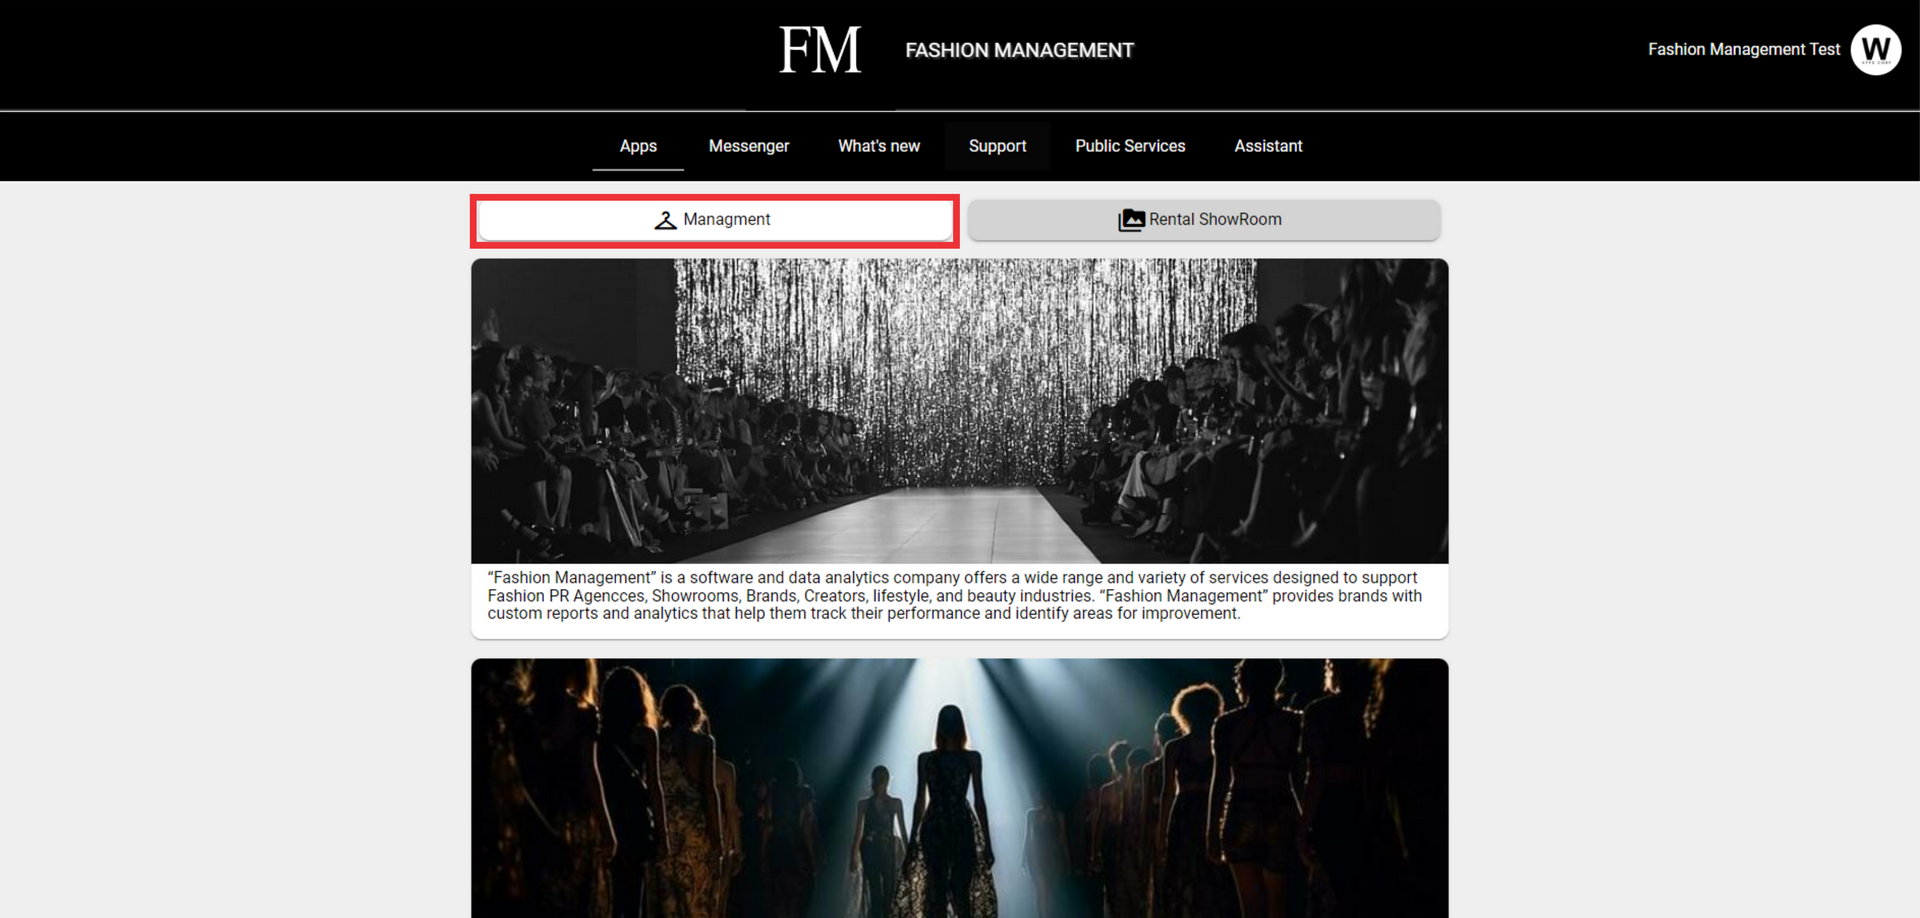
1. Select "management" from the Applications menu.
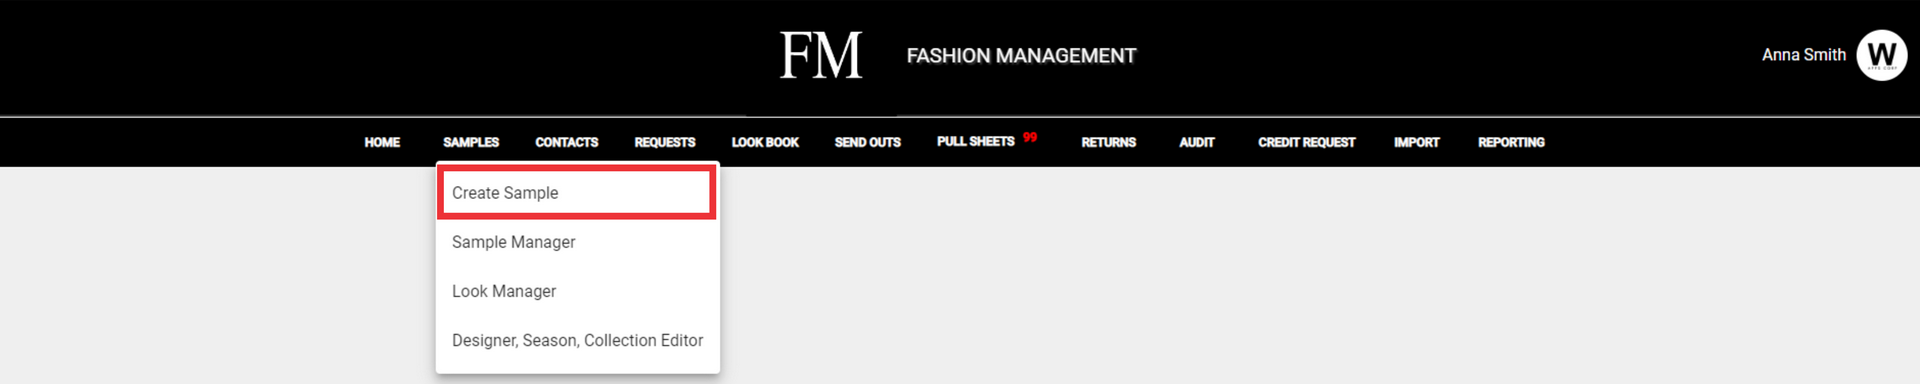
2. Click the "Samples" button to Open the menu.

3. Click the Create Sample Button.
4. Choose the Inventory Status from drop down menu.

5. Select your Department.
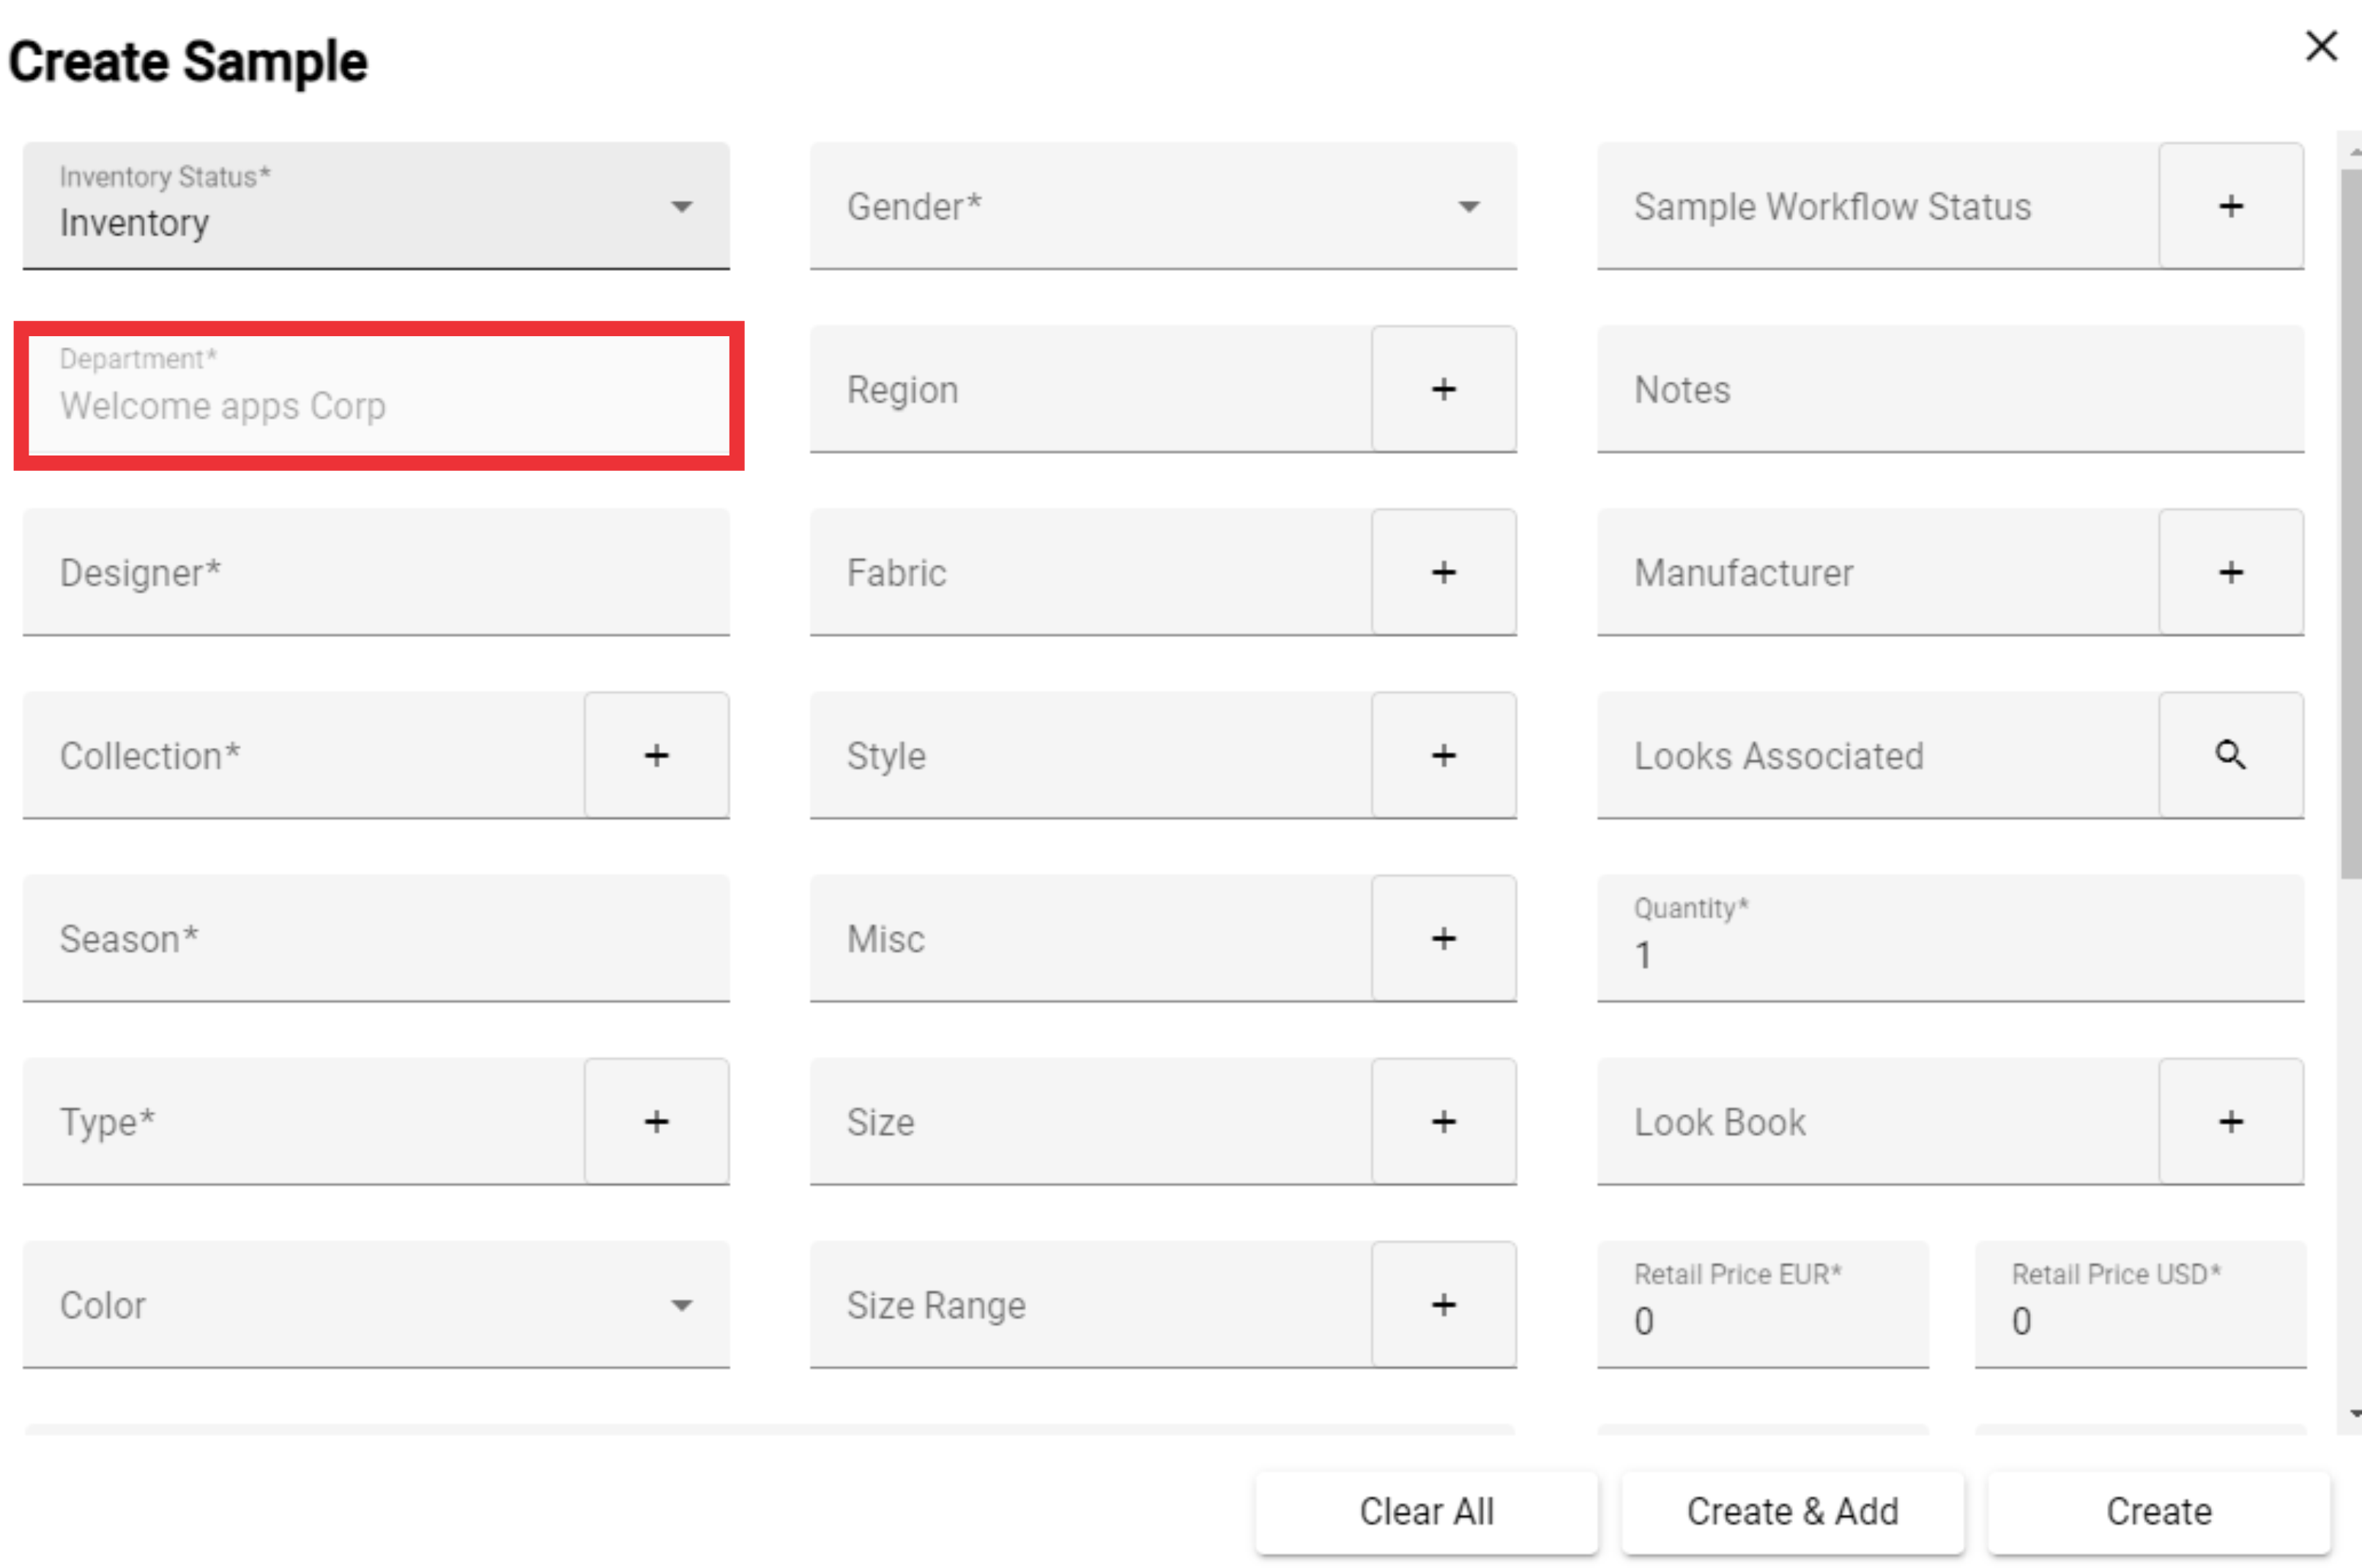
6. Choose a designer from the list.

7. Choose a collection from the list or add new collection.

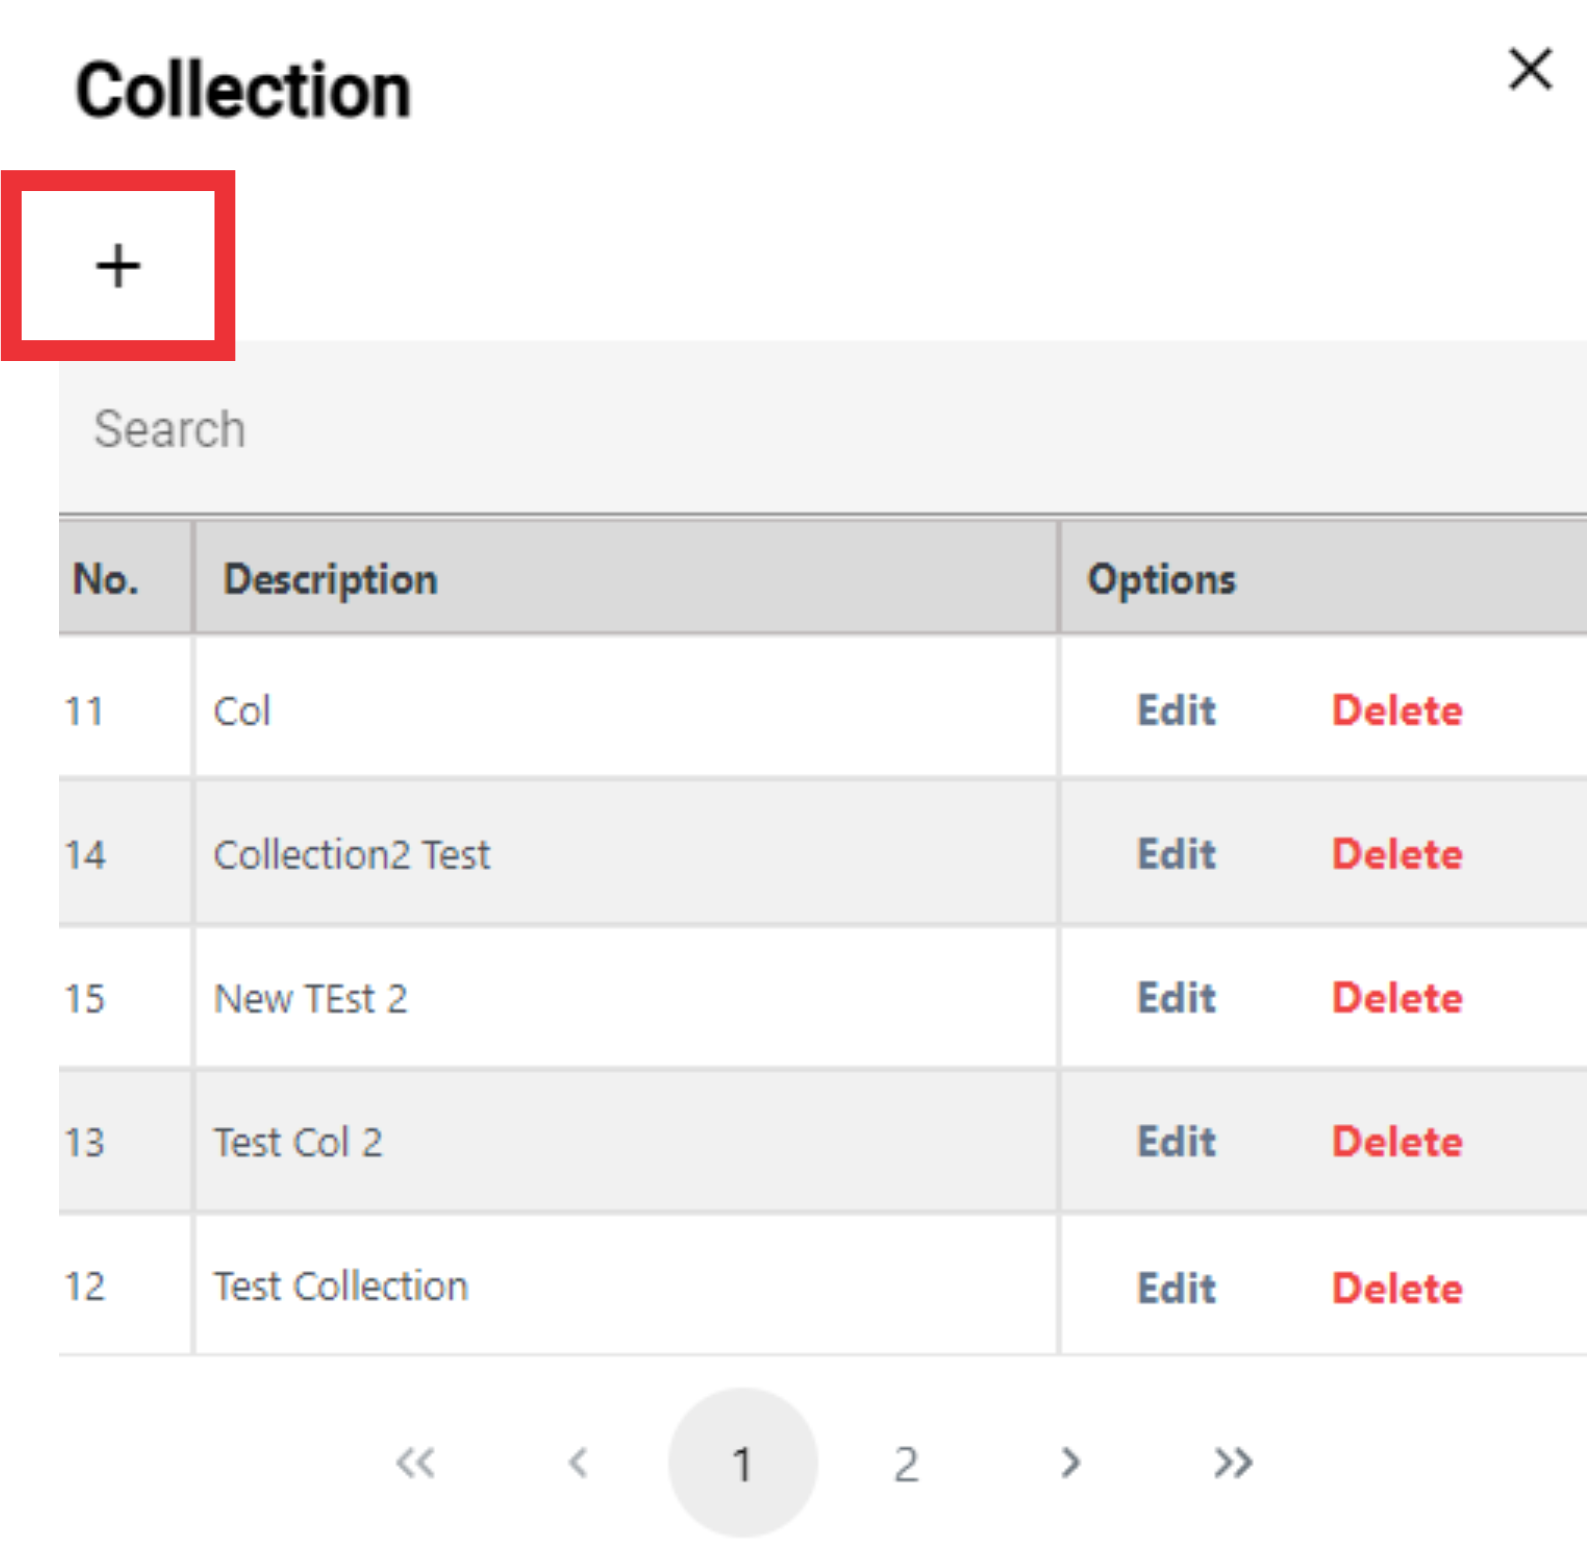
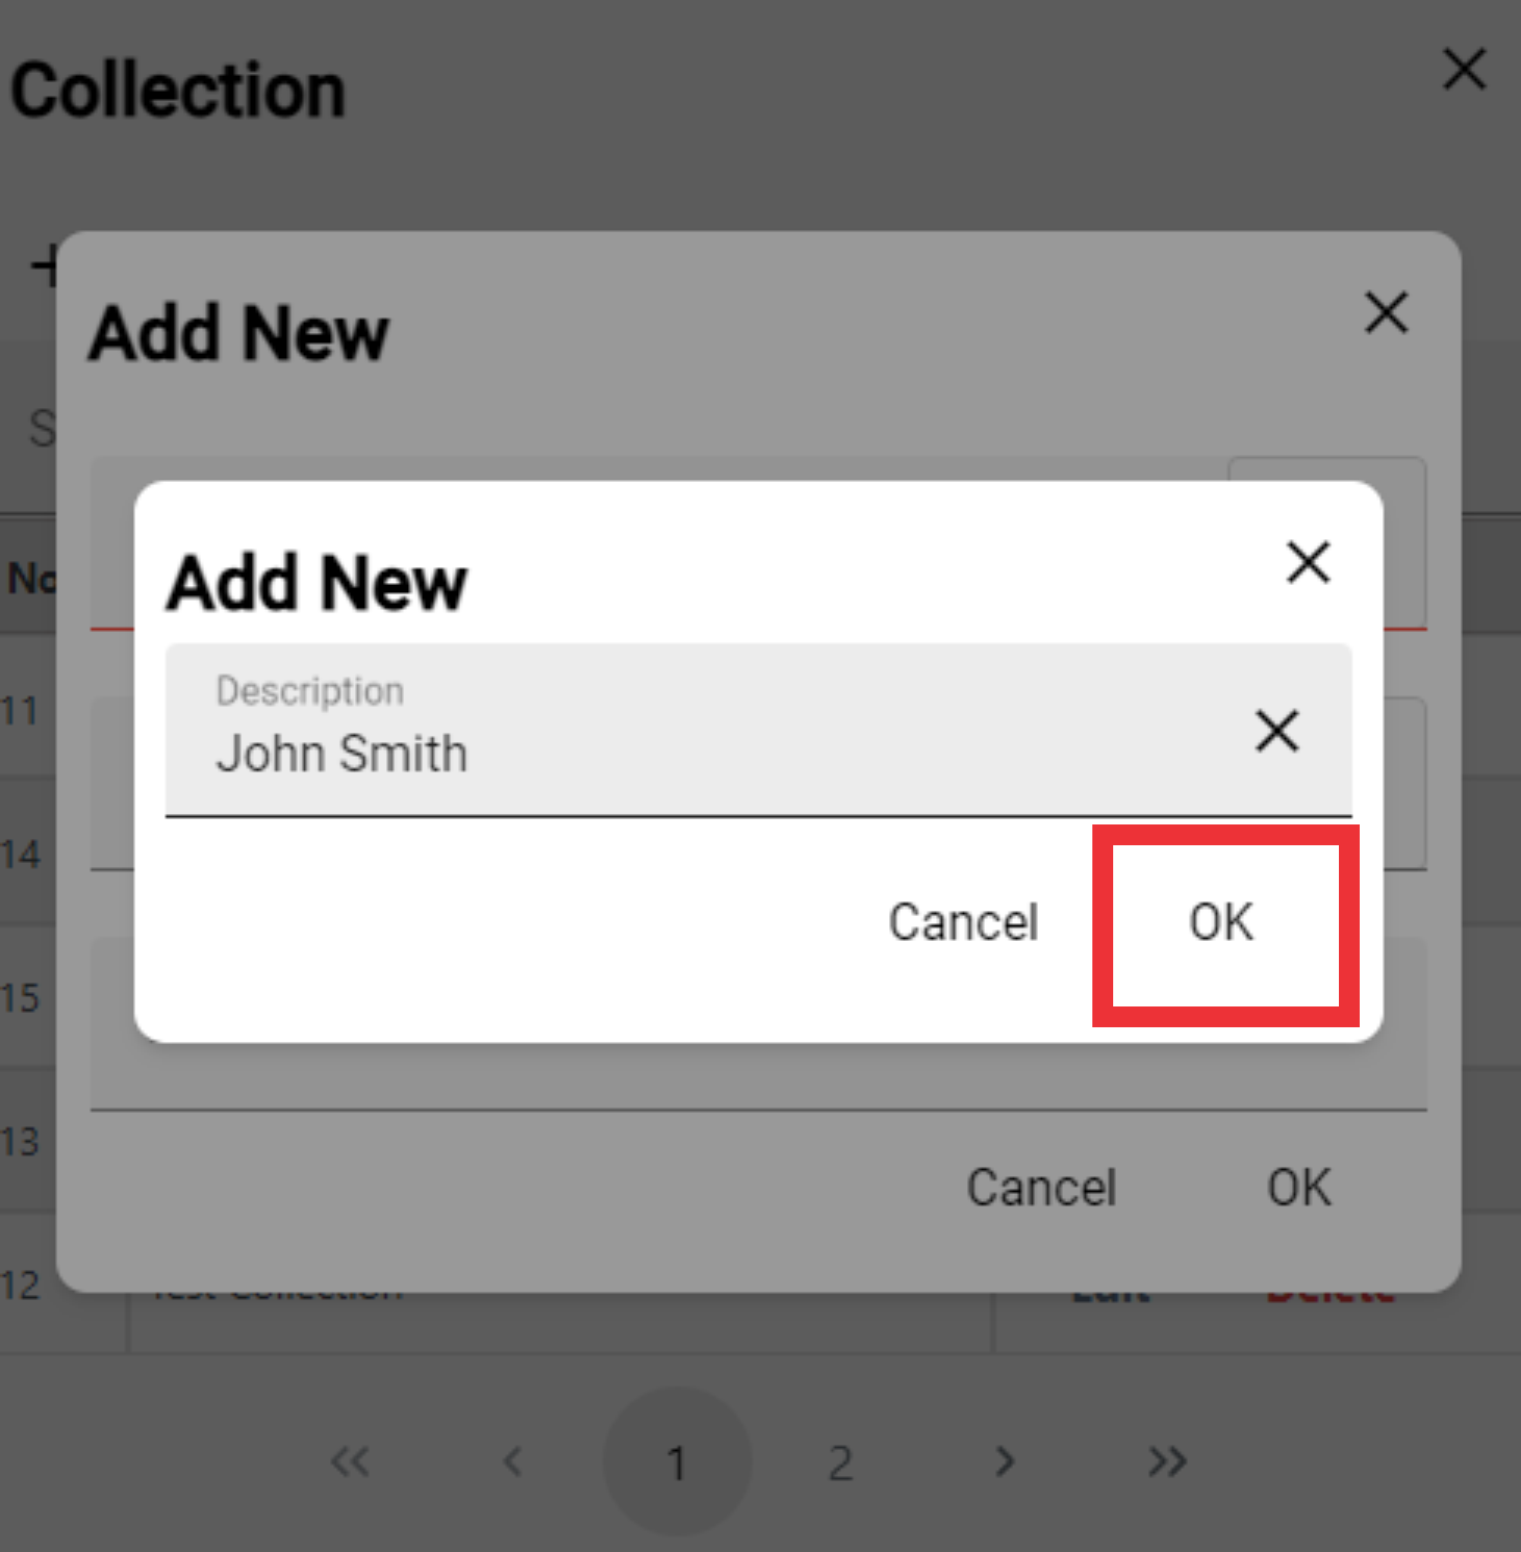
8. For the add a new collection Click the "+" Button.

9. For the create new Collection click the "+" Button.
10. Enter a description in the field.

11. Click the ok button to confirm.
12. Select Season From the list or add a new one.

13. For the add a new Season click the "+" Button.

14. Write a new Season Code.

15. Write a new Season Year or choose Season year from the list.

16. Write a new Season name.
17. Click the ok button to confirm.

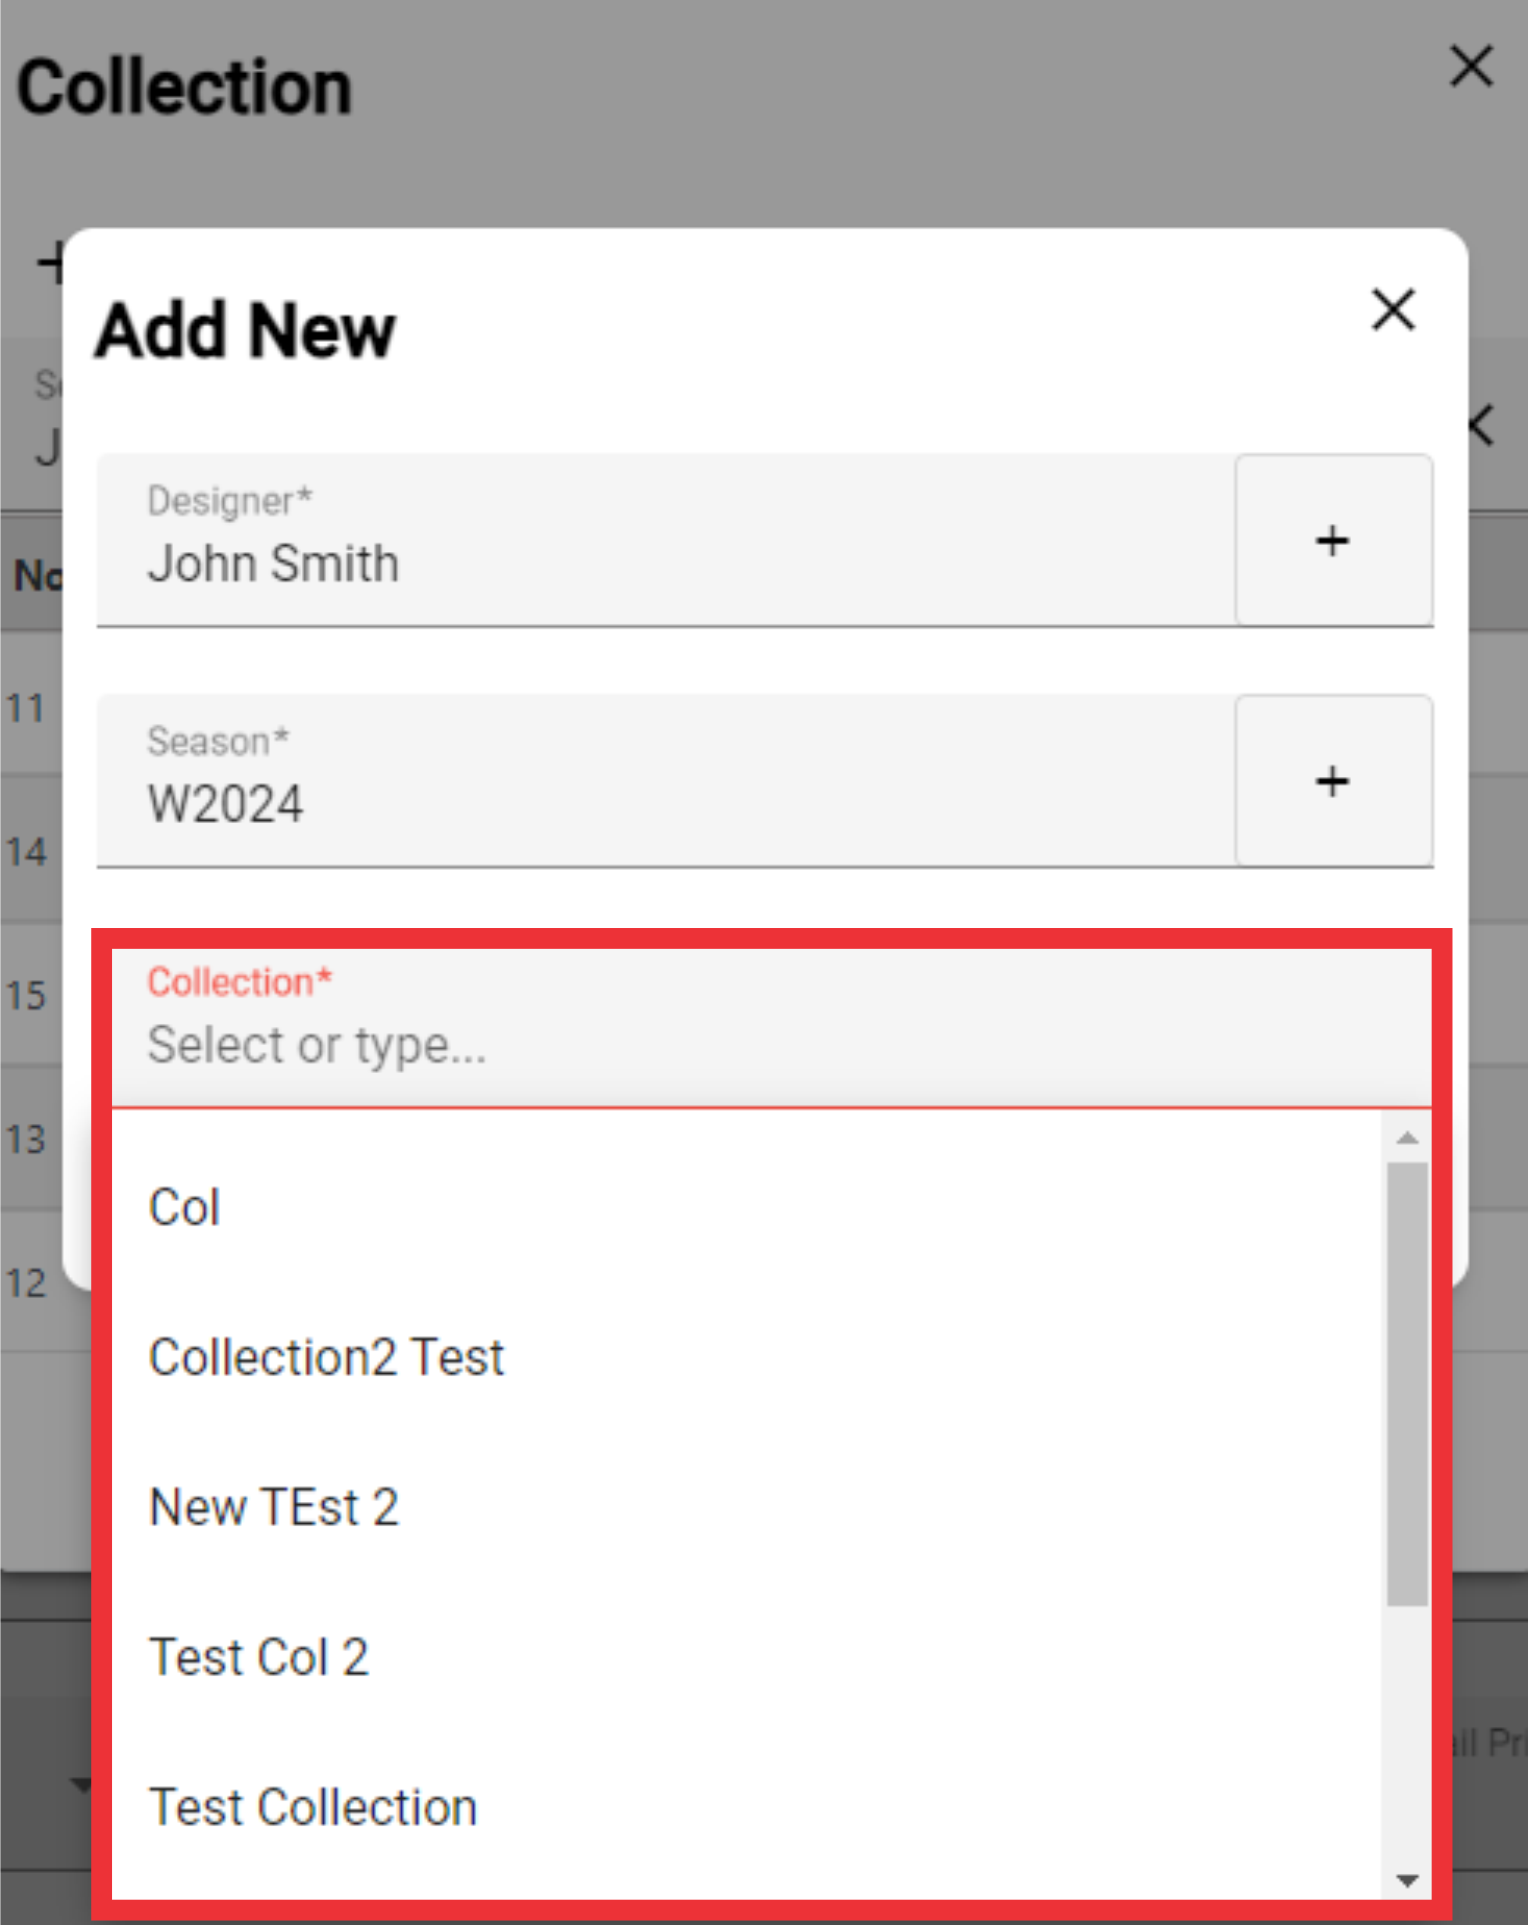
18. Choose form the list collection.
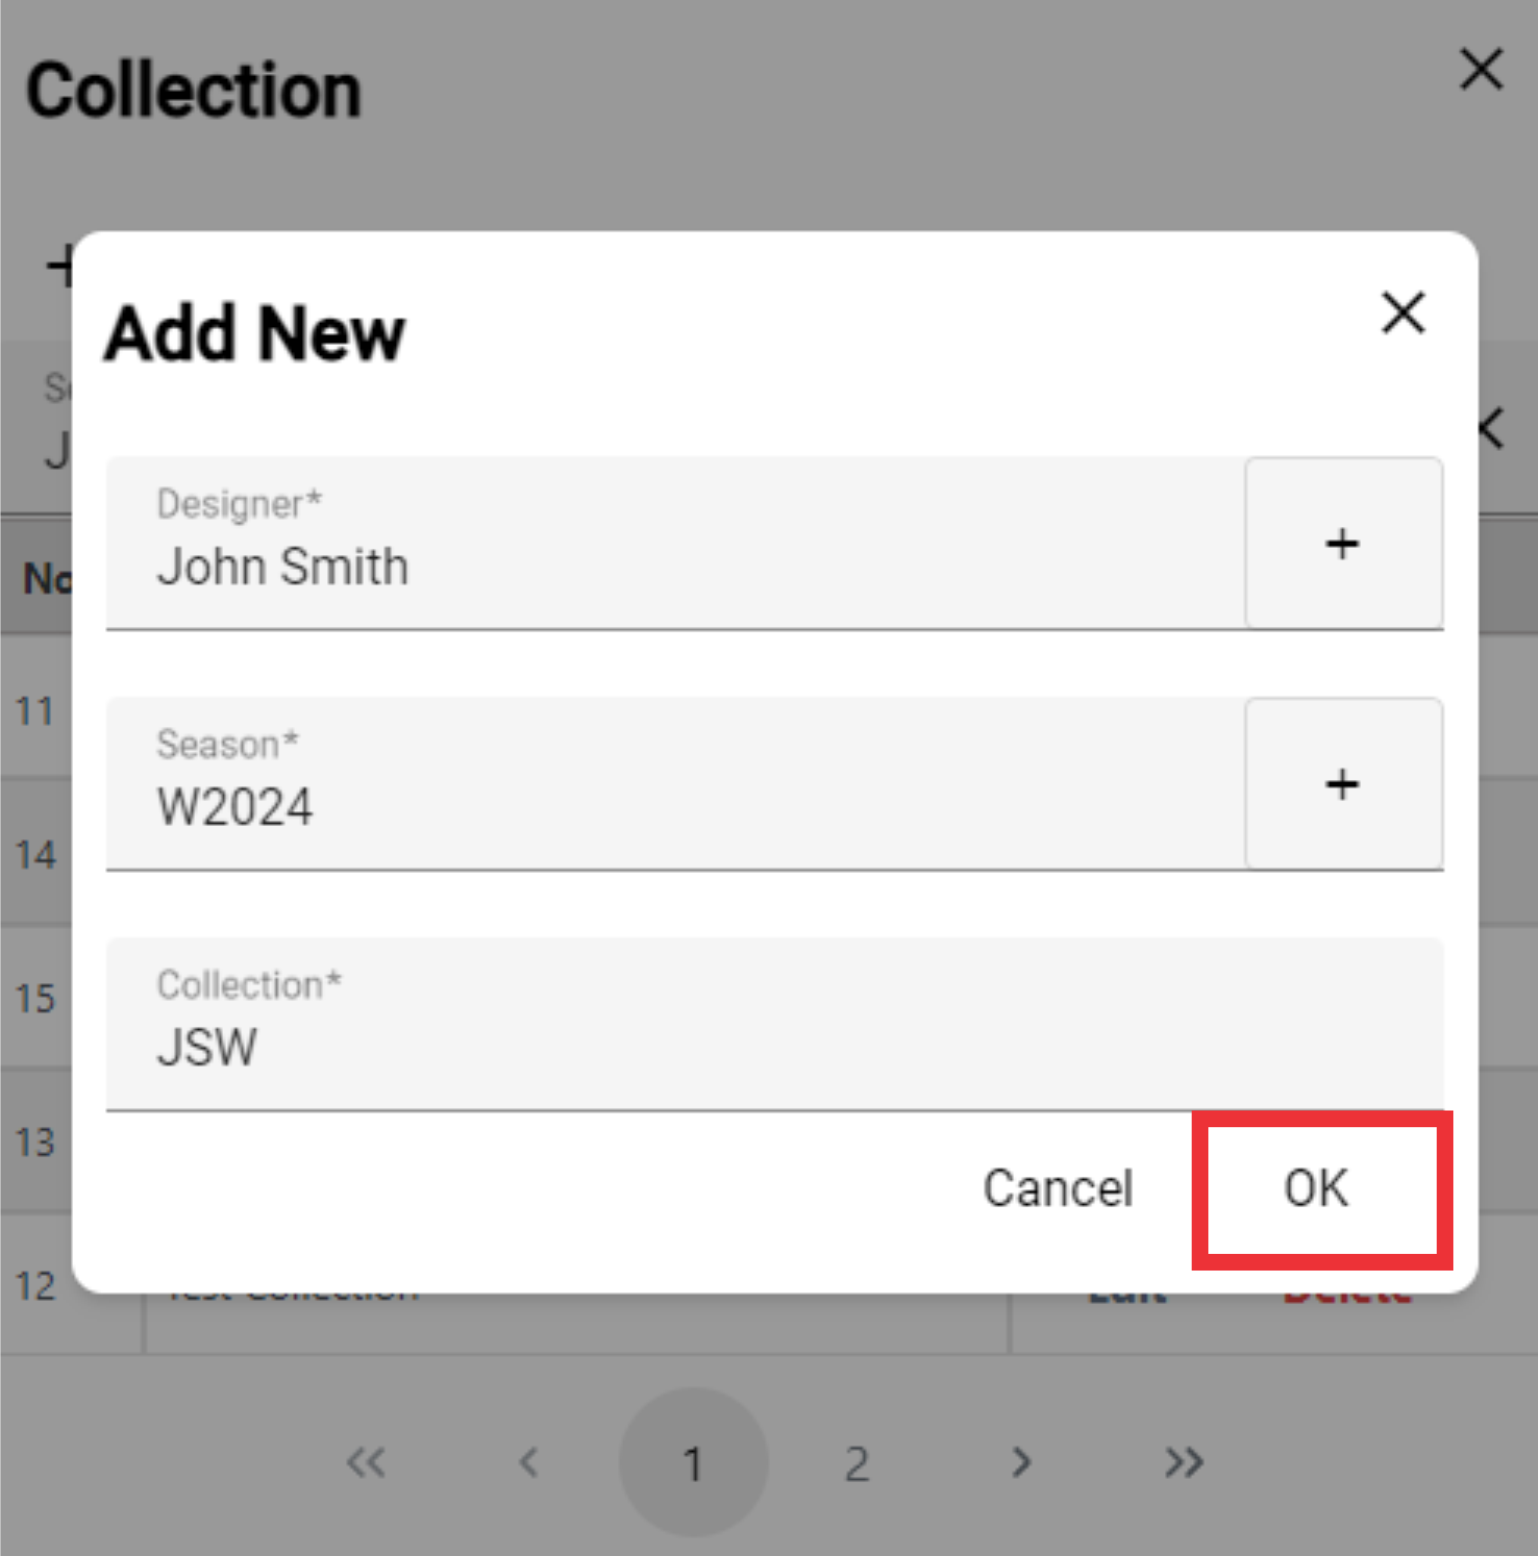
19. Click the OK button to confirm.
20. Click the Edit Button to edit the collection.

21. Edit the desired fields and press the OK button to confirm.

22. For the delete Collection from the list Click the Delete Button.

23. Click the Yes button to confirm.

24. Select Season from the list.

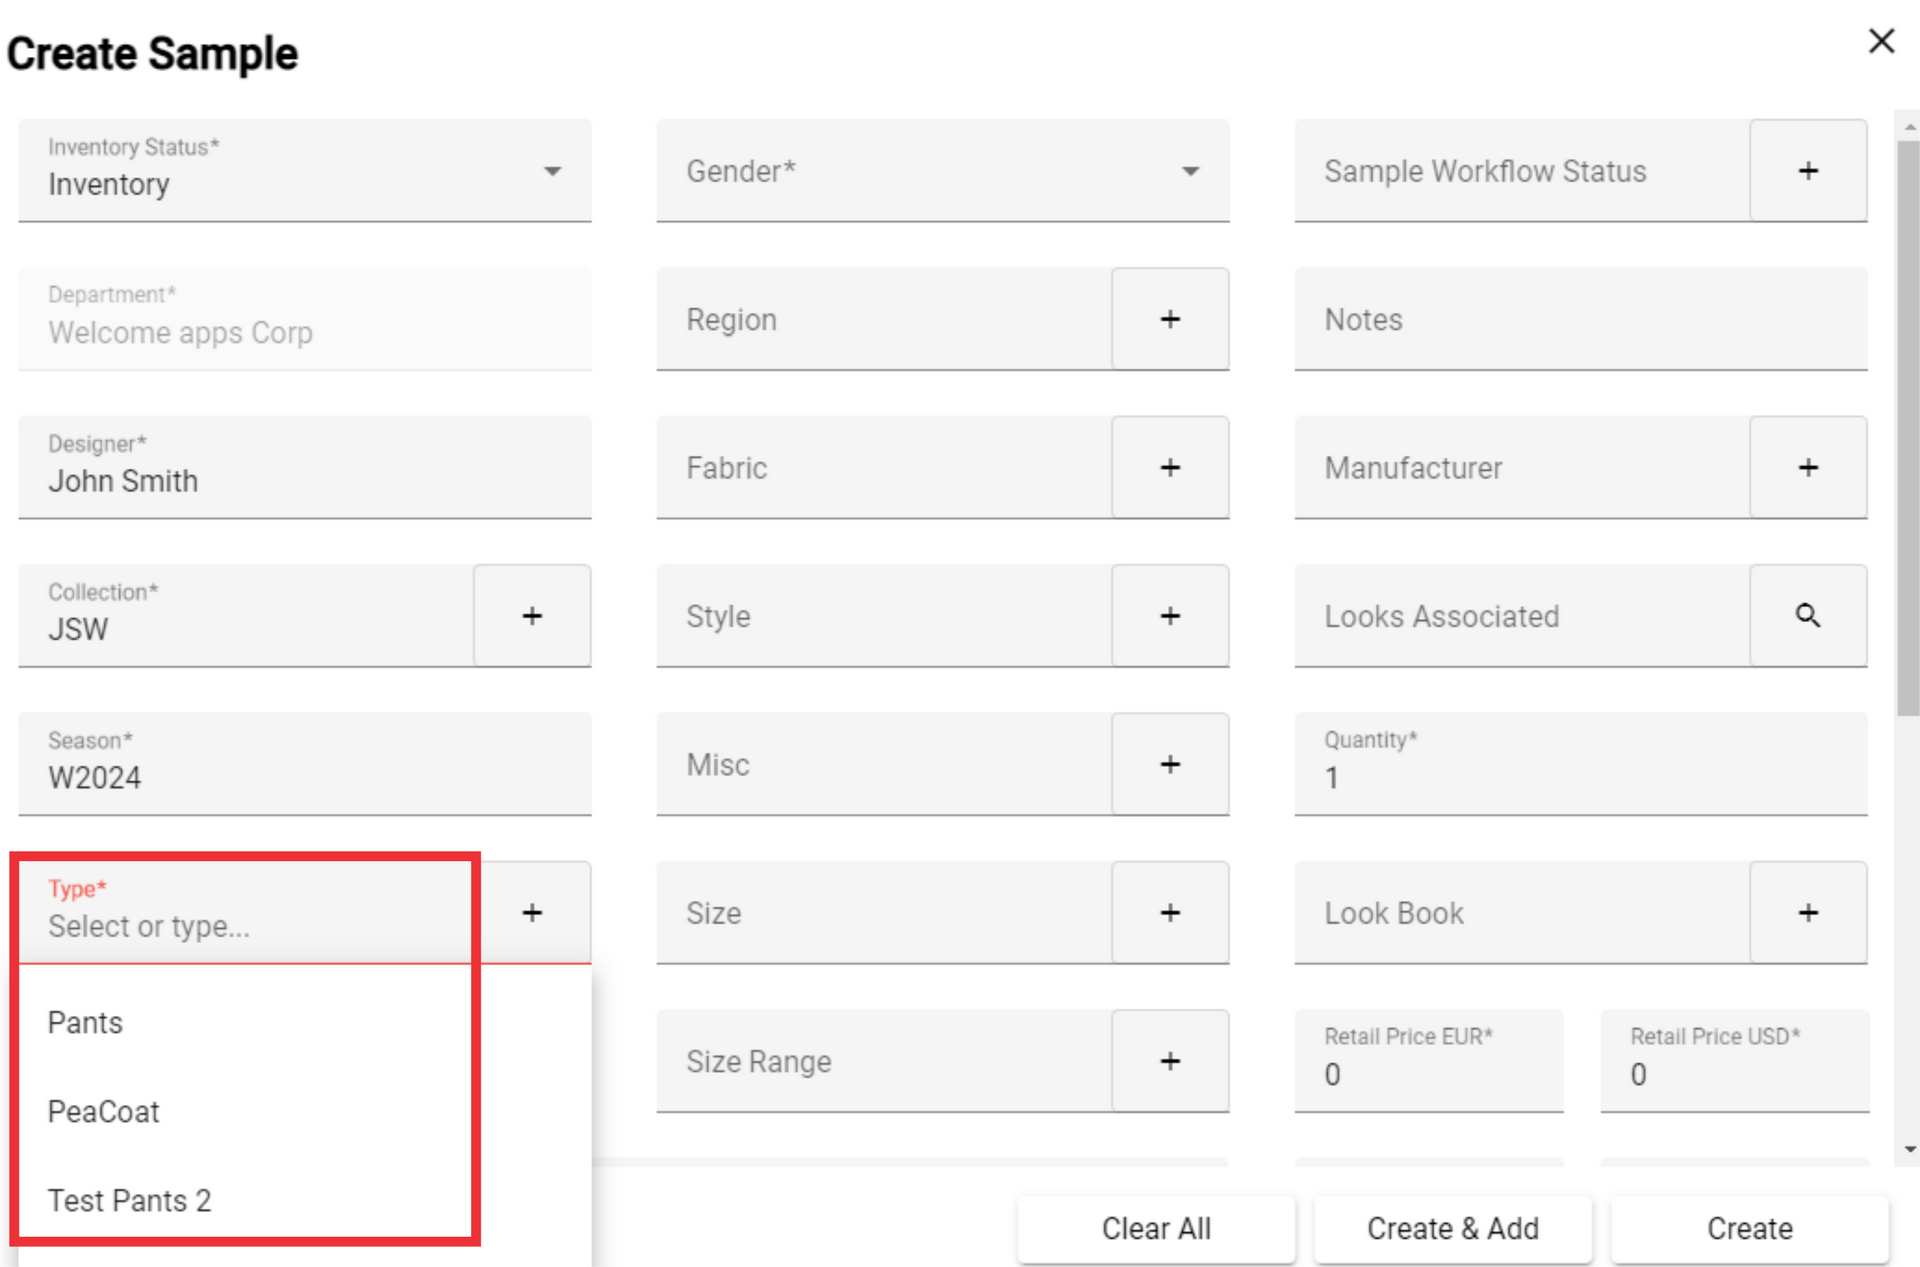
25. Select Type from the list or add a new one.
26. For the add new Type click "+" button.

27. Click the "+" button.

28. Write the Type on the field.
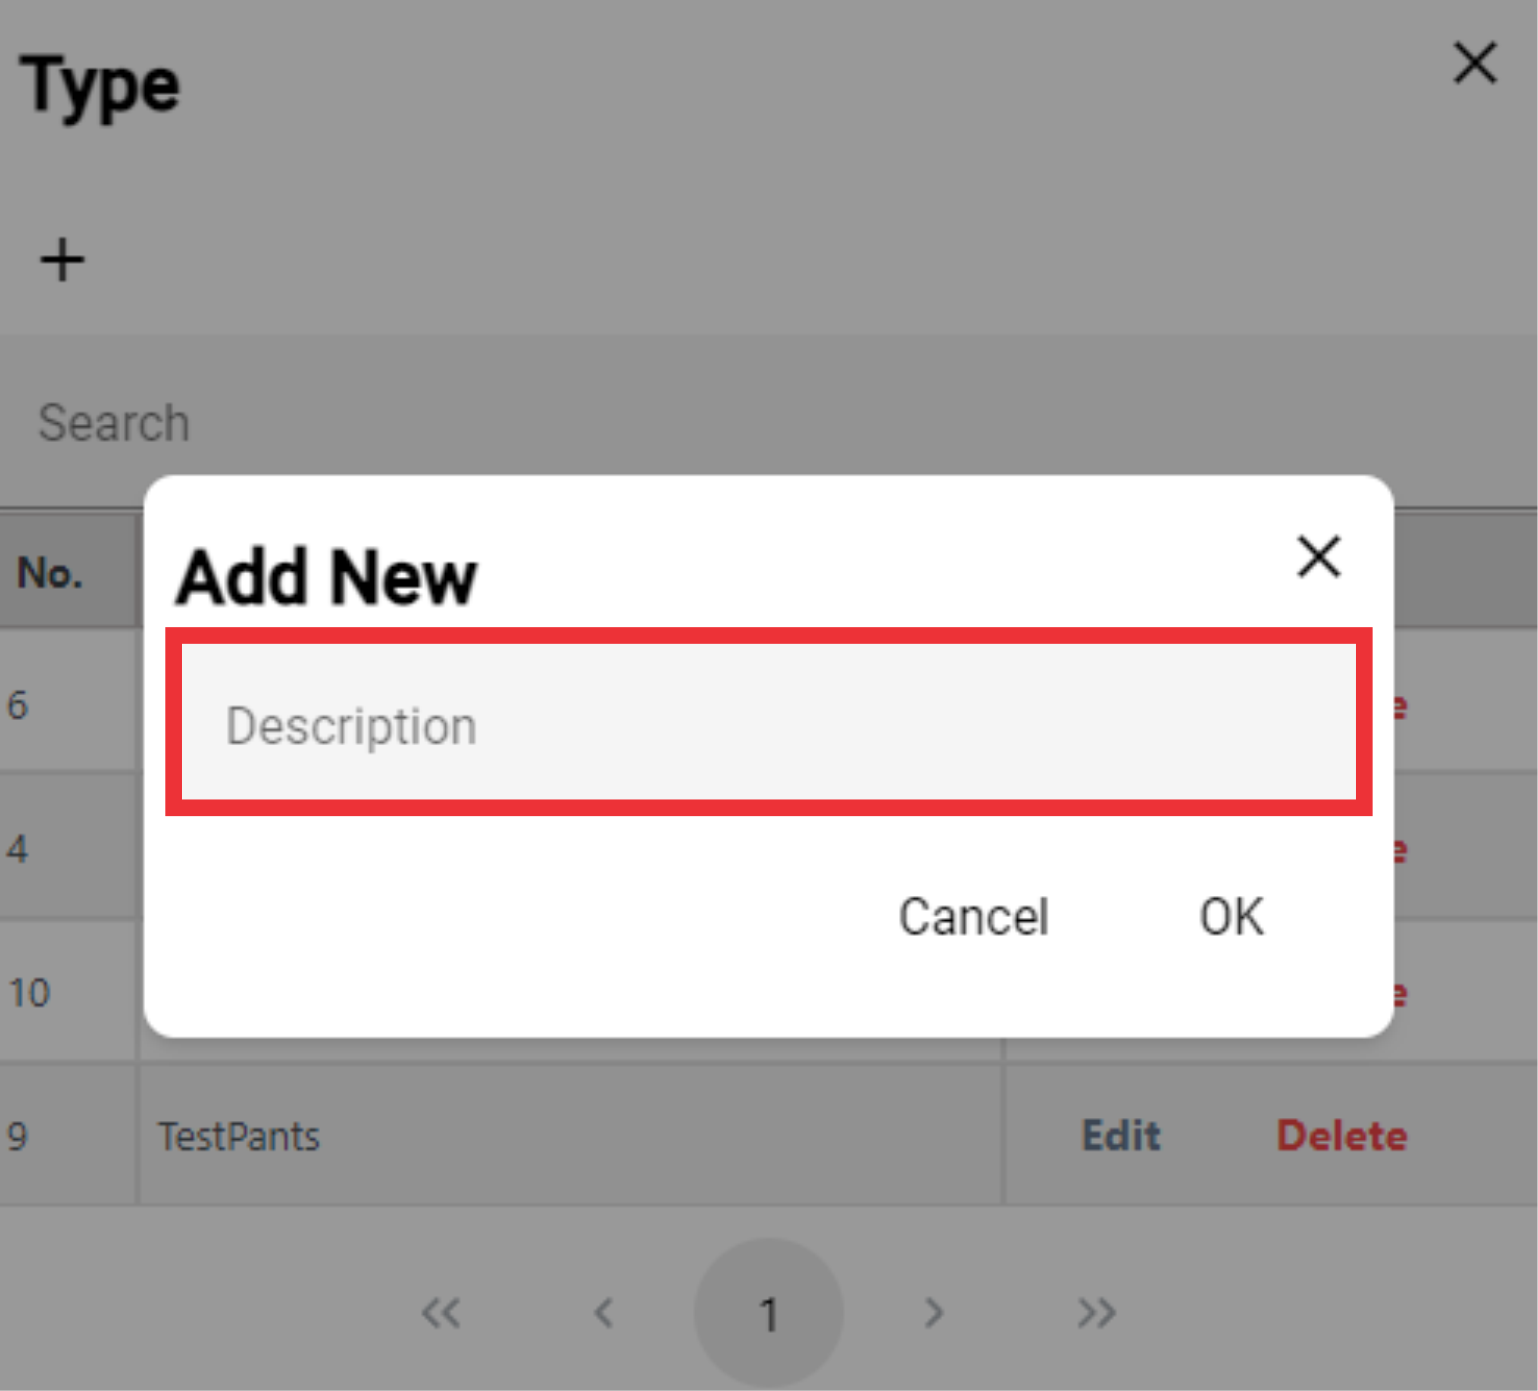
29. Click the OK button to confirm.

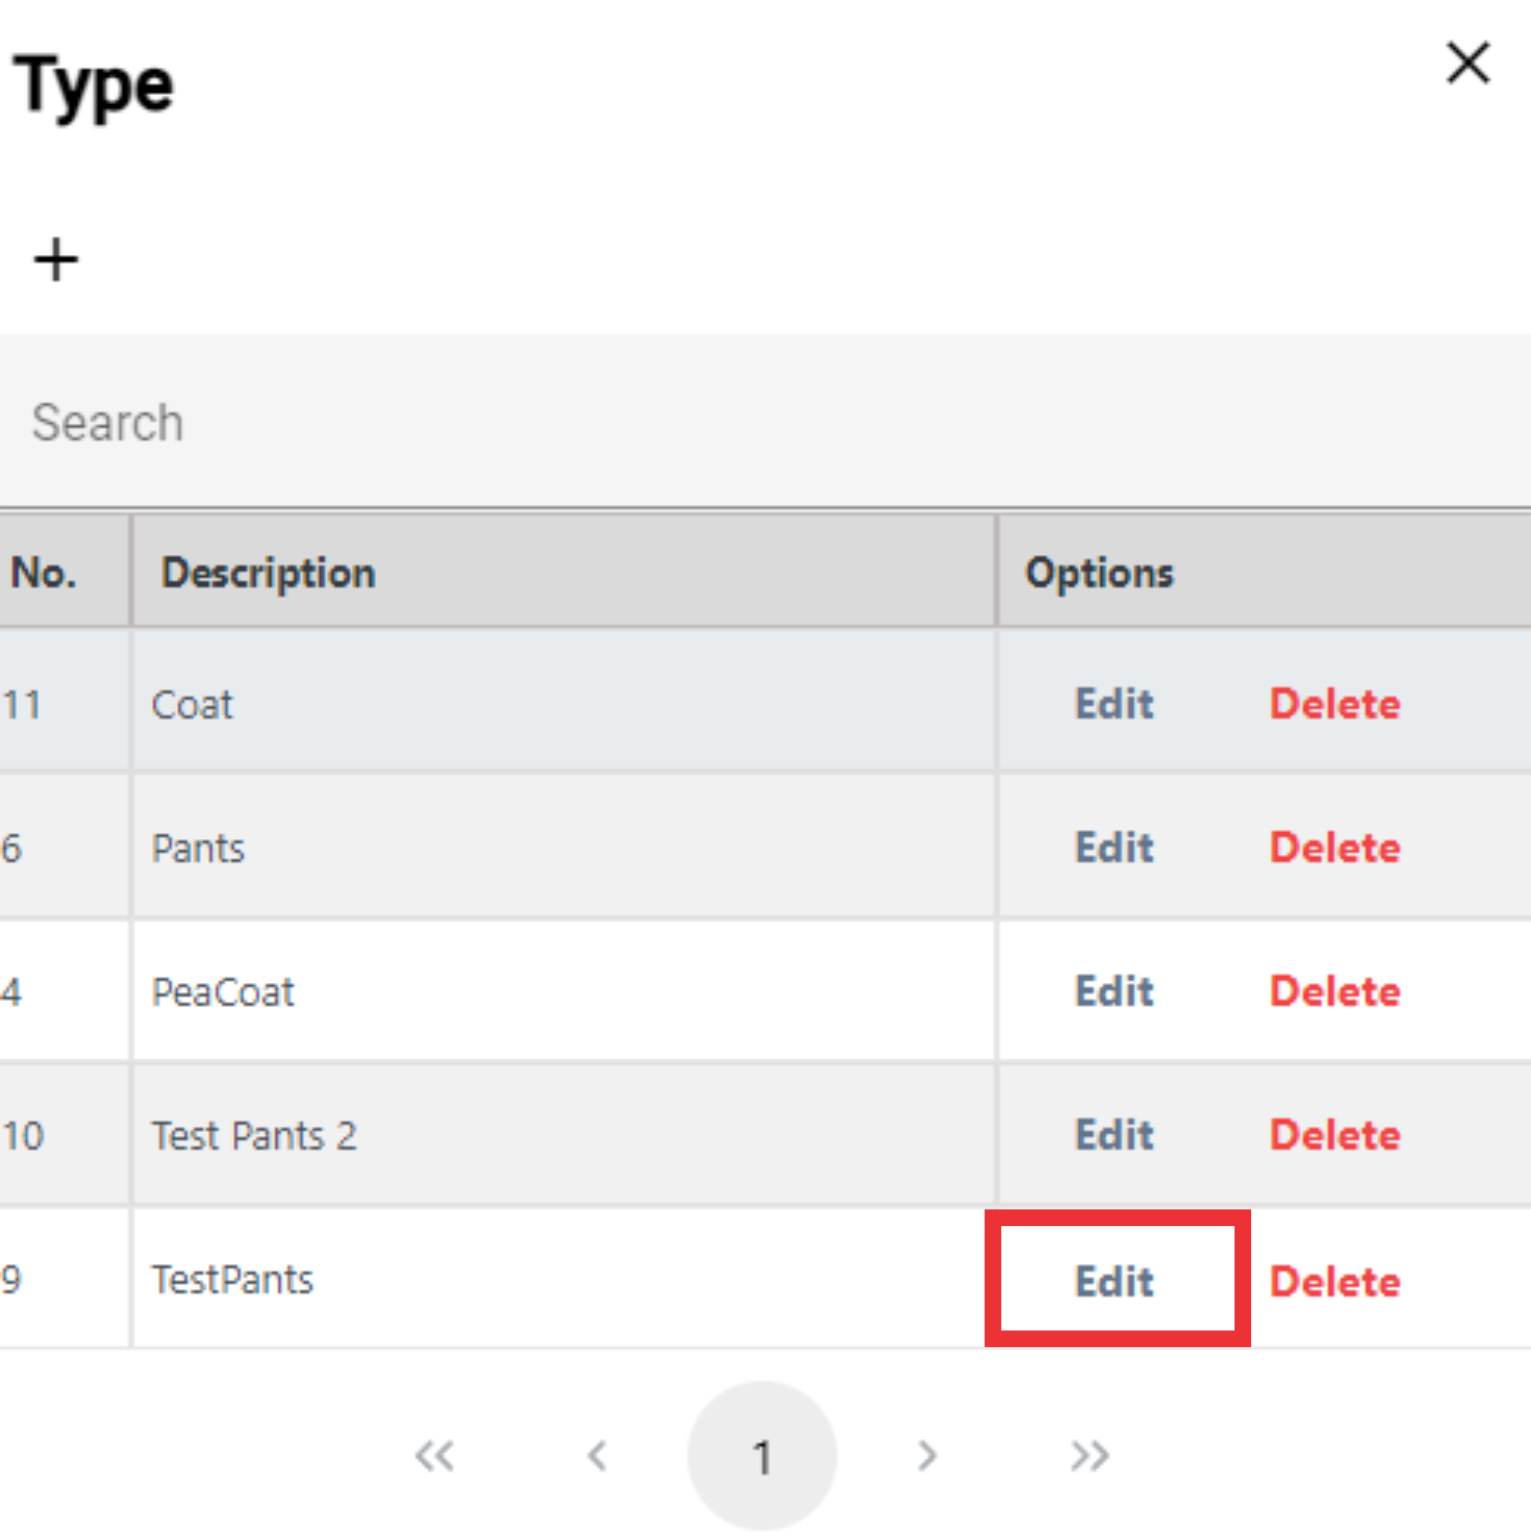
30. For the edit the Type click the "Edit" Button.
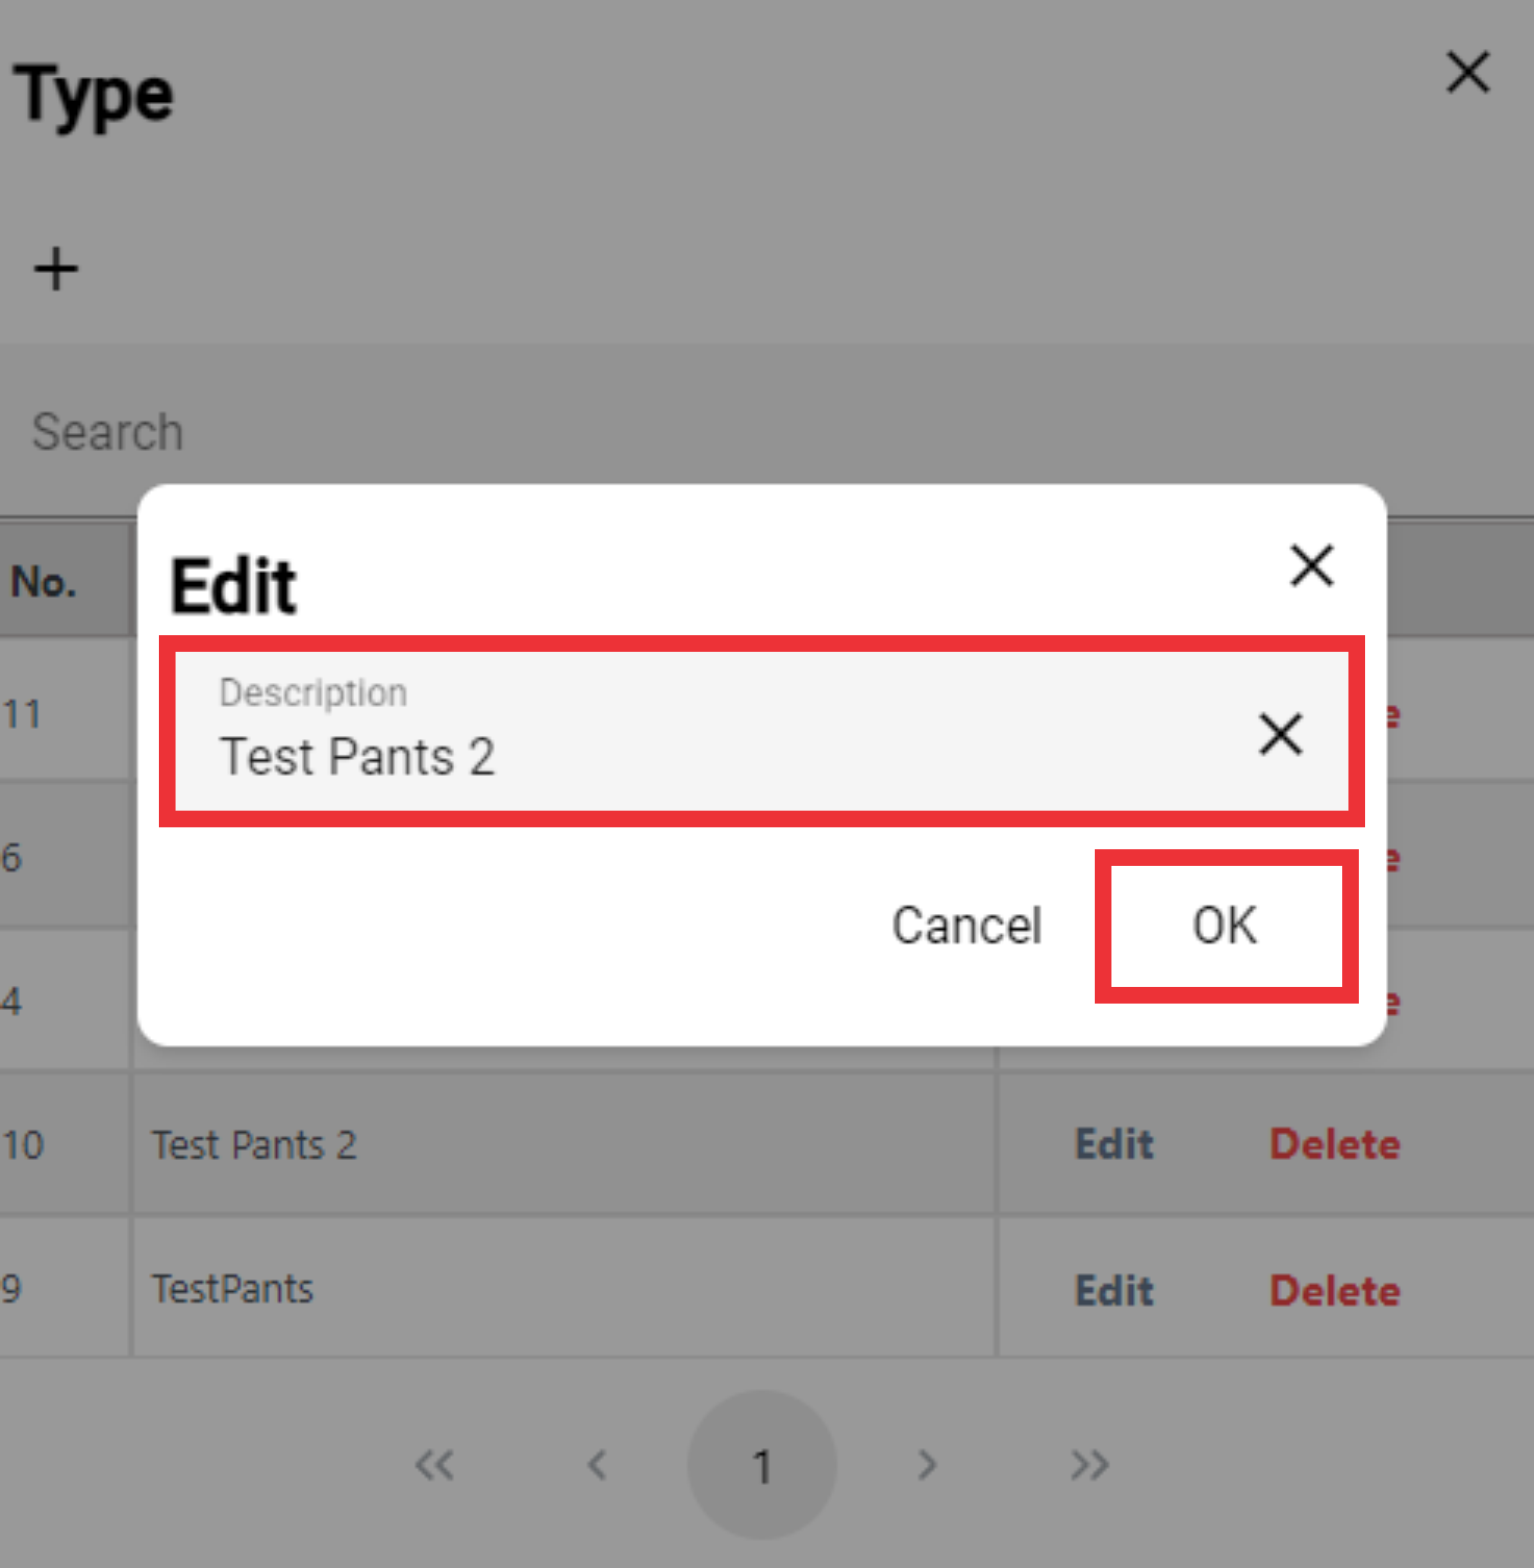
31. Edit the Type and Click the OK button to Confirm.
32. For the delete Type click the "Delete" button.

33. Click the "YES" button to confirm.

34. Choose a color from the drop down list.

 35. Select a gender from the drop-down list.

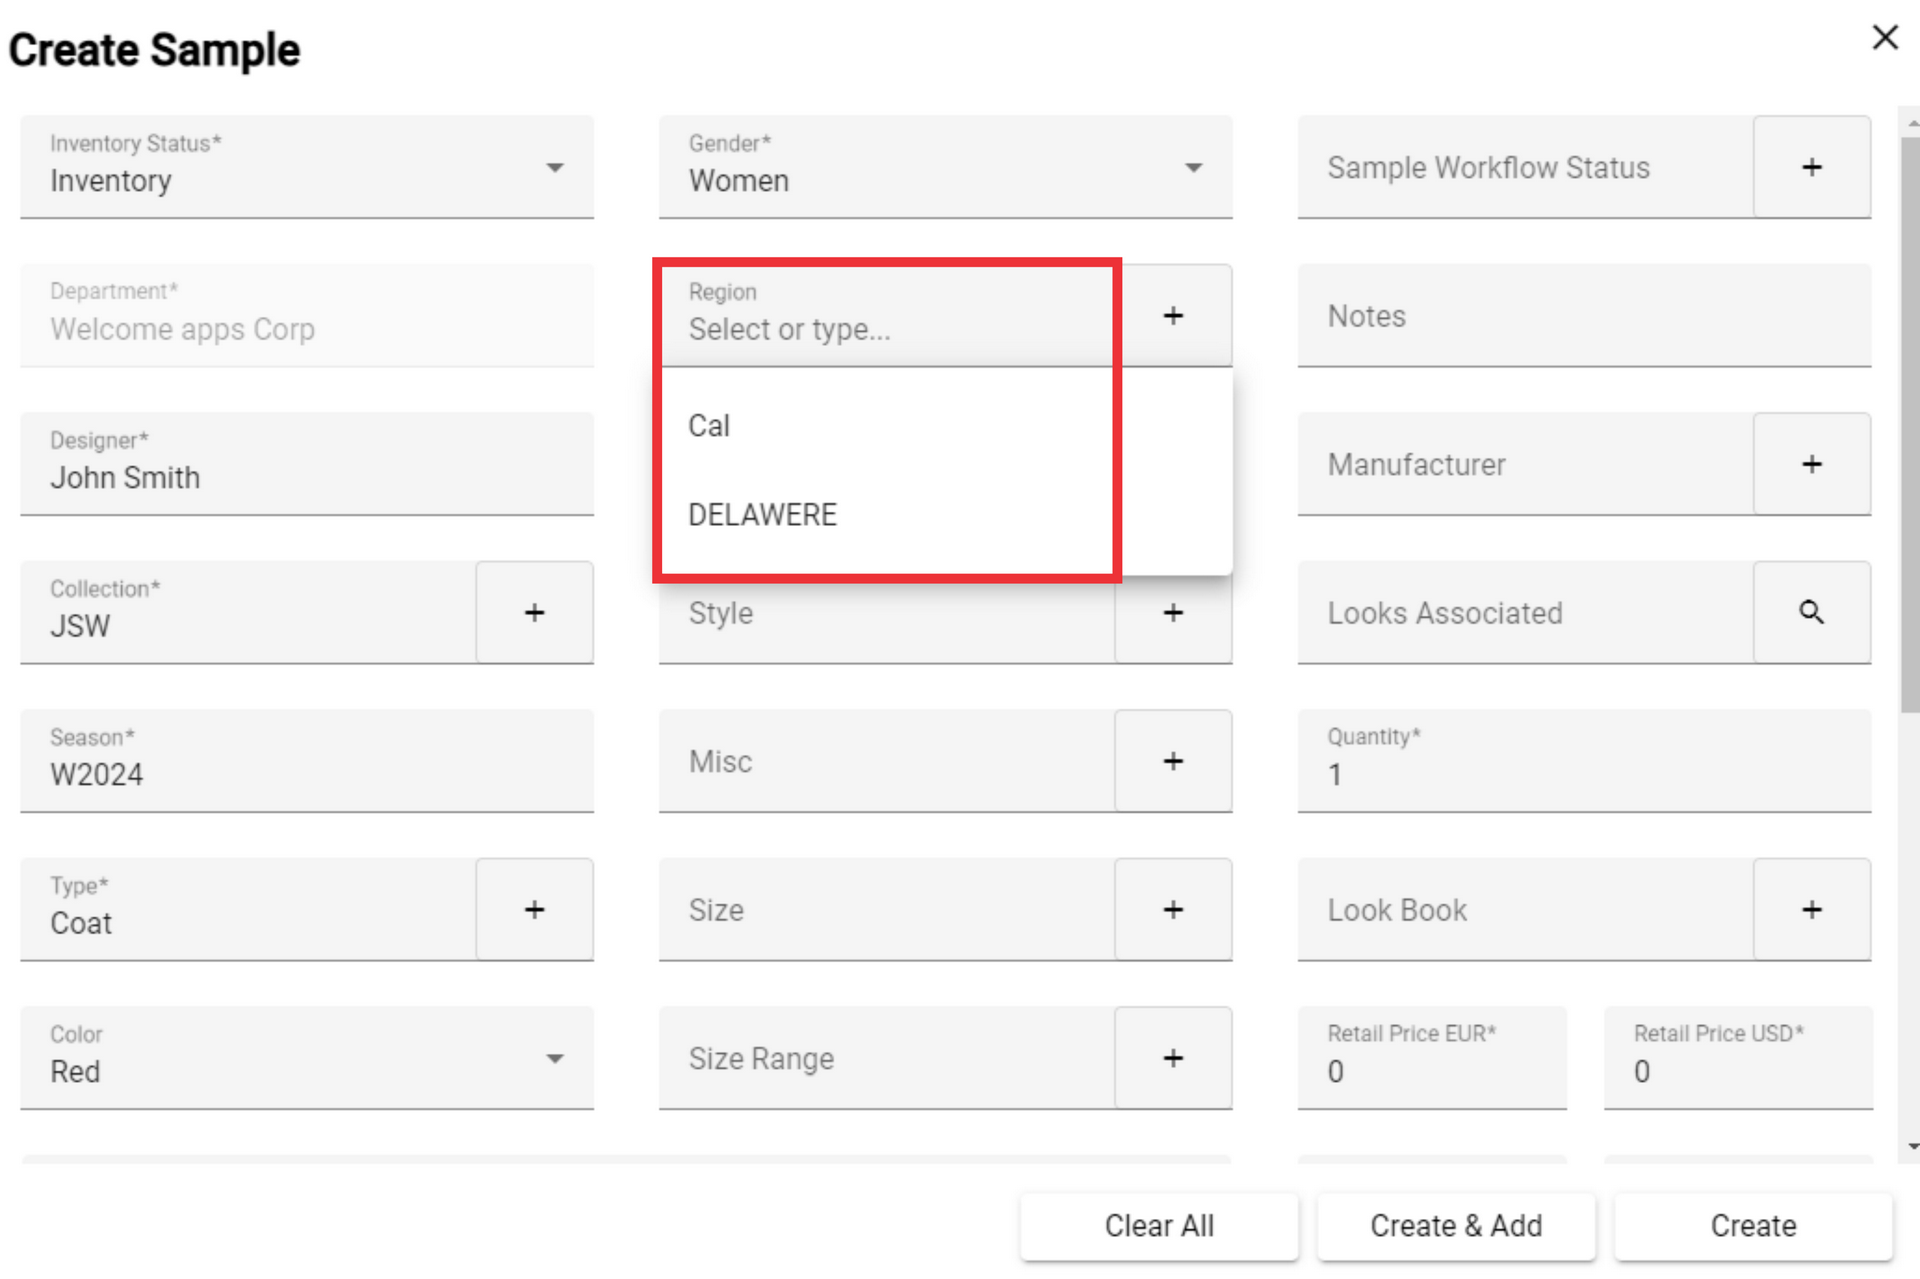
36. Select a gender from the drop-down list or add a new one.
37. For the add a new region click the "+" button.

38. For the add a new region click the "+" button.
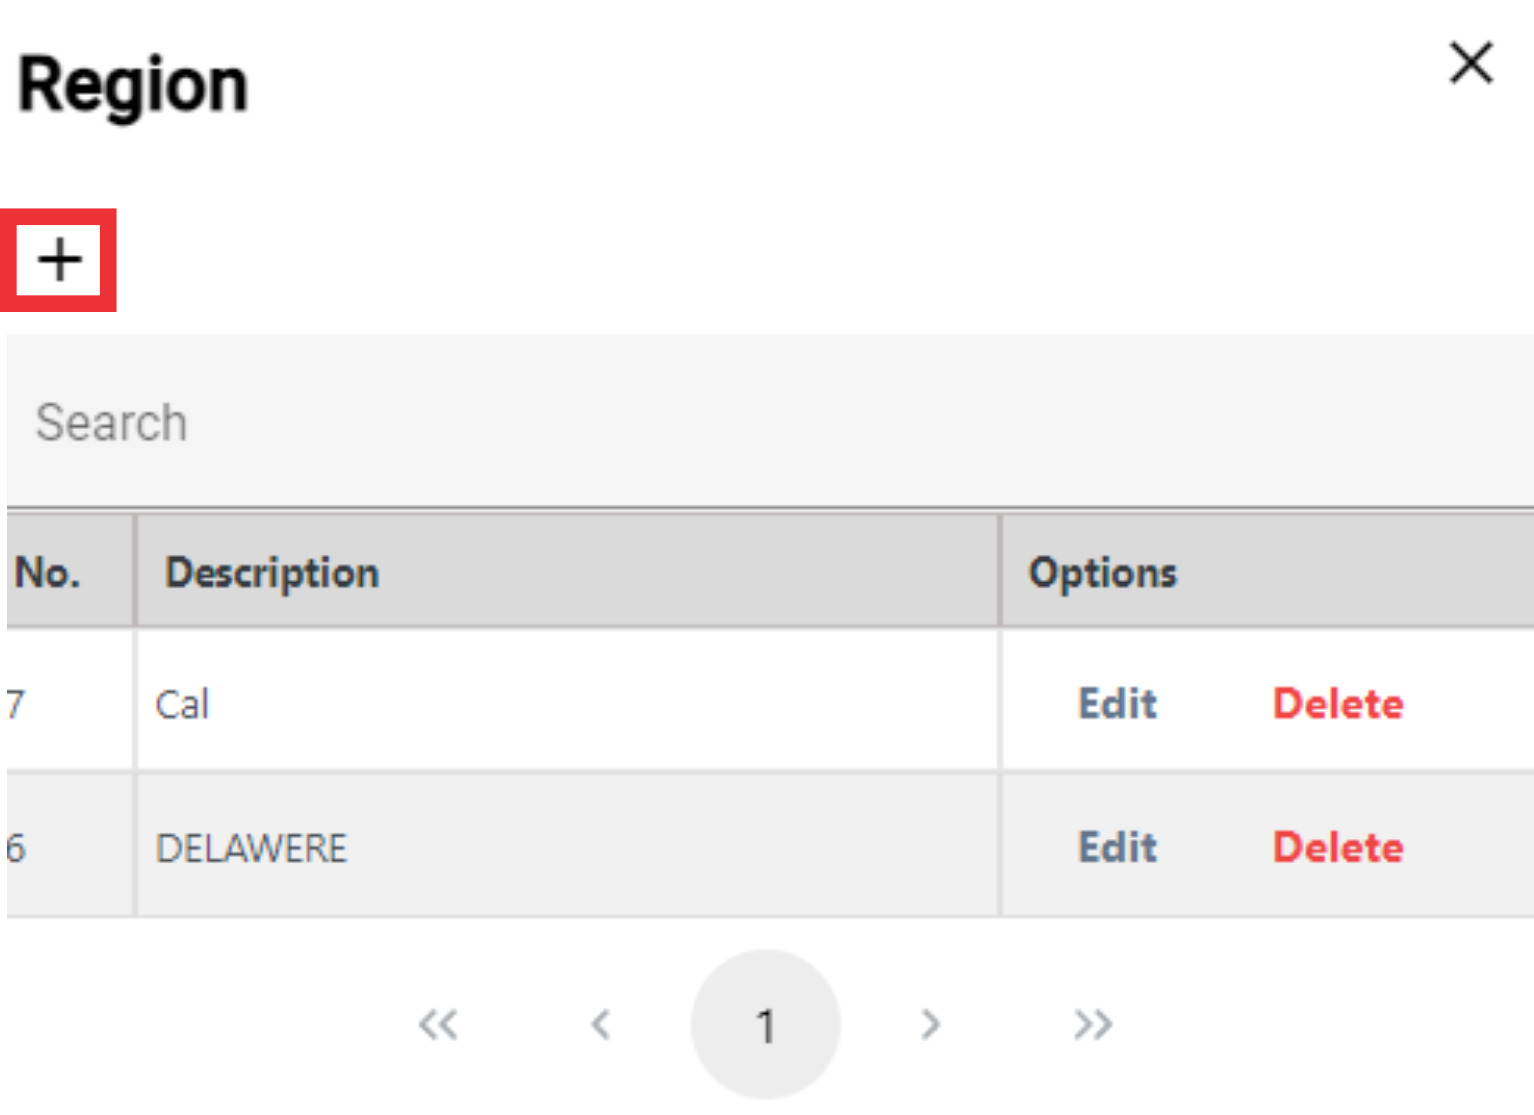
39. Write the Region on the field and click the OK button to confirm.

40. For the edit Region click the "Edit" Button.
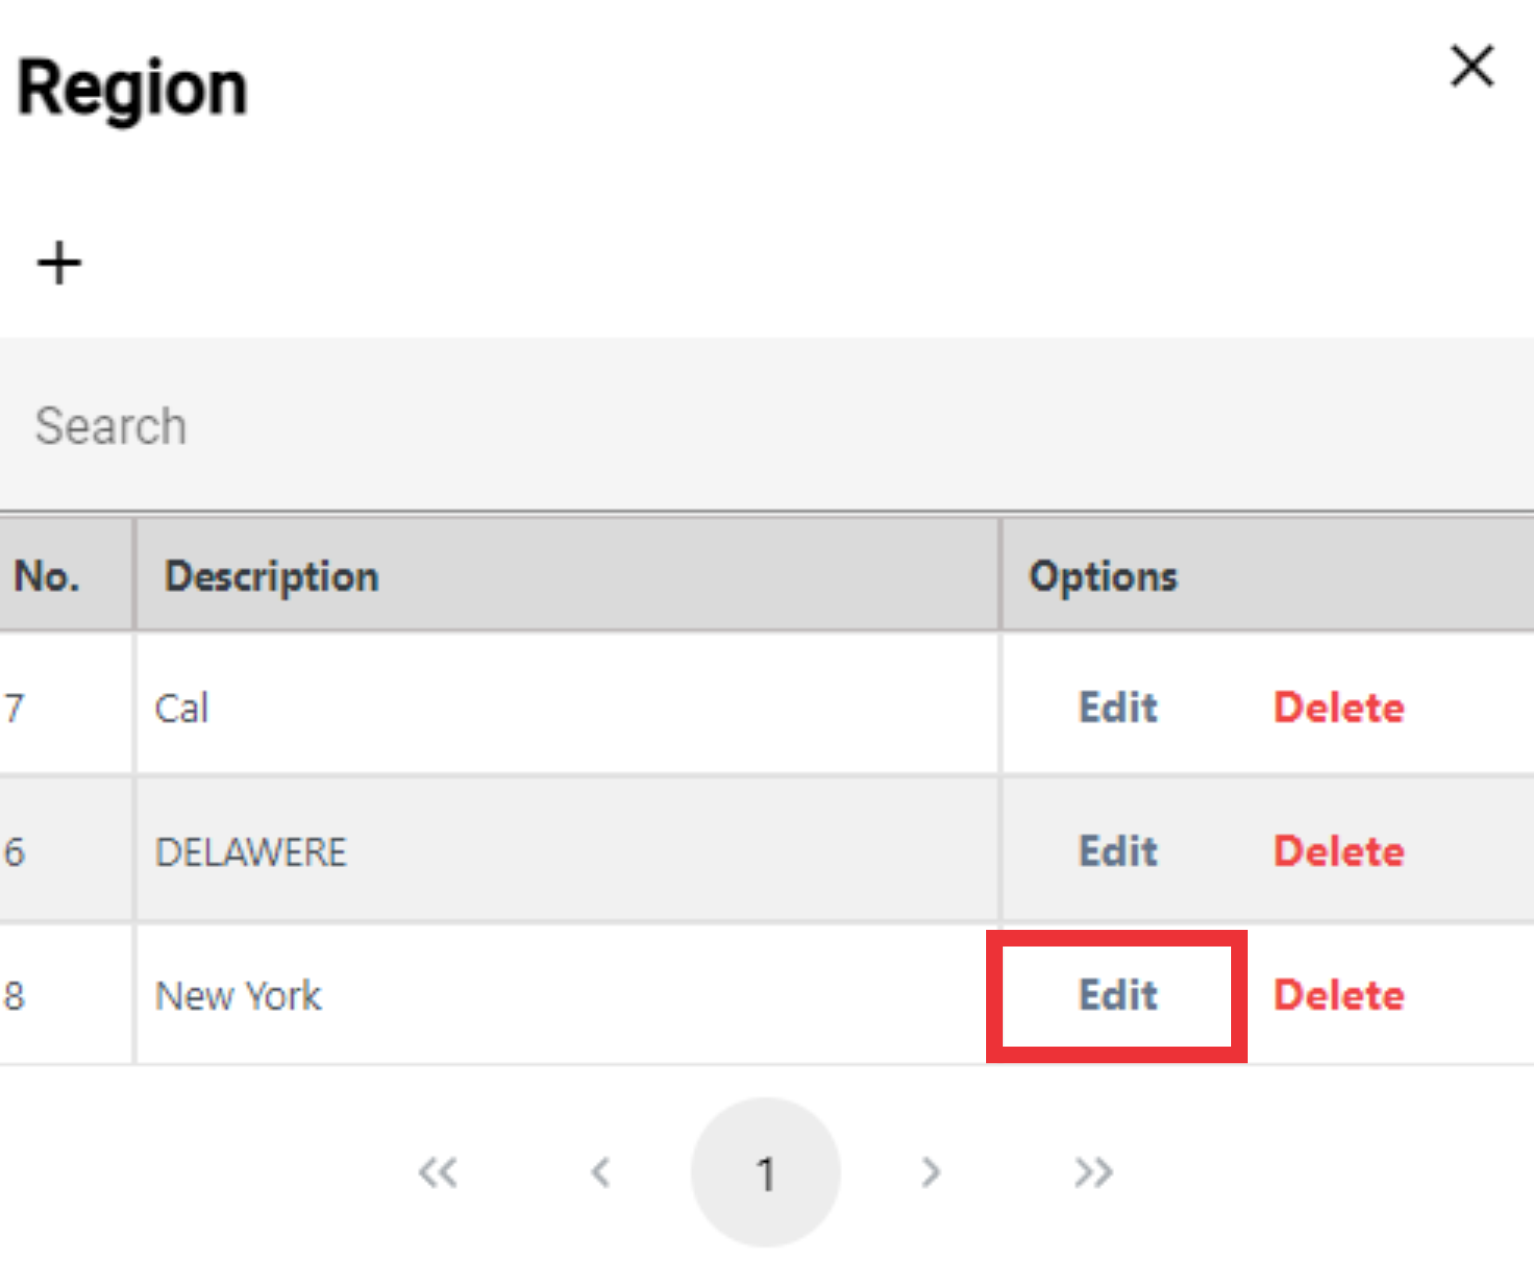
41. Edit region and click the OK button to confirm.

42. For The Delete Region from the list click the "Delete" Button.

43. Click the "Yes" Button to confirm.
44. For the close this window click the "X" Button.

45. Select the Fabric from the list or add a new one.

46. For the add a new Fabric click the "+" Button.

47. For the add a new Fabric click the "+" Button.

48. Write the Fabric on the field and click the "OK" button to confirm.

50. For the edit Fabric click the "Edit" Button.

51. Edit Fabric Description and click the "OK" button to confirm.

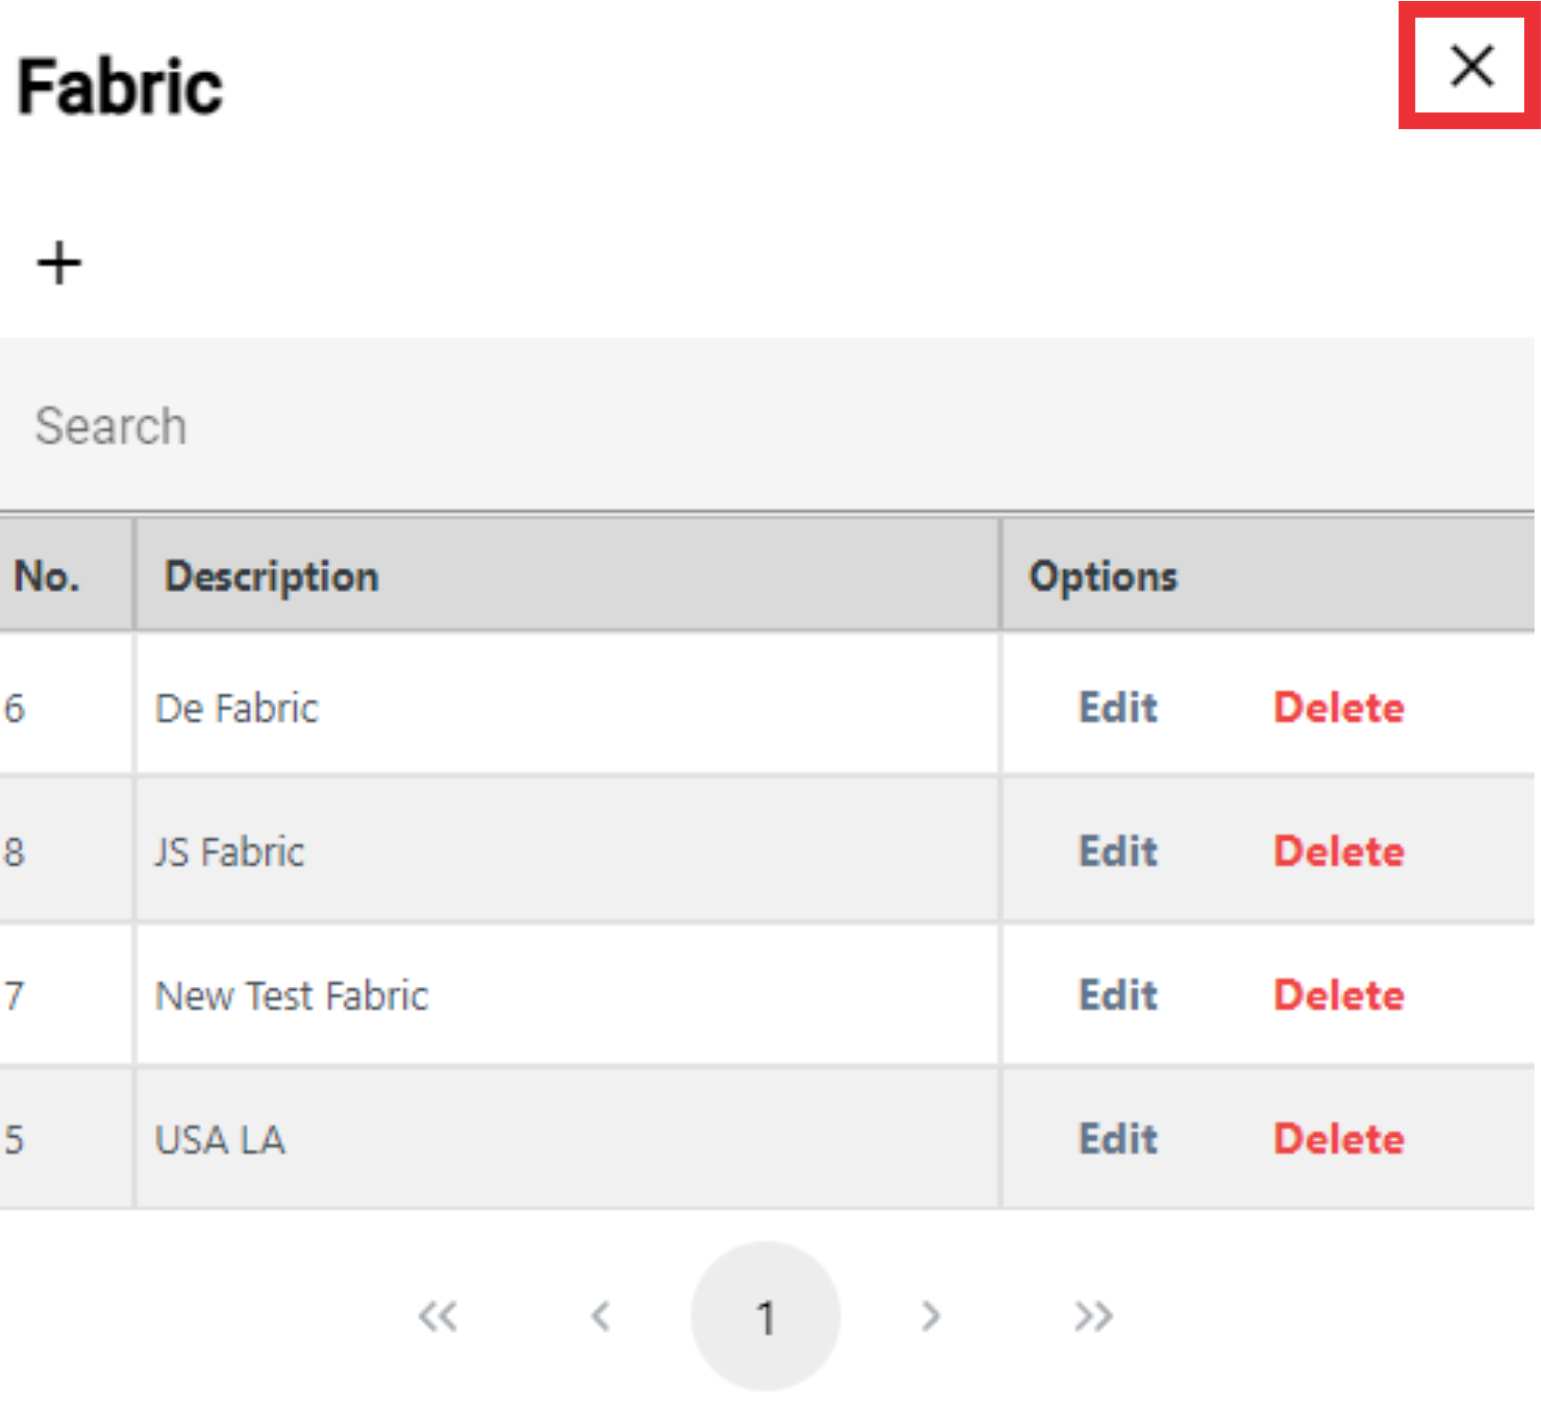
52. For the Delete Fabric from the list click the "Delete" button.

53. For the close this window click the "X" button.
54. Select Style from the drop down list or add a new one.

55. For the add a new Style click the "+" button.

56. For the add a new Style click the "+" button.

57. Enter the Style on the field and lick the "OK" button to confirm.

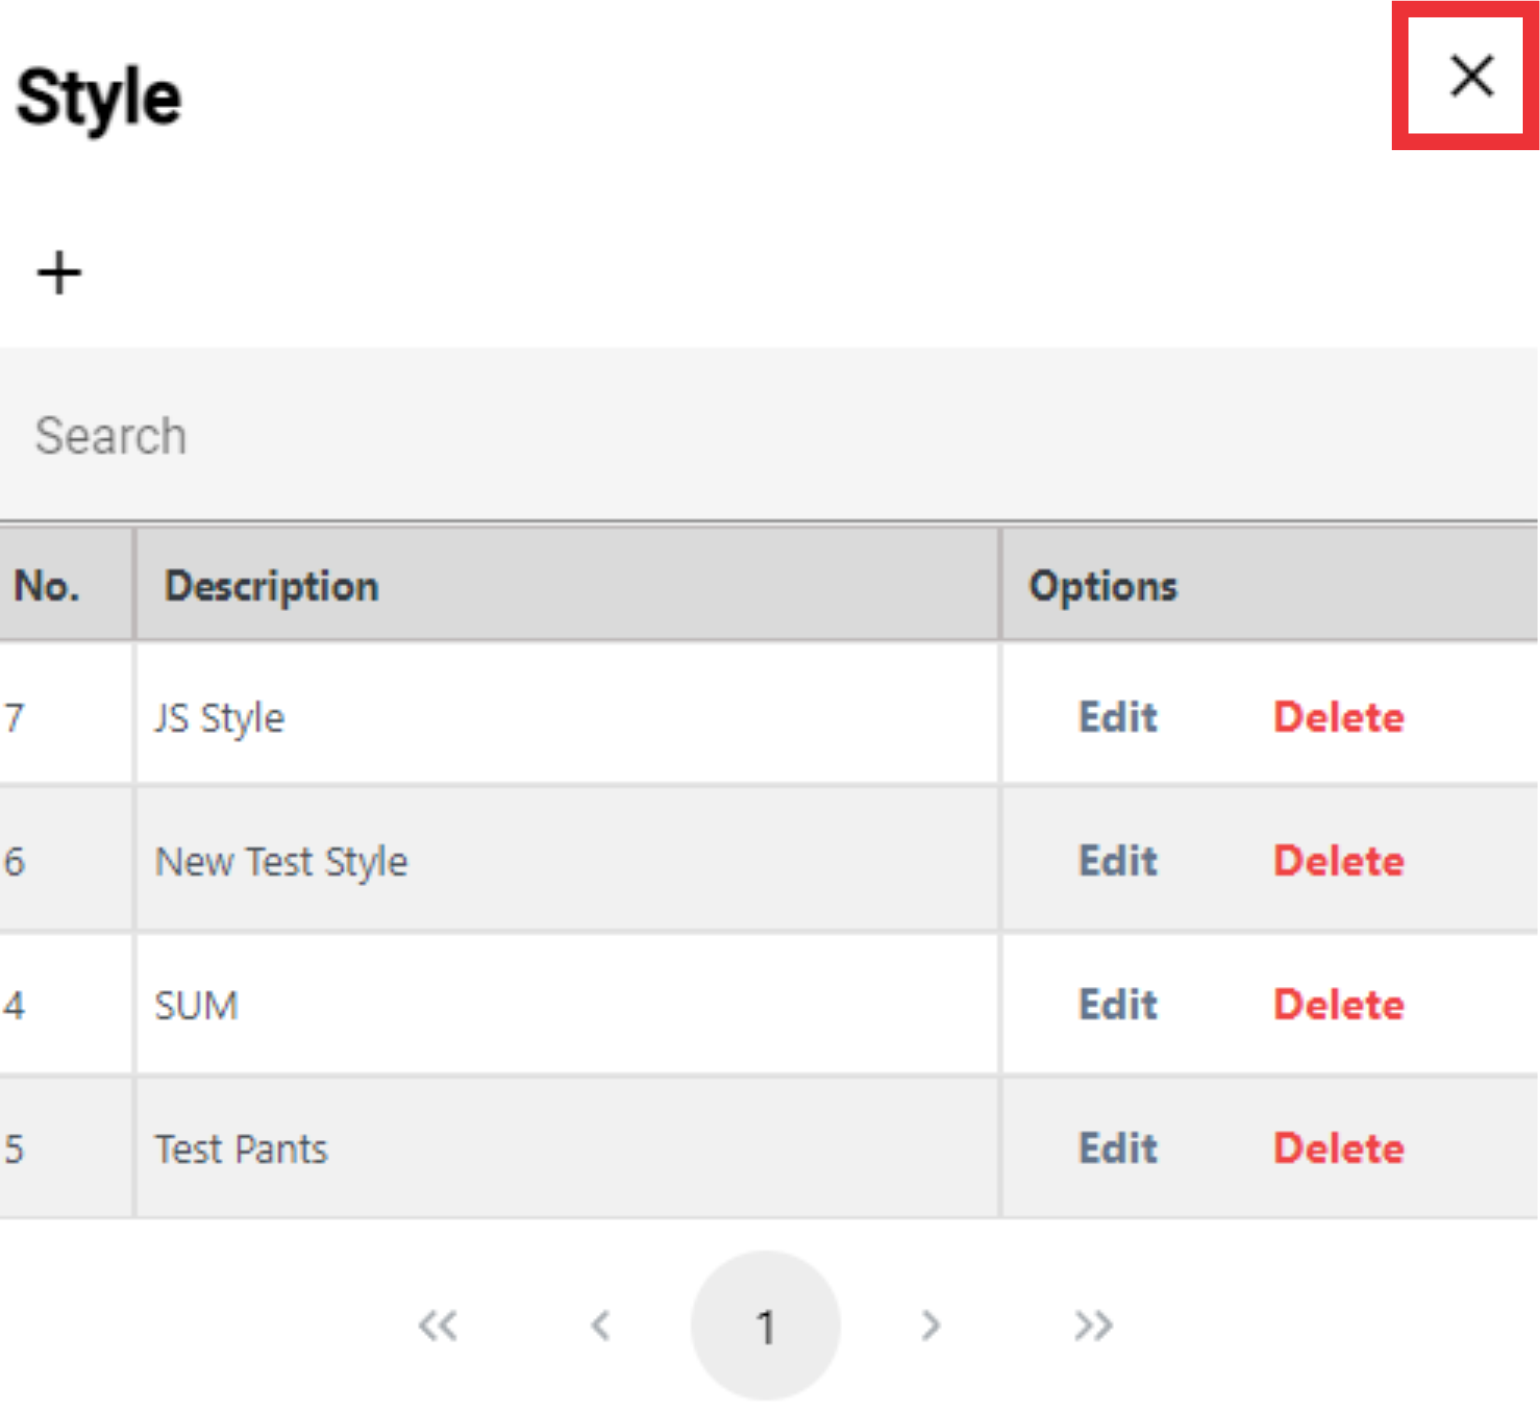
58. For the Edit Style click the "Edit" button.
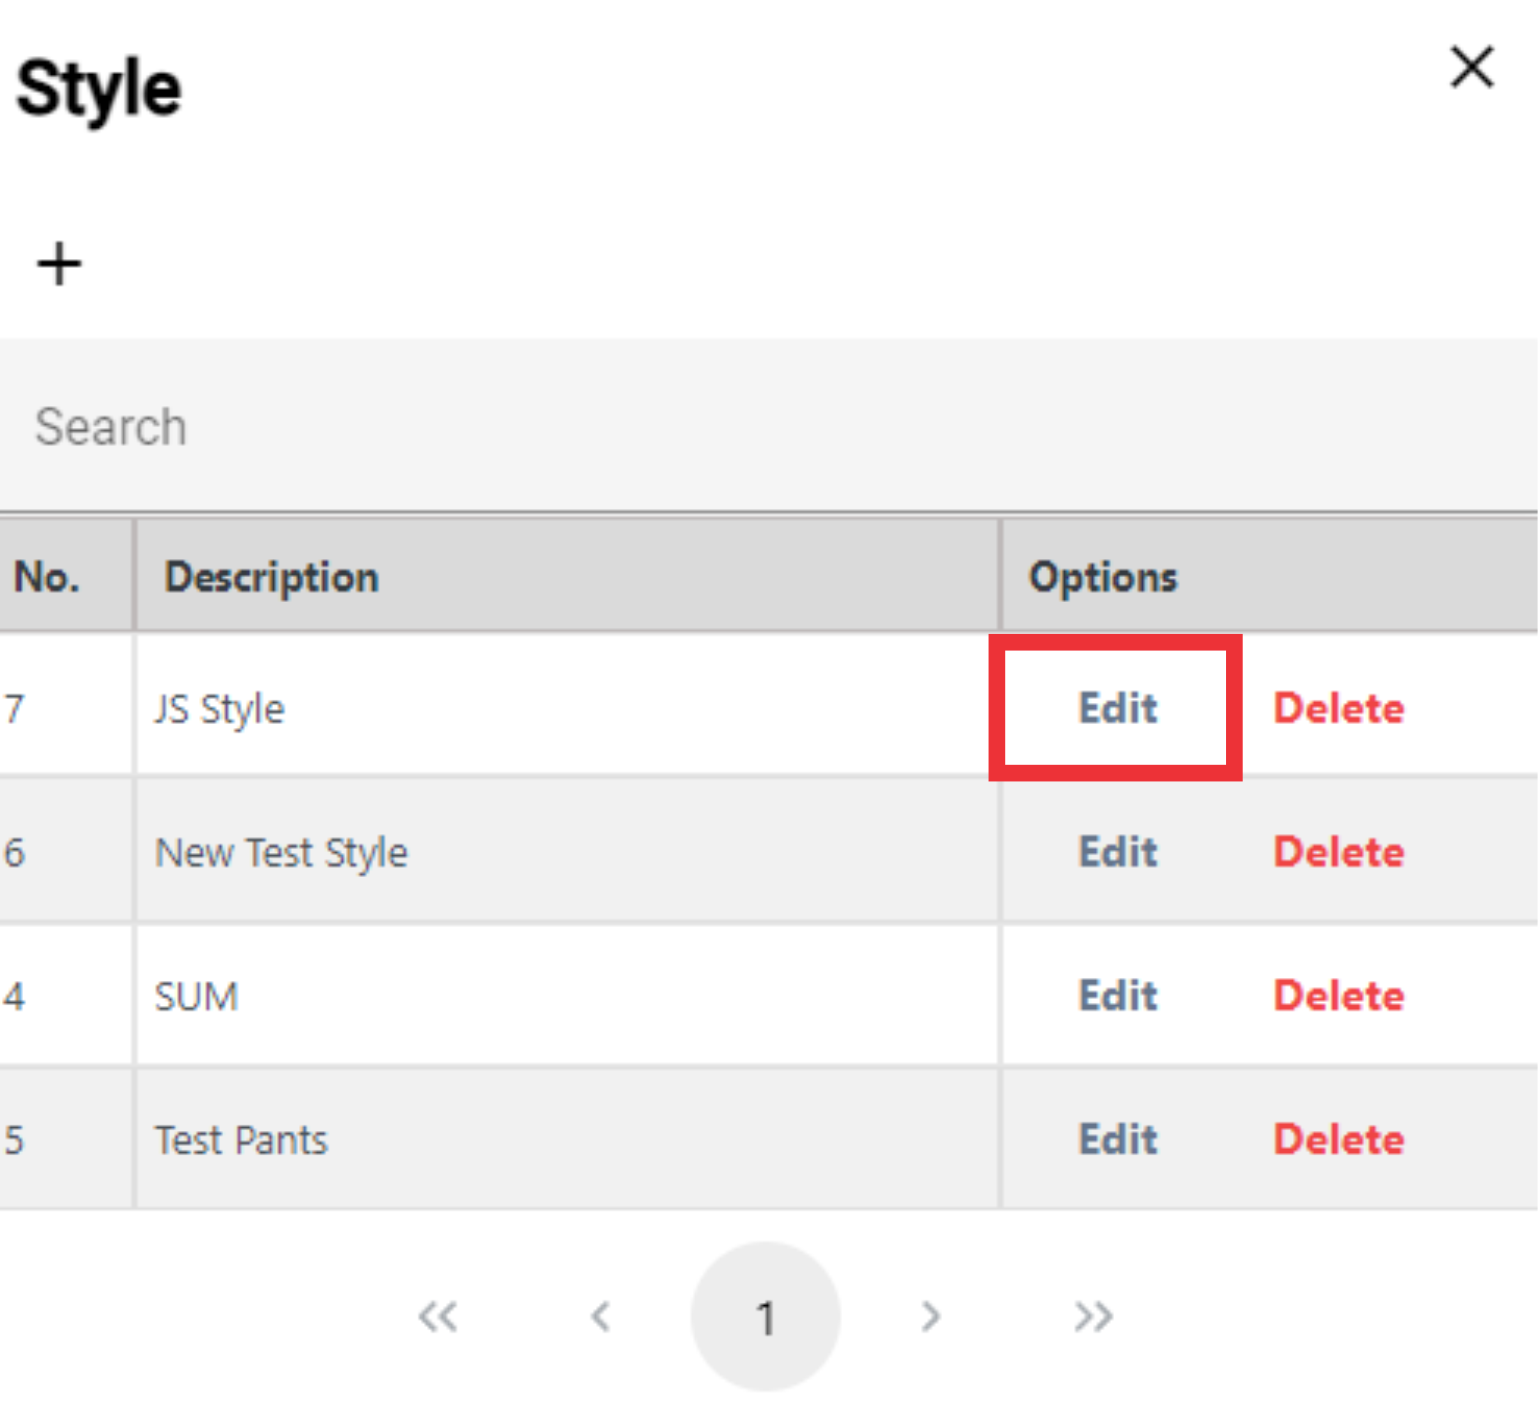
59. Edit Style Descritpion text on the field and click the "OK" button to confirm.

60. For the Delete Style from the list click the "Delete" button.

61. Click the "Yes" button to confirm.
62. For the close this window click the "X" button.
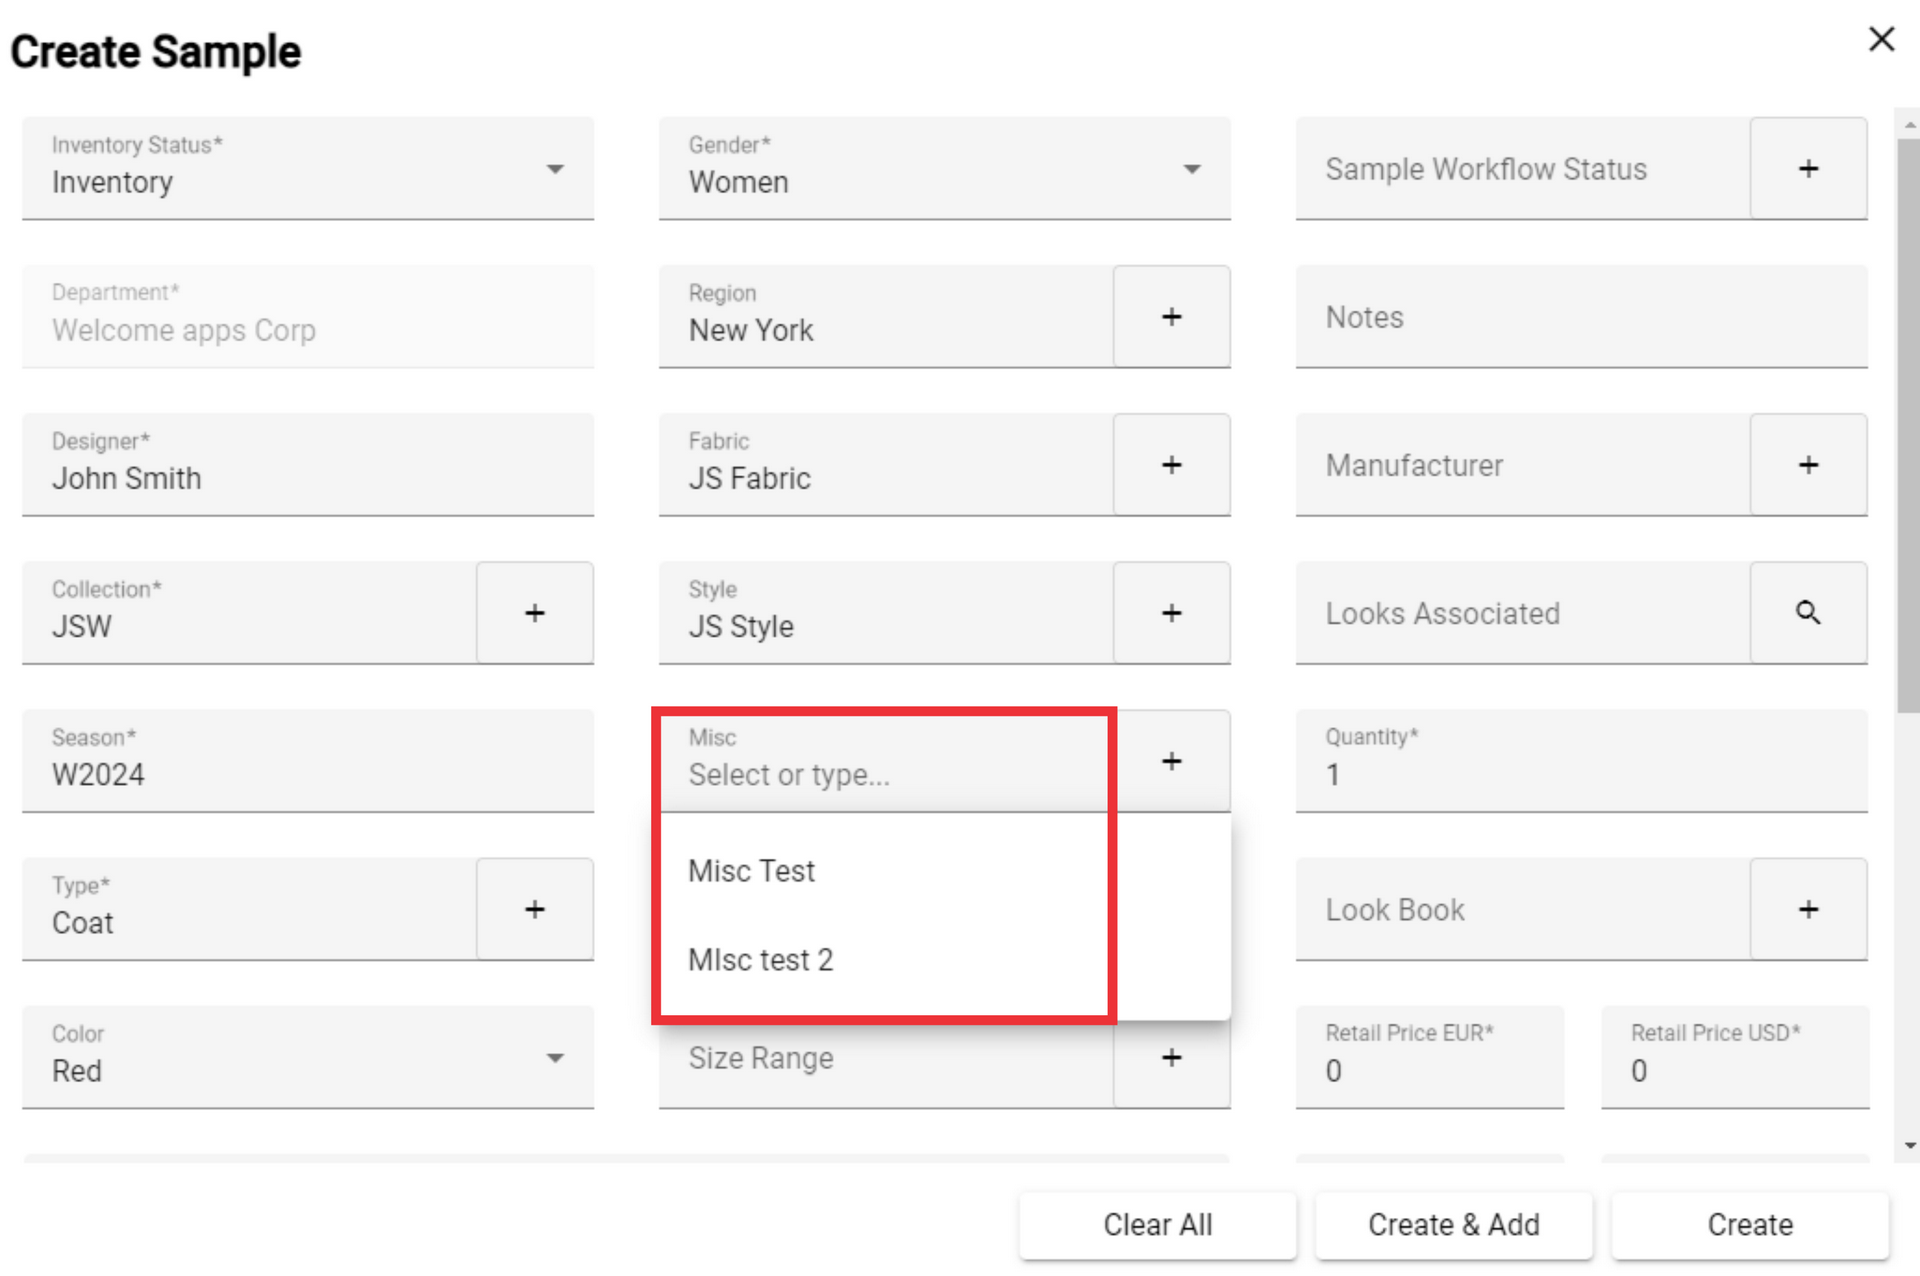
63. Select the Misc from the drop down list or add a new one.
64. For the add a new Misc click the "+" Button.
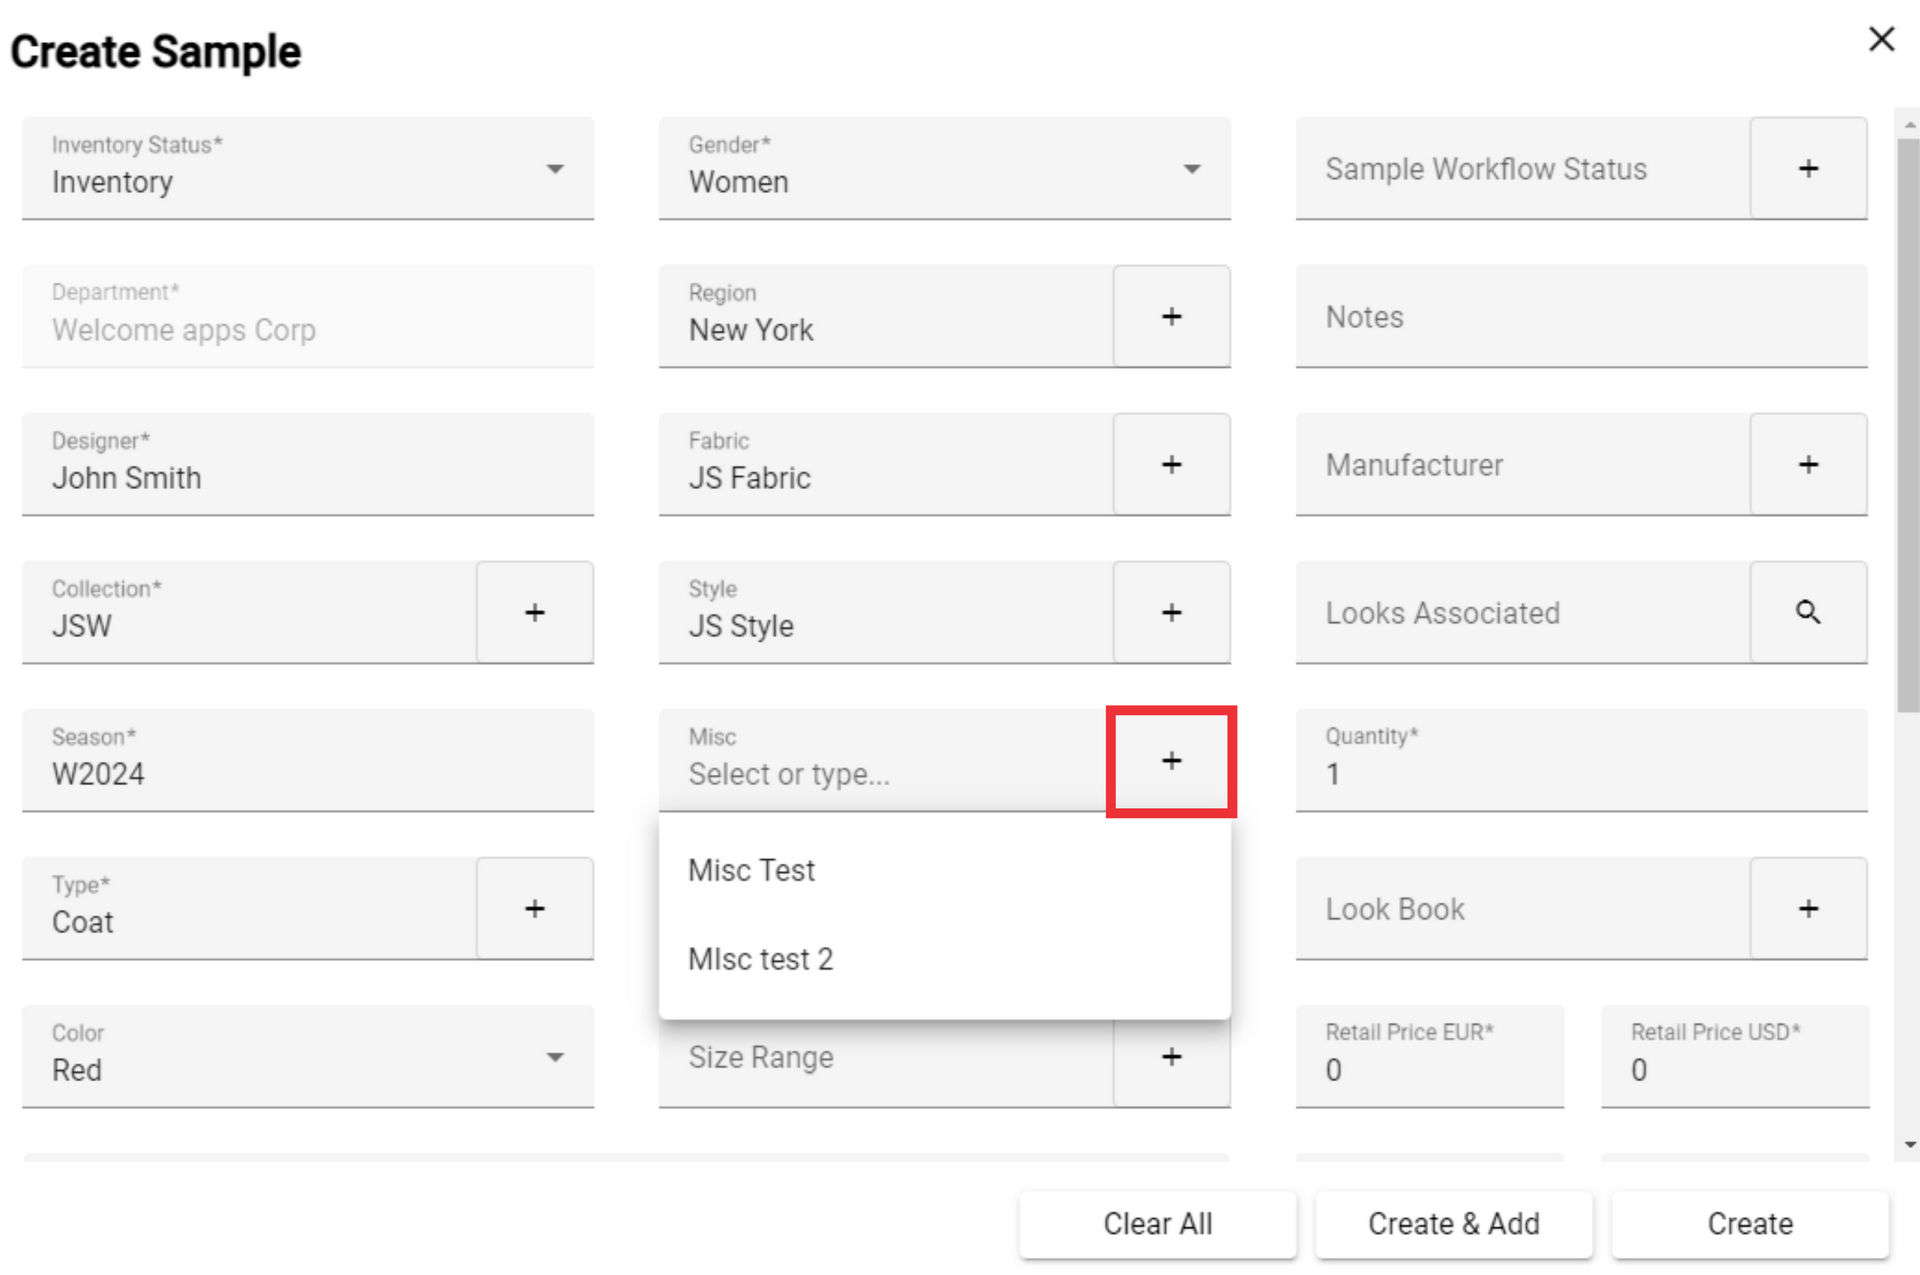
65. For the add a new Misc click the "+" Button.

66. Enter new Misc on the field and click the "OK" button to confirm.

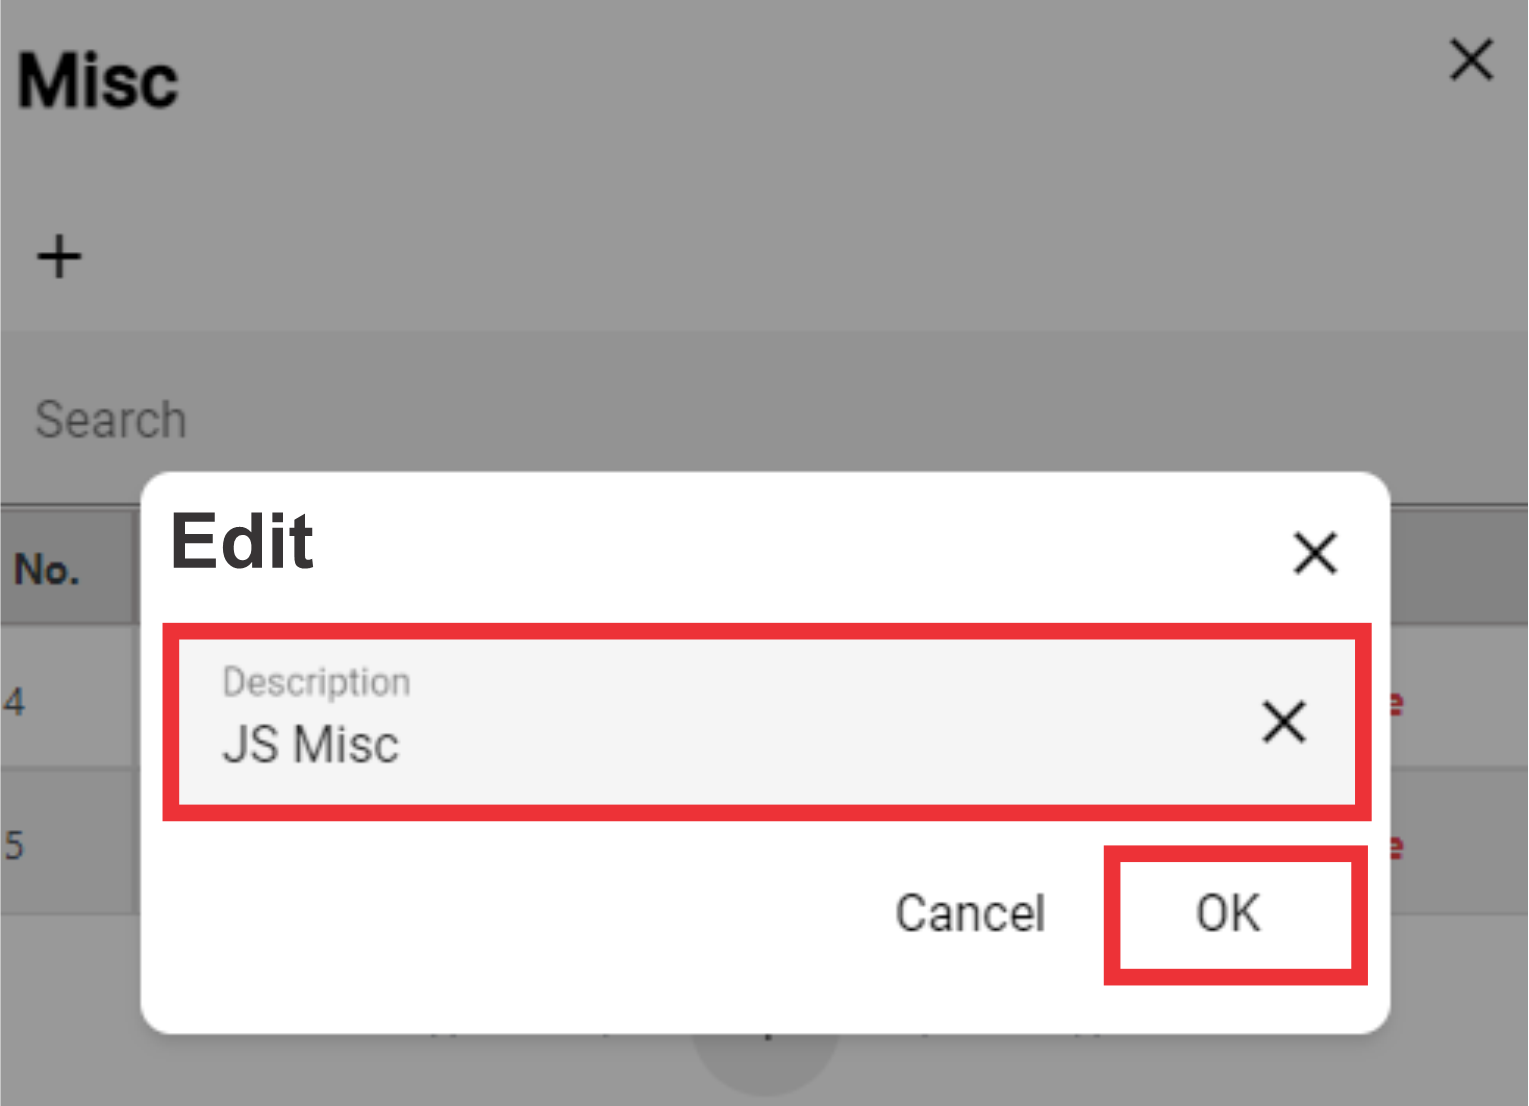
67. For the edit Misc click the "Edit" button.
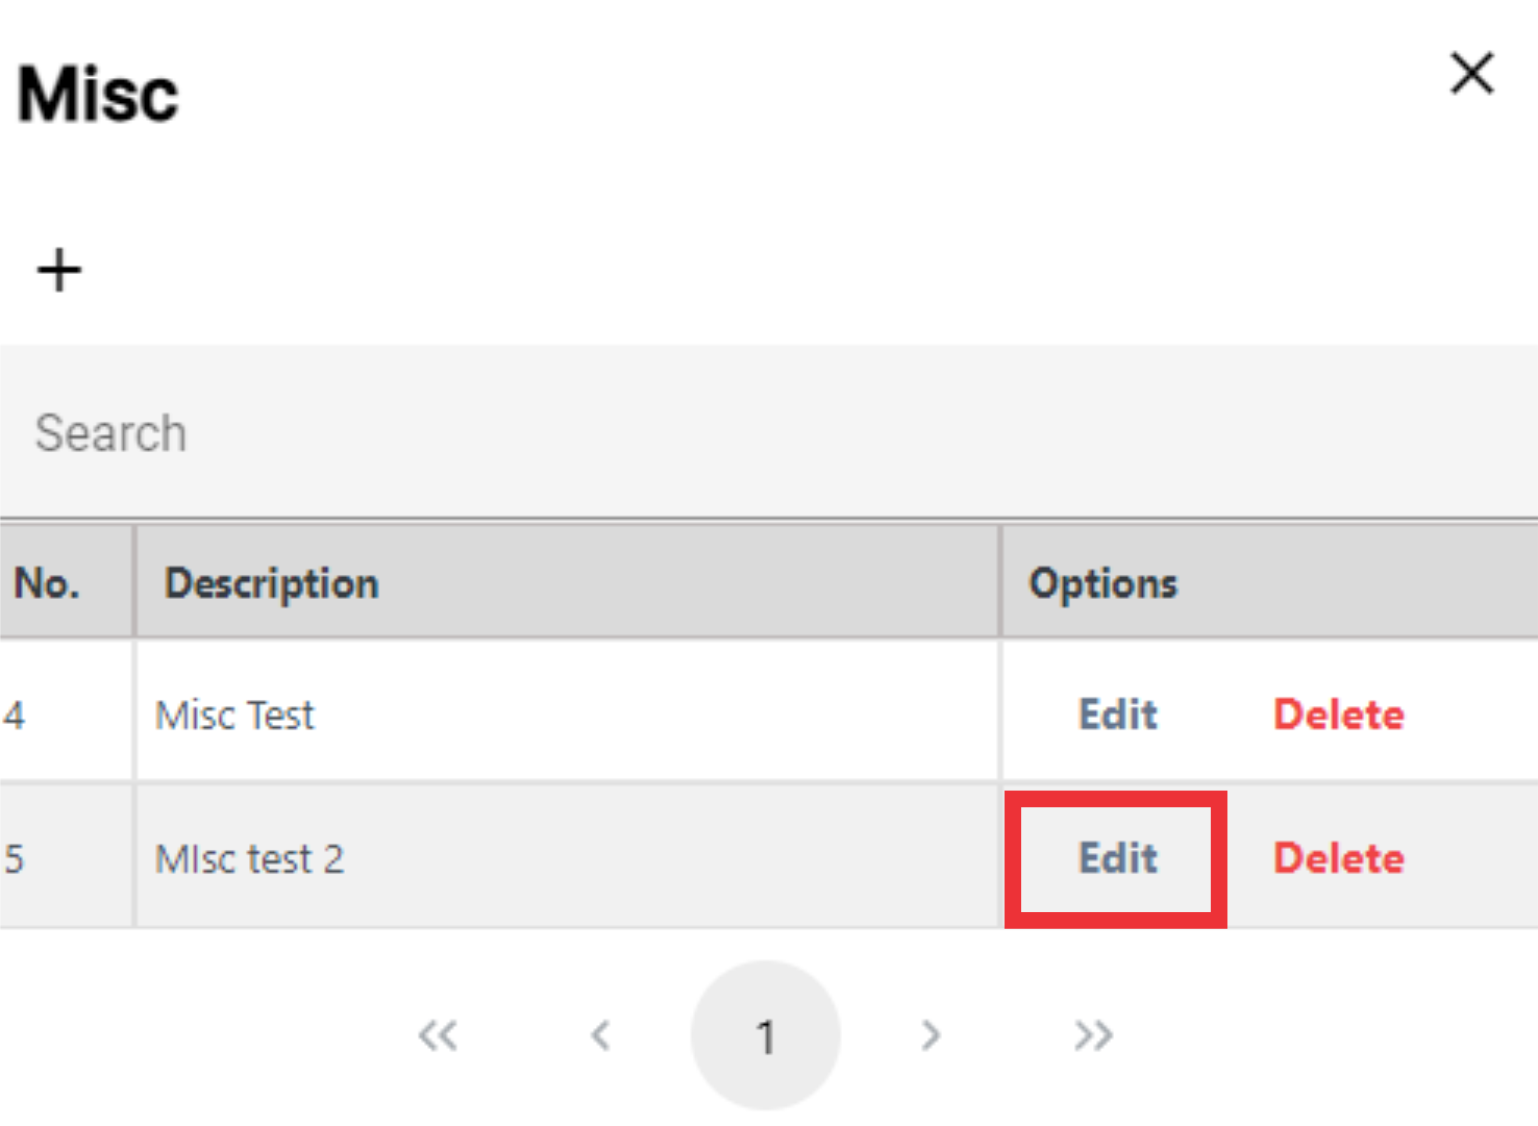
68. Edit Misc description text and click the "OK" button to confirm.
69. For the delete Misc from the list click the "Delete" button.

70. Click the "Yes" button to confirm.
71. For the close this window click the "X" button.

72. Select Size from the list or add a new one.

73. For the add a new size click the "+" button.
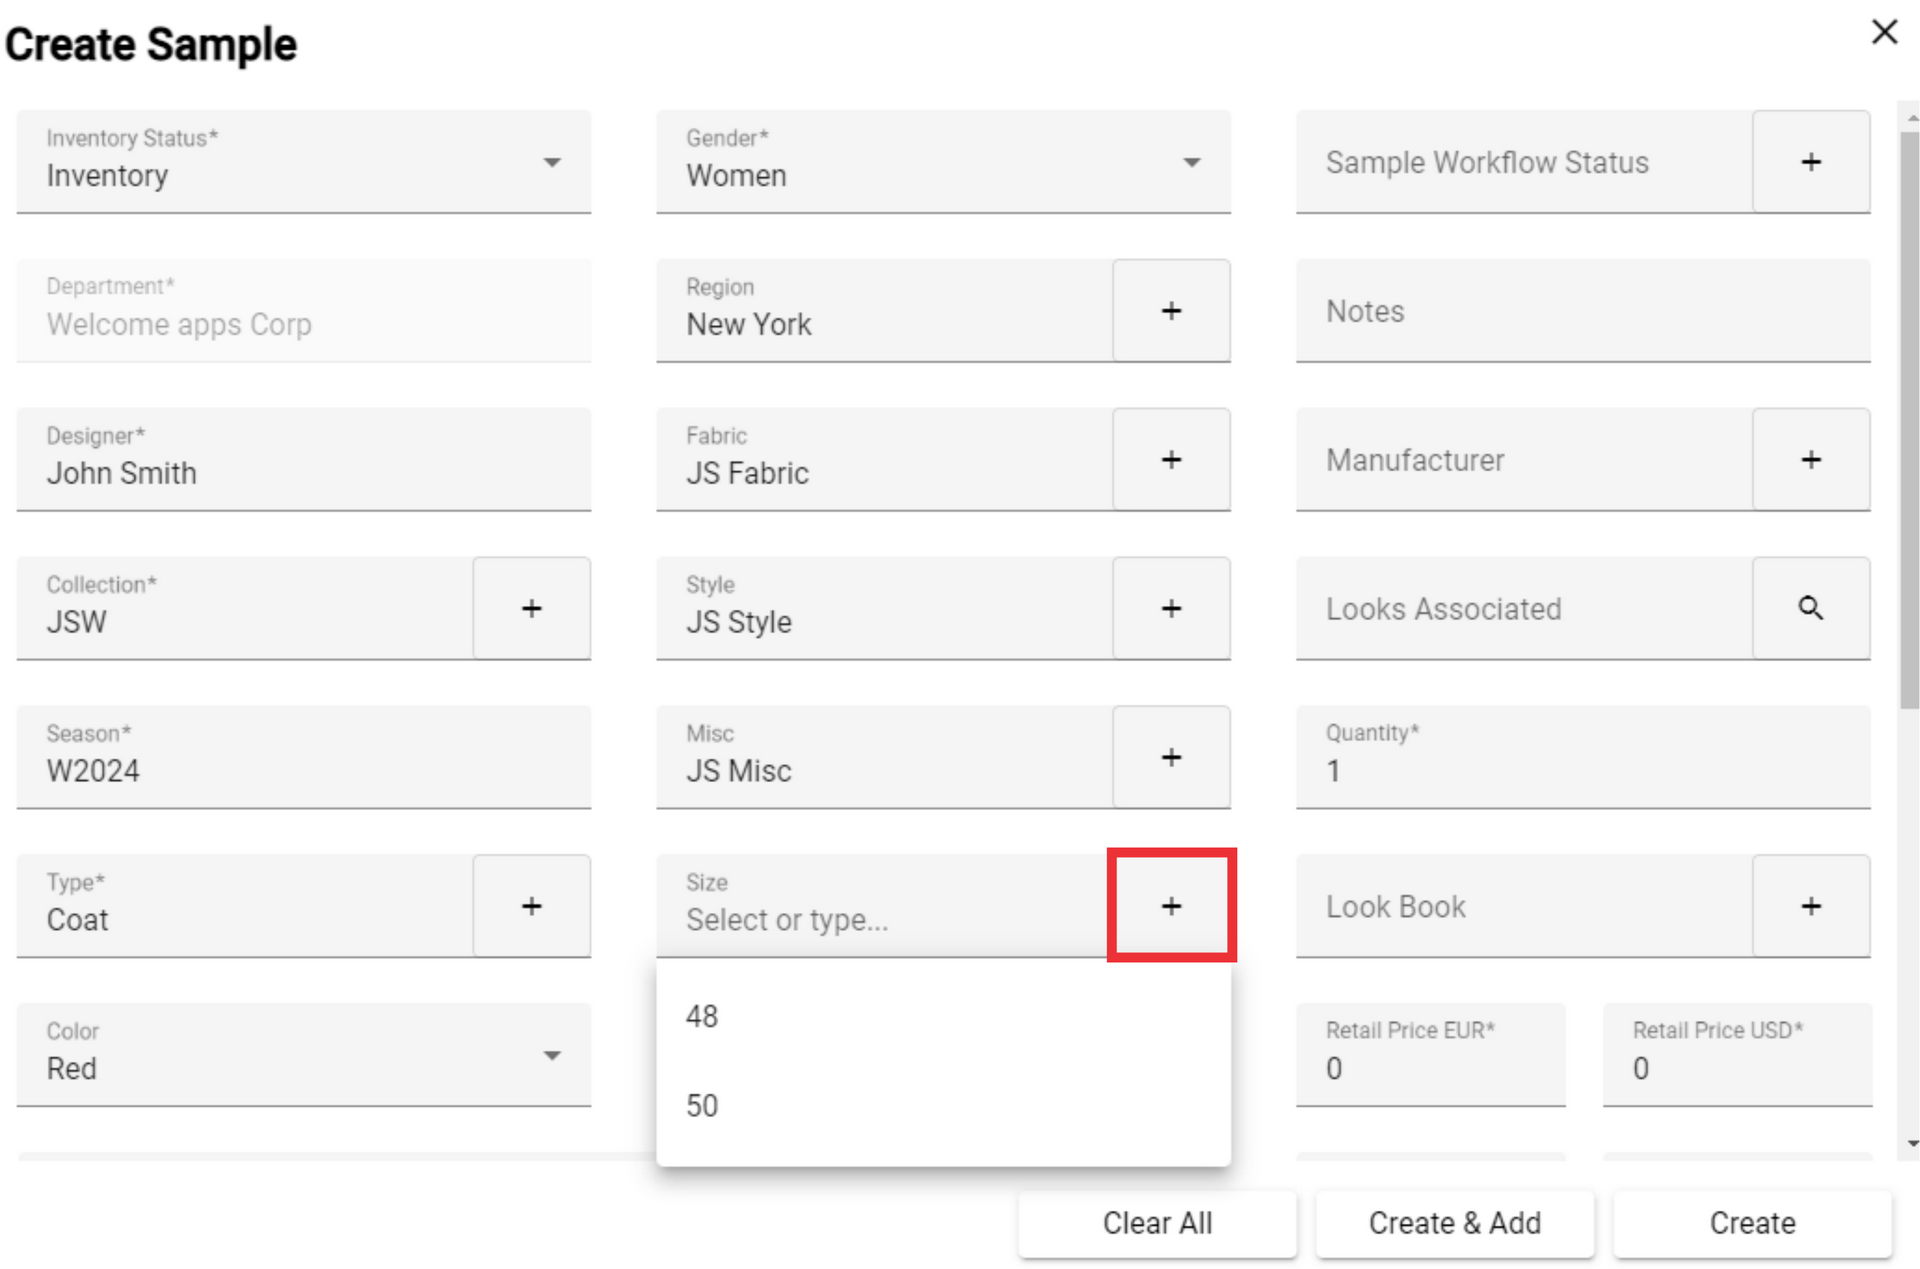
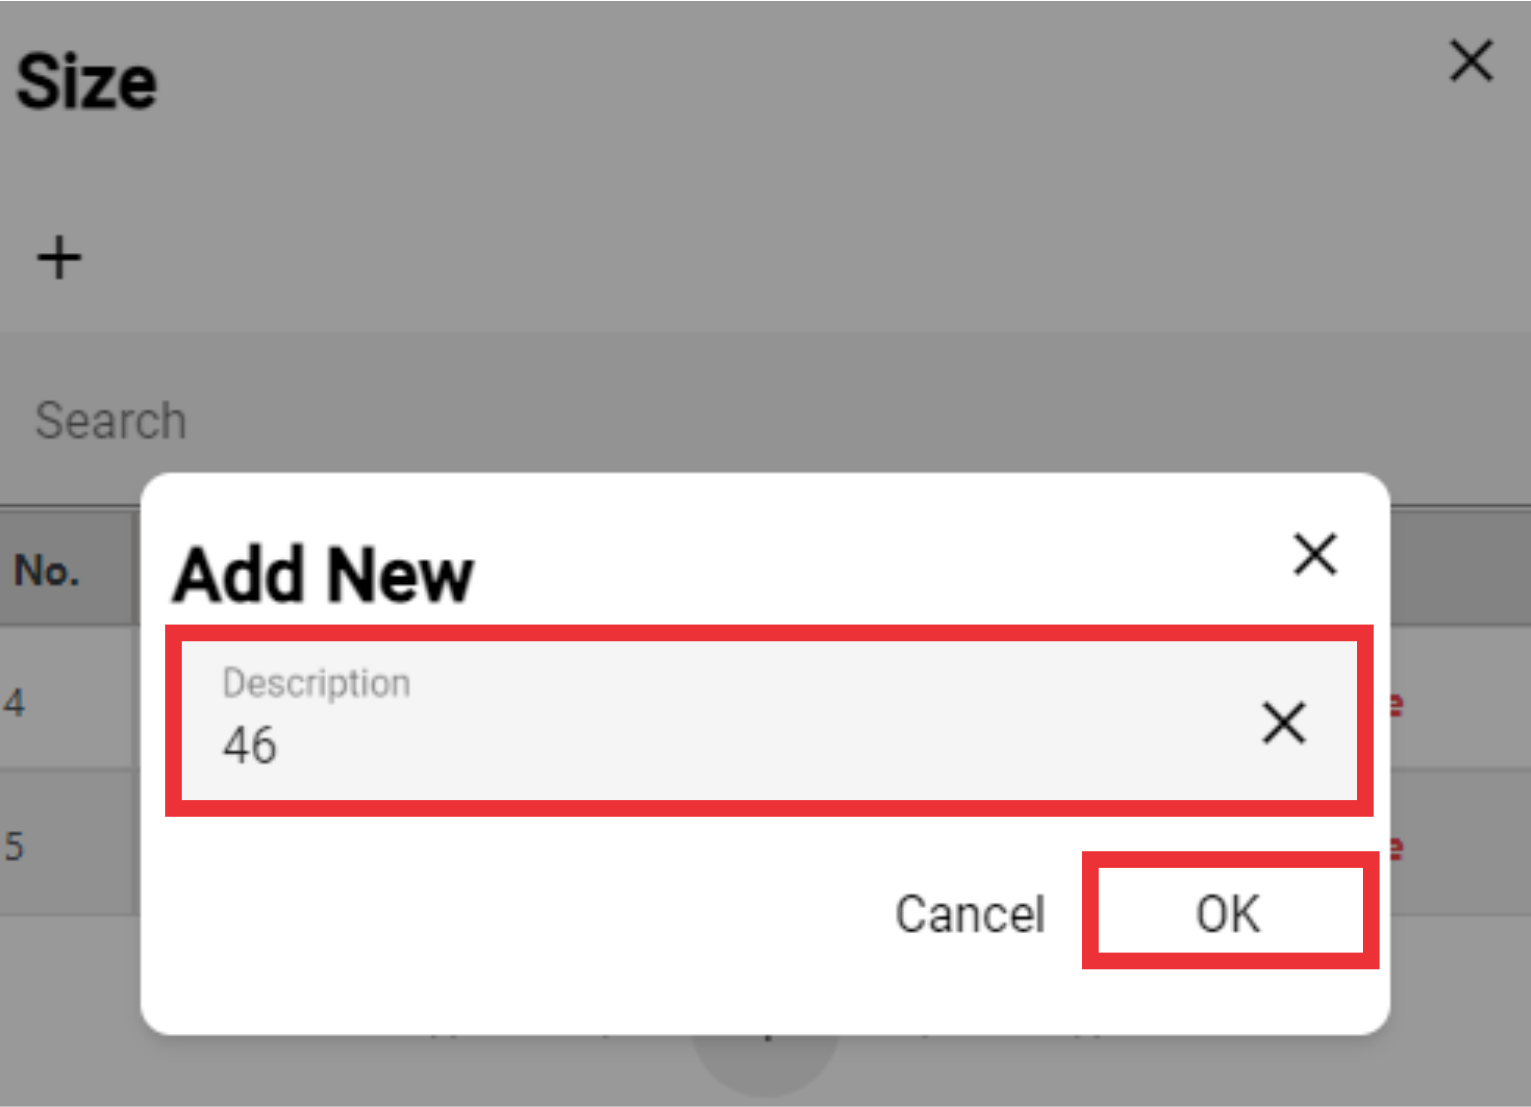
74. For the add a new size click the "+" button.

75. Write the Size on the field an click the "OK" button to confirm.
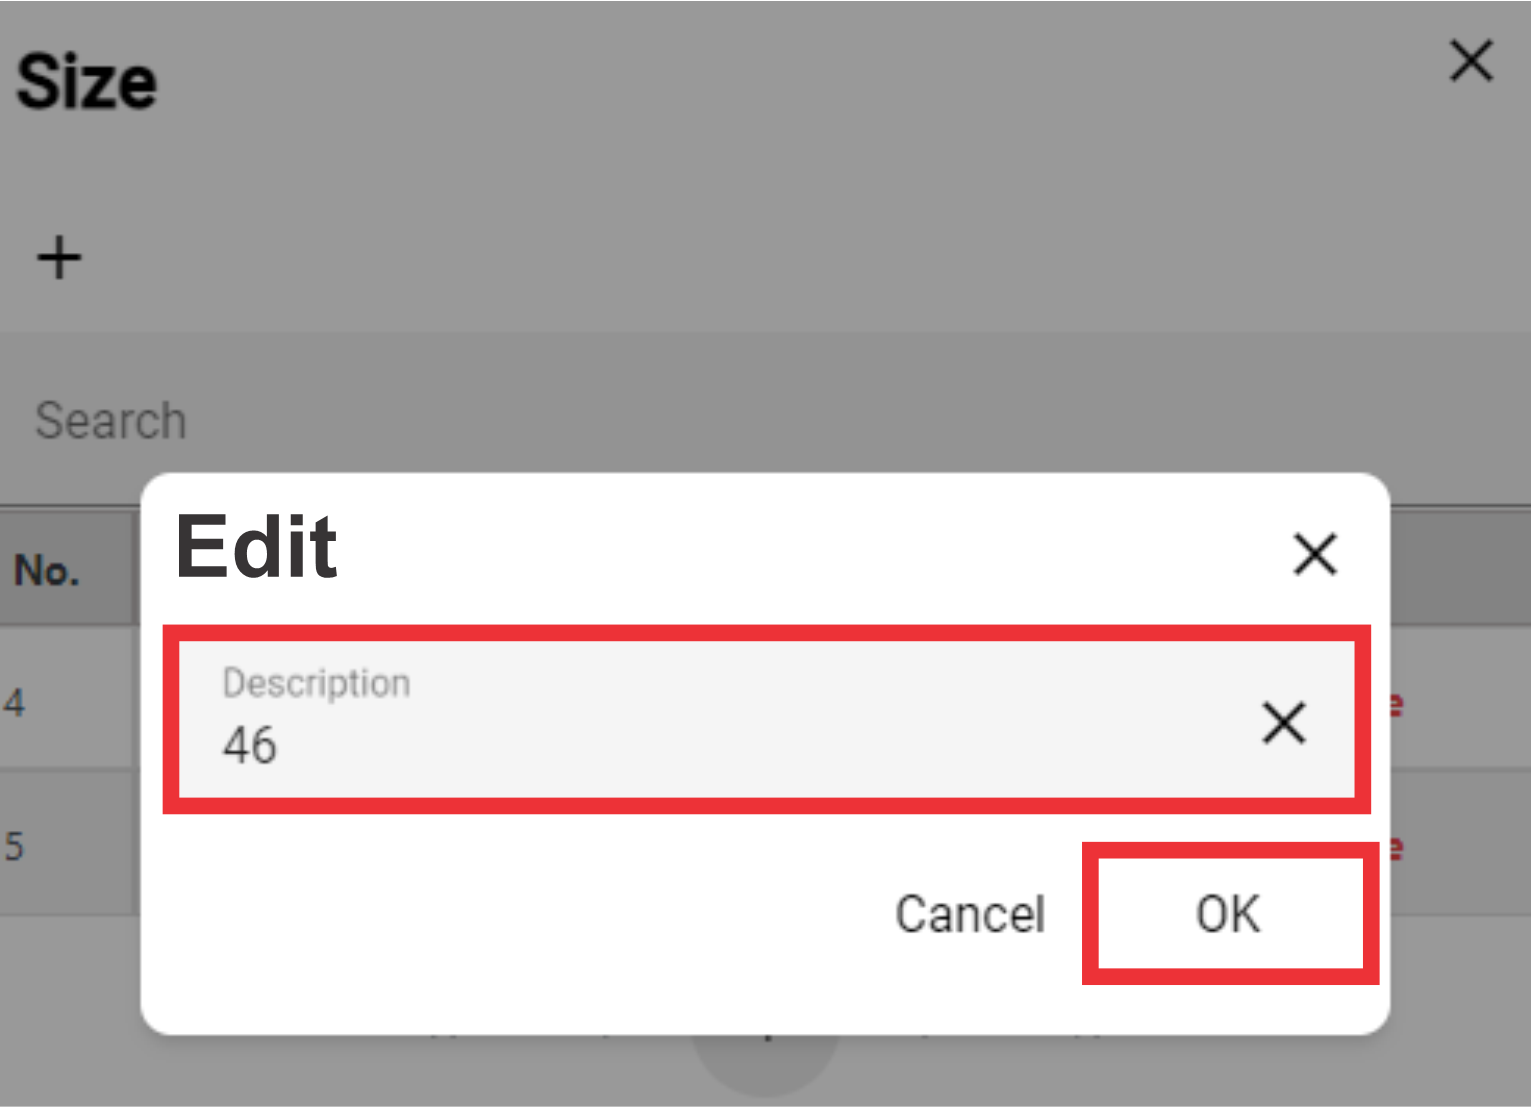
76. For the edit Size click the "Edit" button.

77. Edit Size description and click the "OK" button to confirm.
78. For the Delete Size from the list click the "Delete" button.
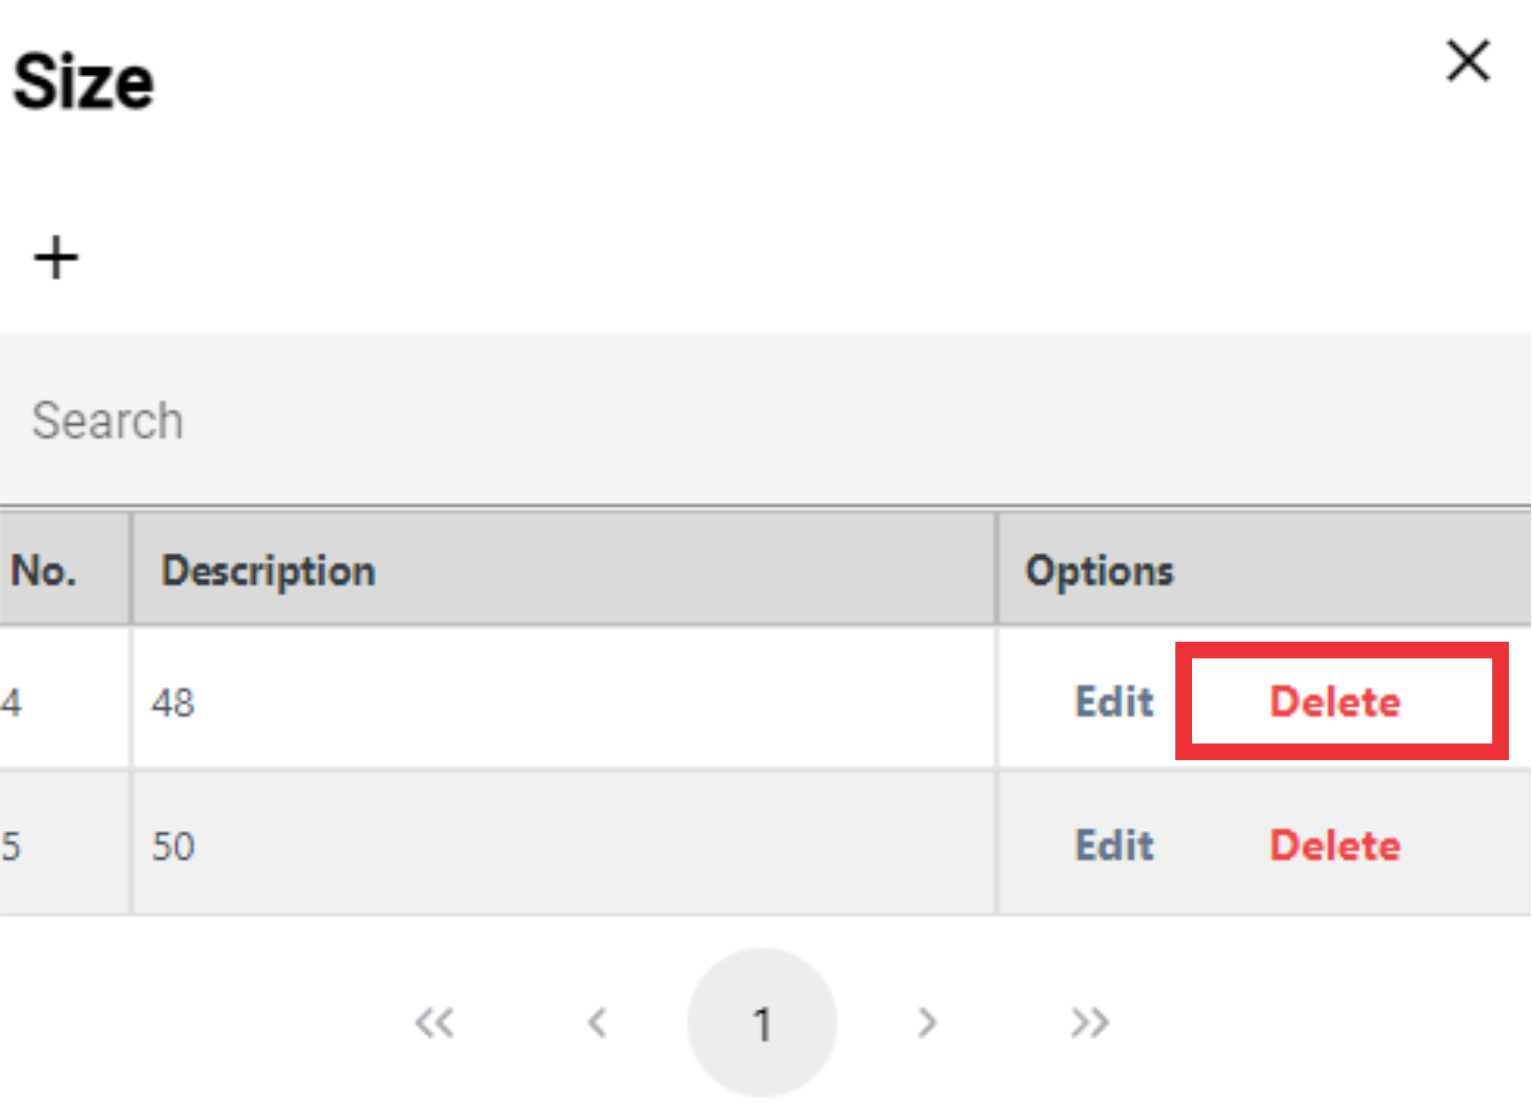
79. Click the "Yes" button to confirm.
80. For the close this window click the "X" button.

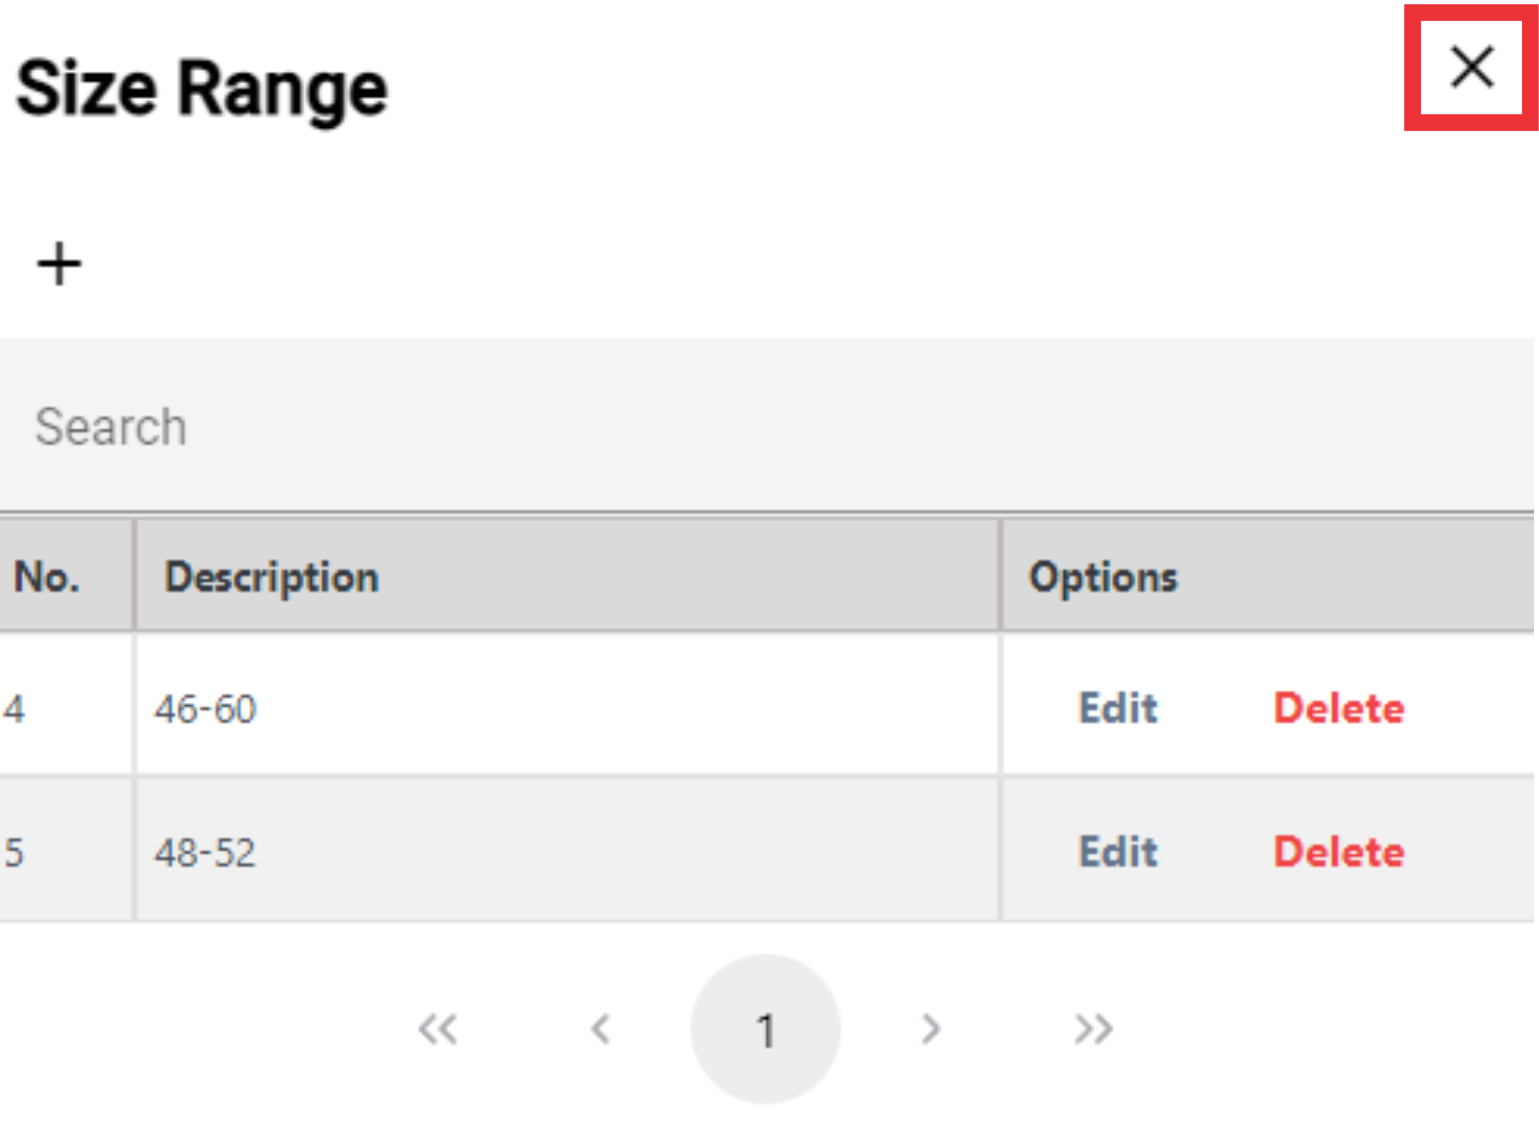
81. Select Size Range from the drop down list or add a new one.

82. For the add a New Size Range click the "+" button.

83. For the add a New Size Range click the "+" button.

84. Write Size Range on the field and click the "OK" button to confirm.

85. For the Edit Size Range click the "Edit" button.

86. Edit Size Range description on the field and click the "OK" buton to confirm.
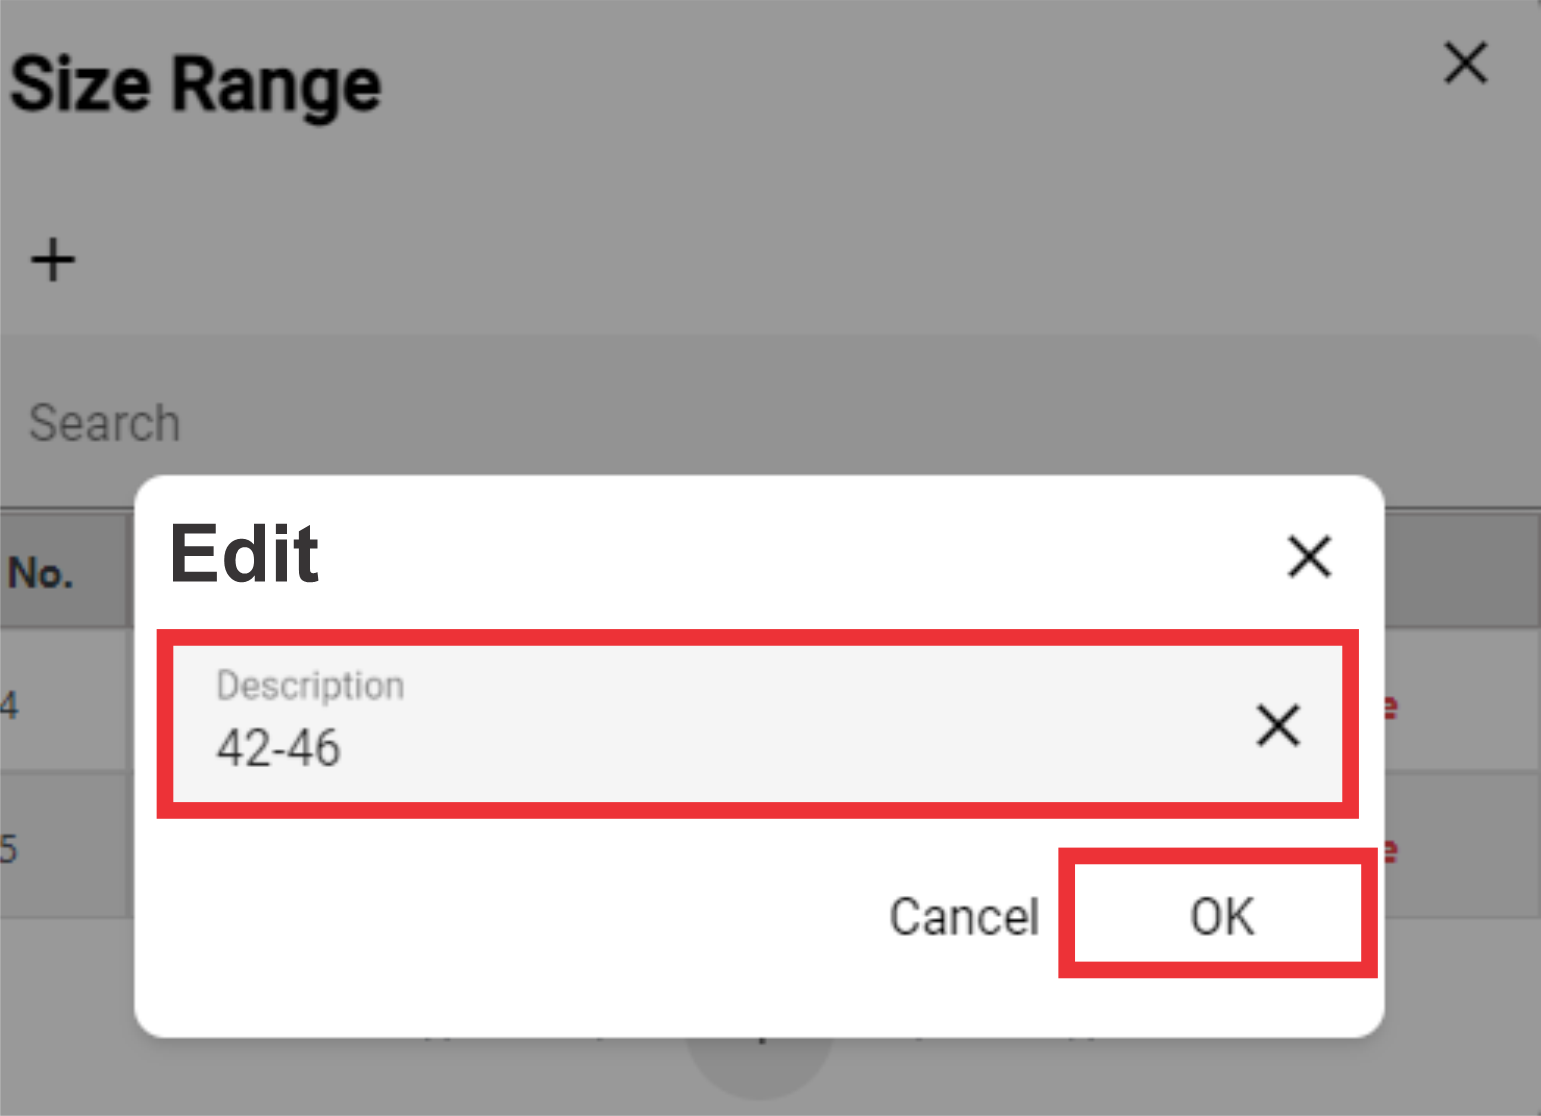
87. For The Delete Size Range click the "Delete" button.

88. For the confirm click the "Yes" button.
89. For the close this window click the "X" button.
90. Type or Select from the drop down list Sample Workflow Status or add a new one.
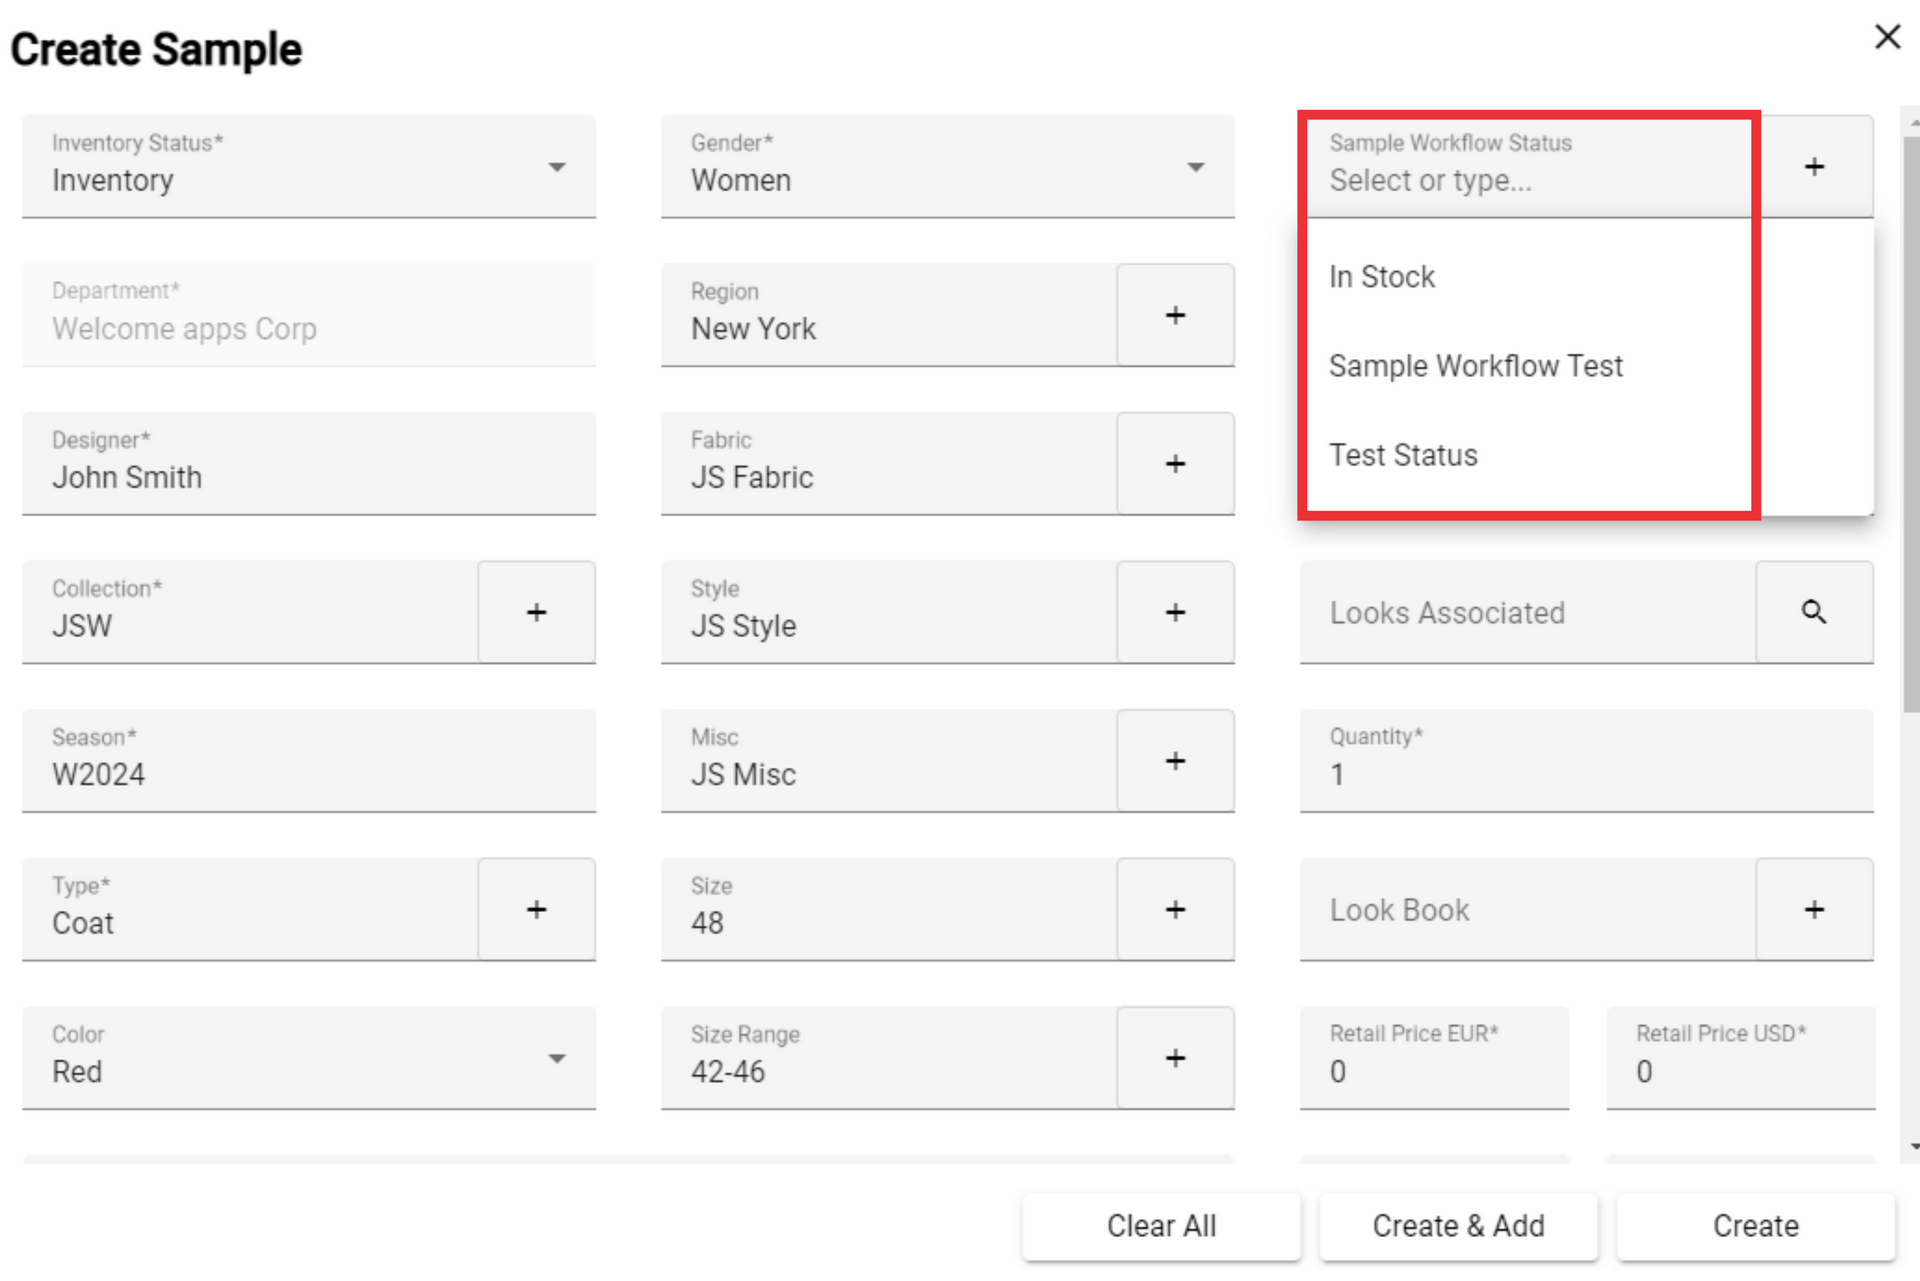
91. For the add a new Sample Workflow Status click the "+" button.

92. For the add a new Sample Workflow Status click the "+" button.

93. Write a new Sample Workflow Status on the field and click the "OK" button to confirm.

94. For the edit Sample Workflow Status click the "Edit" button.

95. Edit Description and click the "OK" button to confirm.

96. For the delete Sample WorkFlow Status click the "Delete" button.
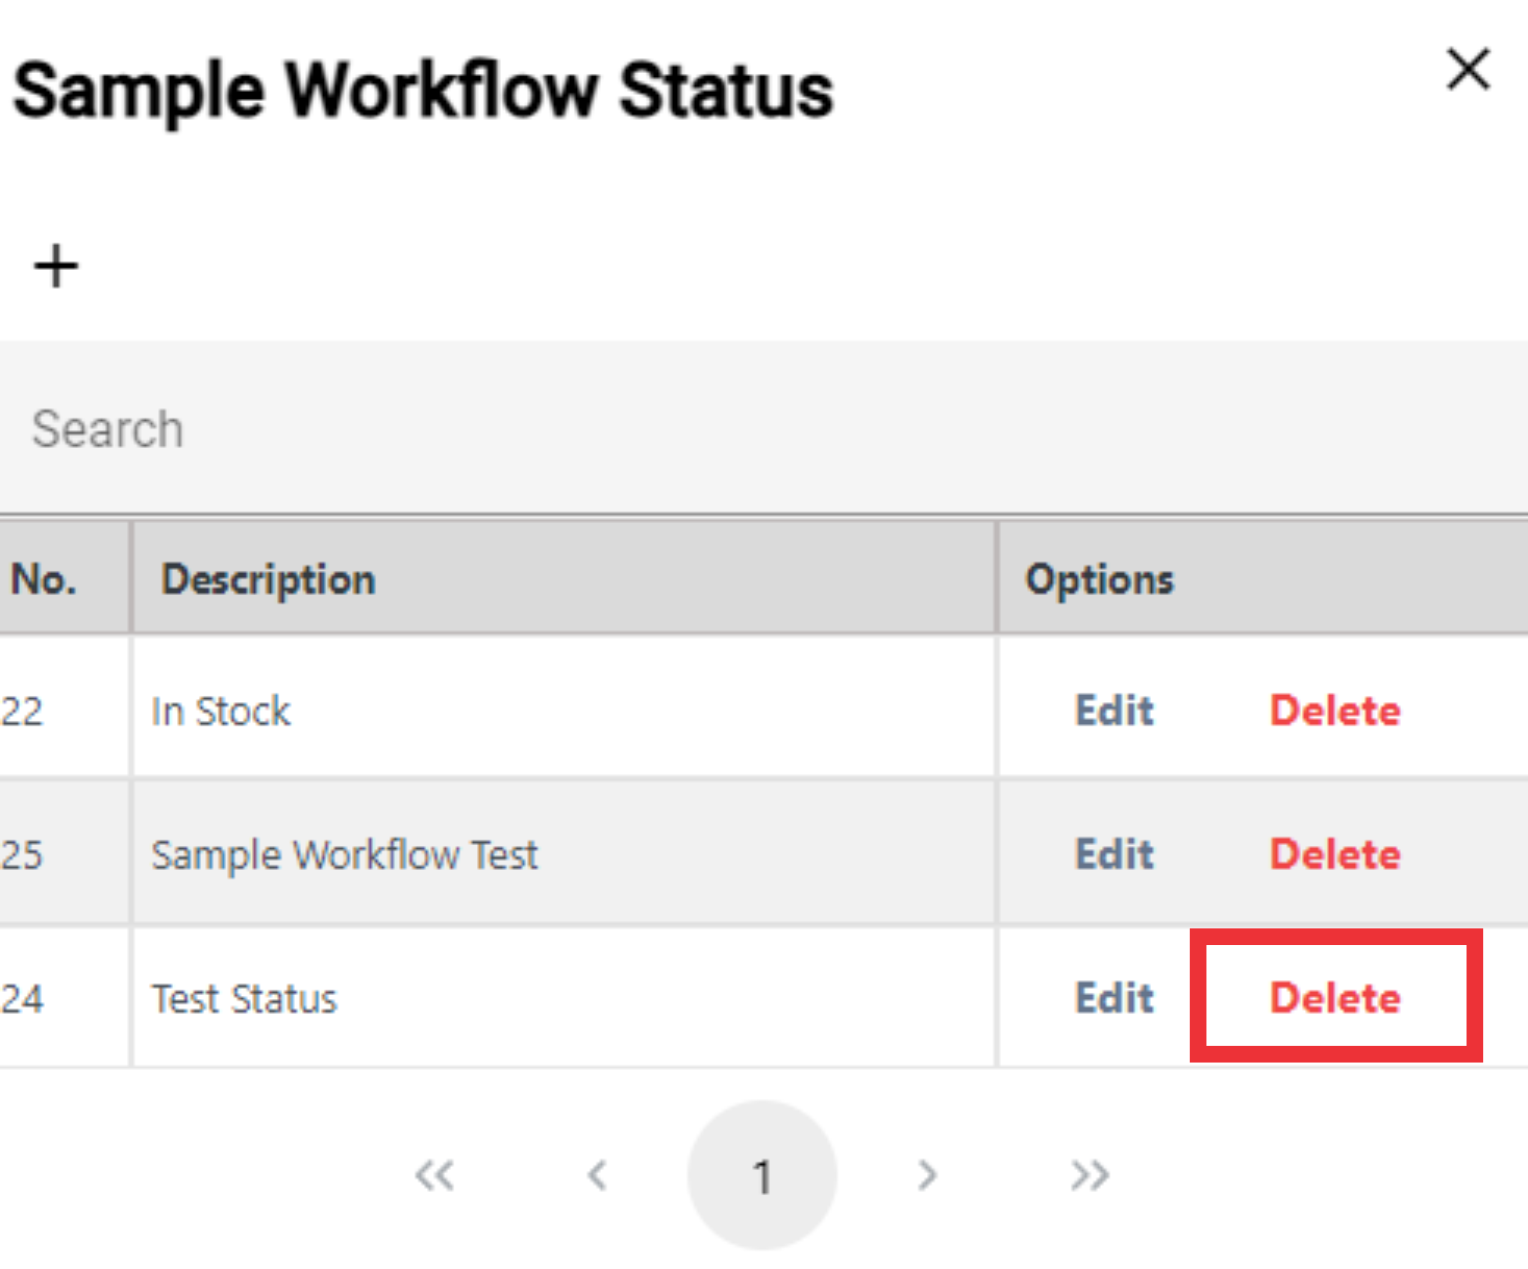
97. Click the "Yes" button to confirm.
98. For the close window click the "X" button.

99. Write notes on the field.

100. Select the manufacturer fro the list or add a new one.

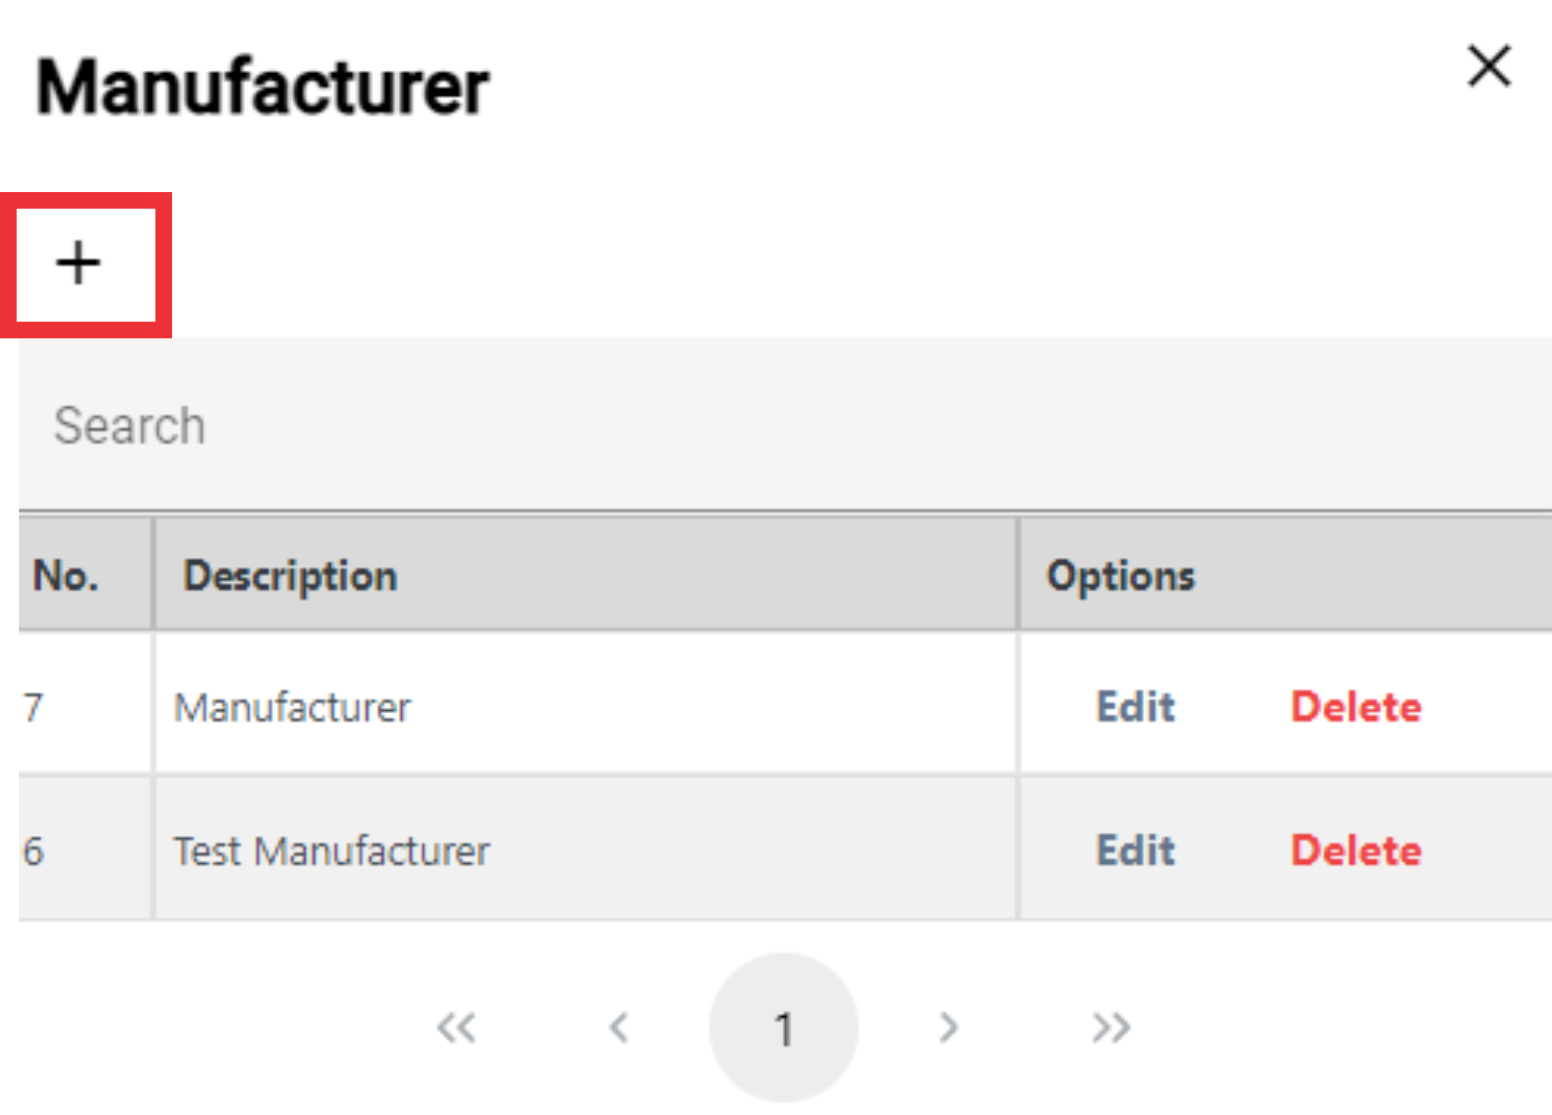
101. For the add a new manufacturer click the "+" button.

102. For the add a new manufacturer click the "+" button.
103. Enter the Description on the field an click the "OK" button to confirm.

104. For the edit Manufacturer click the "Edit" button.
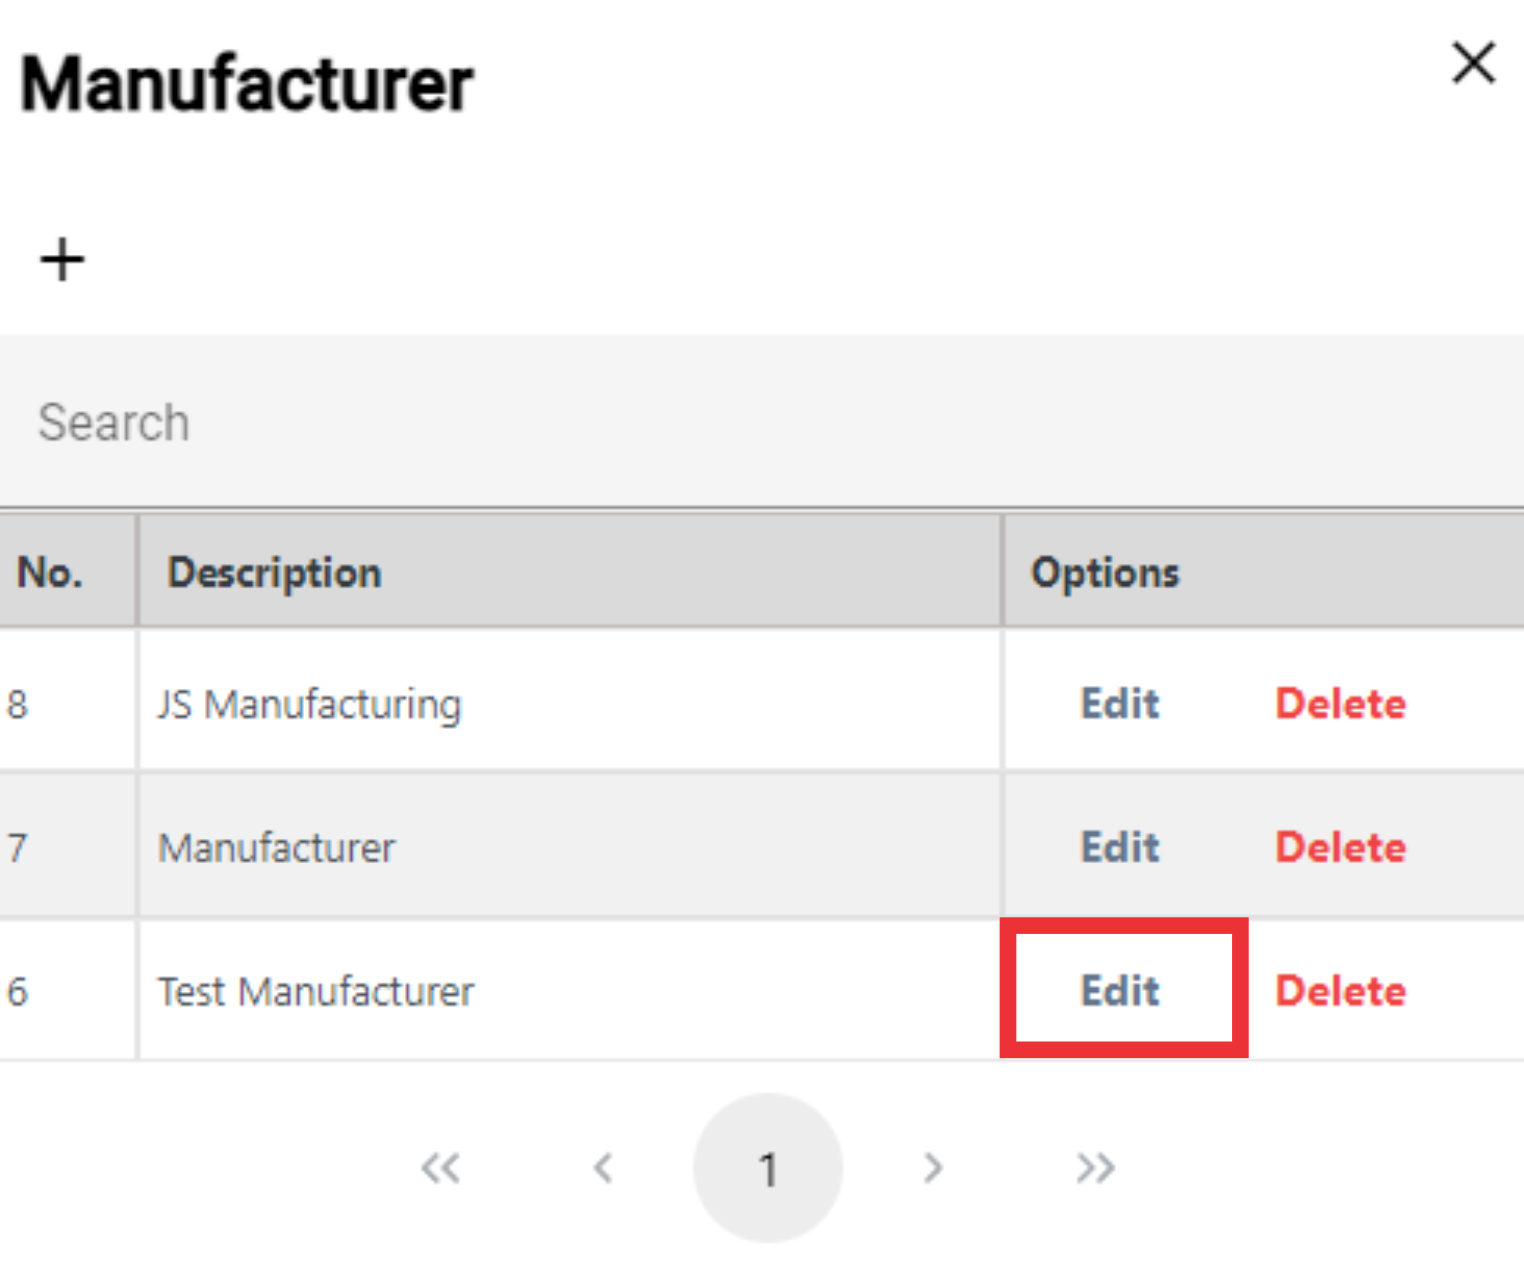
105. Edit descrition text and click the ok buuton to confirm.

106. For the delete Manufacturer from the list click the "Delete" button.

107. Click the "Yes" button to confirm.
108. For the close window click the "X" button.
 109. Optionally search and select items associated with this item.

110. Enter the quantity of the item in the column.

111. Select look book from the list or add an new look book.

112. For the add new look book click the "+" button.

113. click the Select button to add look book from the list.
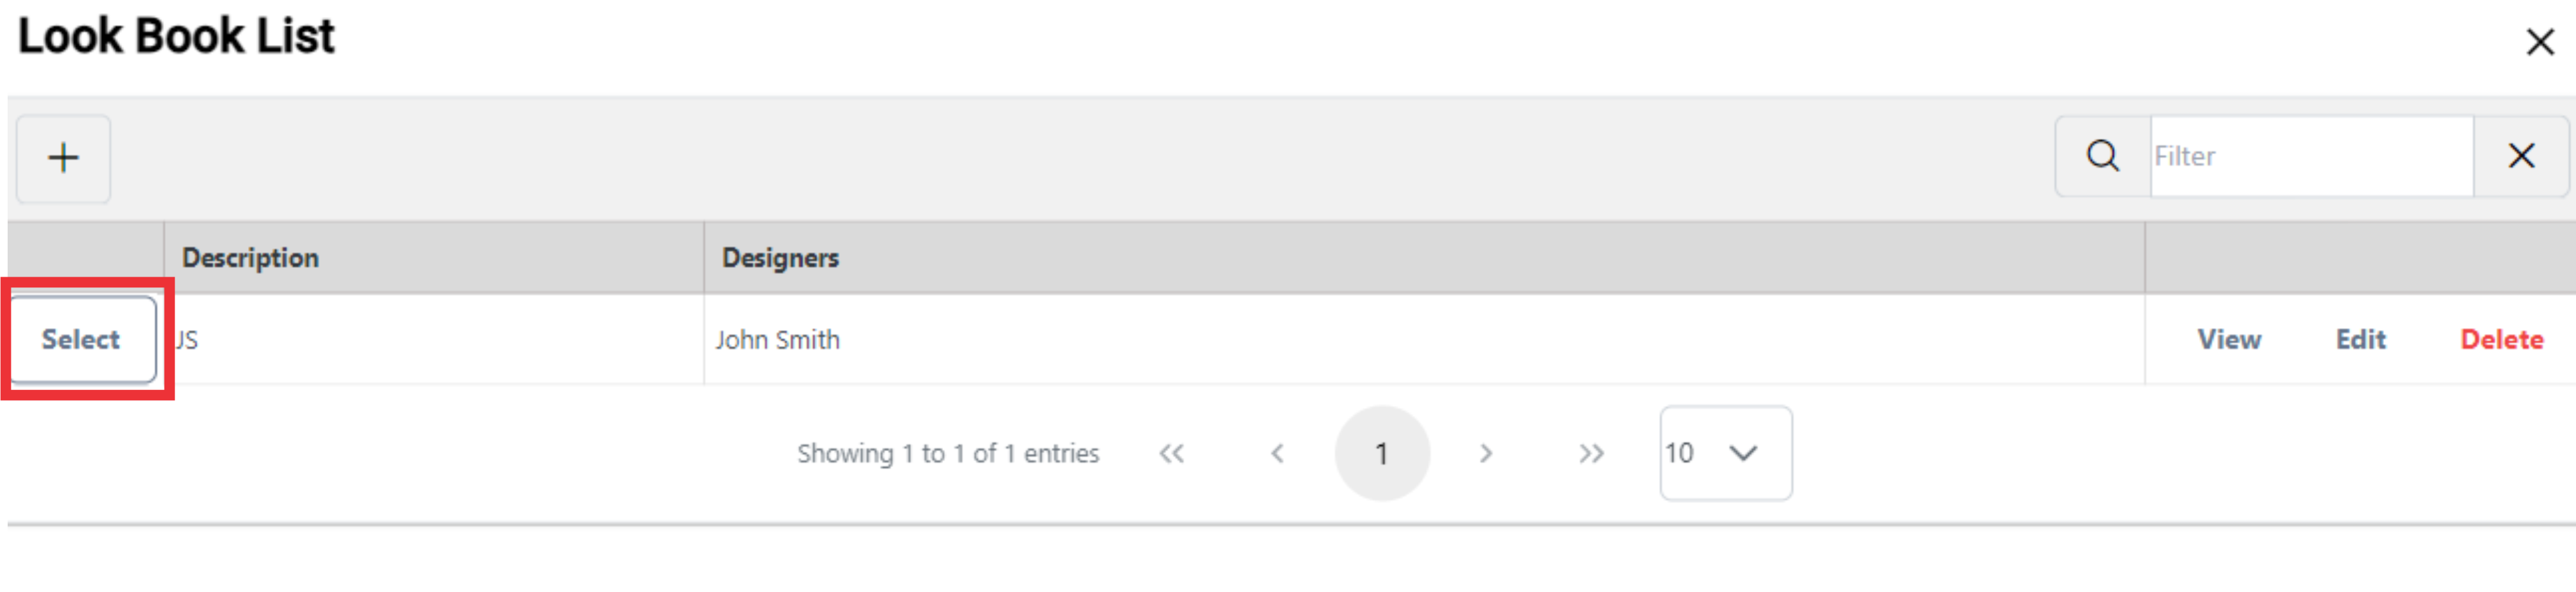
114. click the "Yes" button to confirm.

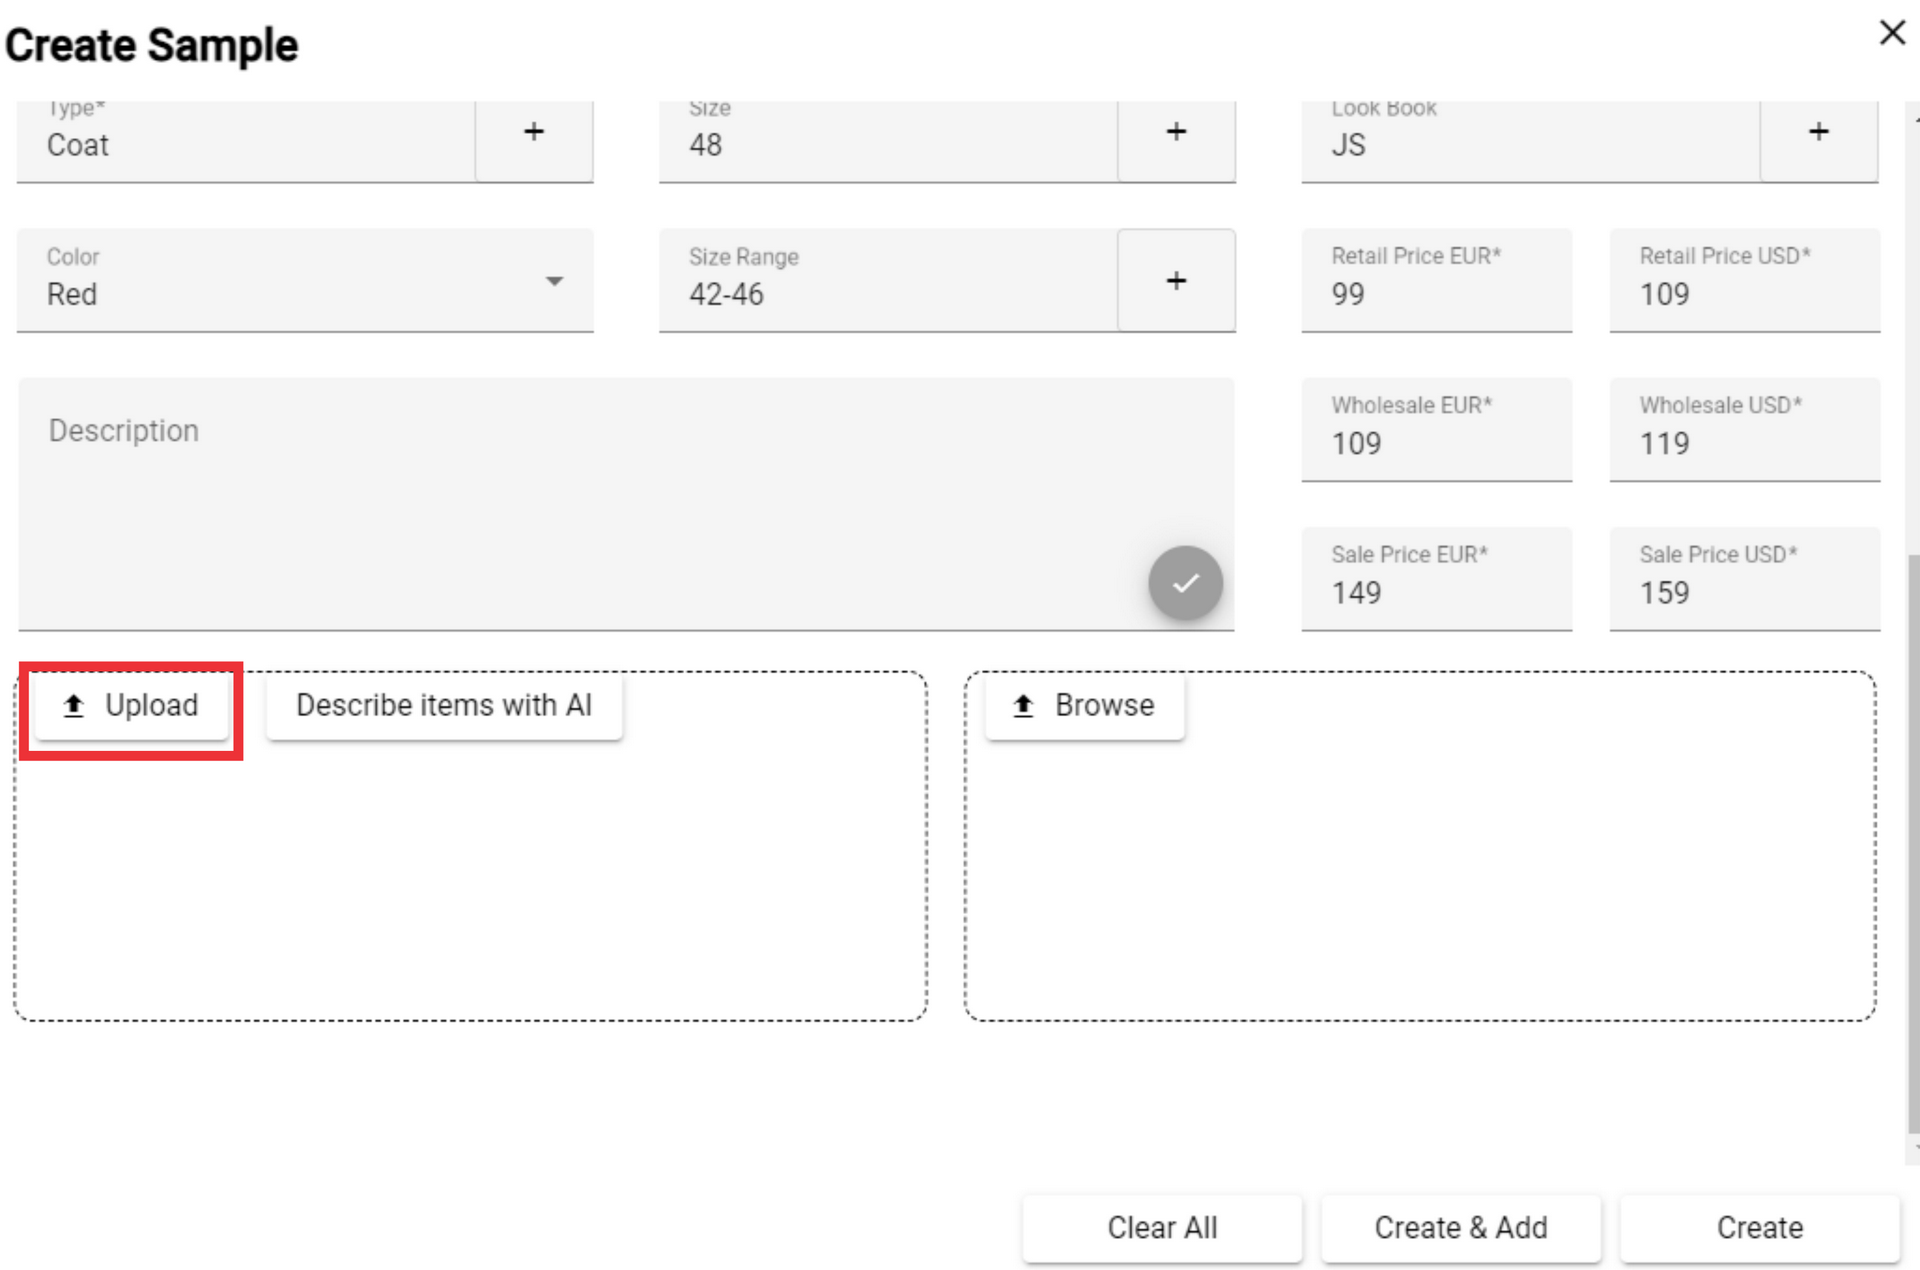
115. Enter Retail Price in EUR* on the field.
116. Enter Retail Price in USD* on the field.

117. Write on the field Wholesale in *EUR.

118. Write on the field Wholesale in *USD.

119. Write on the field Sale Price in *EUR.

120. Write on the field Sale Price in *USD.

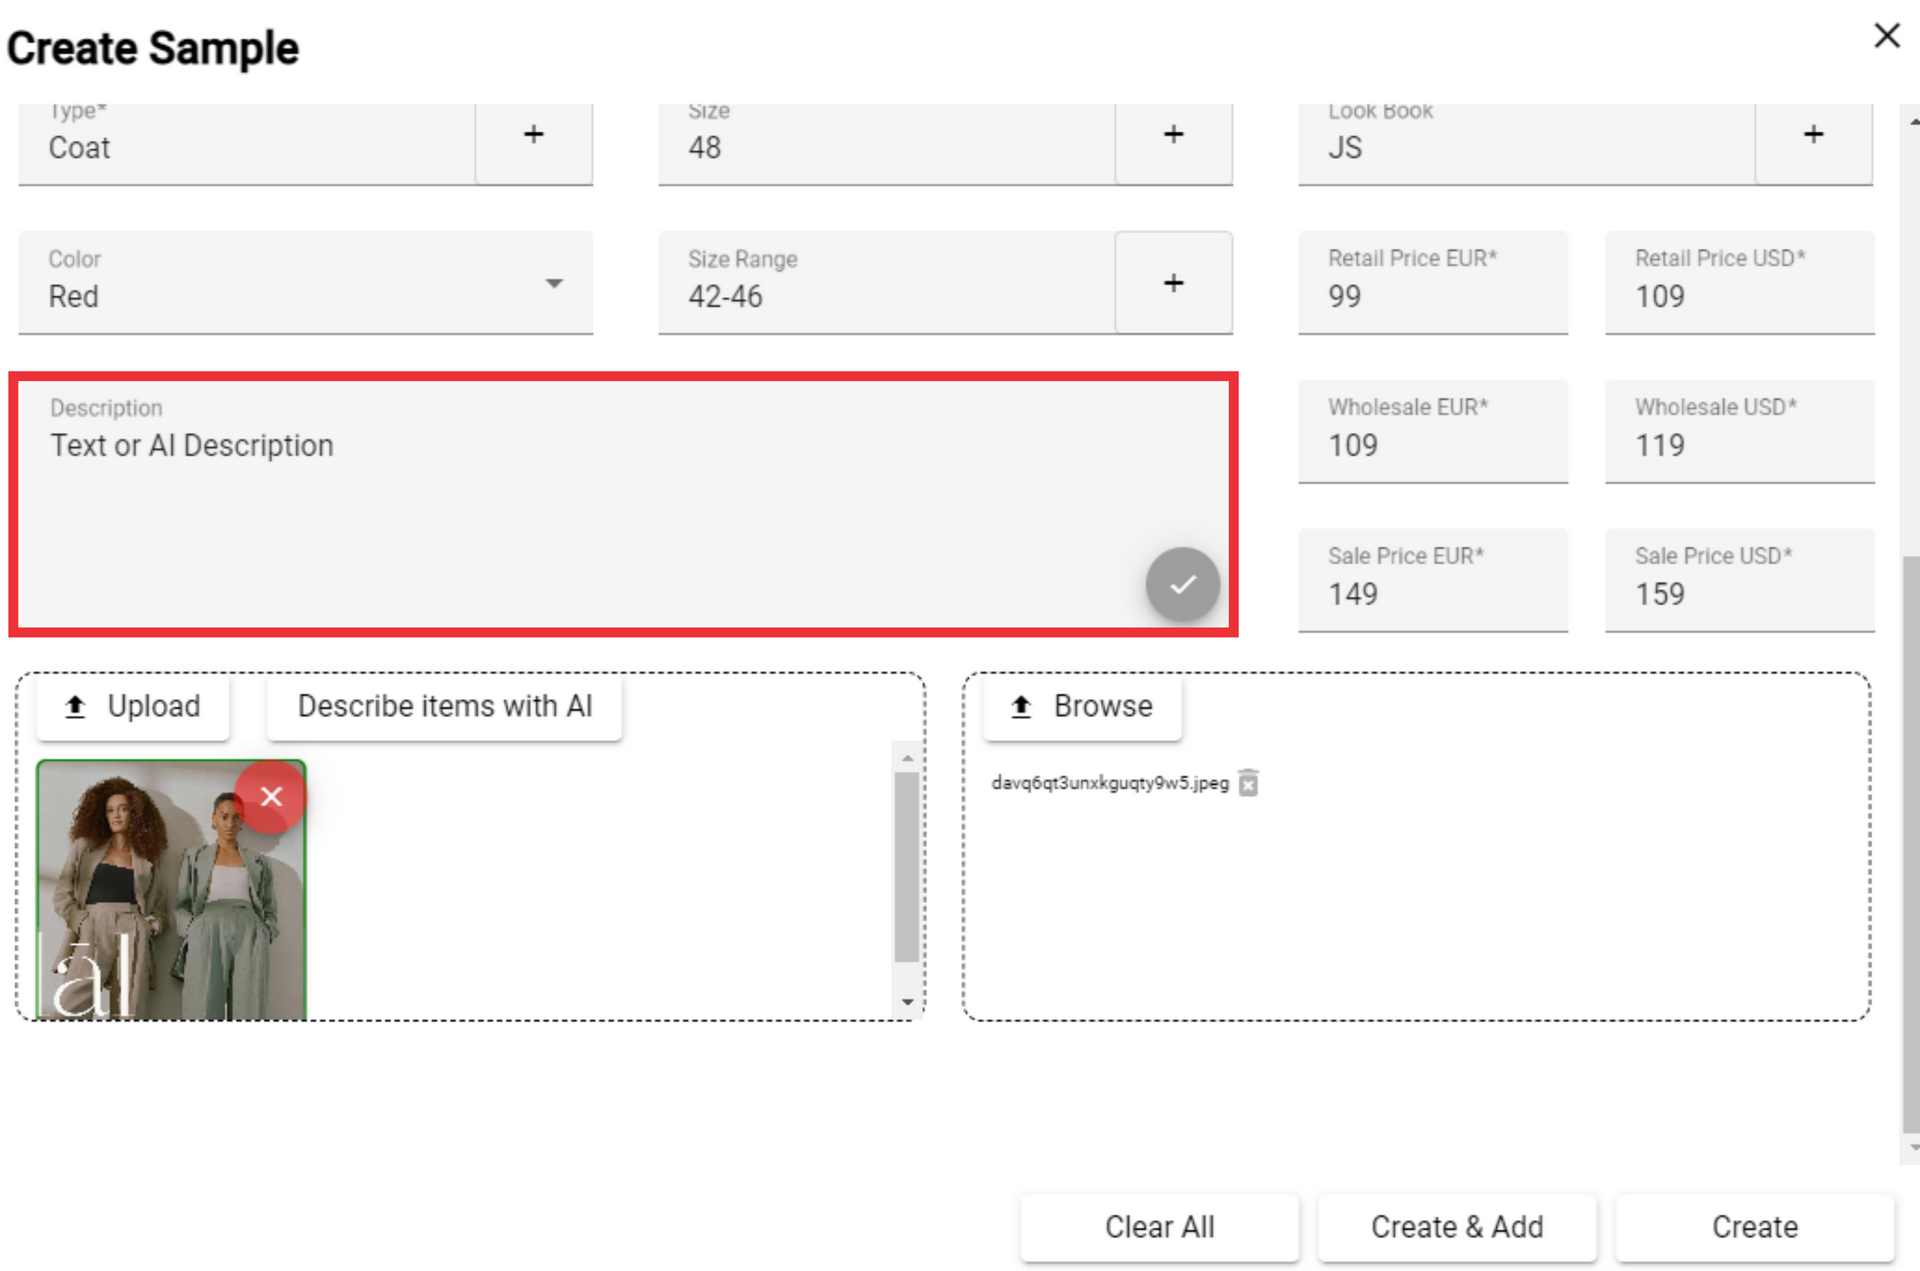
121. Enter Sample Description on the field.

122. Click the "Upload" button to select Sample photos.
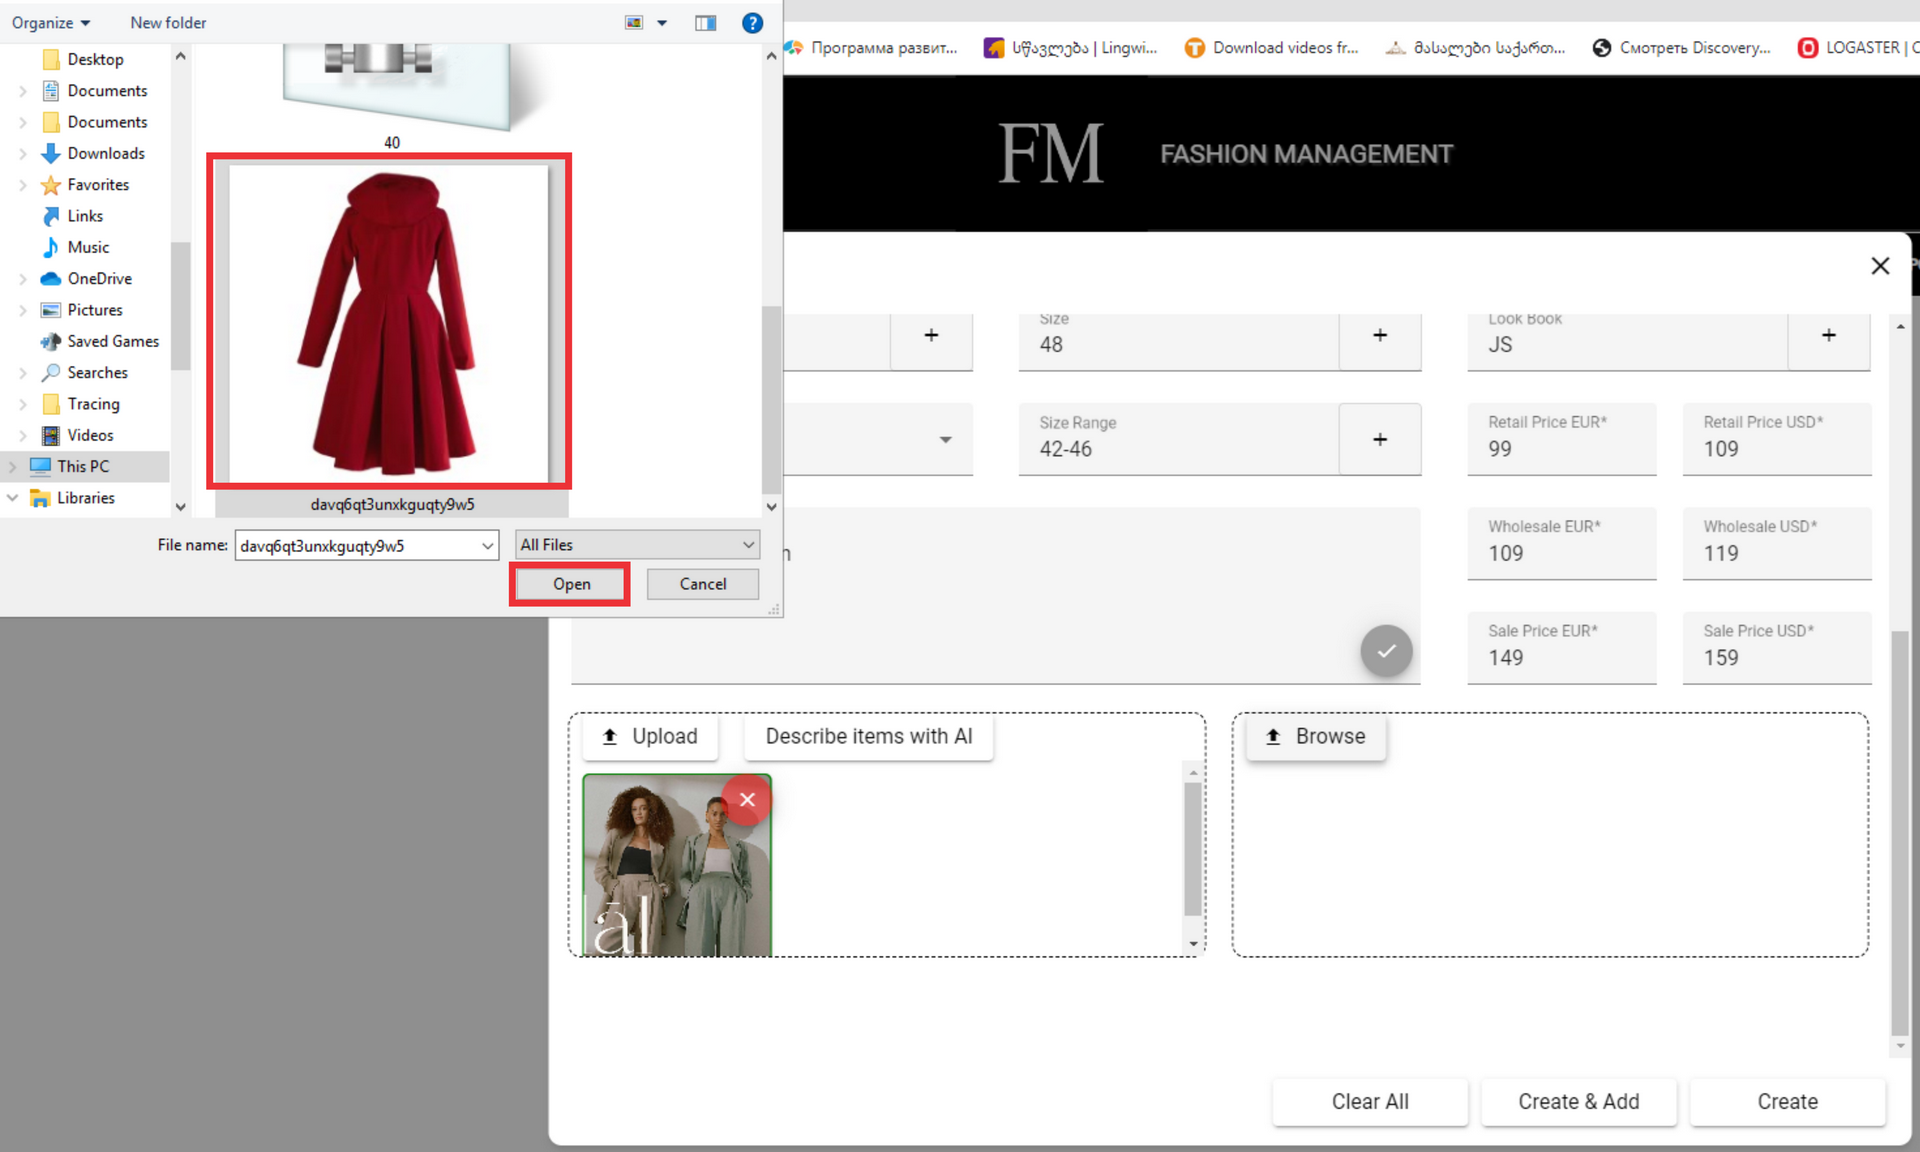
123. Select photo from your PC and click the "Open" button.
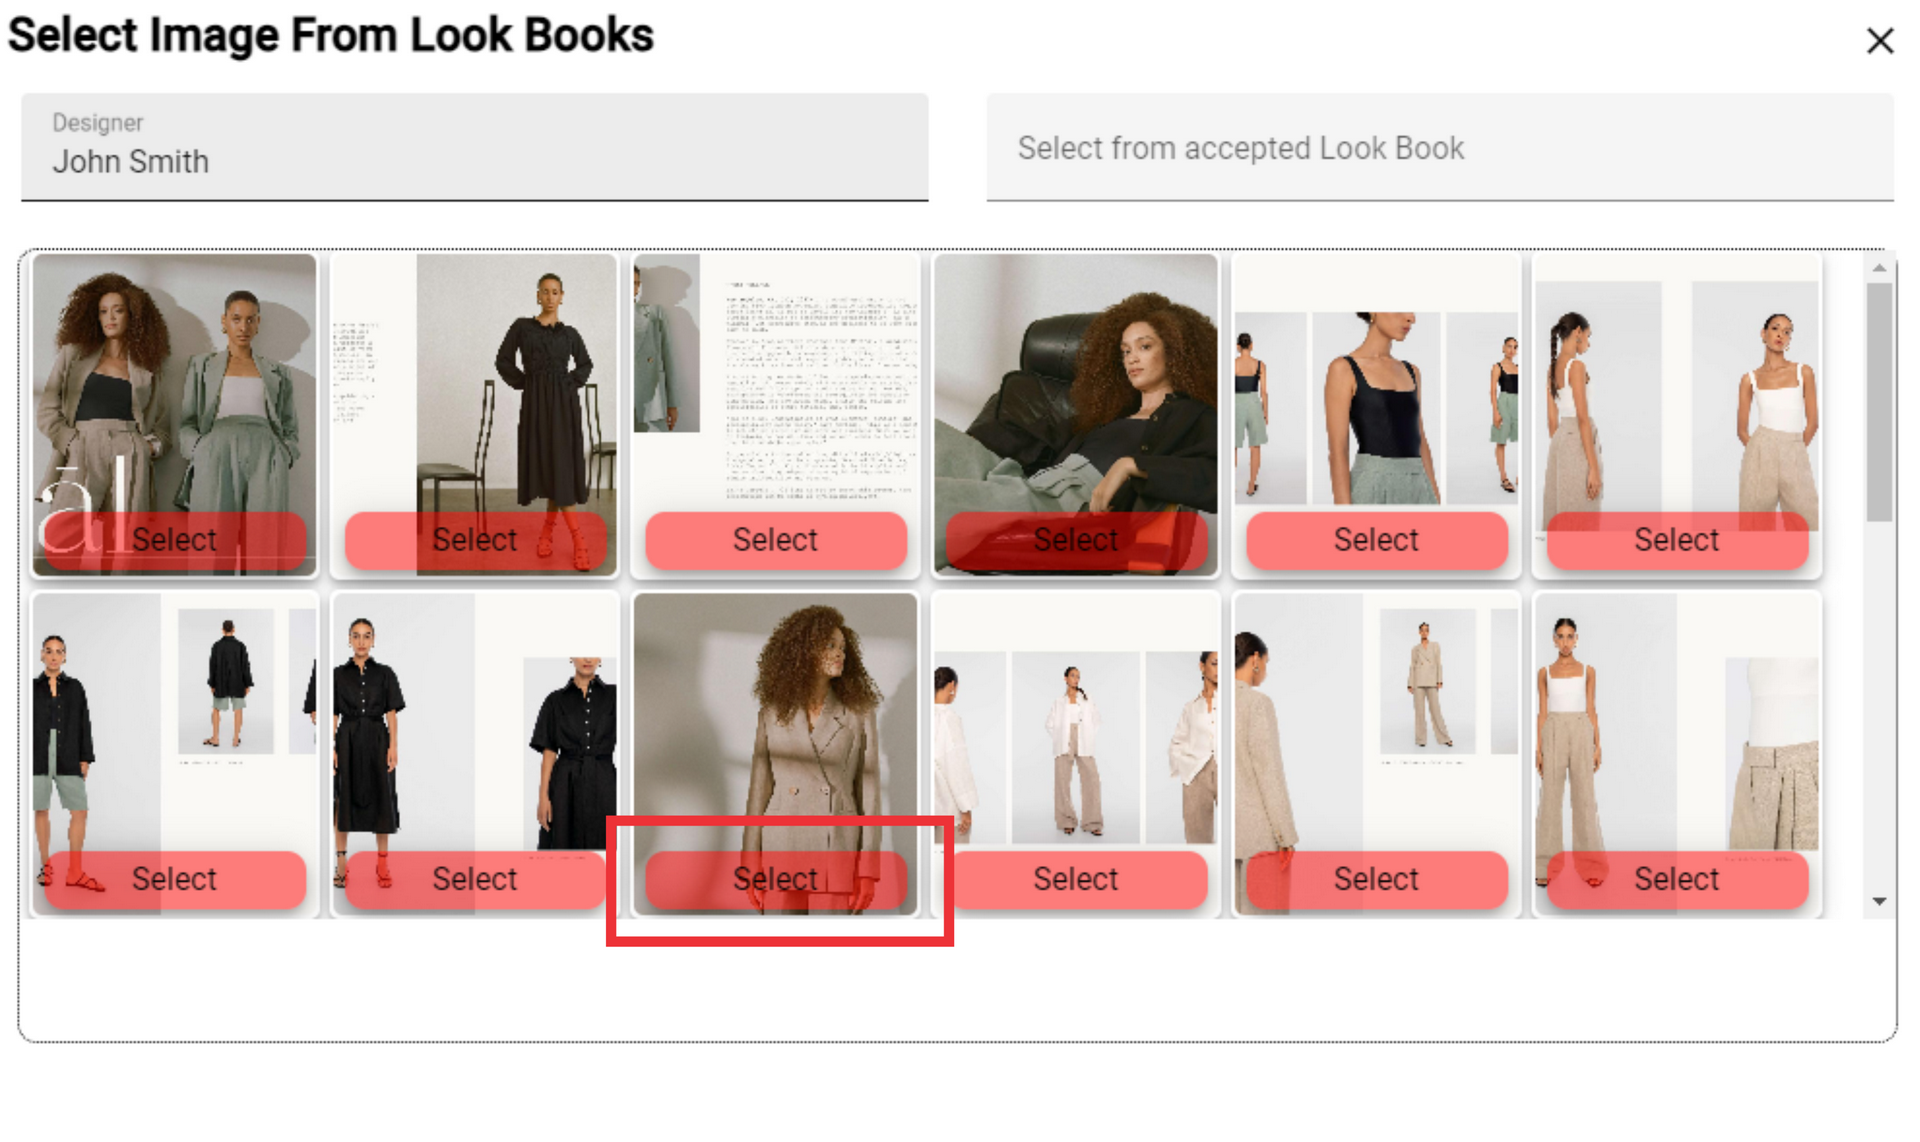
124. For the choose sample photos from look book choose a designer from the list.
 125. Select desired photo from the look book and click the "Select" Button.
126. Click the "Yes" button to confirm.

127. Instead of writing description of the selected photo, you have the option to let our artificial intelligence describe the Sample in the photo in detail.

128. To describe your chosen photo by artificial intelligence, mark the desired photo.

129. Select the desired text described by artificial intelligence and click on it to transfer it to the description.

130. The text you selected will appear in the description field.
131. Select document from your PC and click the "Open" button.

132. For the Create Sample Click the "Create" Button.
