Text---
Follow step by step instruction:
1. Click the management button to enter a Application.

2. Click the "REQUESTS" button.

3. Click the "List of requests" button.

4. The list of all incoming requests is places in the bottom field.

5. Click the create request button.

6. The first step in the menu is delivery infromation. in this section you can add infromation about sender and receiver, also you can crete new contact and new company.

7. Fill all mandatory fields and optionally other fields, all mandatory fields marked with asteriks*
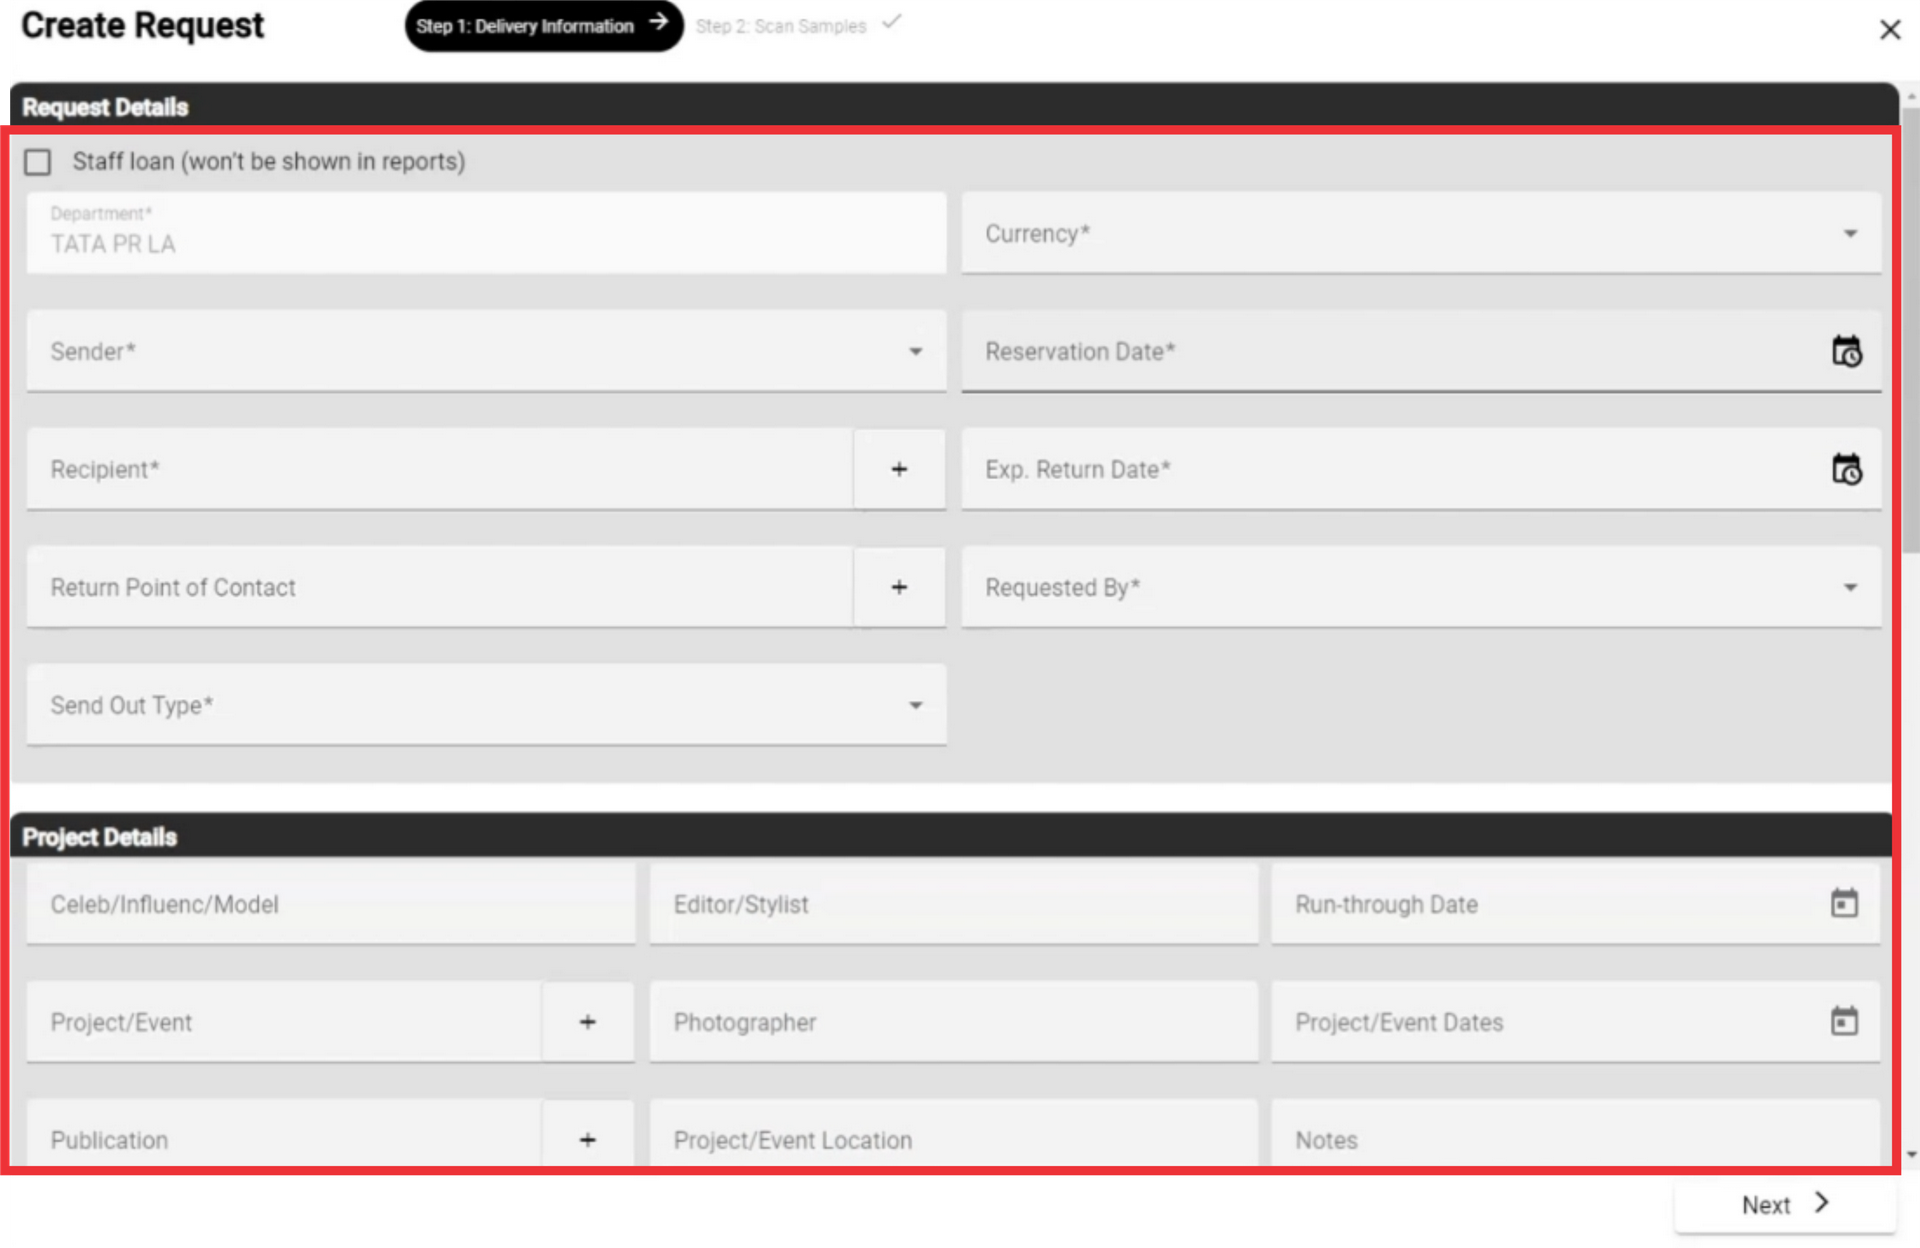
8. After filling in the field click the "Next" button.

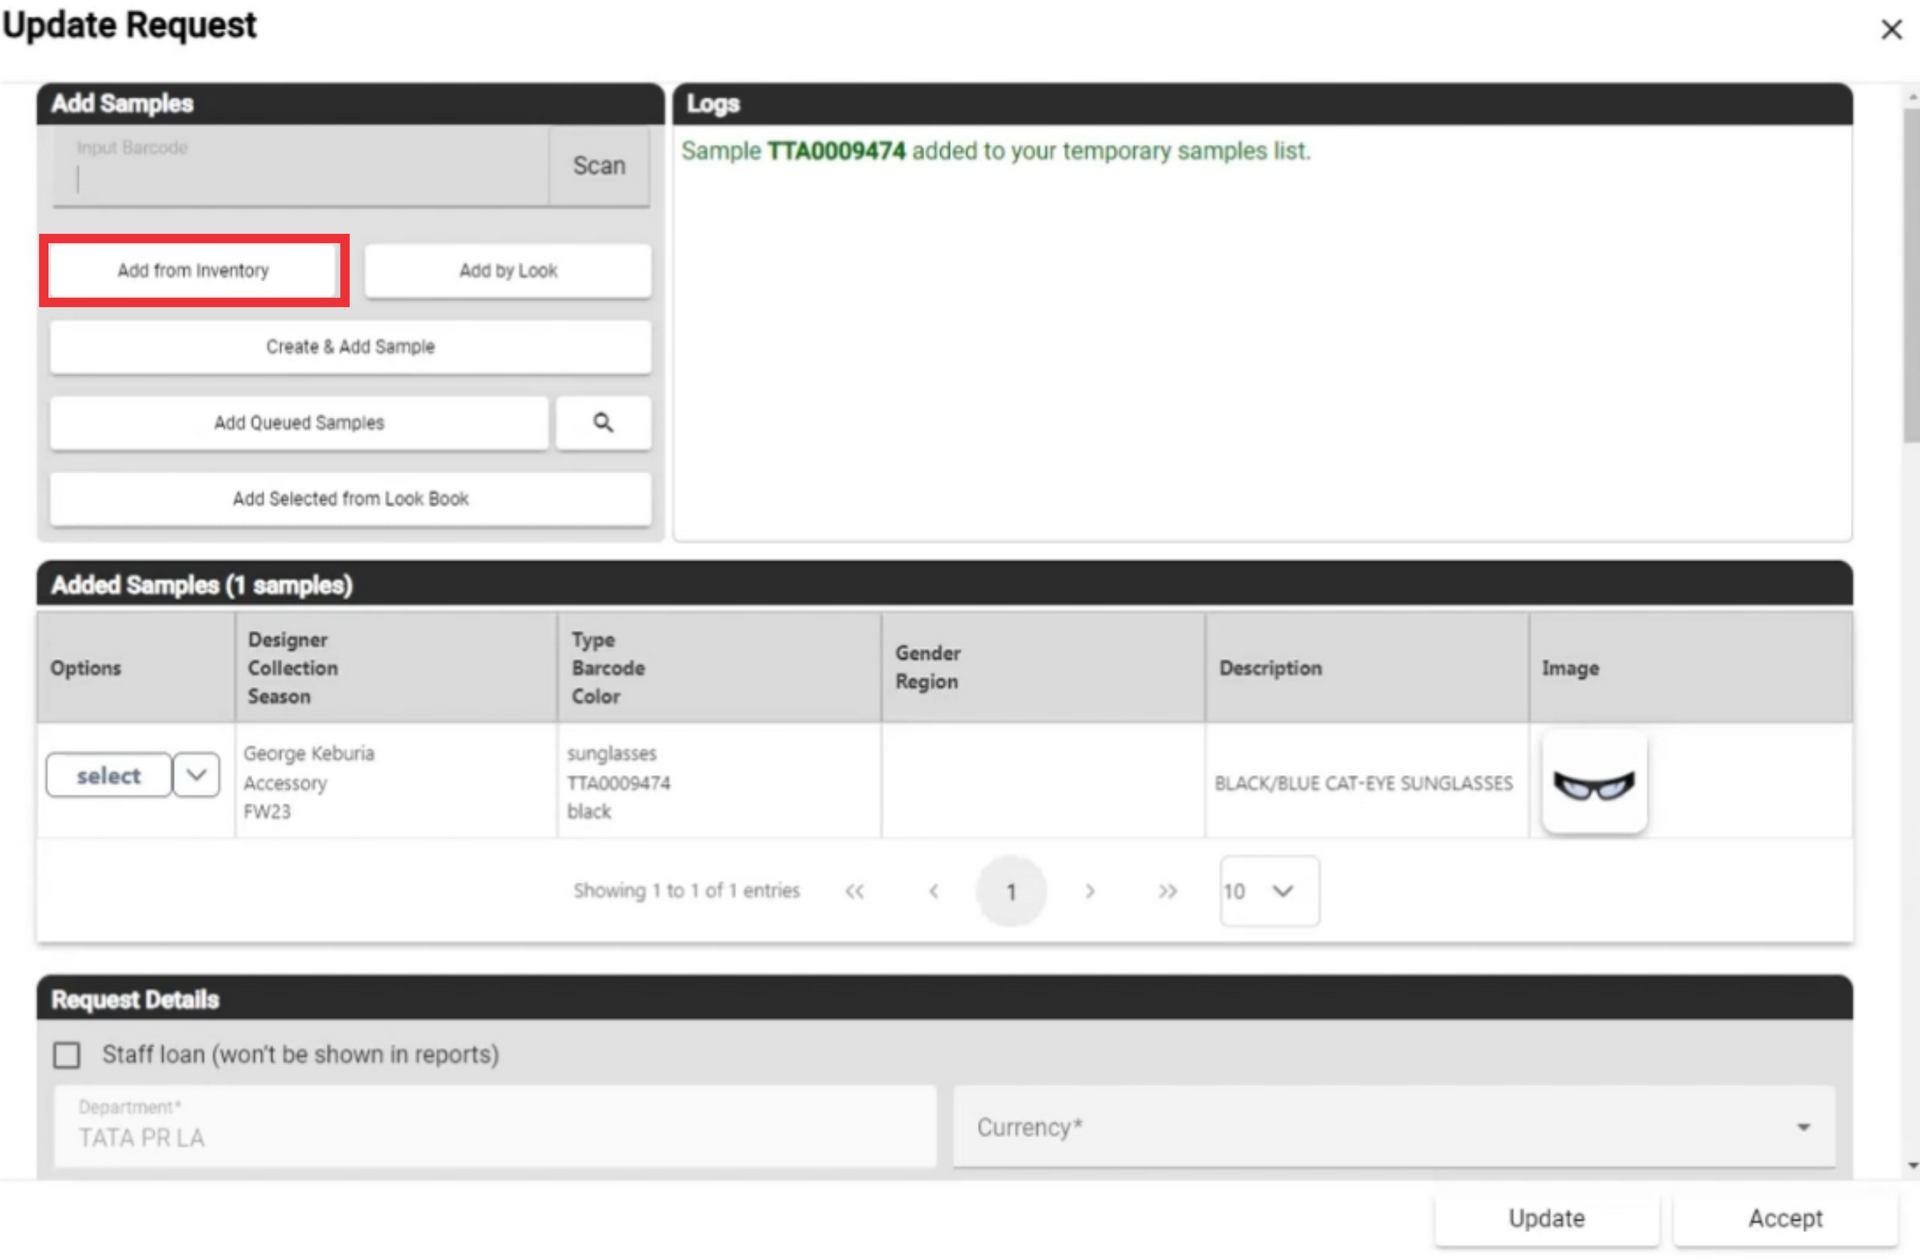
9. in the second step you can add sample manually from input barcode field.

10. Add sample from inventory.

11. Click the add by look button to add sample from catalogs.

12. Click the create and add sample button.

13. Add queued samples If you have pre-marked one or more samples in the sample manager.

14. Click the Add selected from look book button.

15. Click the "Create" button to confirm.

16. Click the yes button to confirm.

17. you can use filter to find desired entry in the list of requests.

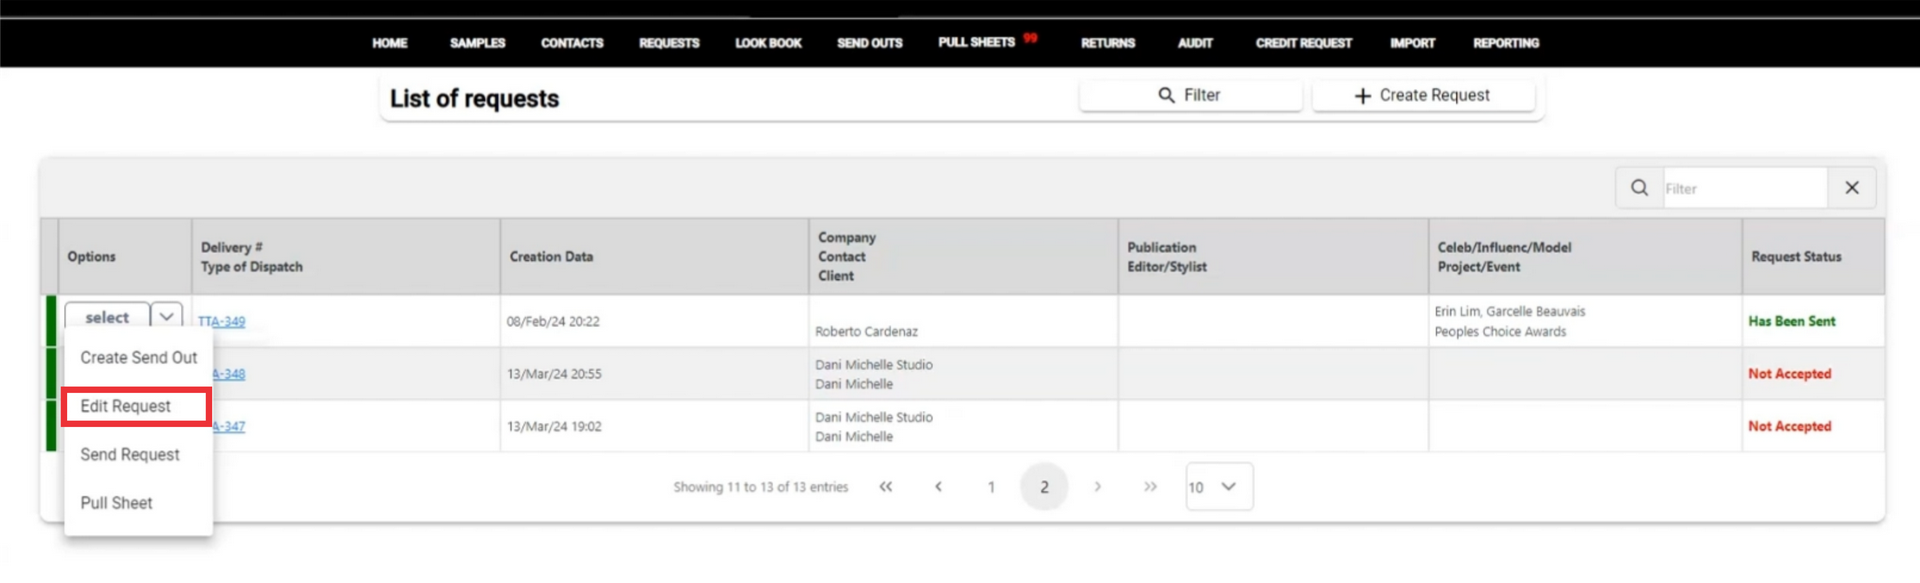
18. Click next page button to go to the next page of the requests list.

19. Click the select button to view to view a menu of incoming request.

20. Click the Edit send out button to view and edit incoming request document.
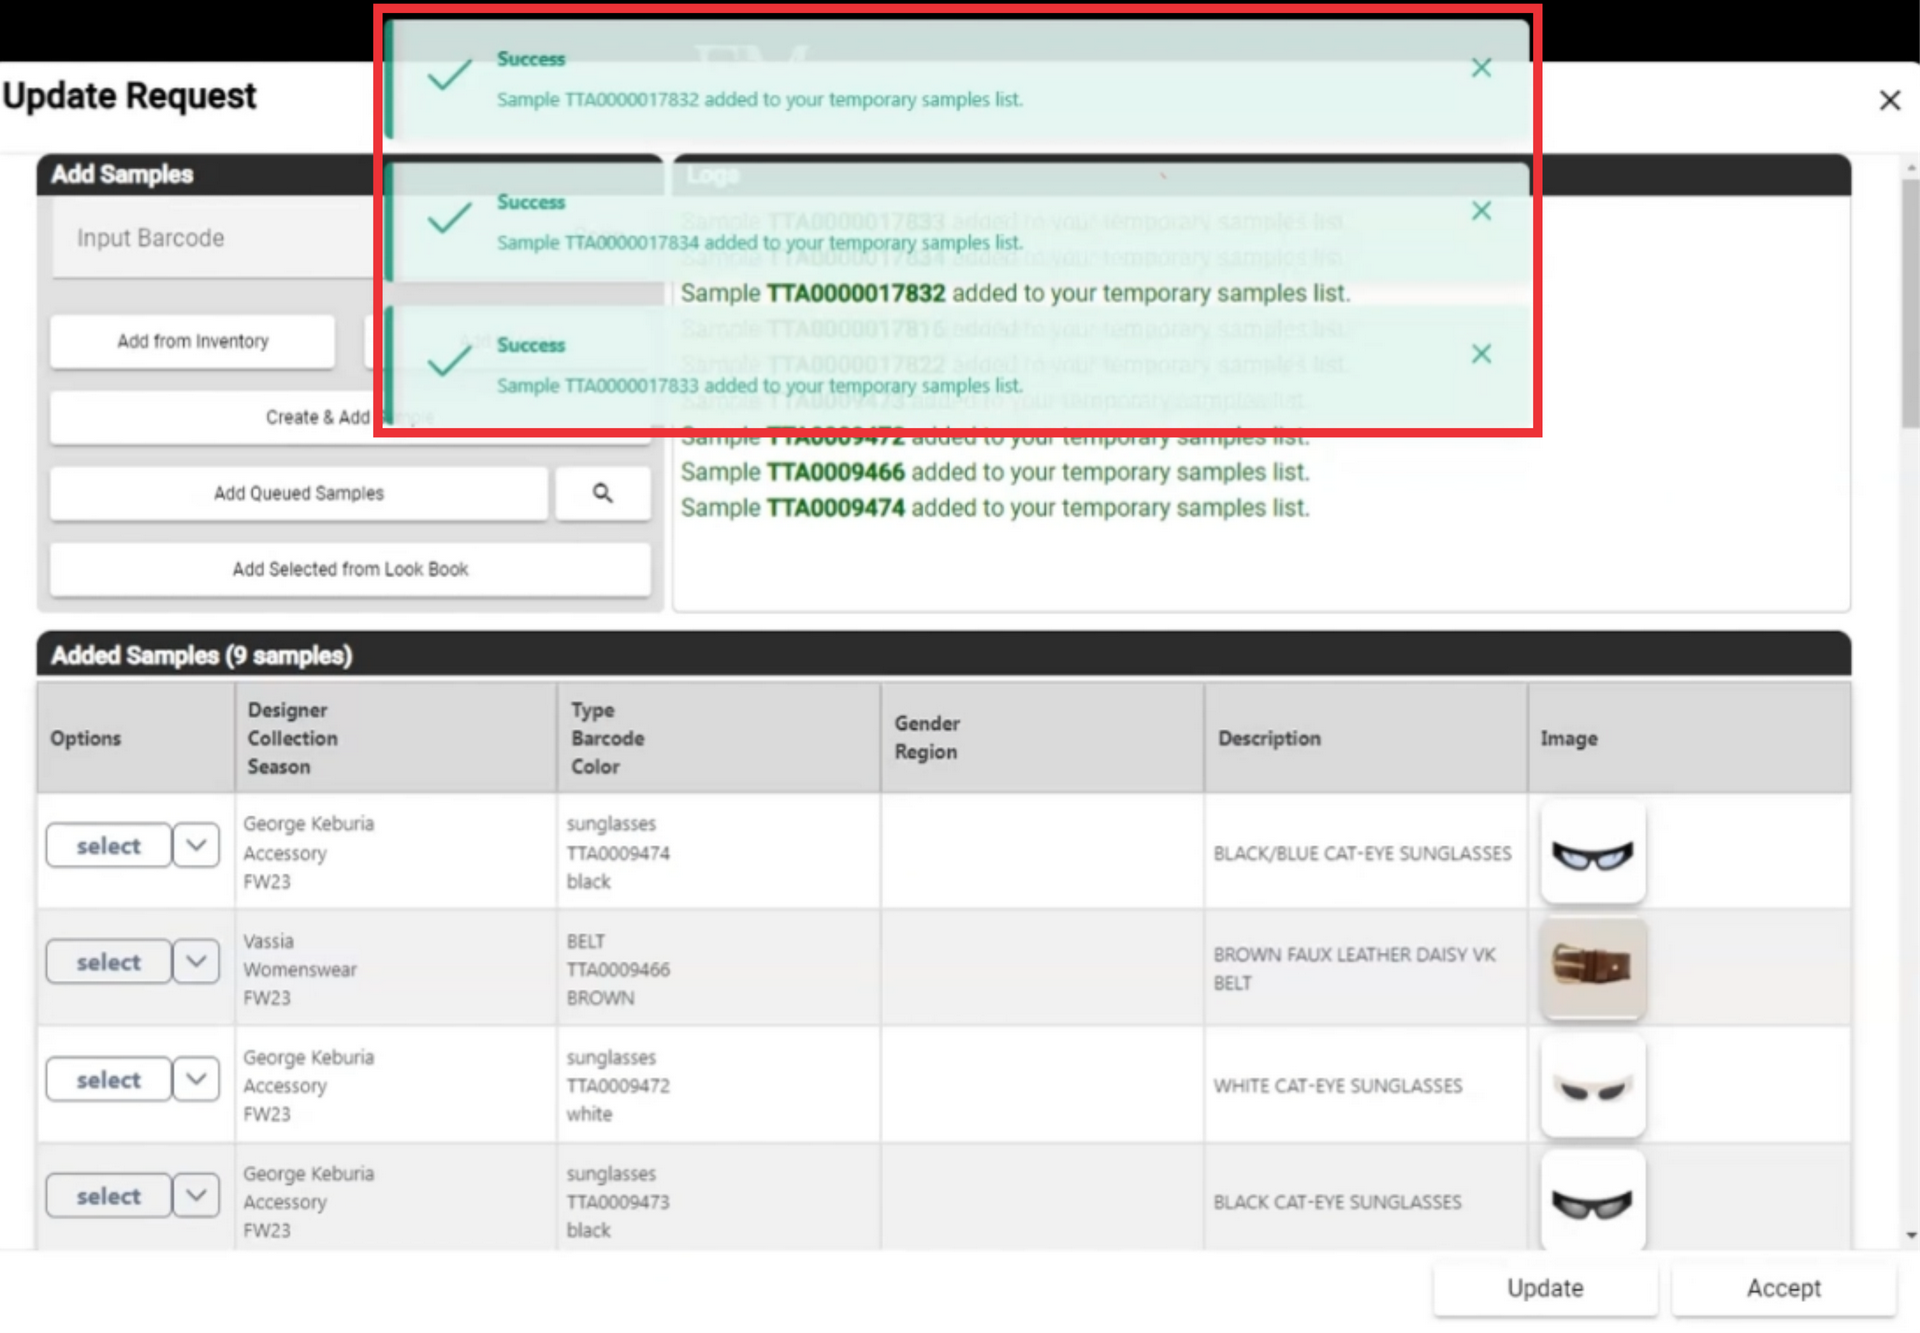
21. If you want to add new sample to the list manually, input barcode to the field an click the scan button.

22. A notification about addition the sample you manually added will be reflected in the logs page.

23. for the add sample from your inventory click the add from inventory button.
24. To find a desired sample from the sample inventory list you can use filters and search by designer, by color, by type, by fabric and by season.

25. Click the xext page button to go to the next page of the samples list.

26. Click the quantity field button to choose a how many samples you want to the appear in one page.

27. Click the select button to add sample from your inventory list.

28. A notification about addition will appear in top of the middle screen.

29. Click the "X" button to close this window.

30. A notification about addition the sample you manually added will be reflected in the logs page.

31. Click the add by look to add sample from the look catalogue.

32. Click the select button to add samples from look.

33. A notifications about addition will appear in top of the middle screen.
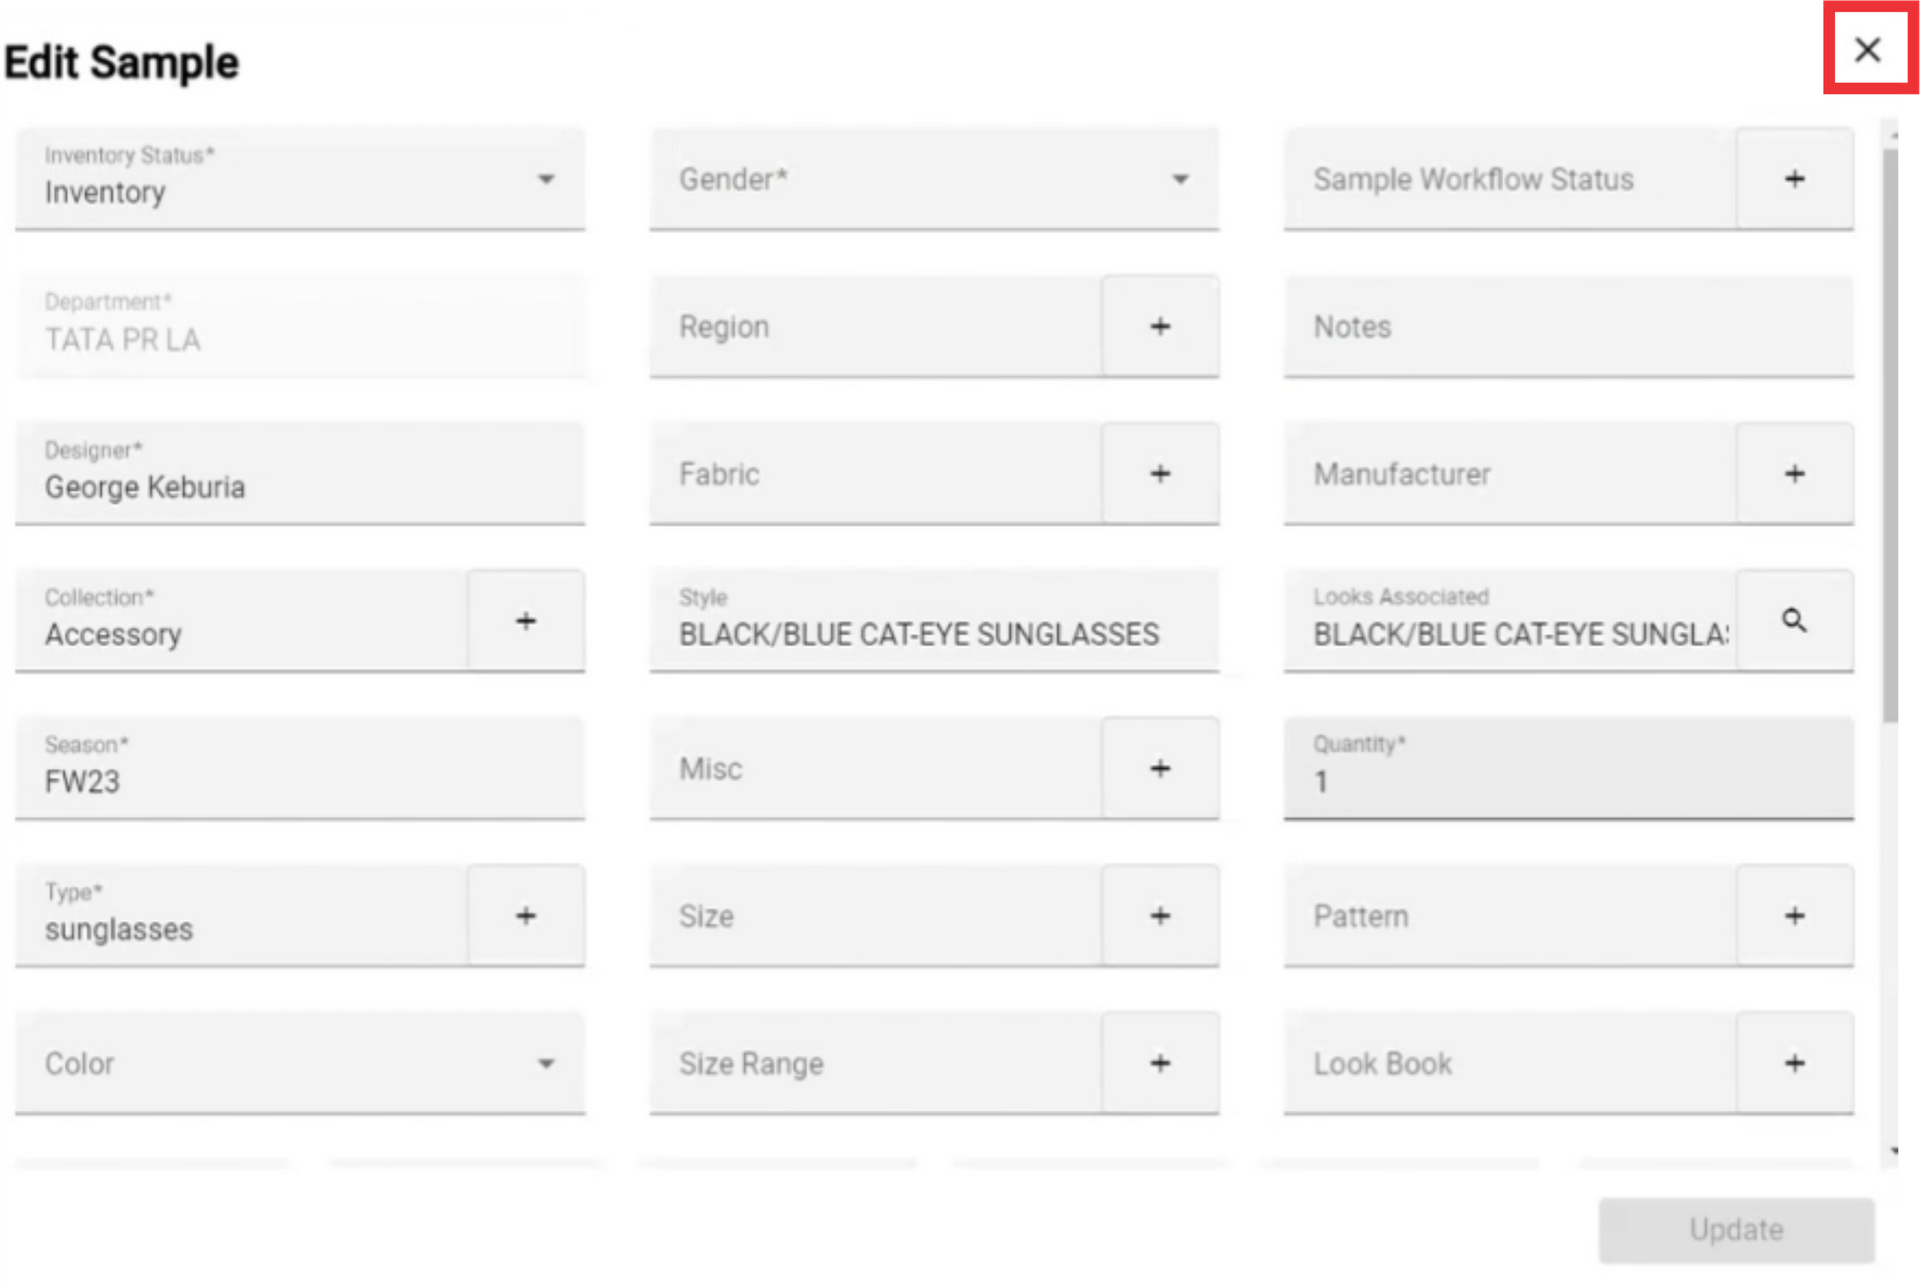
34. For the create a new sample and add it to the list click the "Create and add sample" button.

35. Fill all the mandatory and other fields. It is nessesary fill all fields marked with asteriks*

36. For the create and add new sample click the "Create and add" button.

37. You can add queued samples that you selected in the sample manager.

38. A notification about addition the samples will be reflected in the logs page.

39. For the add samples from the look book click the "Add selected from look book" button.
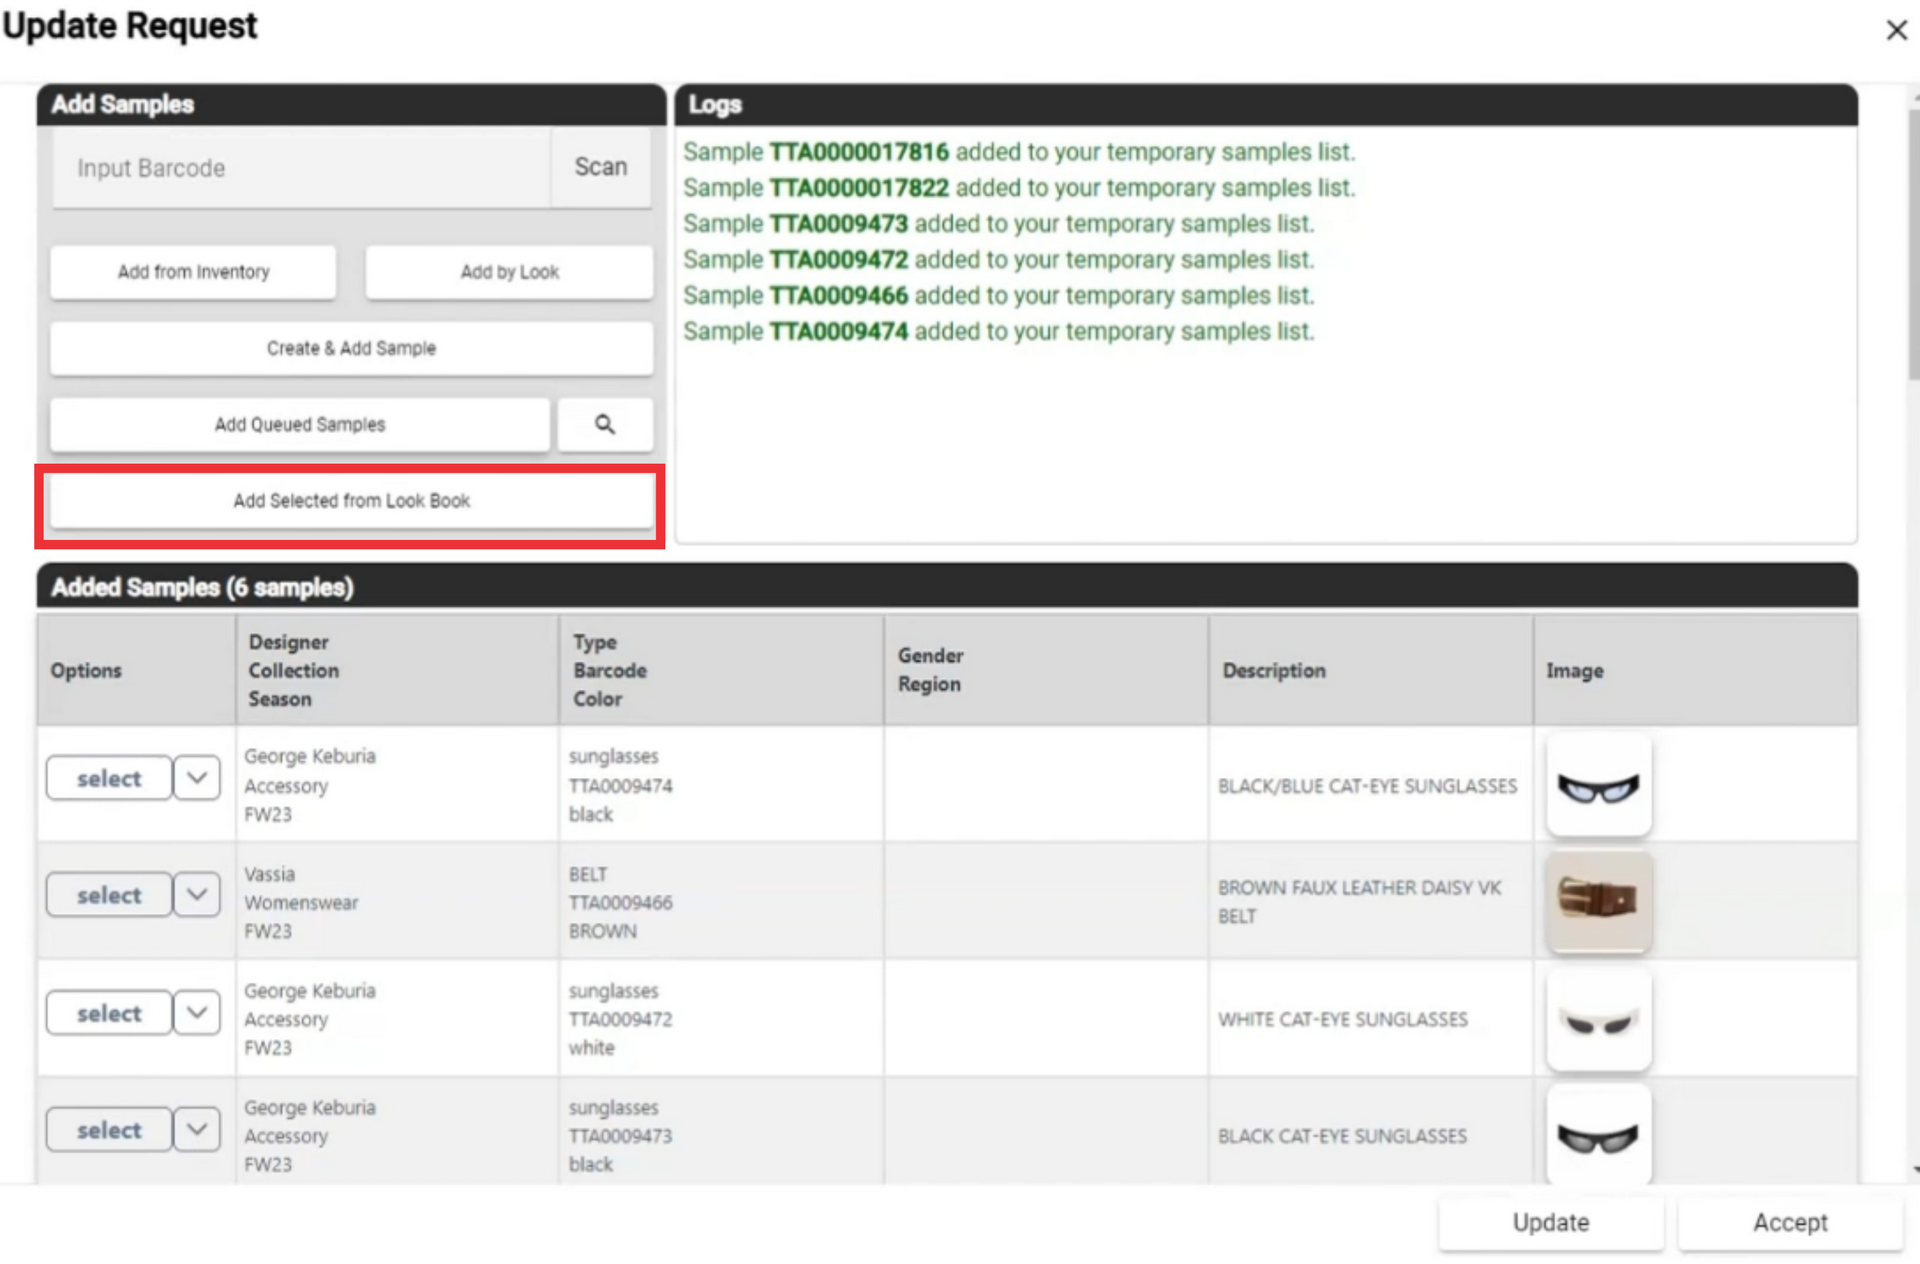
40. For the add selected samples from the sent look book click the select button.

41. Click the yes button to confirm.

42. If any photo from the look book are not including in the samples manager list, a notification will appear.

43. Click the yes button to confirm.

44. in the list of displayed photos from look book

45. For the create a new sample click the "Create Sample" button.

46. Fill all the mandatory and other fields. It is nessesary fill all fields marked with asteriks*
47. For the create and add new sample click the "Create and add" button.
48. It is nessesary to create all photos prom the look boook images list

49. For the close this window click the "X" button.

50. A notifications about addition will appear in top of the middle screen.

51. A notification about addition the samples will be reflected in the logs page.

52. Scroll down to see the list of added samples.
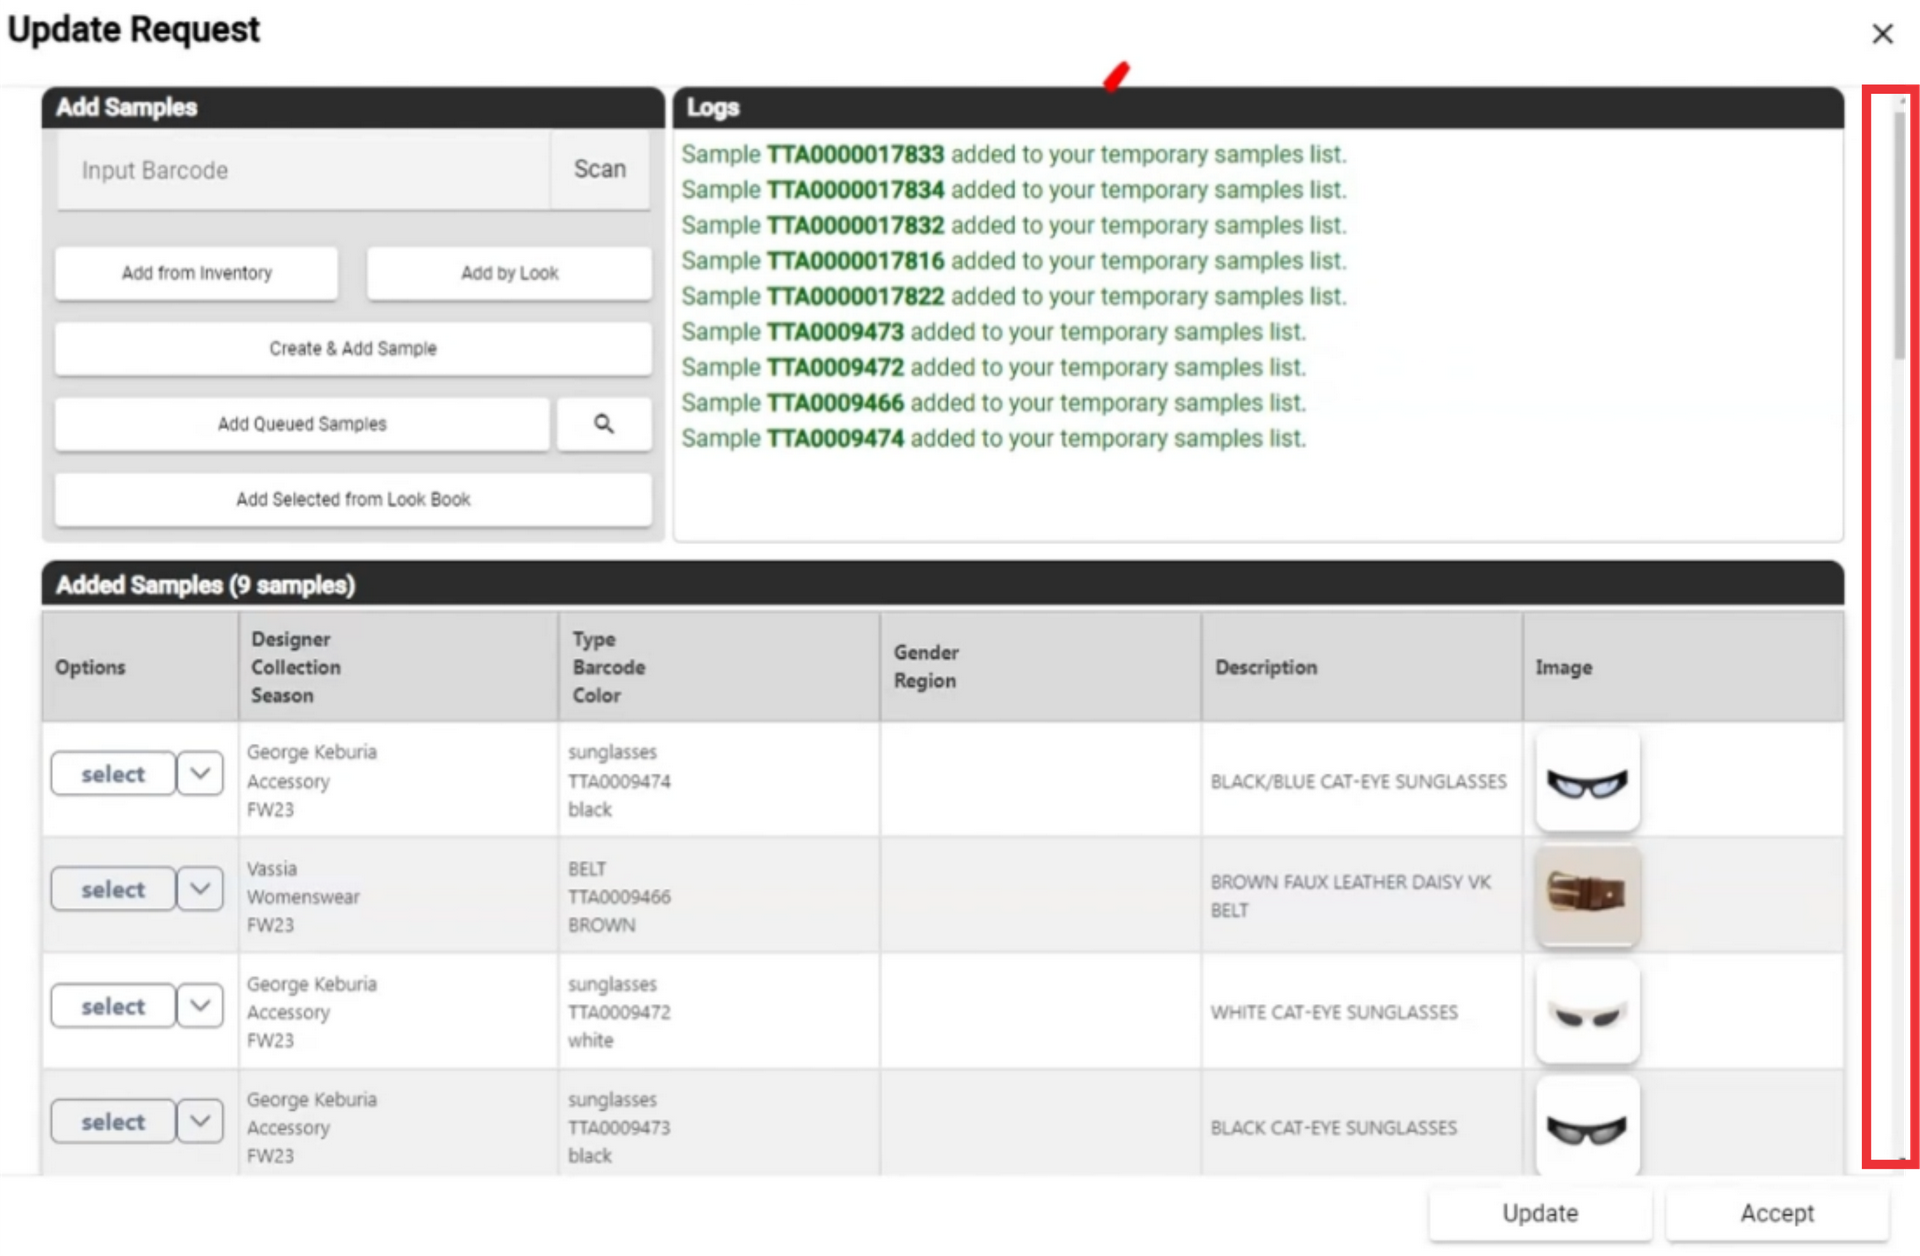
53. To go to the next page click the next page button.

54. Select from drop down list bumber of how many samples included in request document you want to see on one page.

55. samples included in the request list.
Red color - Sample reques not been approved.

56. Beige color means - This sample is also requested in another request document.
57. White color means - Sample can be approved.

58. For the view sample options click the Select button.

59. Click the View details button.

60. Click the "X" button to close this window.
61. For the view sample options click the Select button.
62. Click the choose more samples from this designer.

63. To find a desired sample from the sample inventory list you can use filters and search by designer, by color, by type, by fabric and by season.

64. To go to the next page click the next page button.

65. Select from drop down list bumber of how many samples included in request document you want to see on one page.

66. For the add other sample from desired designer click the select button.

67. A notifications about addition will appear in top of the middle screen.

68. Click the "X" button to close this window.

69. A notification about addition the samples will be reflected in the logs page.

70. For the view sample options click the Select button.
71. Click the remove sample button to delete sample from request list.

72. Click the yes button to confirm.

73. The sample you have removed from the request list will be marked with red color.

74. For the view sample options click the Select button.
75. To restore sample to request list click the restore sample button.

76. Click the yes button to confirm.

77. Scroll down to view request details.

78. Fill mandatory and other desired field at request details. All mandatory field marked with asteriks*

79. Fill mandatory and other desired field at project details. All mandatory field marked with asteriks*

80. In shipping details section you can edit address label, type of dispatch, cost of shipping and truching number field.

81. Mark this checkbox if samples is handoff to another department.

82. Mark this checkbox if samples pull original air waybill number from the receiving department.

83. Click the update button to save data.

84. Click the select button to open request menu.

85. Click the Send request button for send request document.

86. Enter email address in the field.

87. Enter phone number in the field.

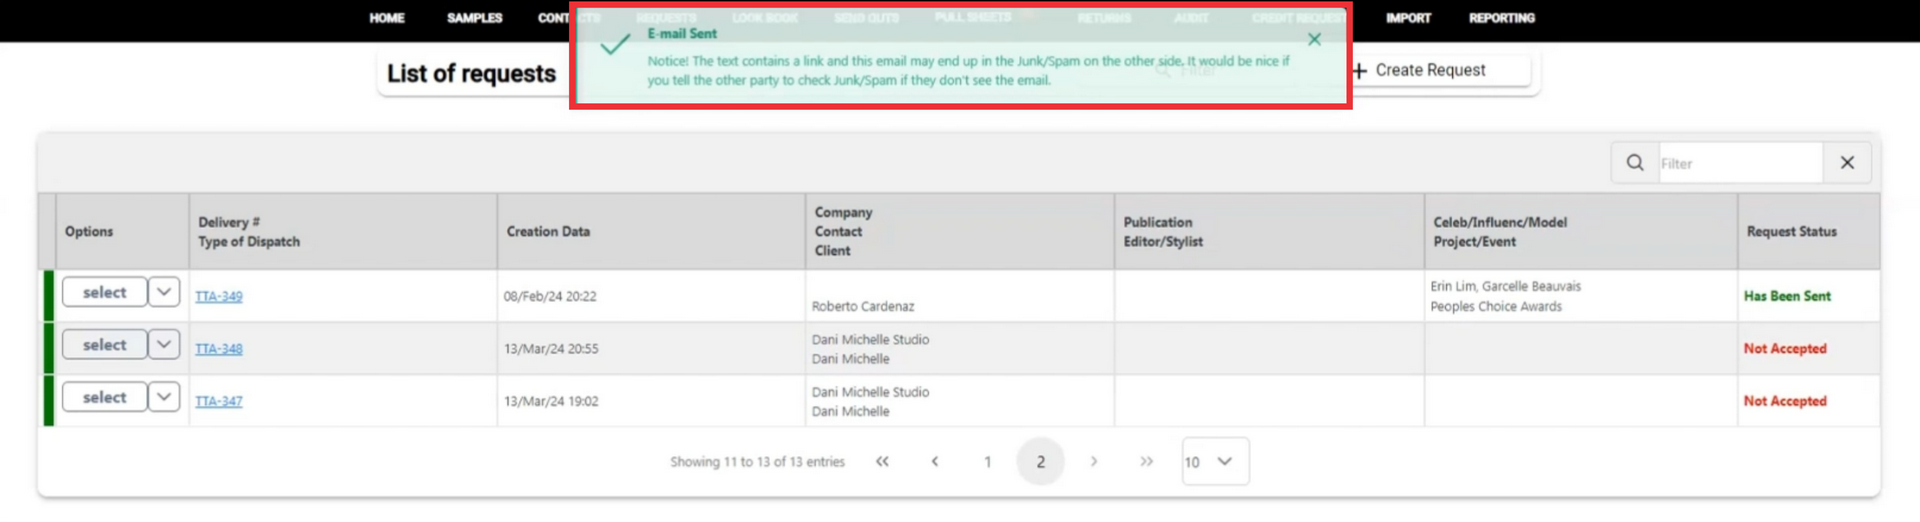
88. The requst number will automatically filled in the field.

89. Enter email text in the field.

90. Click the send button.

91. After sending a sending confirmation message will apperar in the upper middle screen. If the recipient did not received email pleas check spam or junk folder.
92. The recipient will click the request list lick to view document.

93. Please wait a few seconds while email redirecting to the request document.

94. in this page you can view requested samples list.

95. Click the select button to open request menu.
96. For create and send pull sheet document click the pull sheet button.

97. Eneter the email address in the field.

98. Enter the phone number in the field.

99. Send out number will be automatically added to the field.

100. Enter email text in the field.

101. Click the send button to send pull sheet document.

102. After sending a sending confirmation message will apperar in the upper middle screen. If the recipient did not received email pleas check spam or junk folder.
103. Recipient will click on the link in incoming email.

104. Please wait a few seconds while email redirecting to the pull sheet document.
105. Fill all field in the pull sheet document.
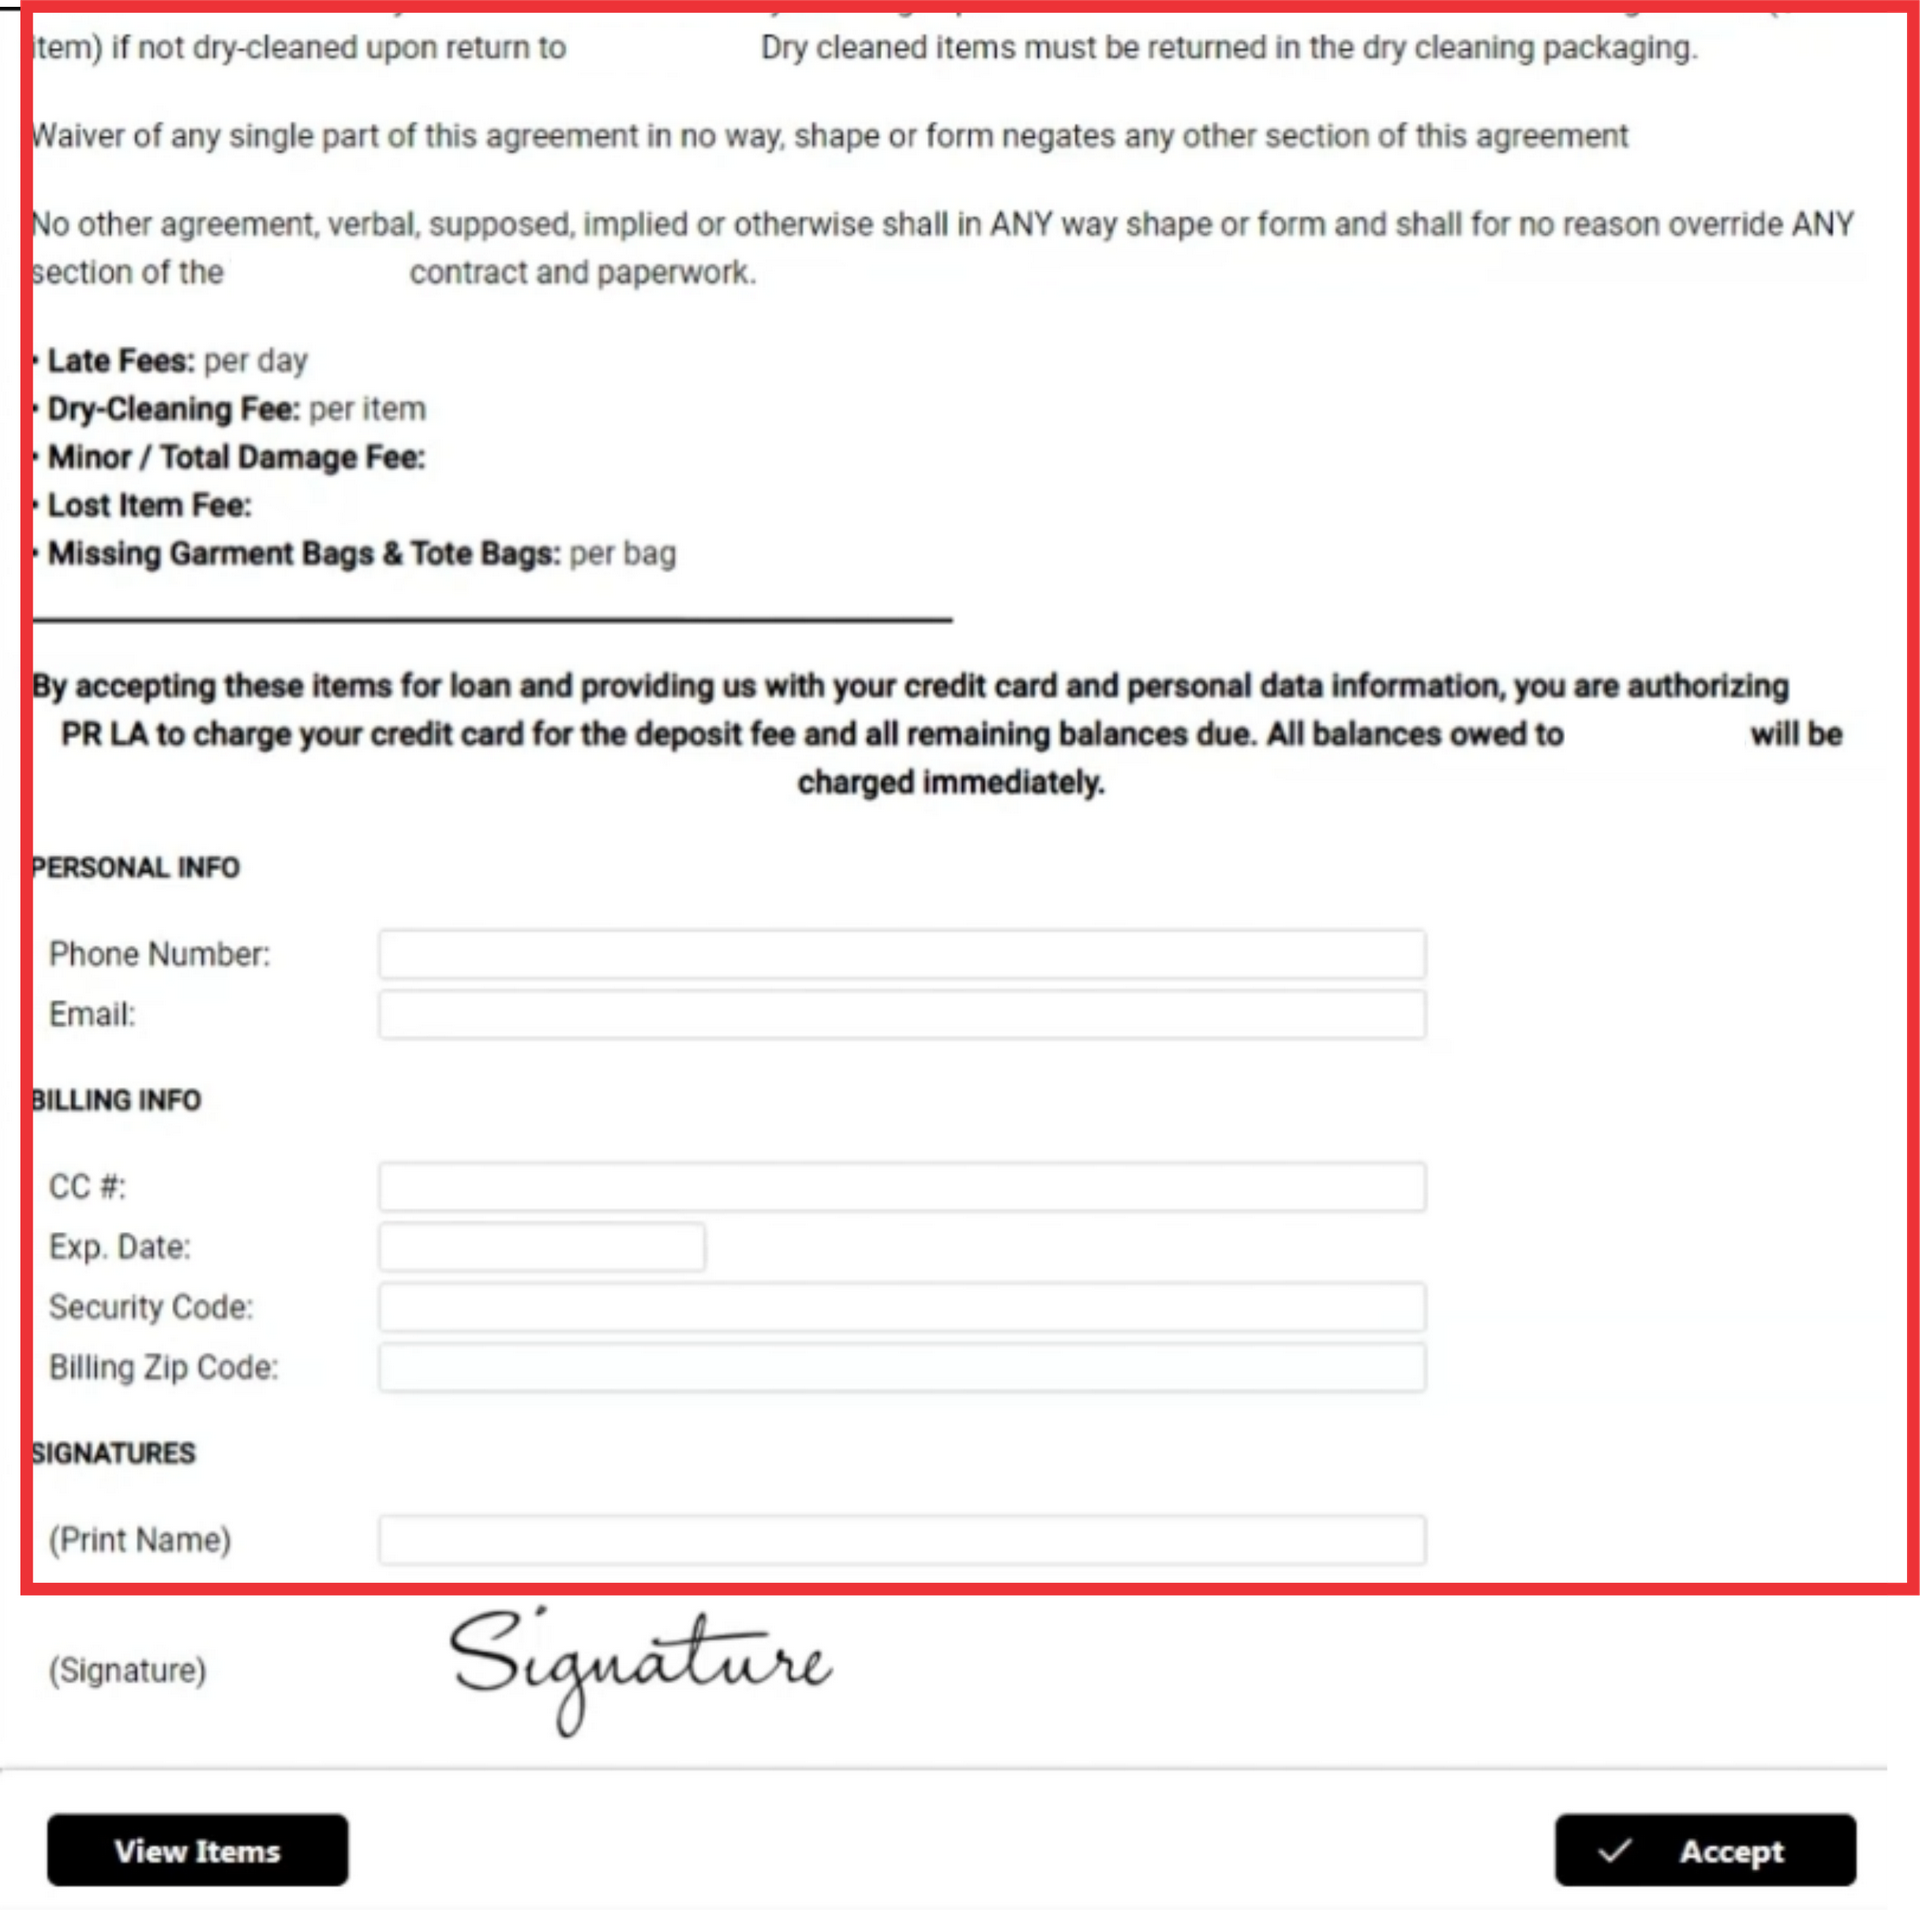
106. To apply electronic sigrature click the signature button.

107. make a singature in the special form.

108. click the ok button to confirm.

109. Click the view items button to see a list of samples included in the pull sheet document.

110. Click the accept button to send back signed pull sheet document.

111. Click the print button to print a pull sheet document.

112. Choose your printer options and click the print button.

113. Click the select button to open the request document menu.
114. For the create send out document from recuest document click the Create send out button.

115. See the confirmation message about creation of the send out document in the upper middle side of the screen.
