In this section you can view all pull sheet documents you have created. Also from this section you can edit your pull sheet document template and create a new pull sheet document.
Follow the step by step instruction:
1. Click the management button to enter the application.

2. Click the "Pull Sheets" button to open the menu.

3. Click the "Pull Sheet Manager" button.

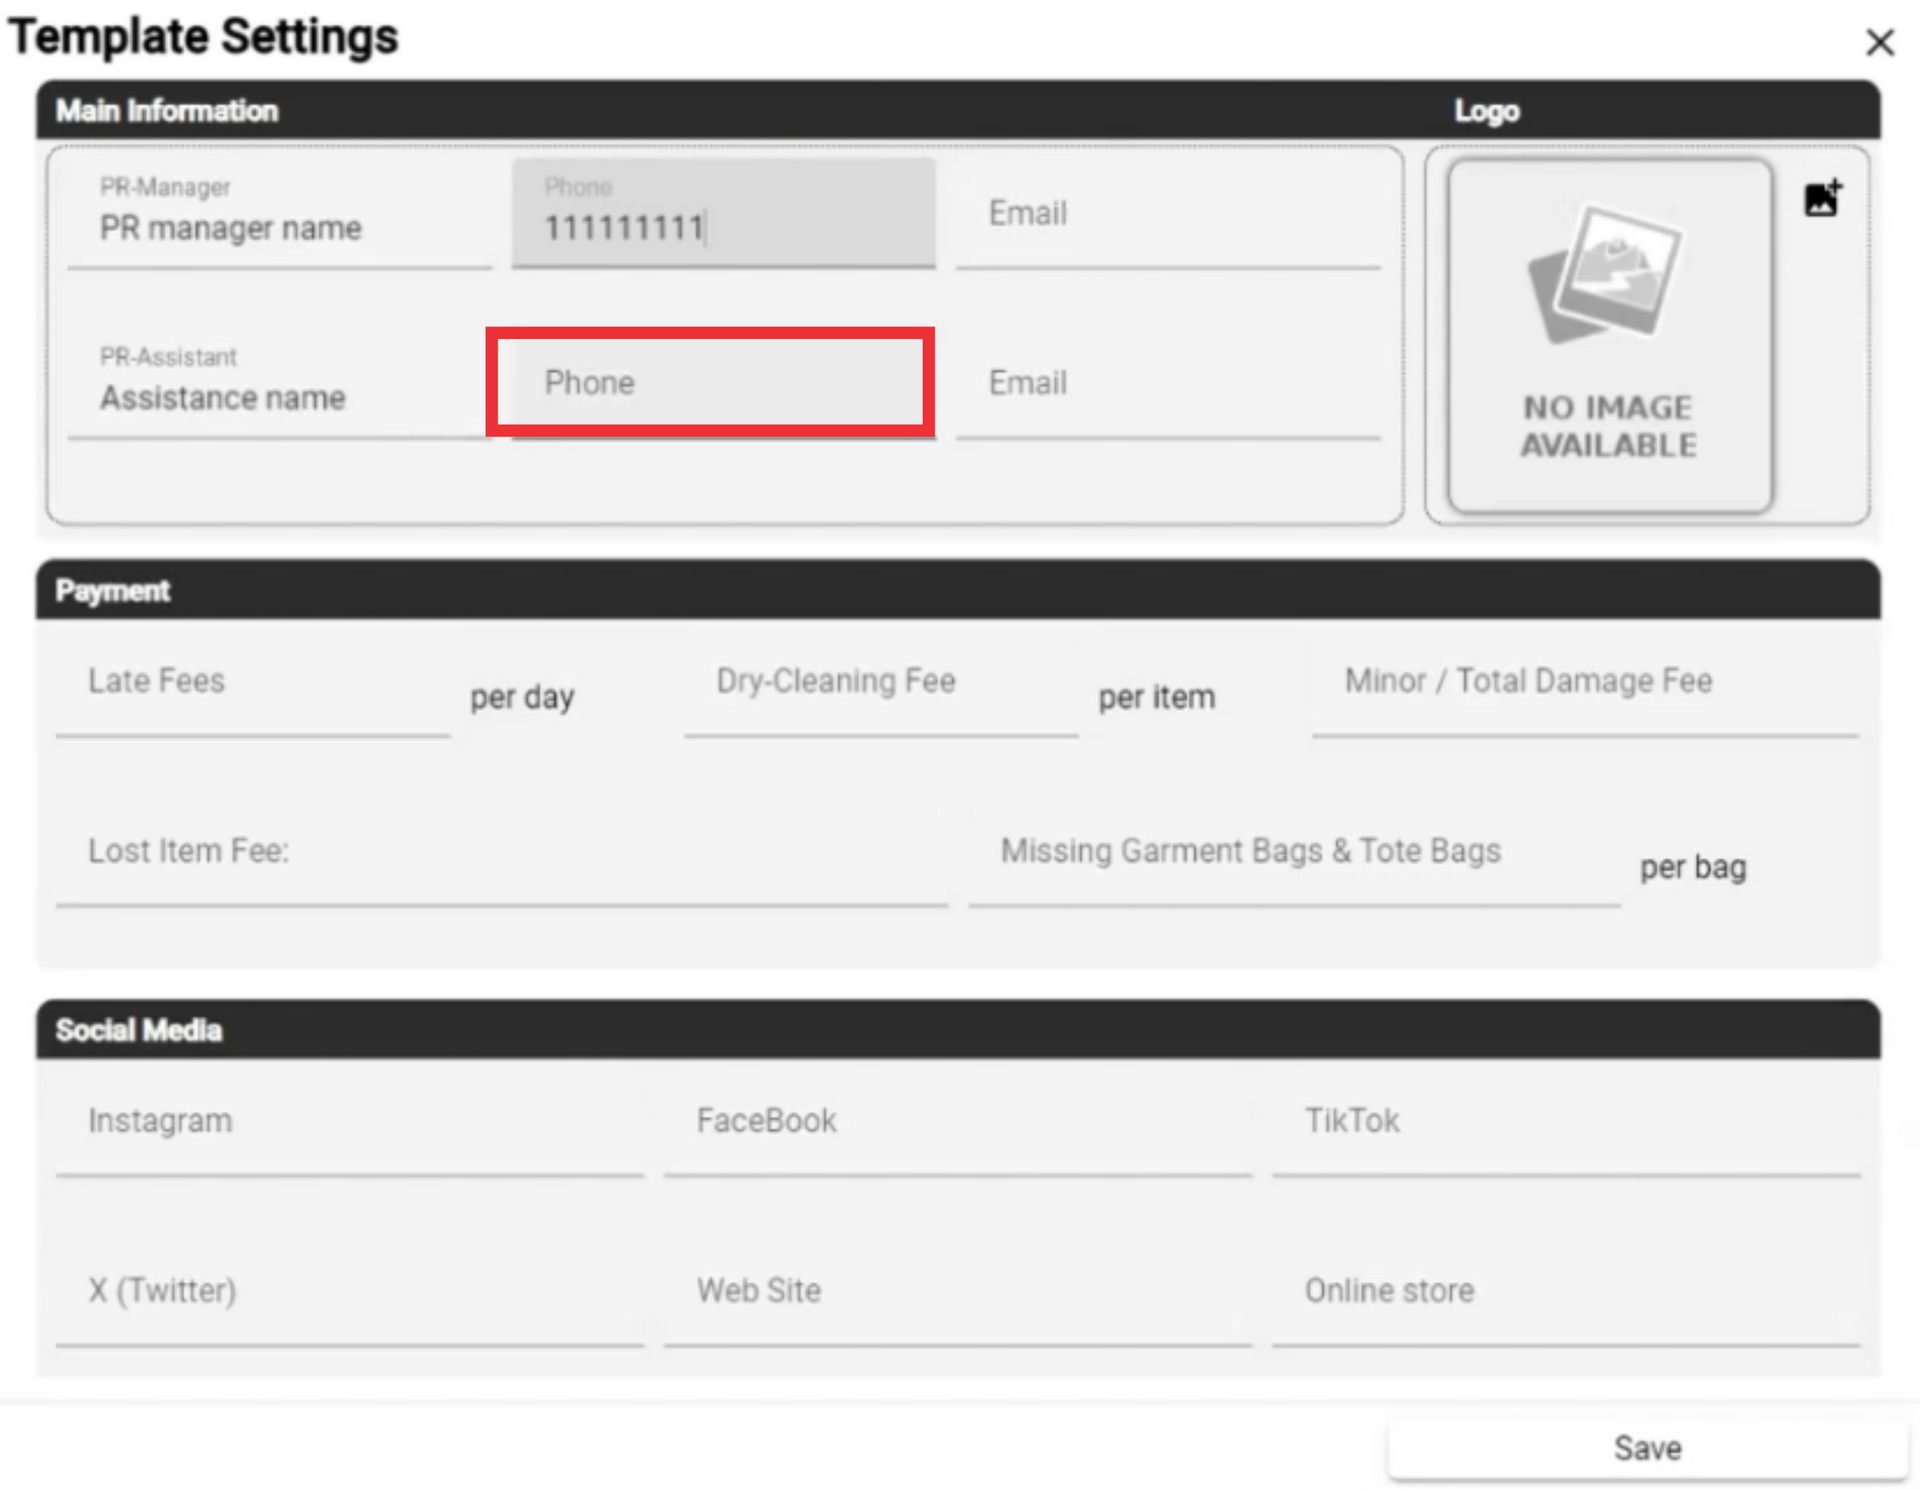
4. For the edit Pull sheet document Click the "Template Settings" button.

5. Write the PR-Manager name in the field.

6. Write the PR-Assistant name in the field.

7. Enter the PR-Manager`s phone number in the field.

8. Enter the PR-Assistant`s phone number in the field.
9. Enter the PR-Manager`s Email Address in the field.
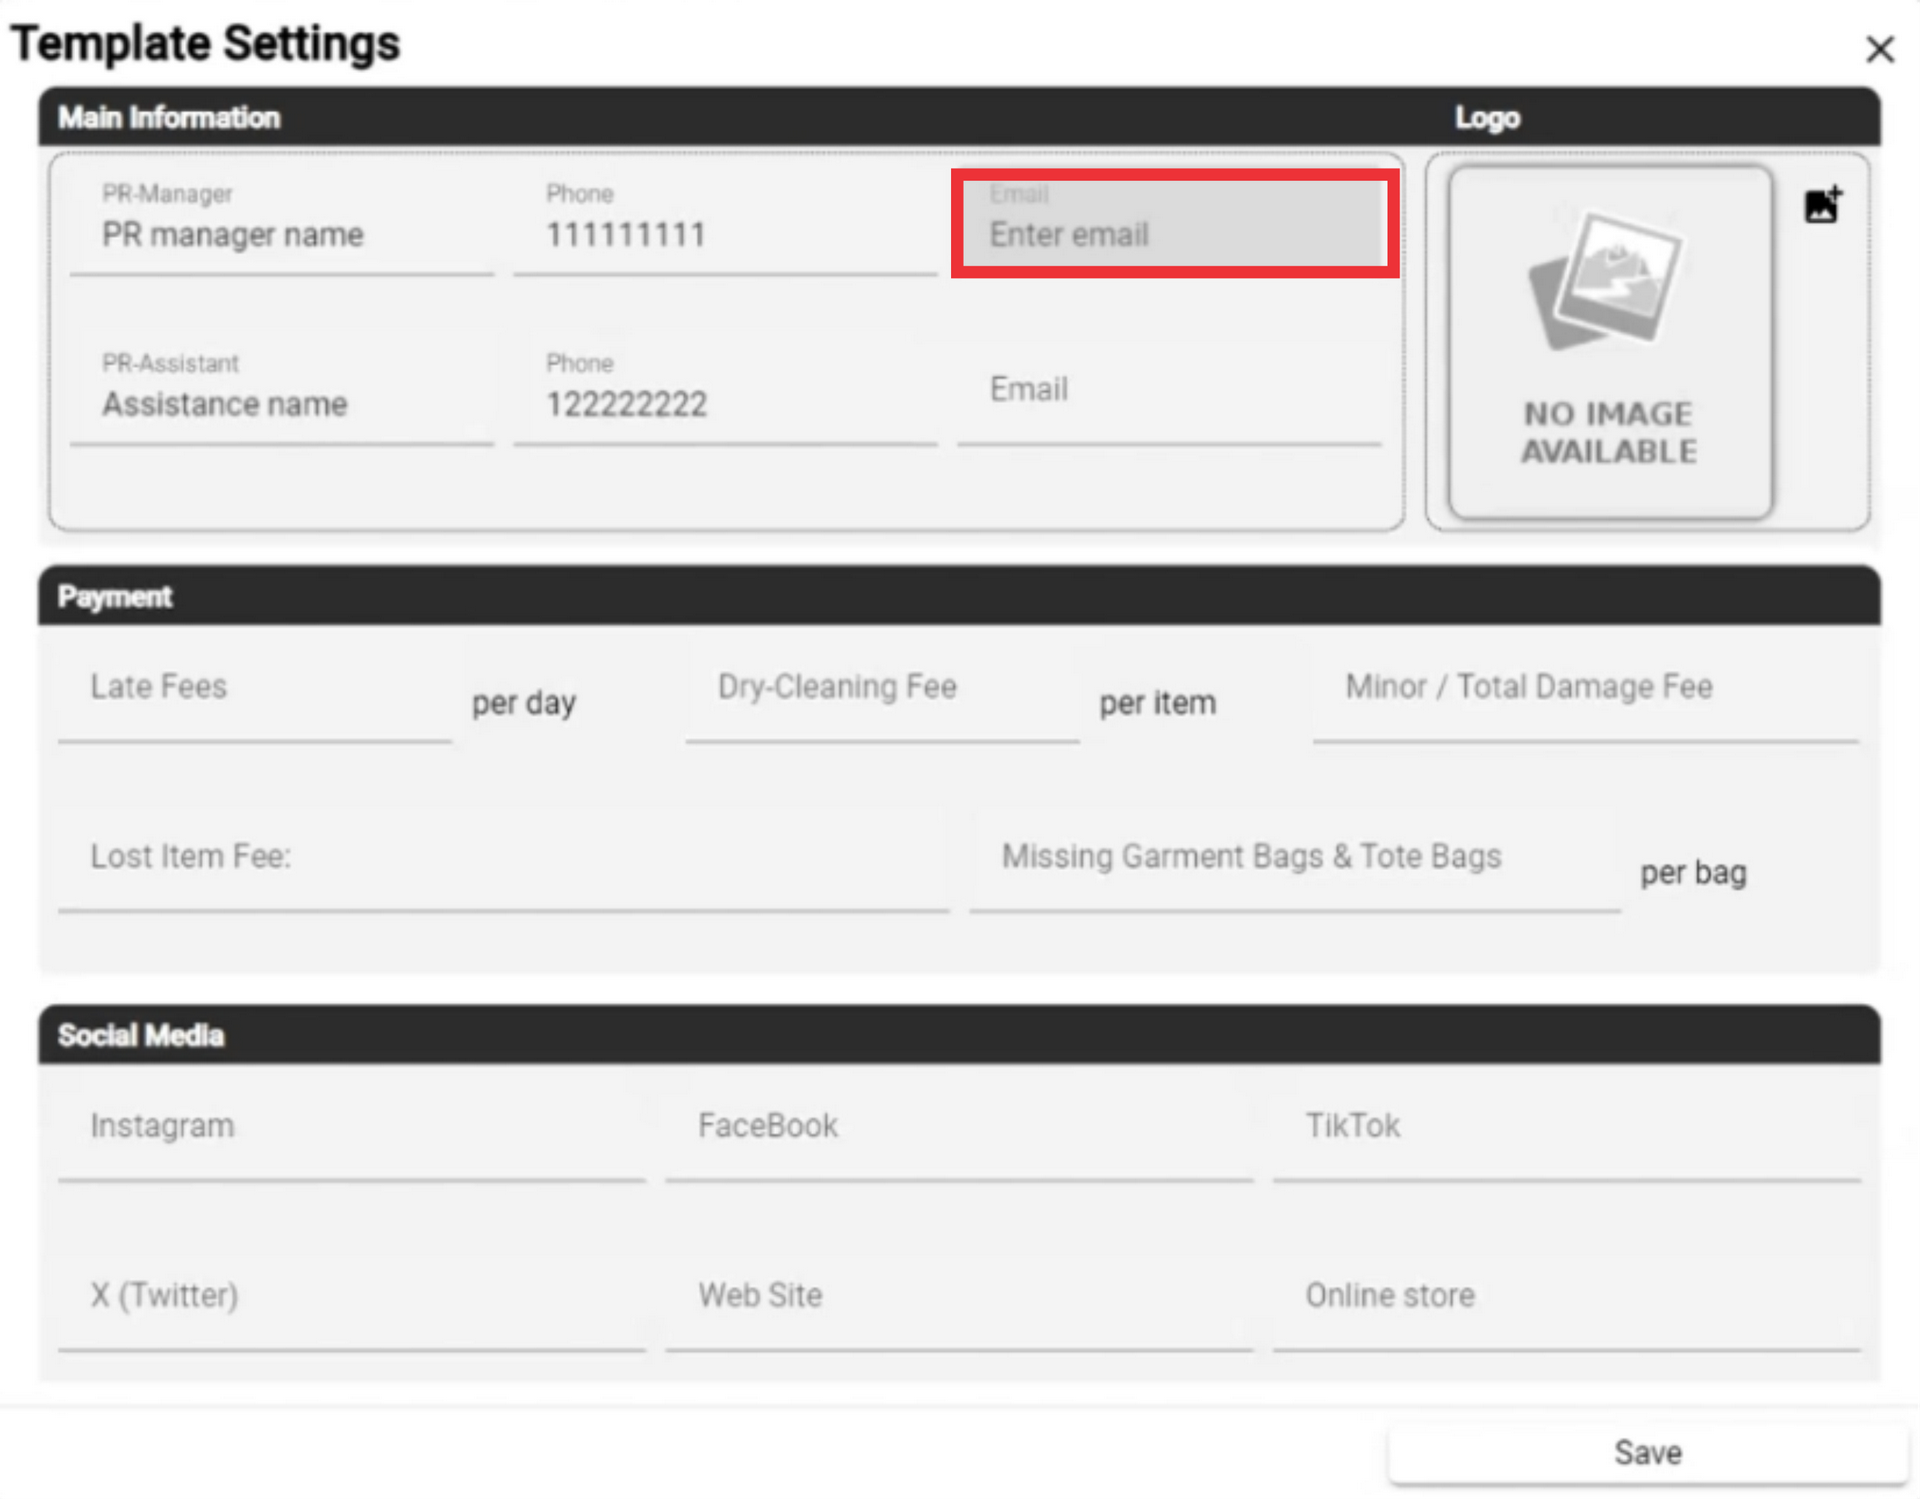
10. Enter the PR-Assistant`s Email address in the field.

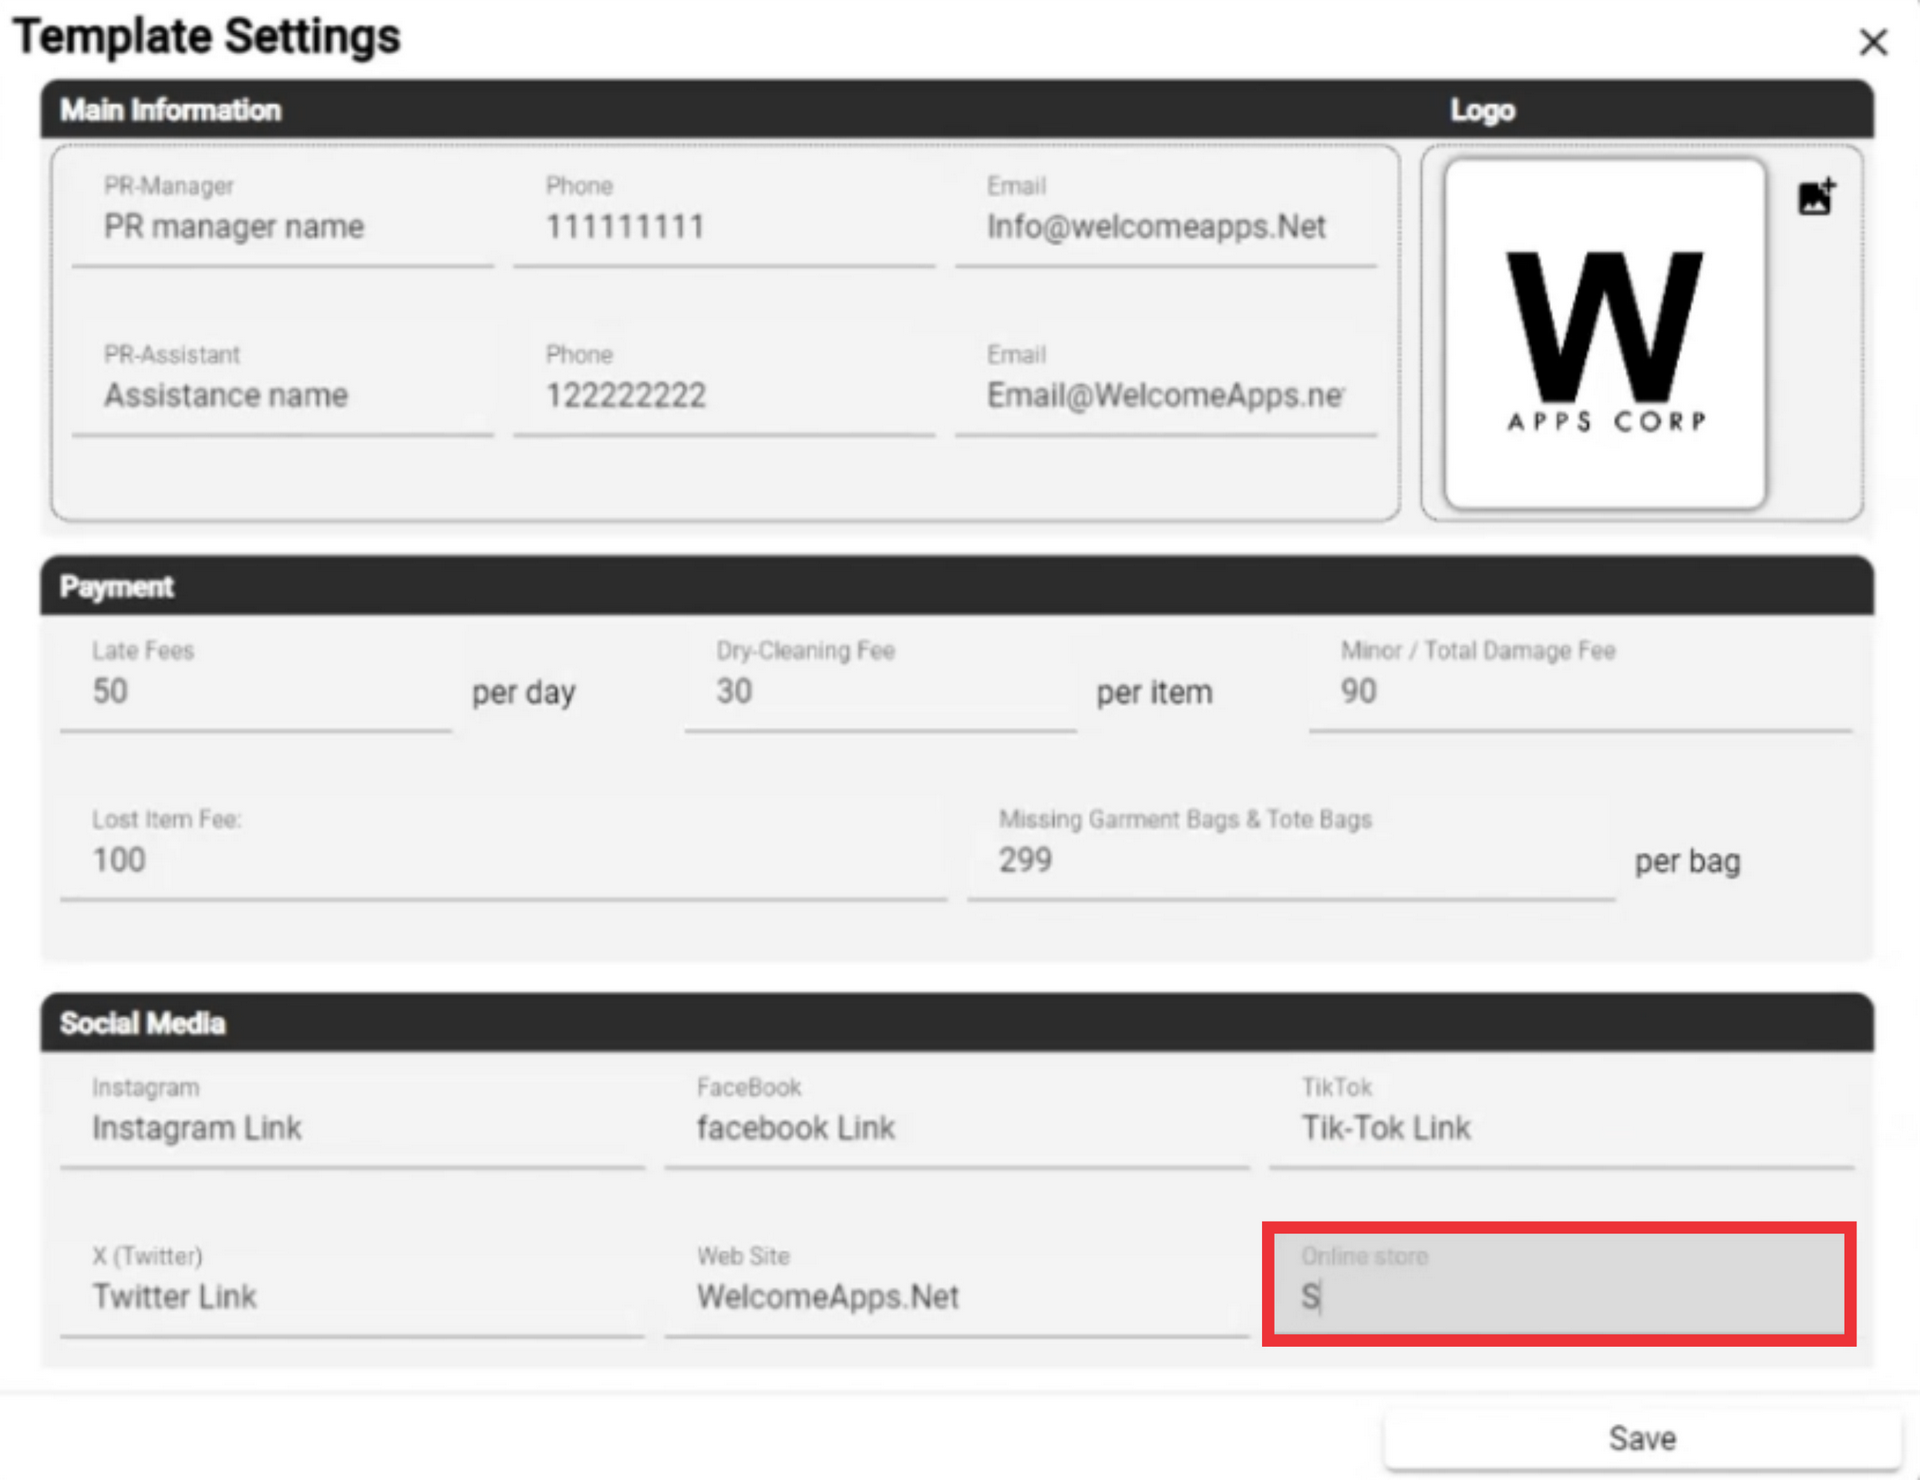
11. For the upload your PR Agency or company logo Click the "Logo" button.

12. Select desired image from your PC or device and click the "Open" button to confirm.

13. Enter the amount of late fee in the field.

14. Enter the lost item fee in the field.

15. Enter the Dry-Cleaning fee in the field for per item.

16. Enter the Minor/Total damage fee in the field.

17. Enter the Missing garment bags fee in the field.

18. Paste the Instagram user link in the field.

19. Paste the X (Twitter) user link in the field.

20. Paste the Facebook user link in the field.

21. Enter the web site address in the field.

22. Paste the Tik-Tok user link in the field.

23. Enter the Online store address in the field.
24. For the save data in the pull sheet document template click the "Save" button.

25. For the create new pull sheet document click the "Create Pull Sheet" button.

26. Enter the Email address in the field.

27. Enter the Phone number in the field.

28. For the attach send out document click the "Add SendOut" button.
29. Choose from the list of the send out documents you have created and click the "Select" button.
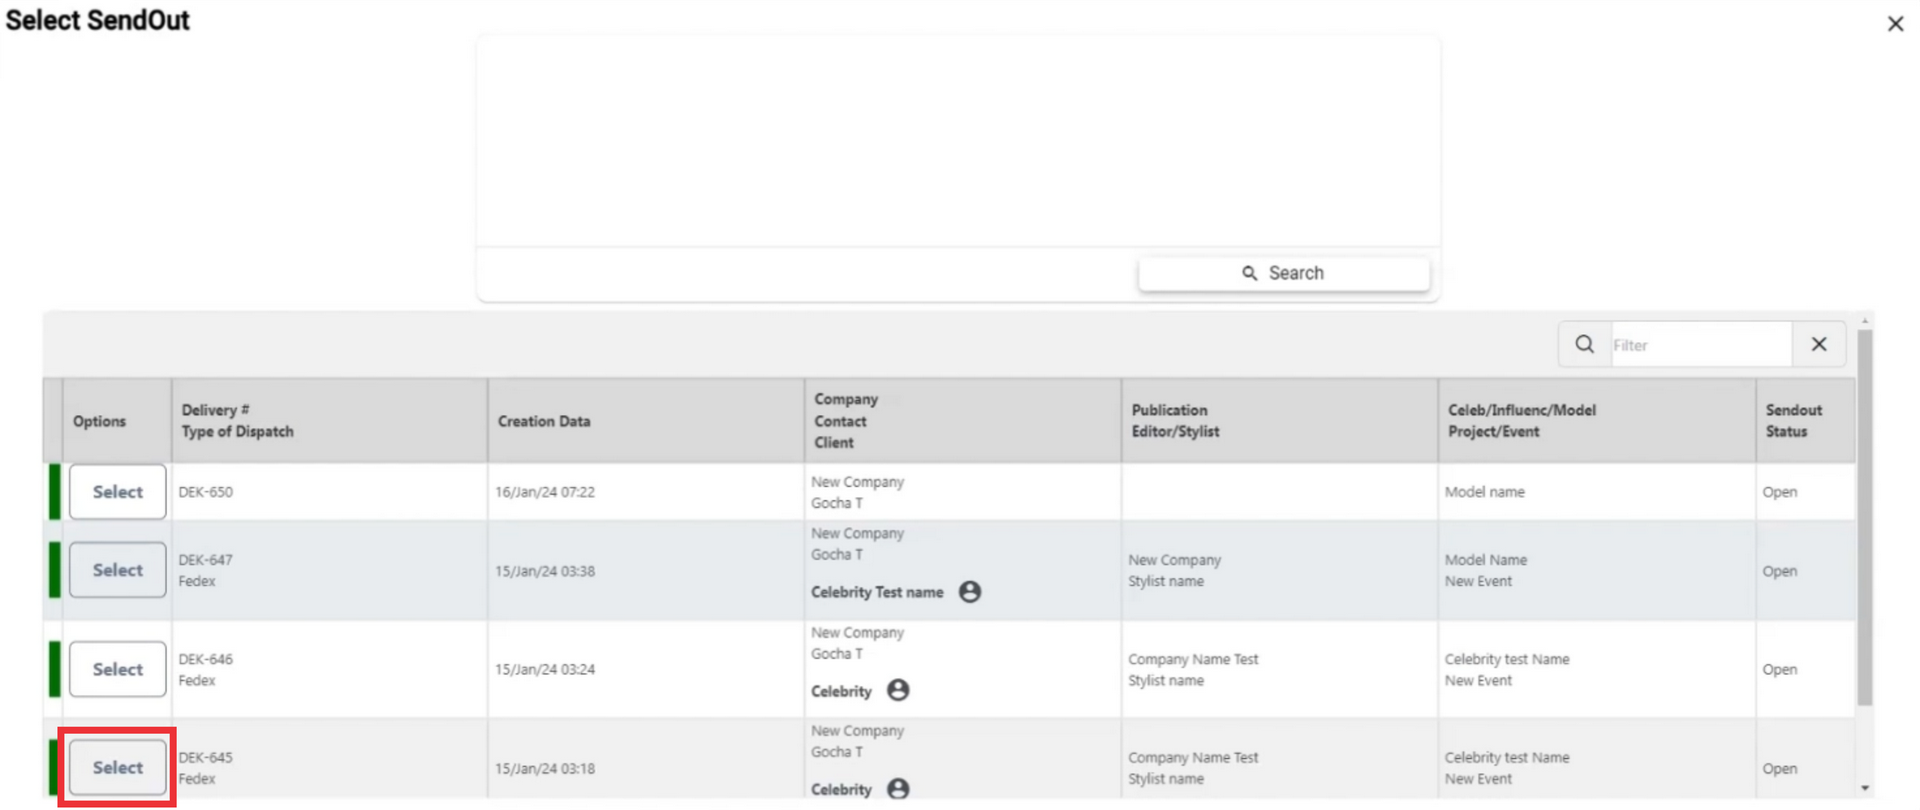
30. The number of the send out document you selected will appear in the document
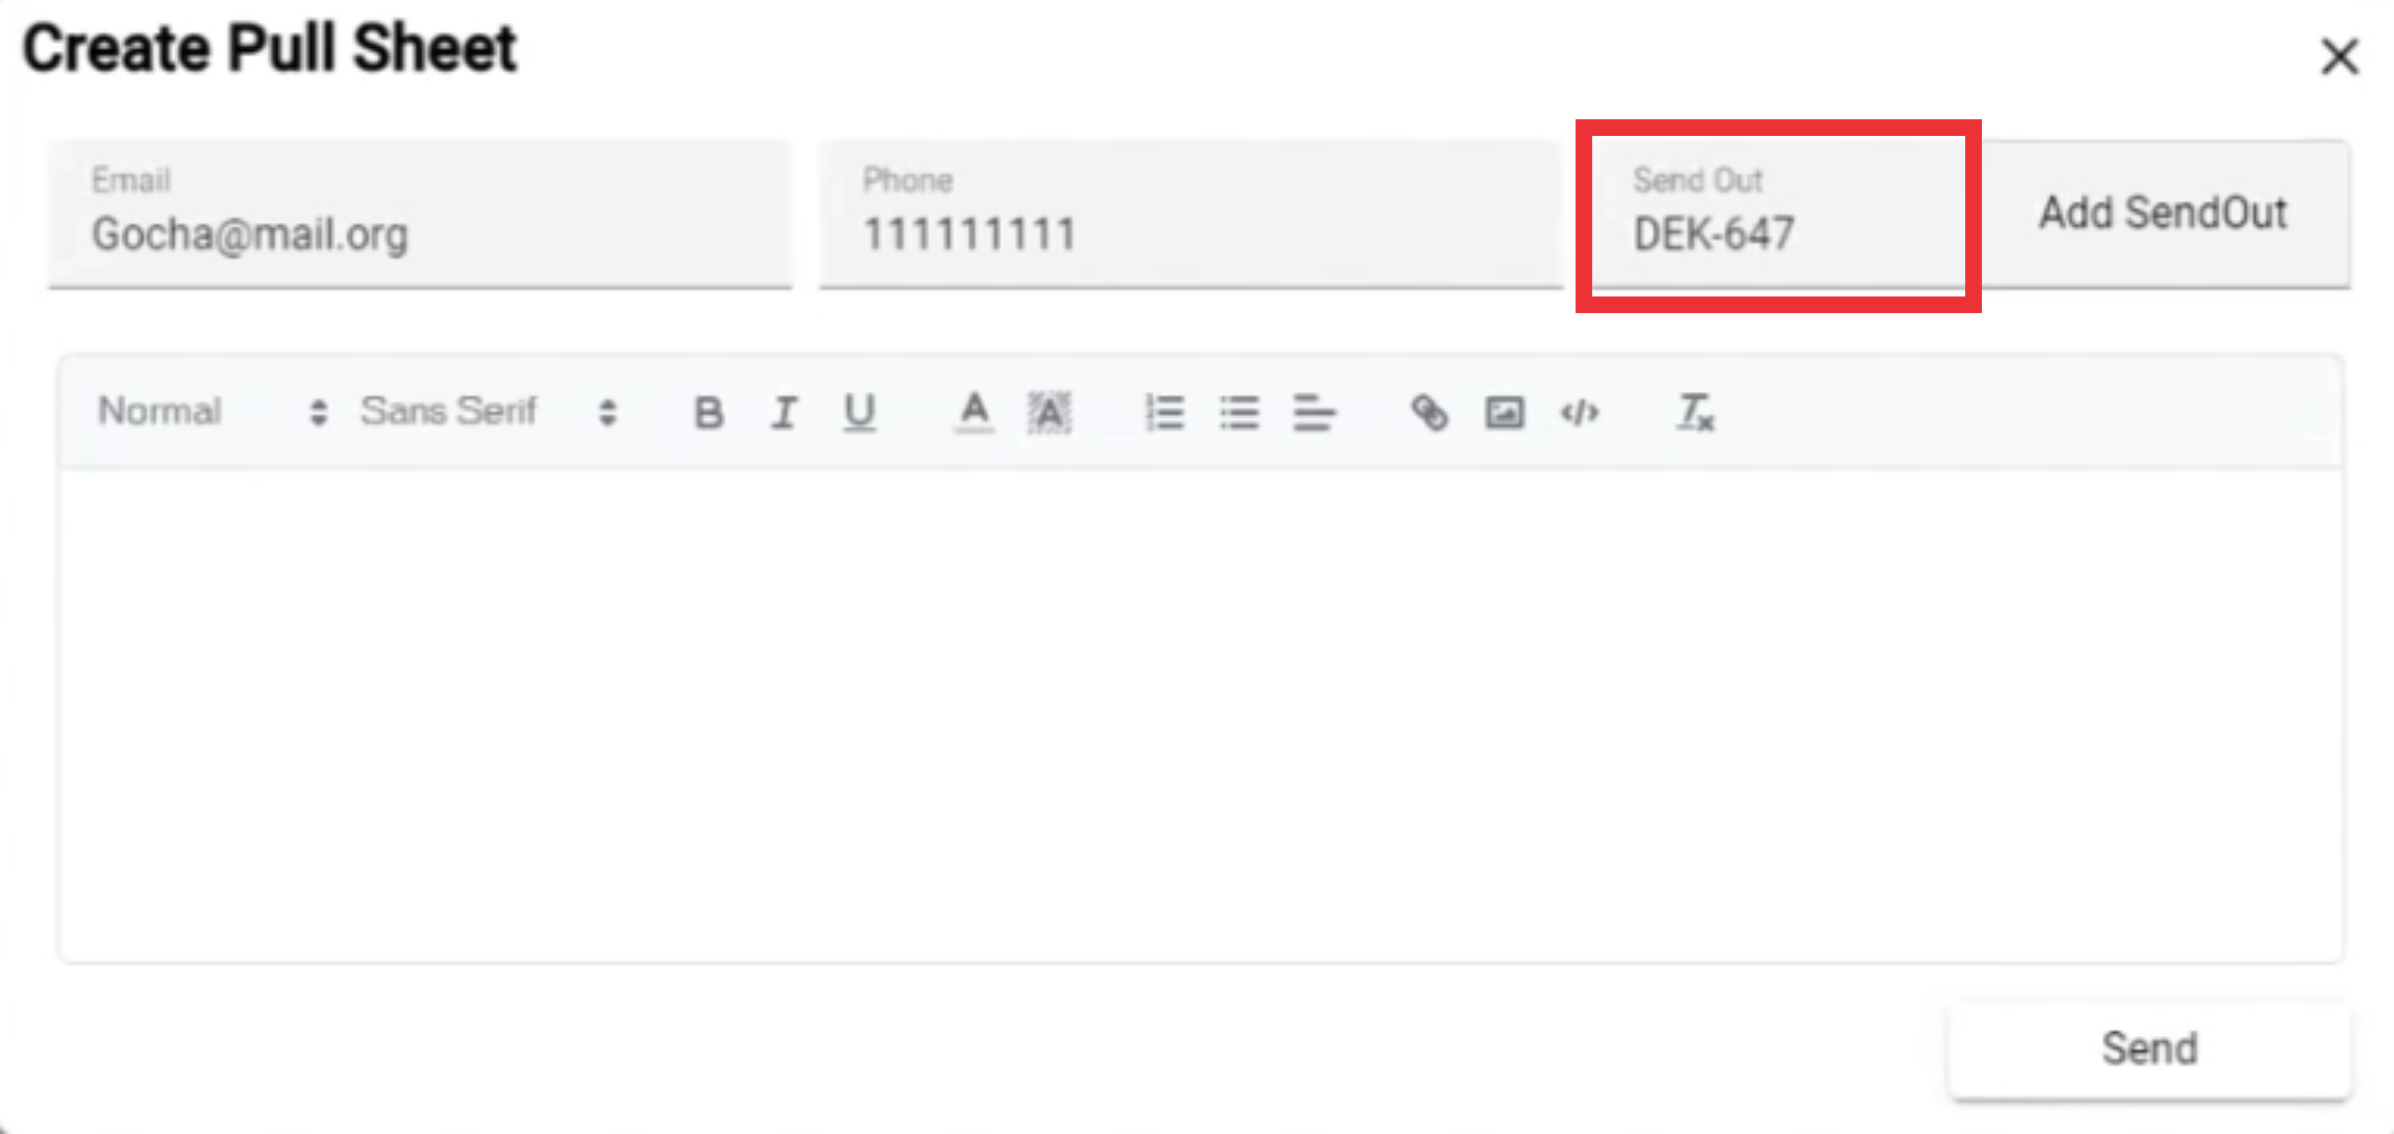
31. Write text in the field.

32. For the create and send pull sheet document click the "Send" button.

33. On the upper middle screen a notification about sending pull sheet document to the address you will appear. If your recipient did not received pull sheet document, please check the spam or junk folder.

34. For the view pull sheet document click the "Pull Sheet" link.

35. Please wait while email is redirected to the pull sheet document.

36. For the see a samples photos included in the pull sheet document click the "View Items" button.
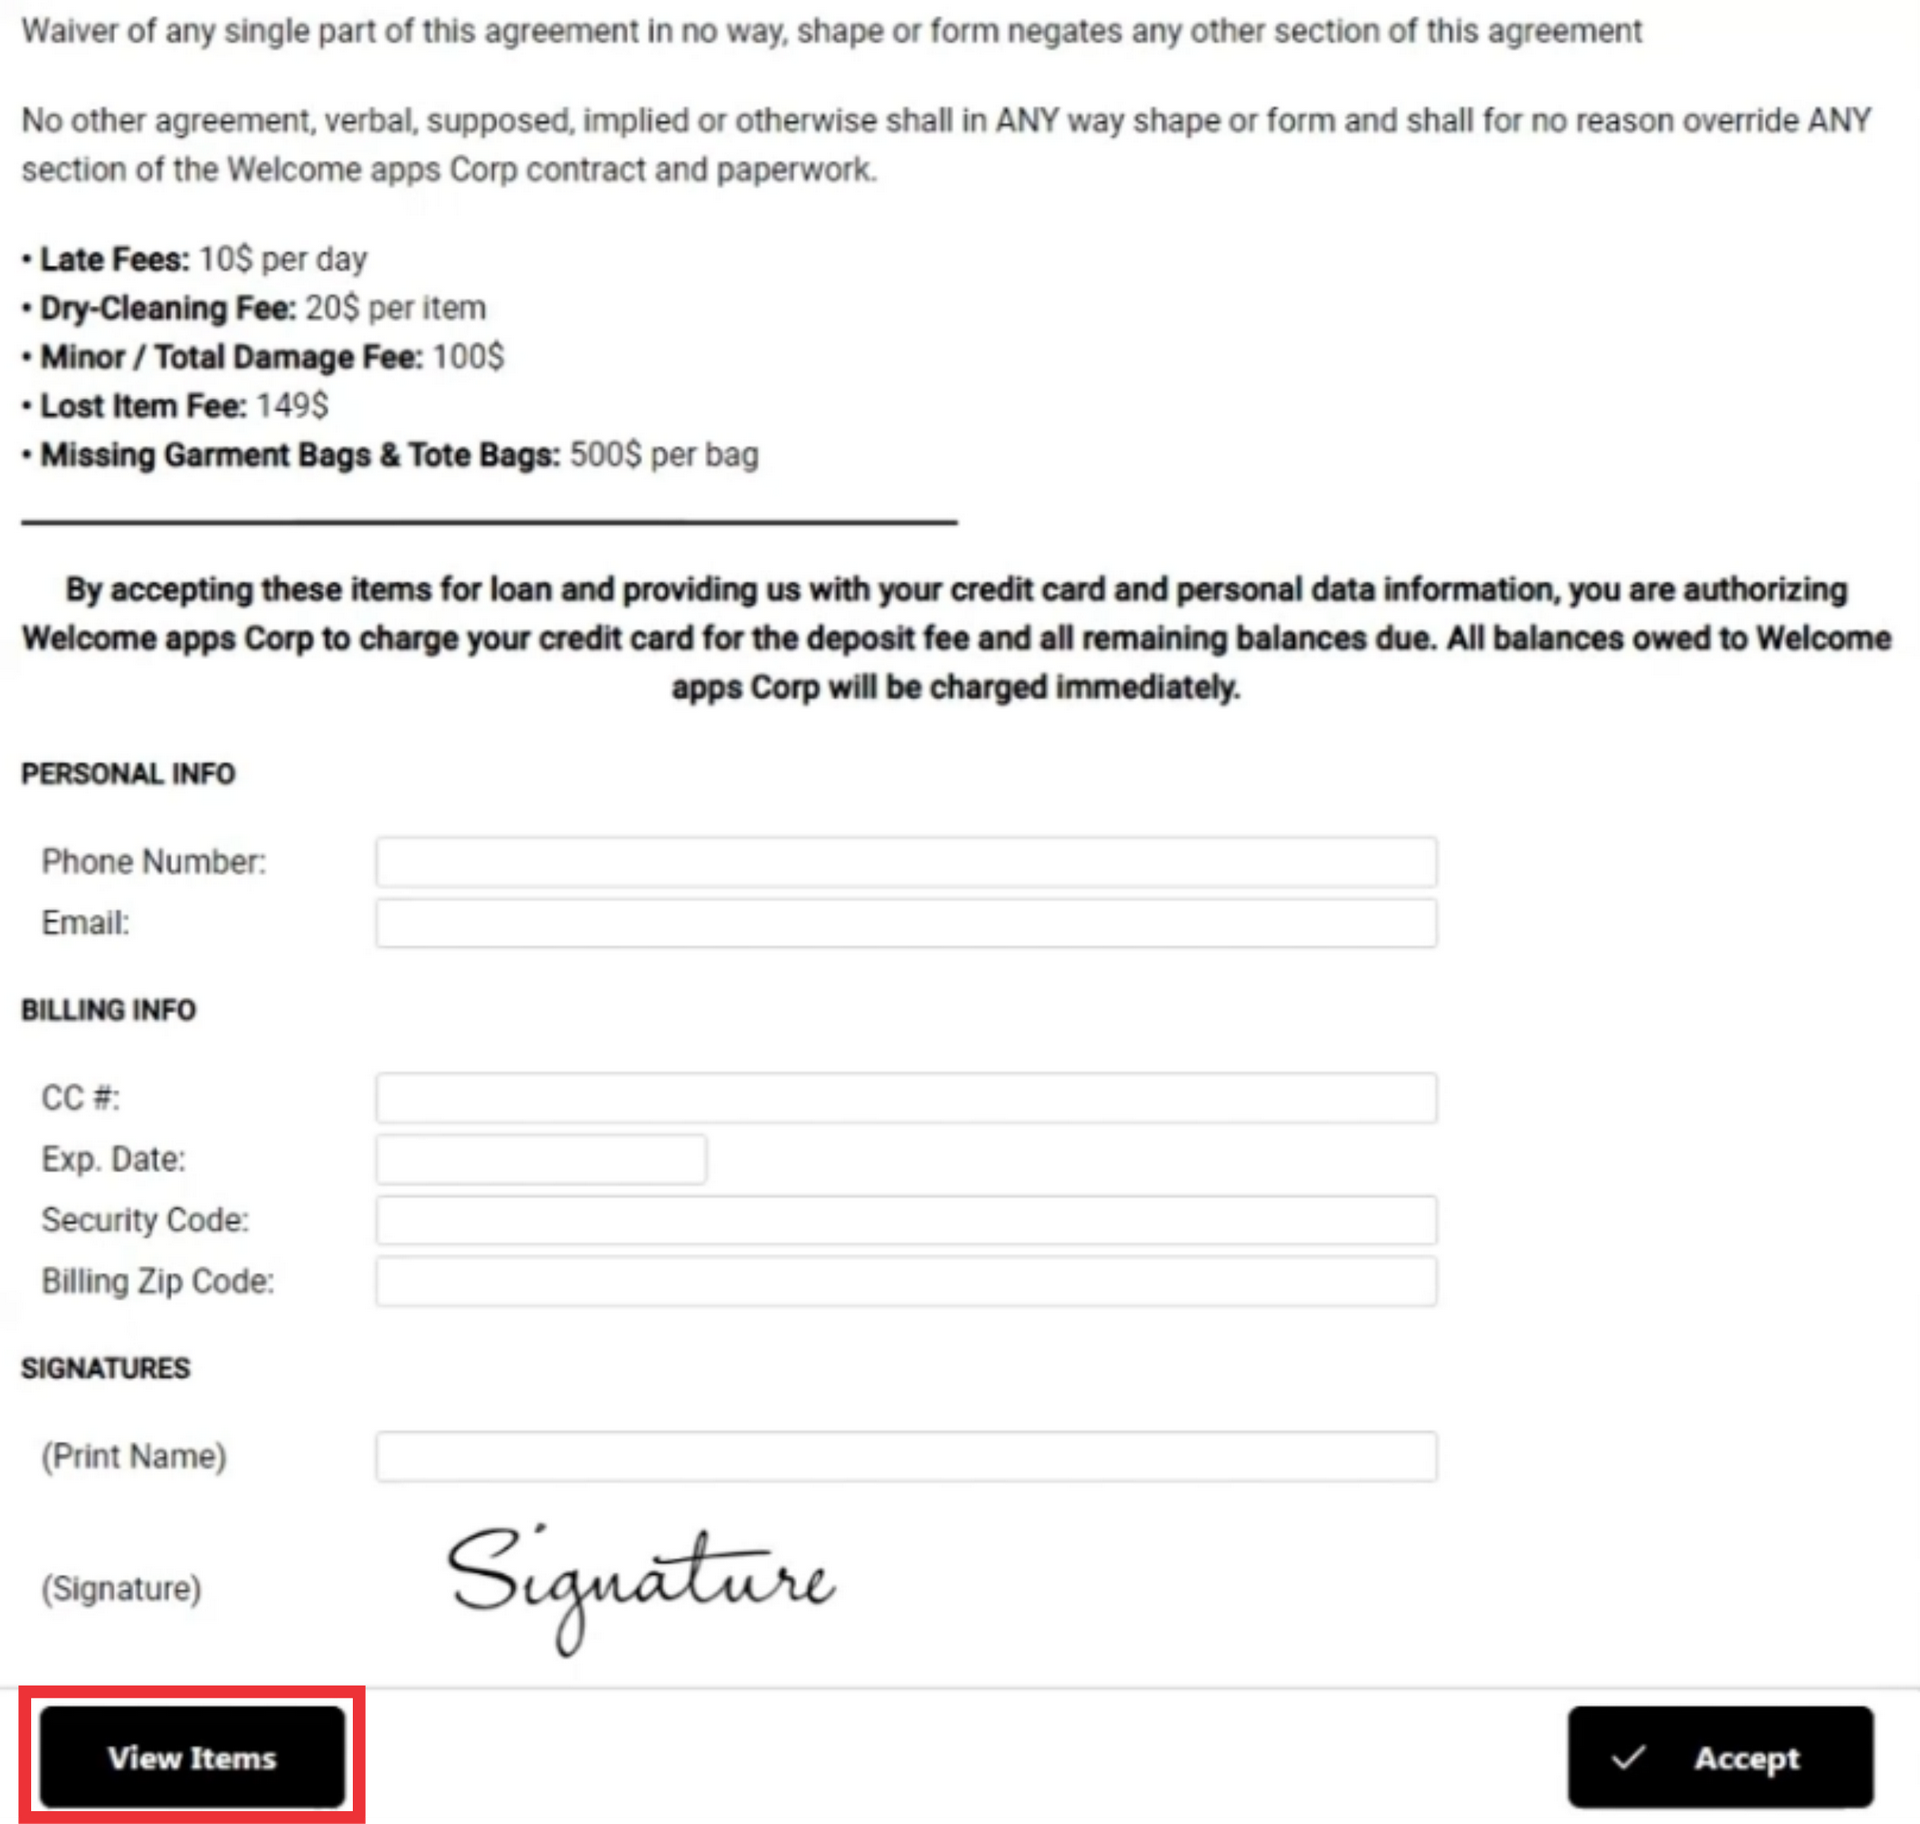
37. For the close this window click the "X" button.

38. Fill the empty fields in the pull sheet document.

39. Click the "Signature" button.

40. Make a signature in the special field.

41. Click the "OK" button to confirm.

42. For the accept pull sheet agreement document click the accept button.

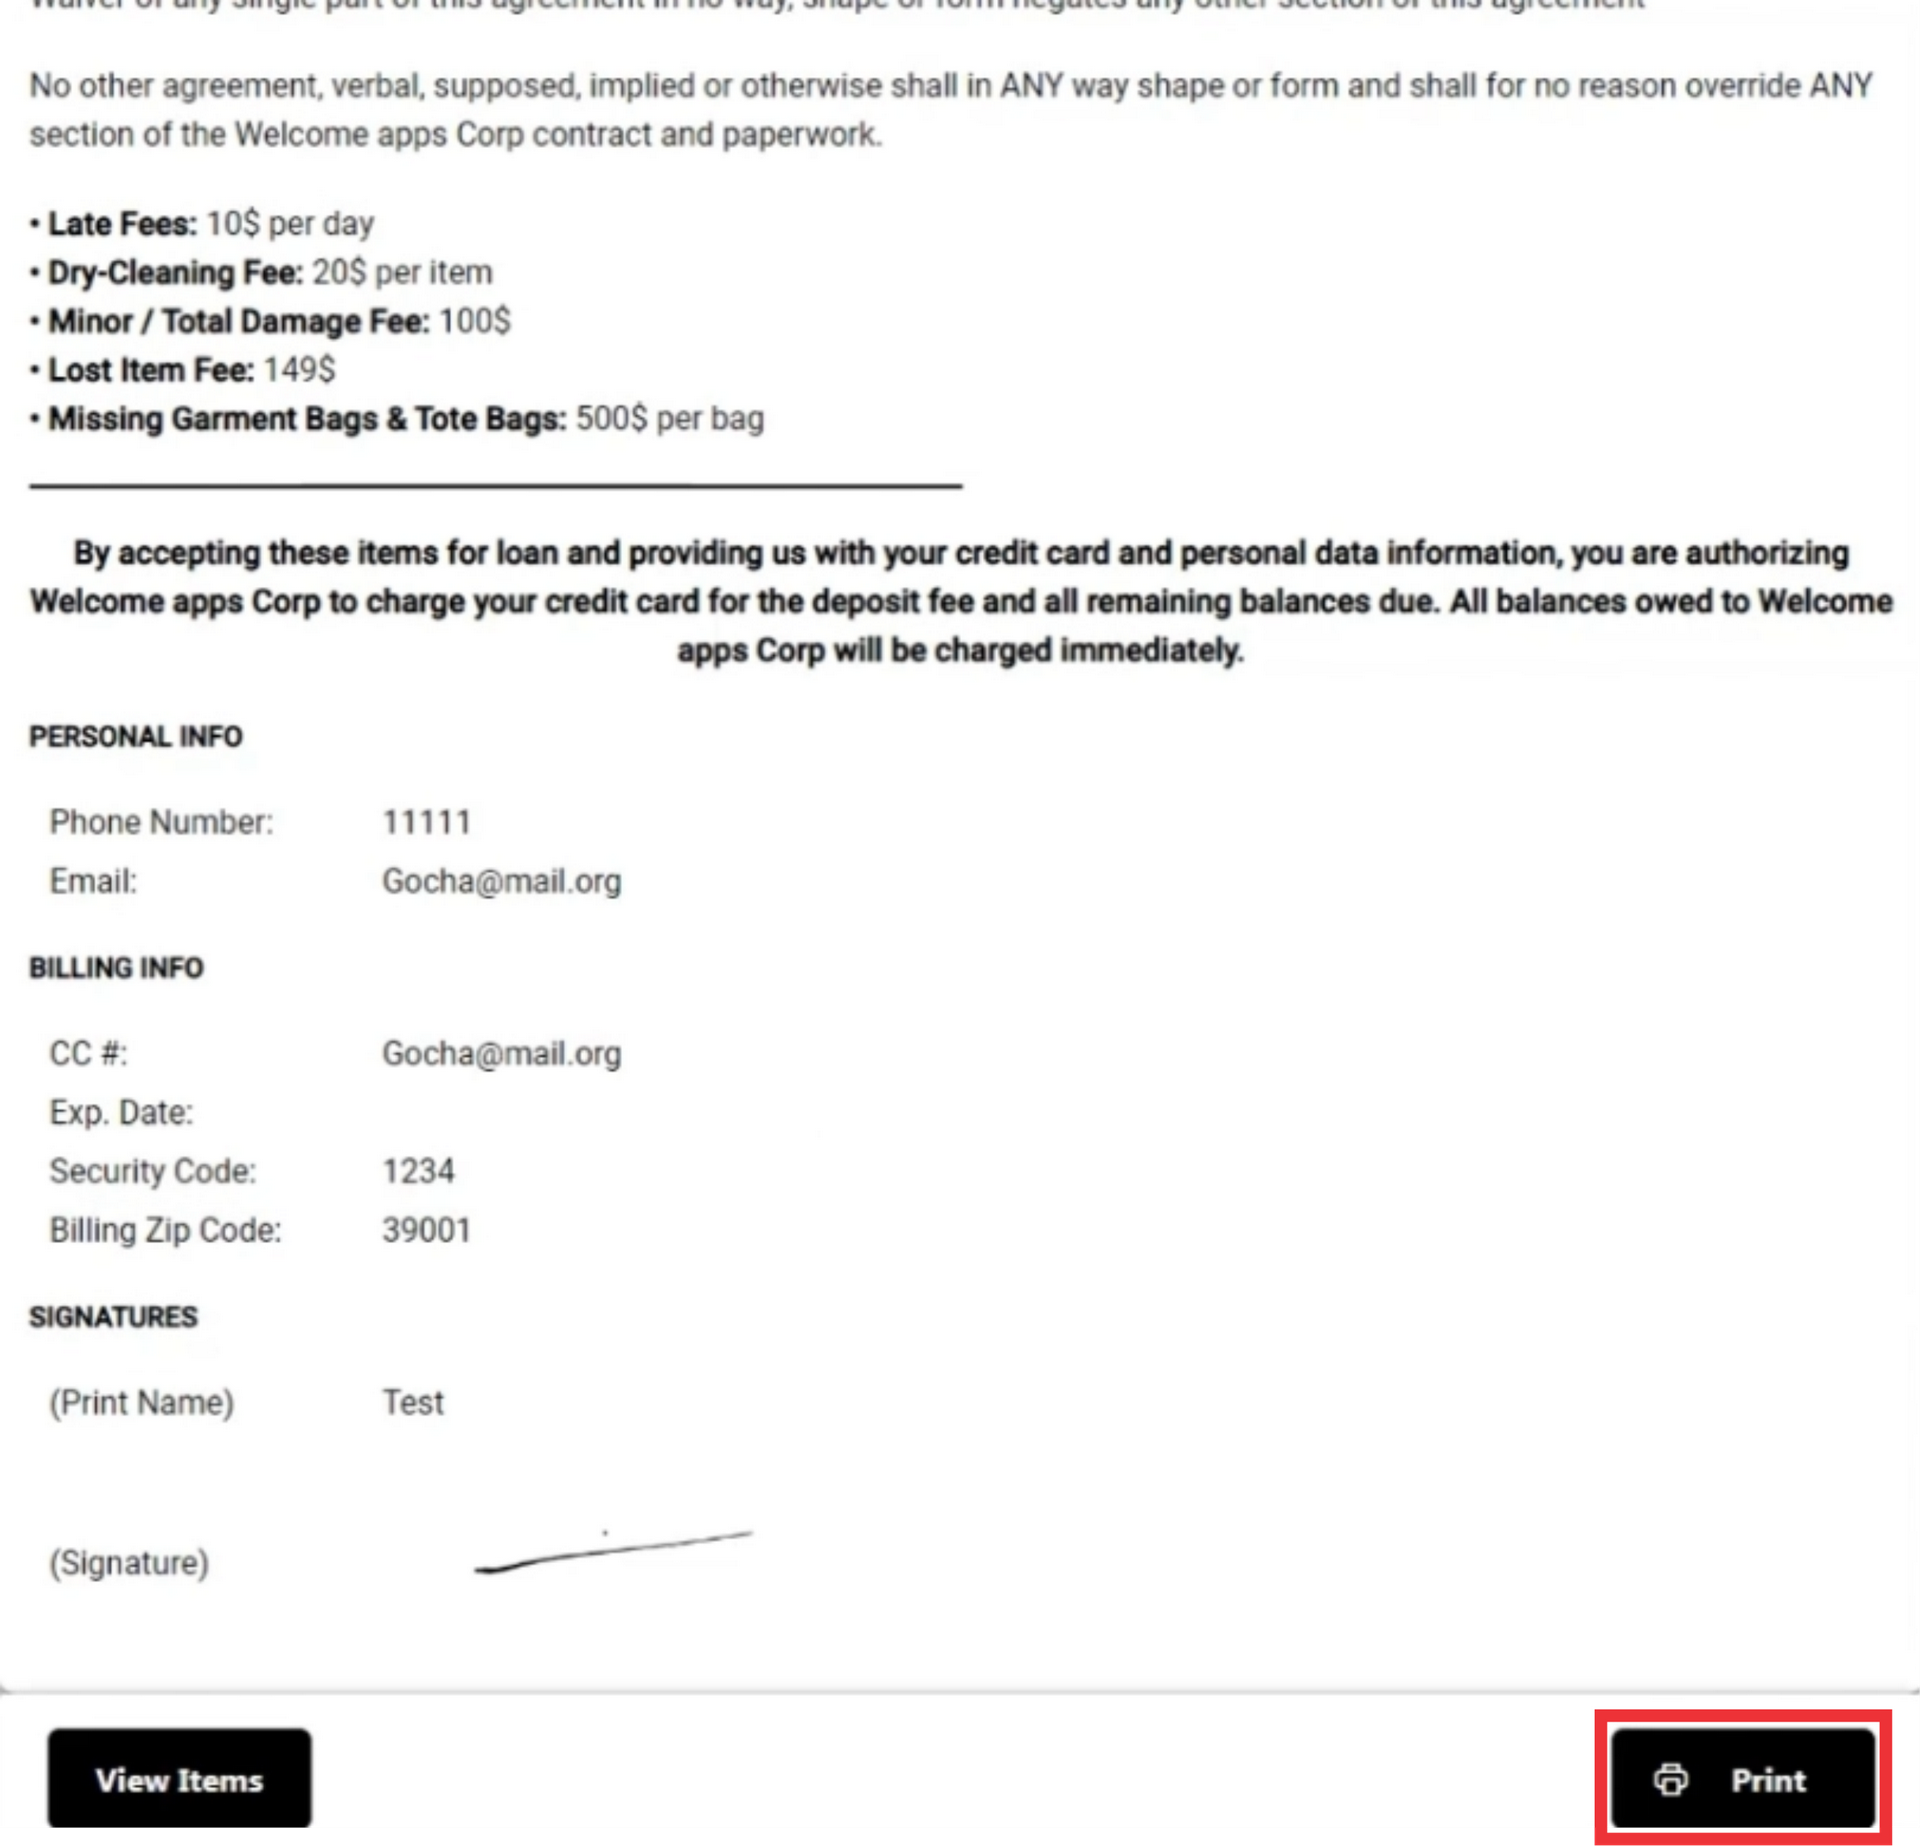
43. After confirmation a confirmation message will appear on the screen.

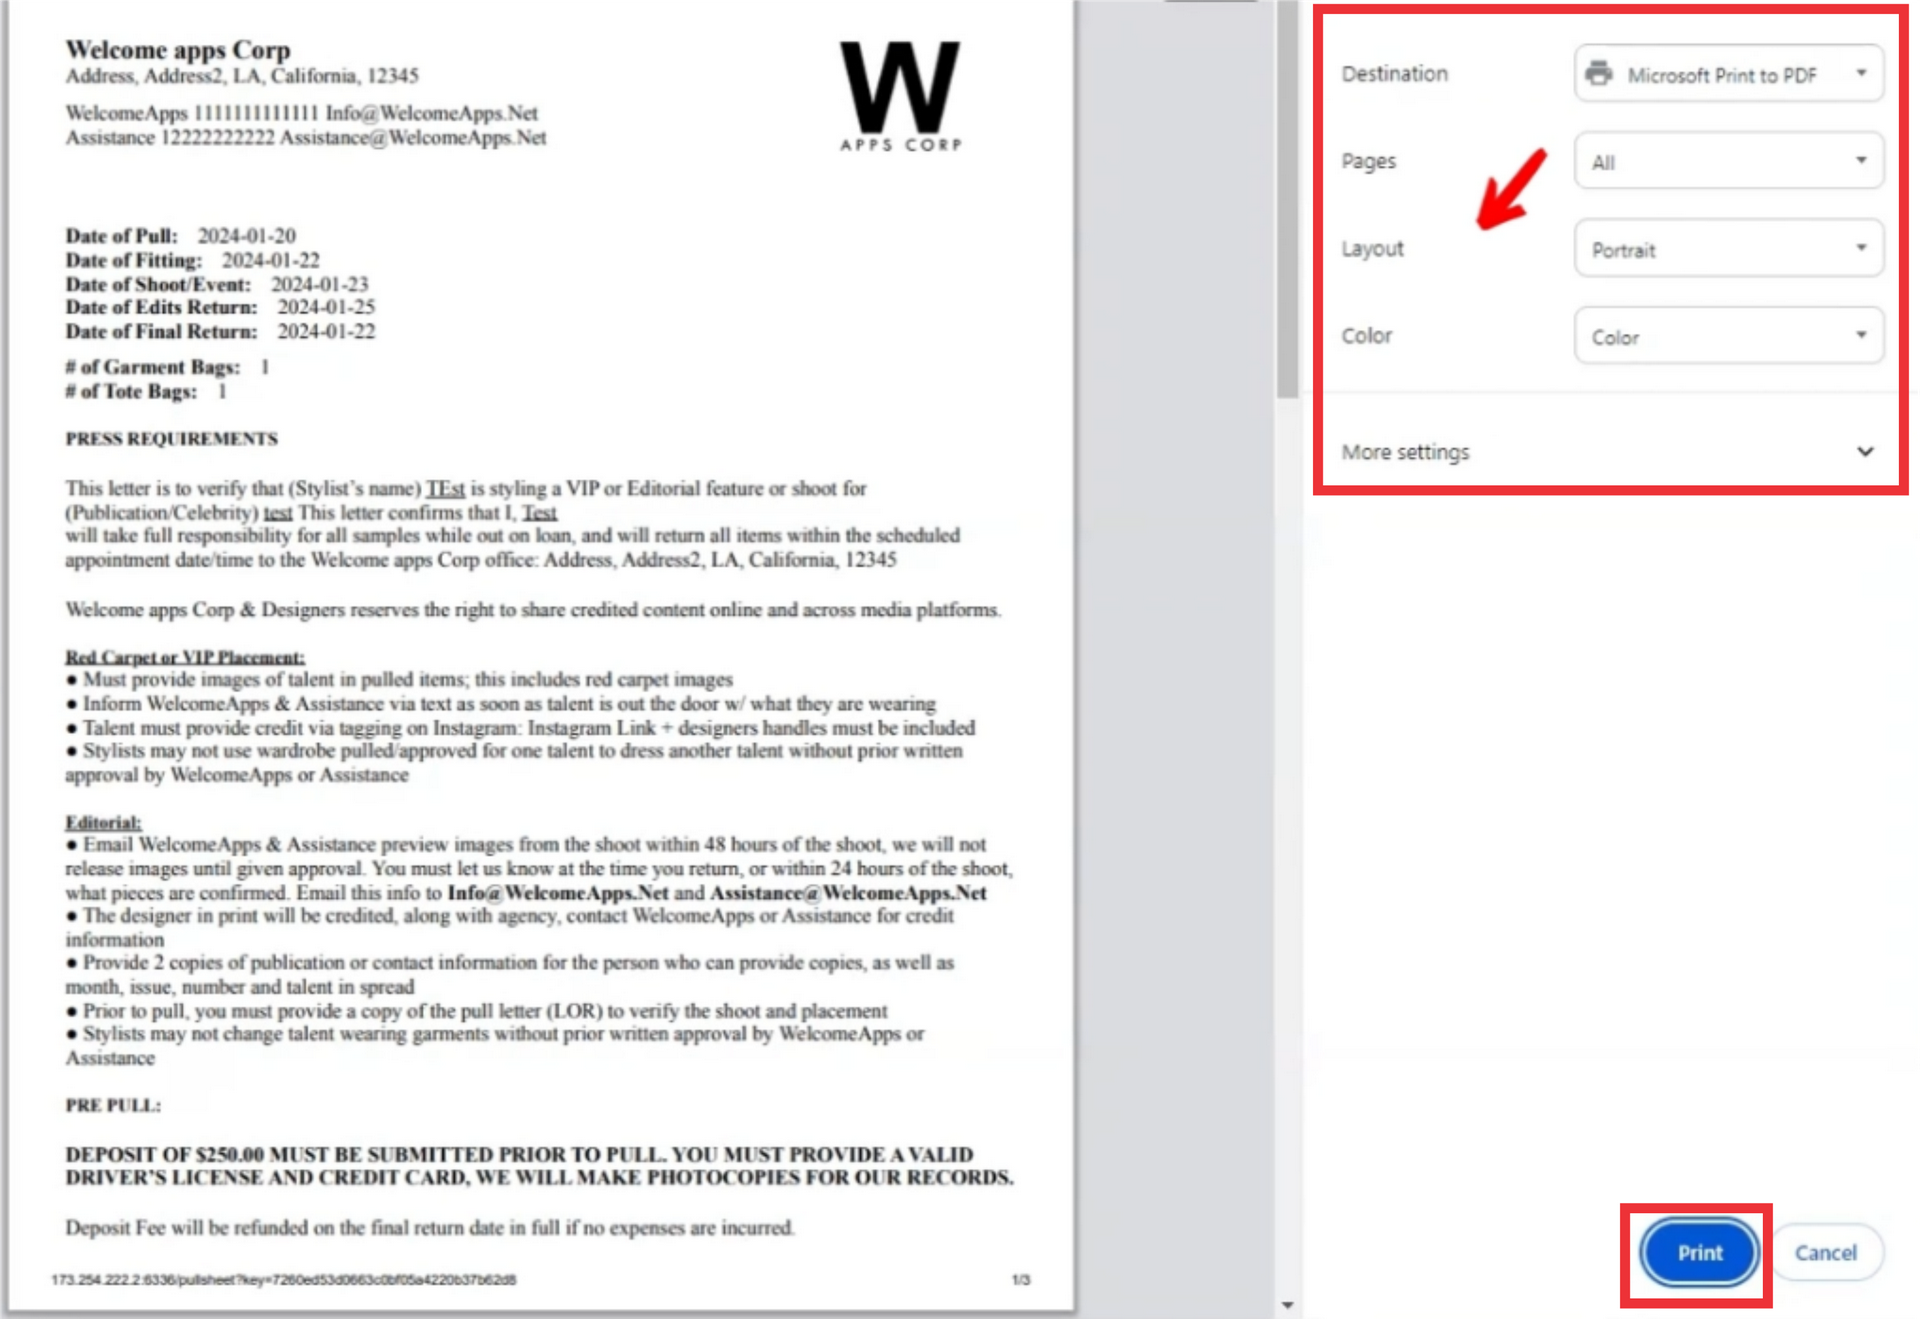
44. For the print signetured pull sheet document click the "Print" button.

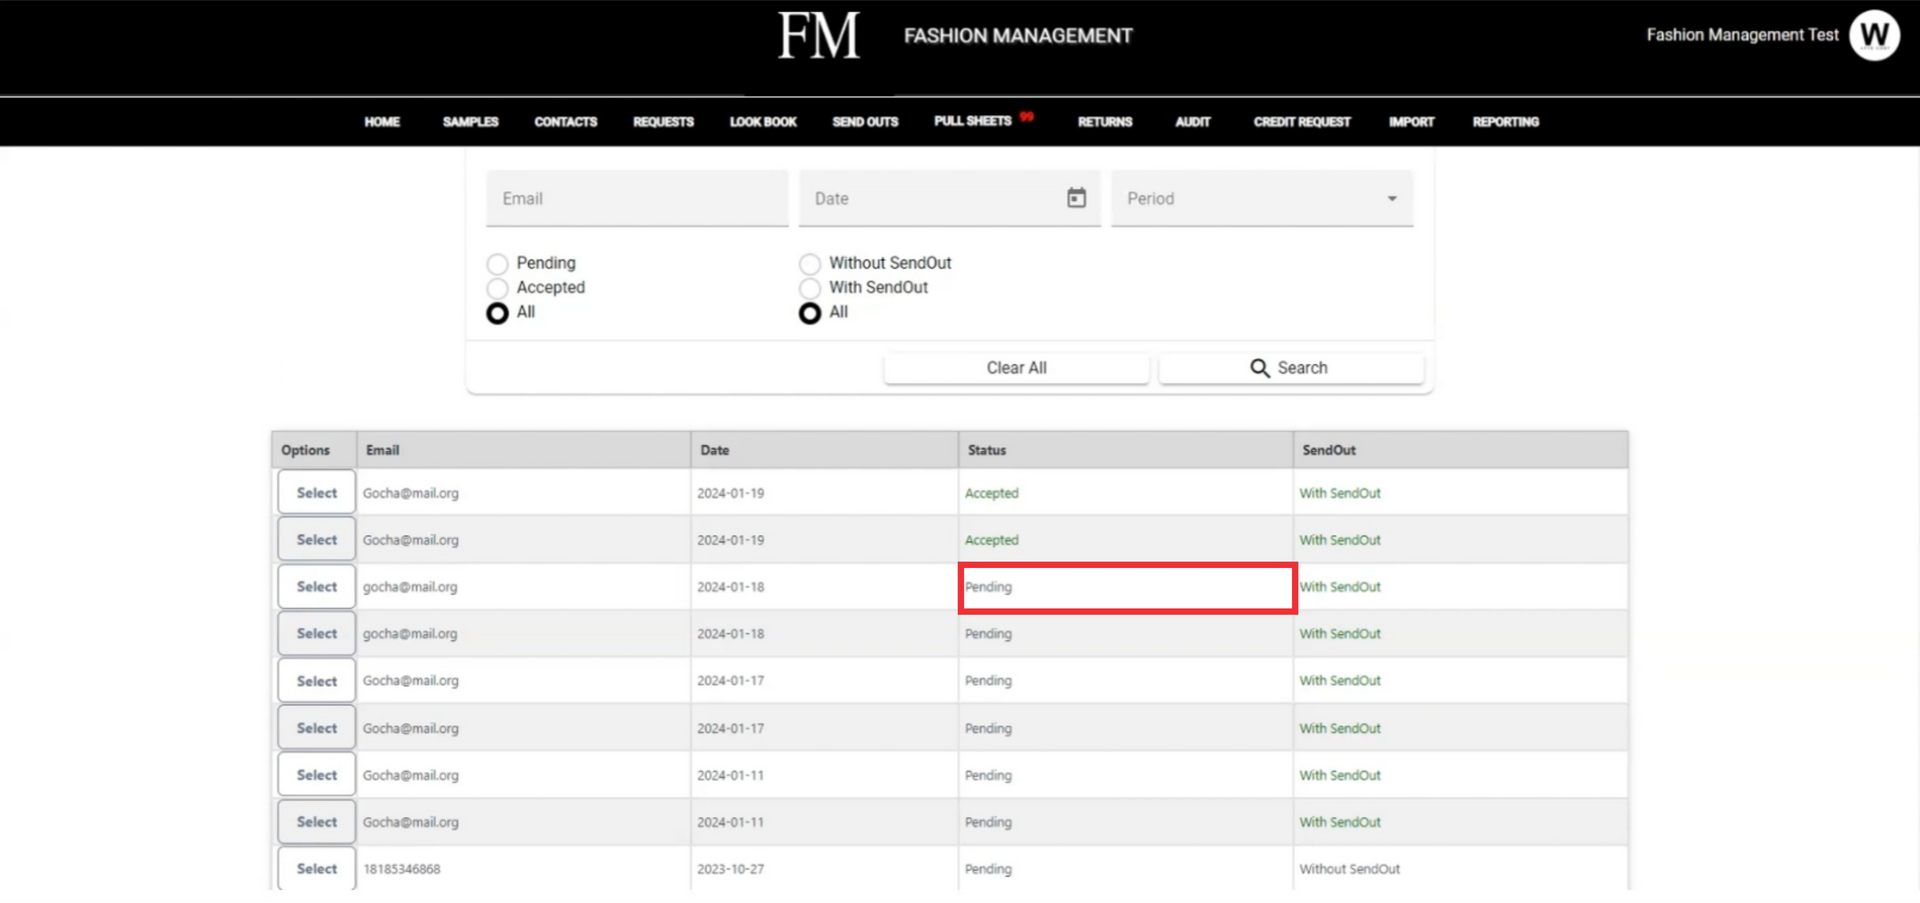
45. Select desired printer settings and click the print button.

46. For the view pull sheet document you have a created and sent, use desired filters and click the search button.

47. For the view all created and sent pull sheet documents click the search button.

48. All created and sent pull sheet documents are displayed at the buttom of the screen.

49. Click the switch button for the view next page.

50. Click the drop down button for view and select number of the documents for each page.

51. Accepted pull sheet documents status are marked with green colors.

52. Pending pull sheet documents status are marked with grey colors.
53. Click the "Select" button for the view pull sheet document menu.

54. Click the "View Pull Sheet" button.

55. Go to the bottom of the document for view samples included in the pull sheet document. For the view photos click the "View Items" button.

56. For the close thiw window click the "X" button.

57. For the print pull sheet document click the "Print" button.
58. Select desired printer settings and click the "Print" button.
59. Click the "Select" button for the view pull sheet document options.
60. Click the view samples button.

61. For the close this window click the "X" button.

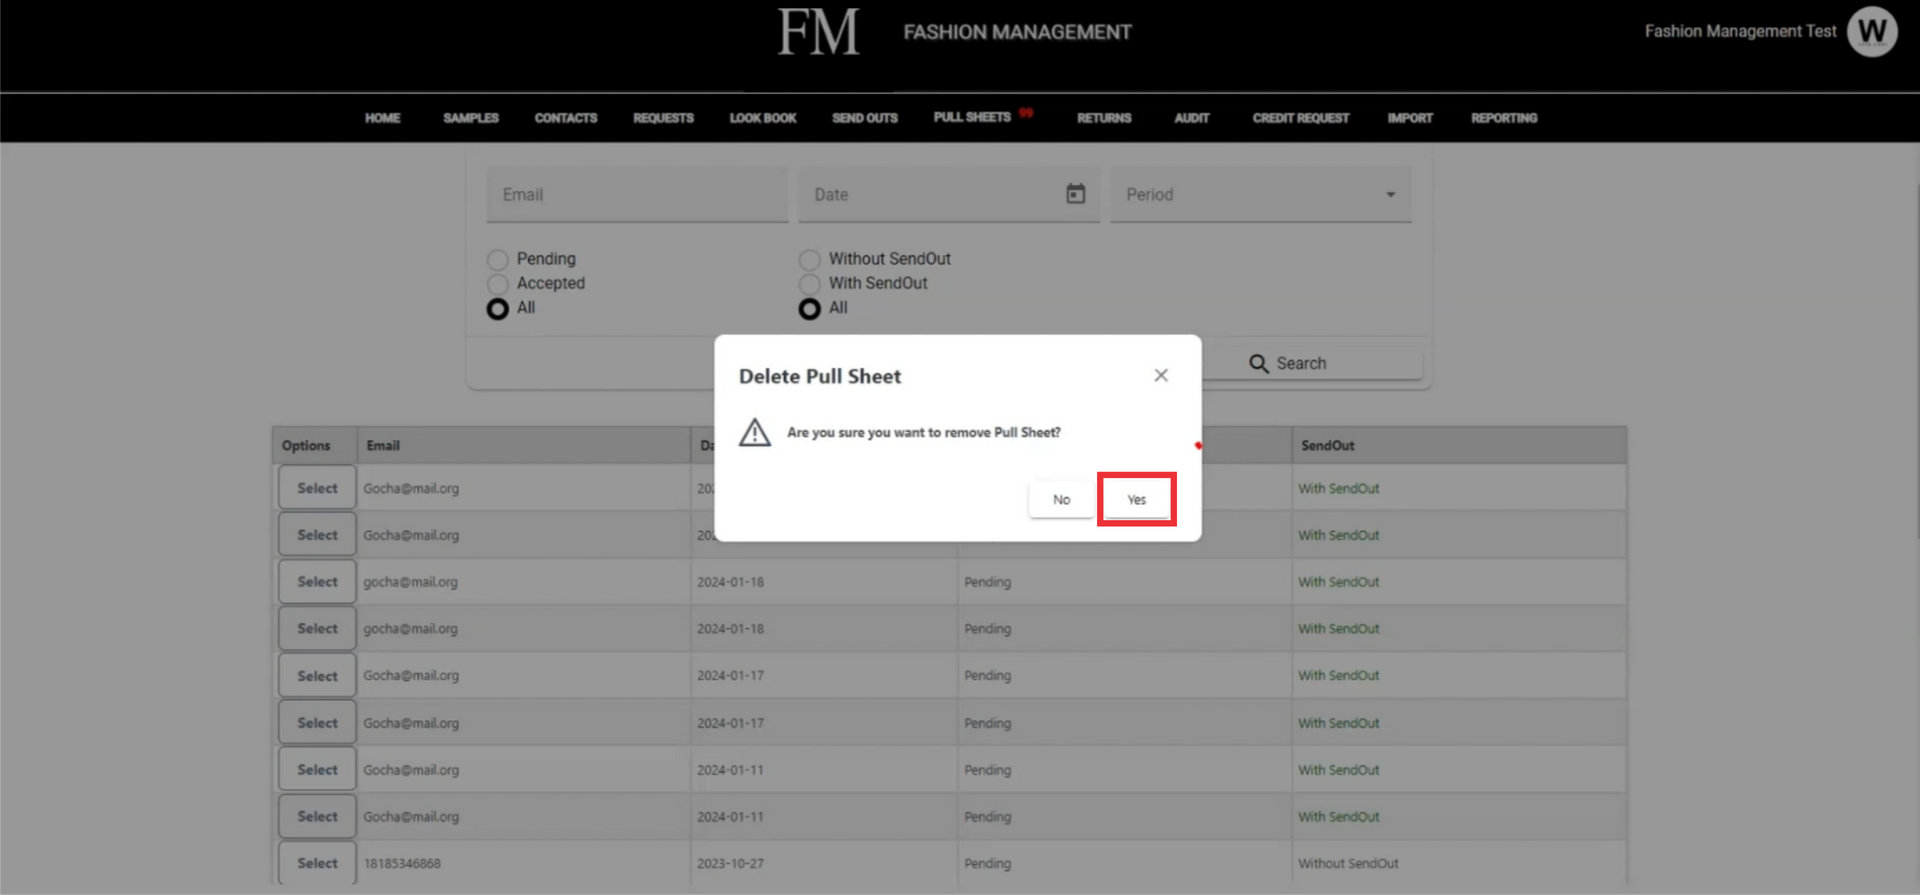
62. For the delete pull sheet documents with "Without Sendout" Status click the Select button.

63. Click the "Delete" button.

64. Click the "Yes" button ton confirm.
65. Delete confirmation message will appear at the middle of the screen.
