in send out managment section you can find all send outs you have created, where you can view them, make corrections and view send out documents.
Follow step by step instructions.
1. Click the management button to enter the application.

2. Click the "Send Outs" button to open the menu.

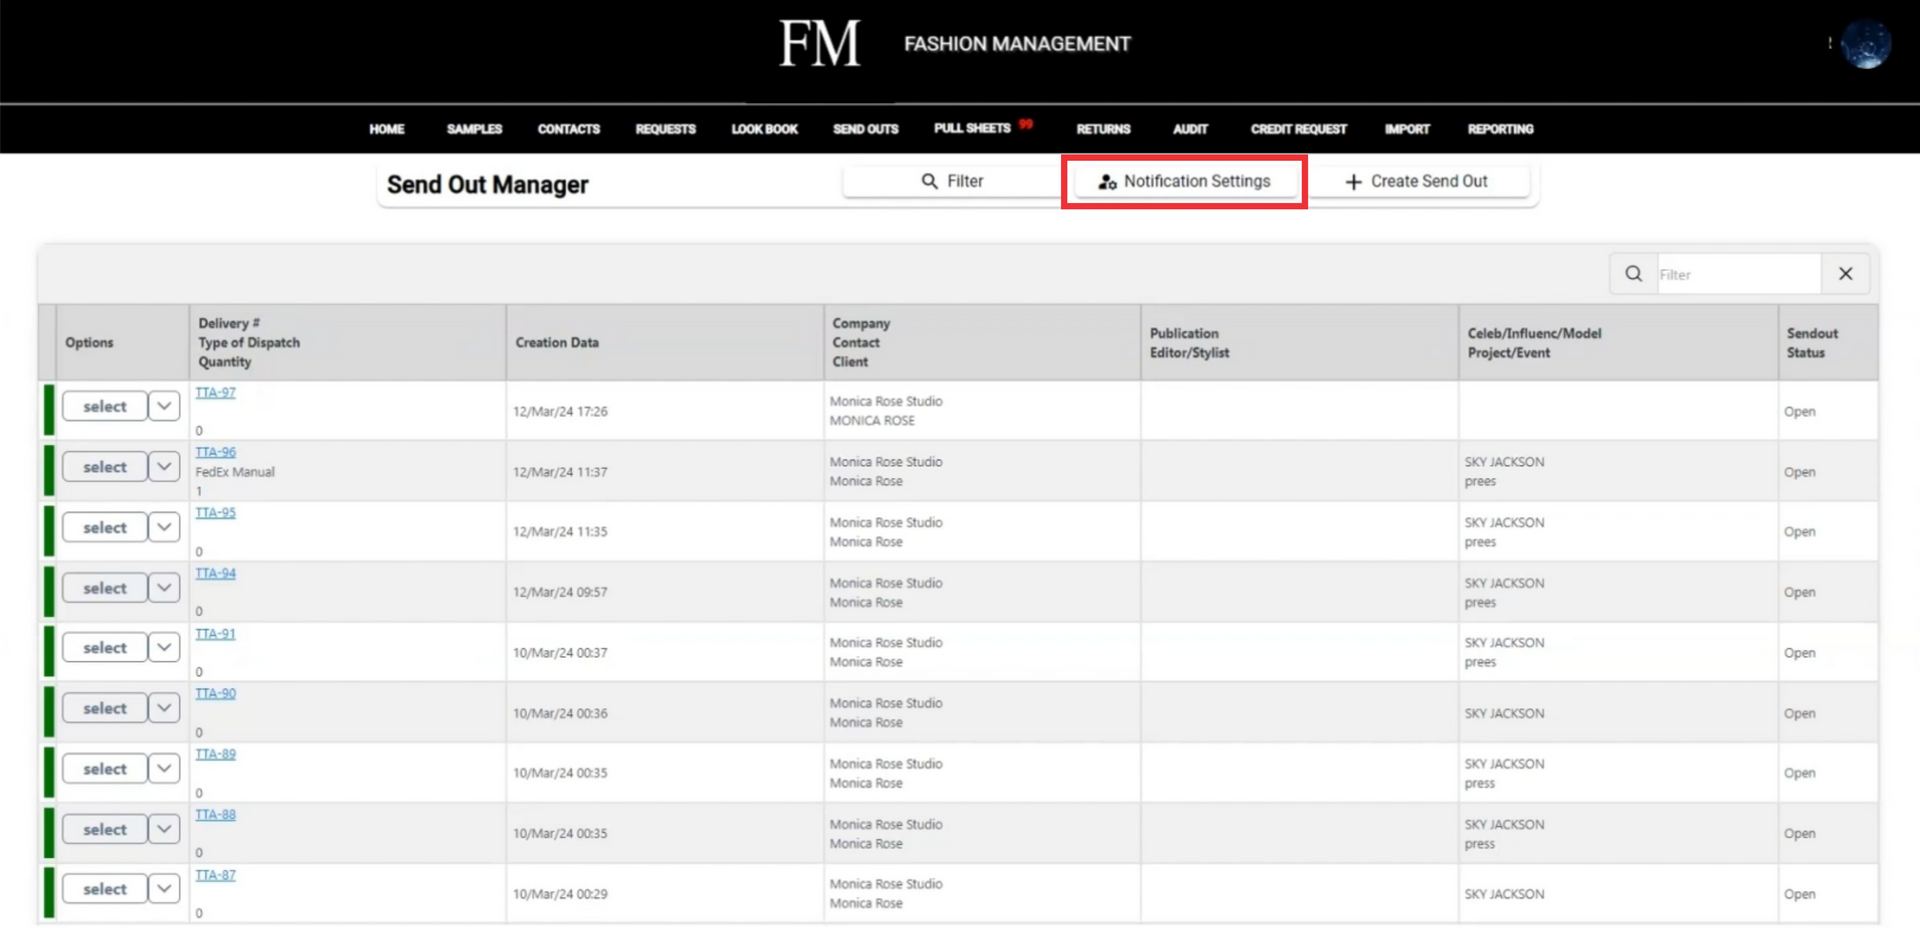
3. Click the "Send out Manager" button.

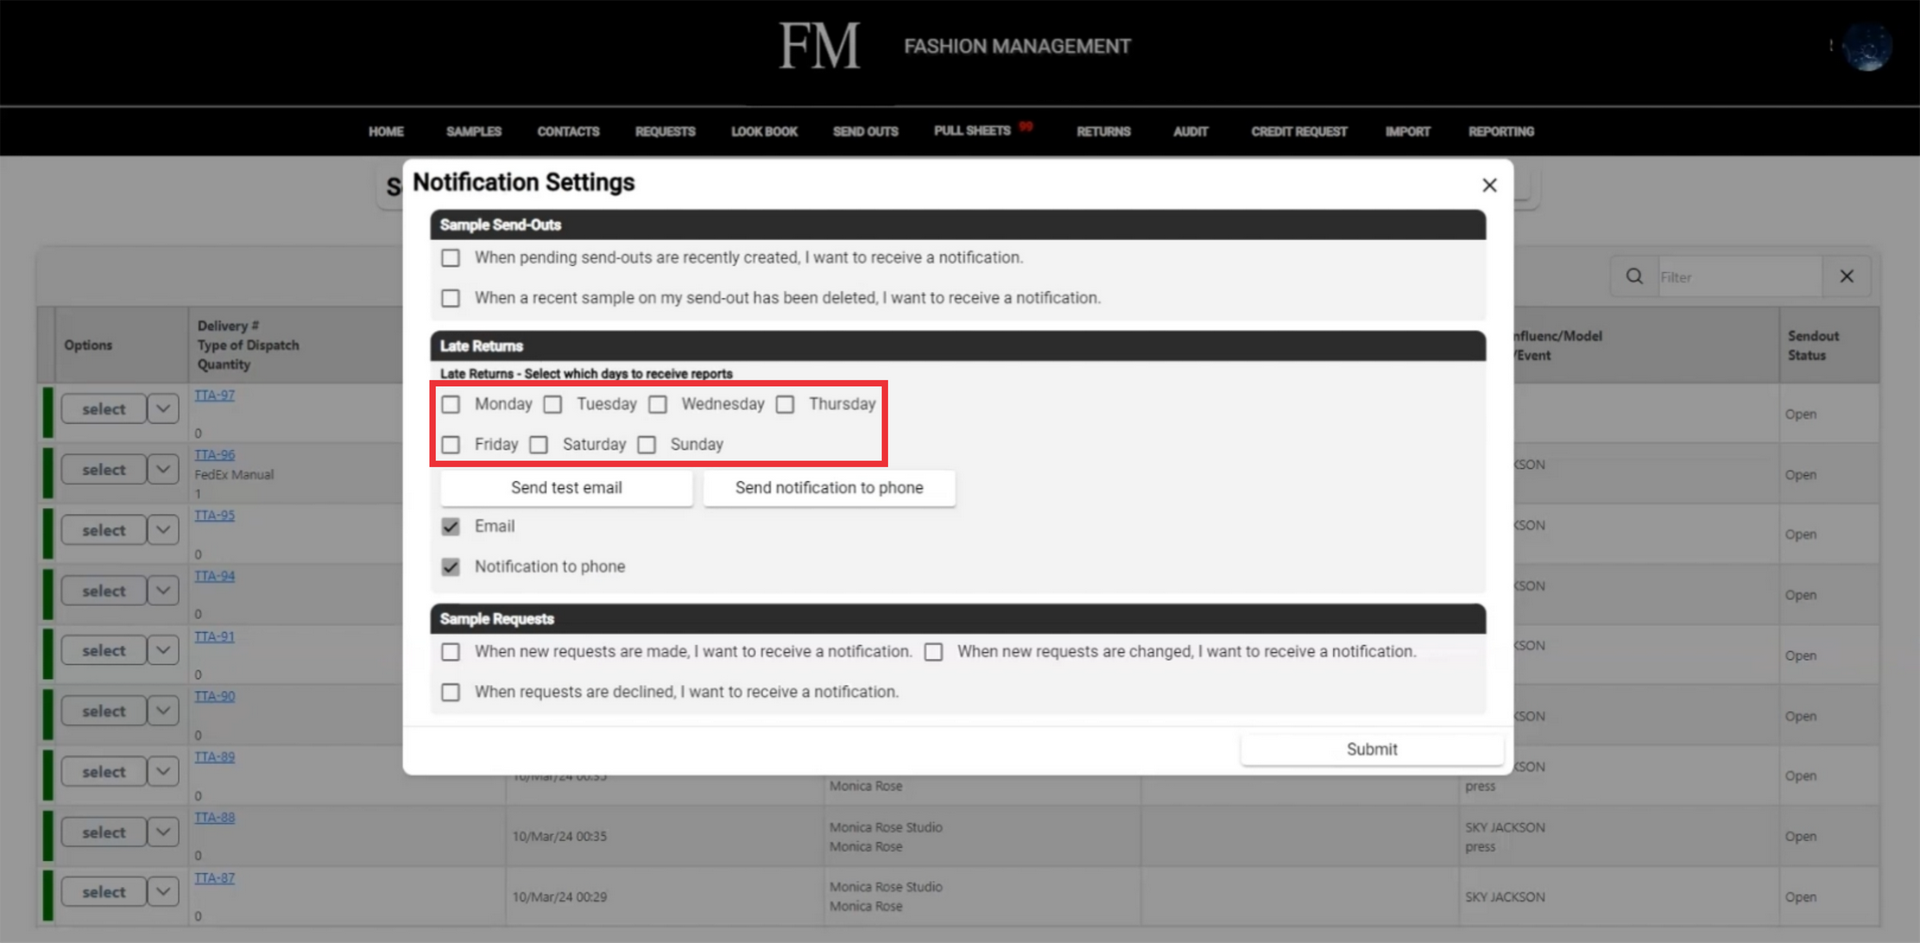
4. In send out manager section you have abbility to receive a notifications about changes made. Click the "Notification Settings" to make a changes.
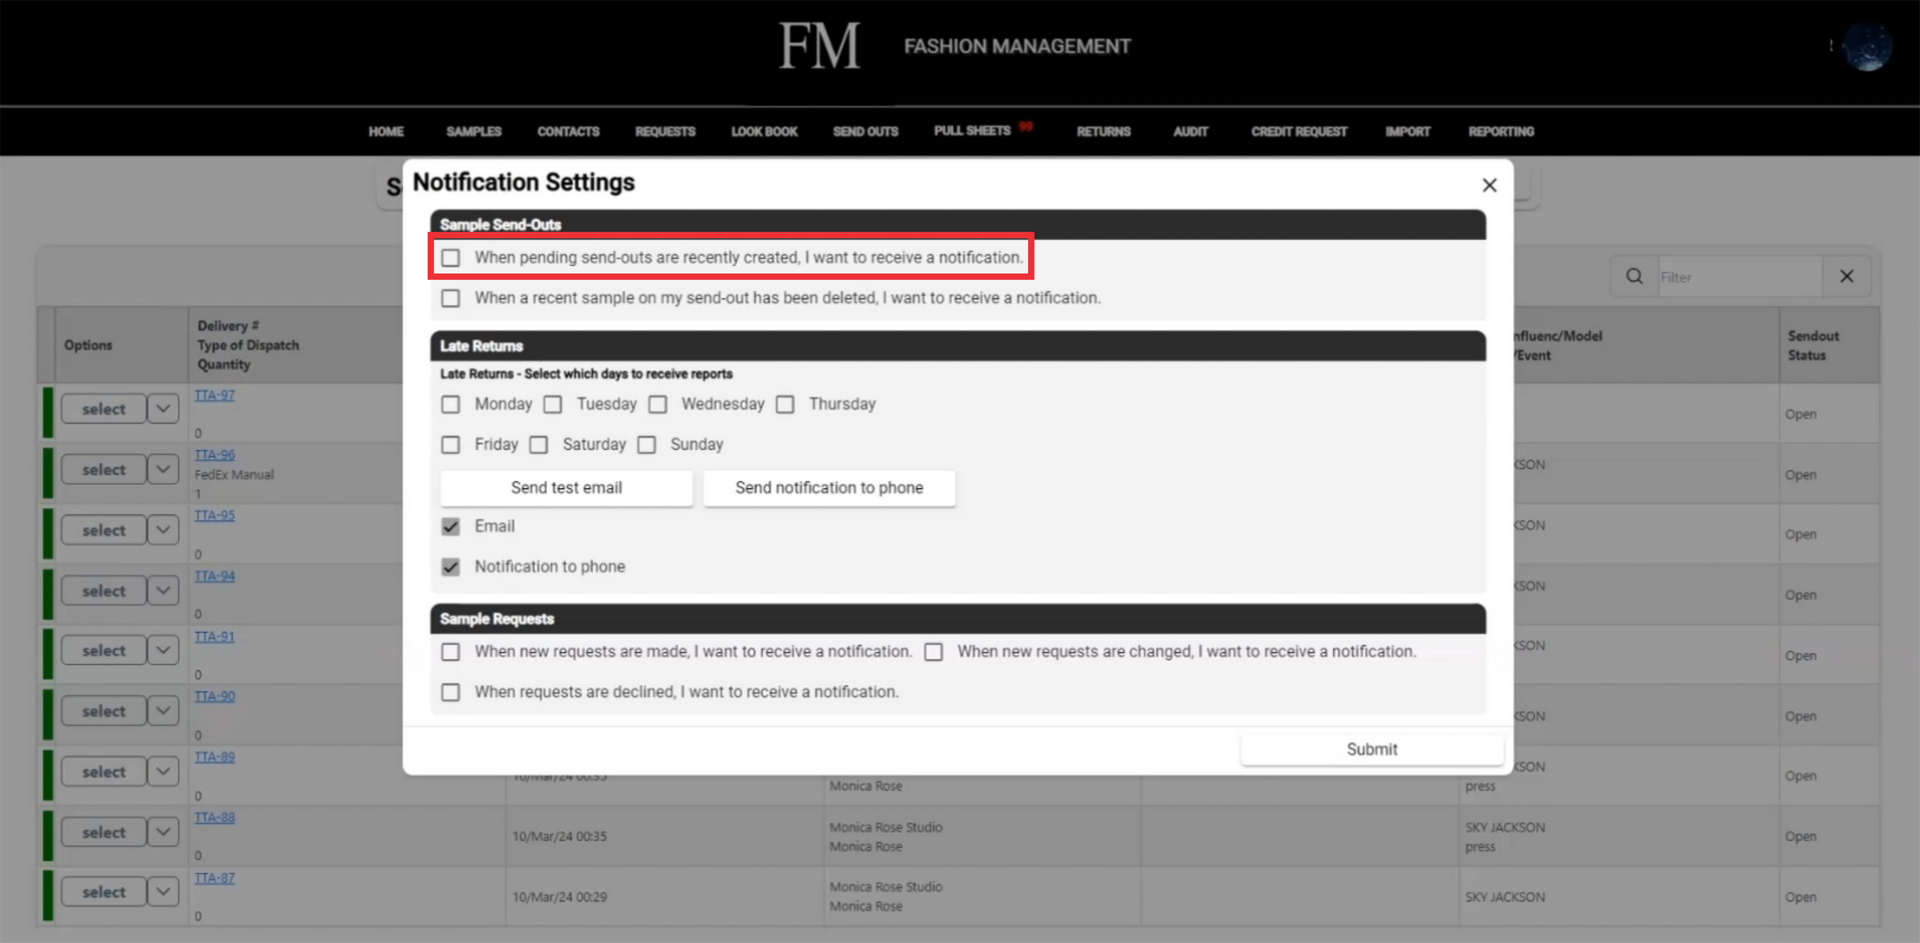
5. Mark this section if you want receive notification when pending send out are recently created.
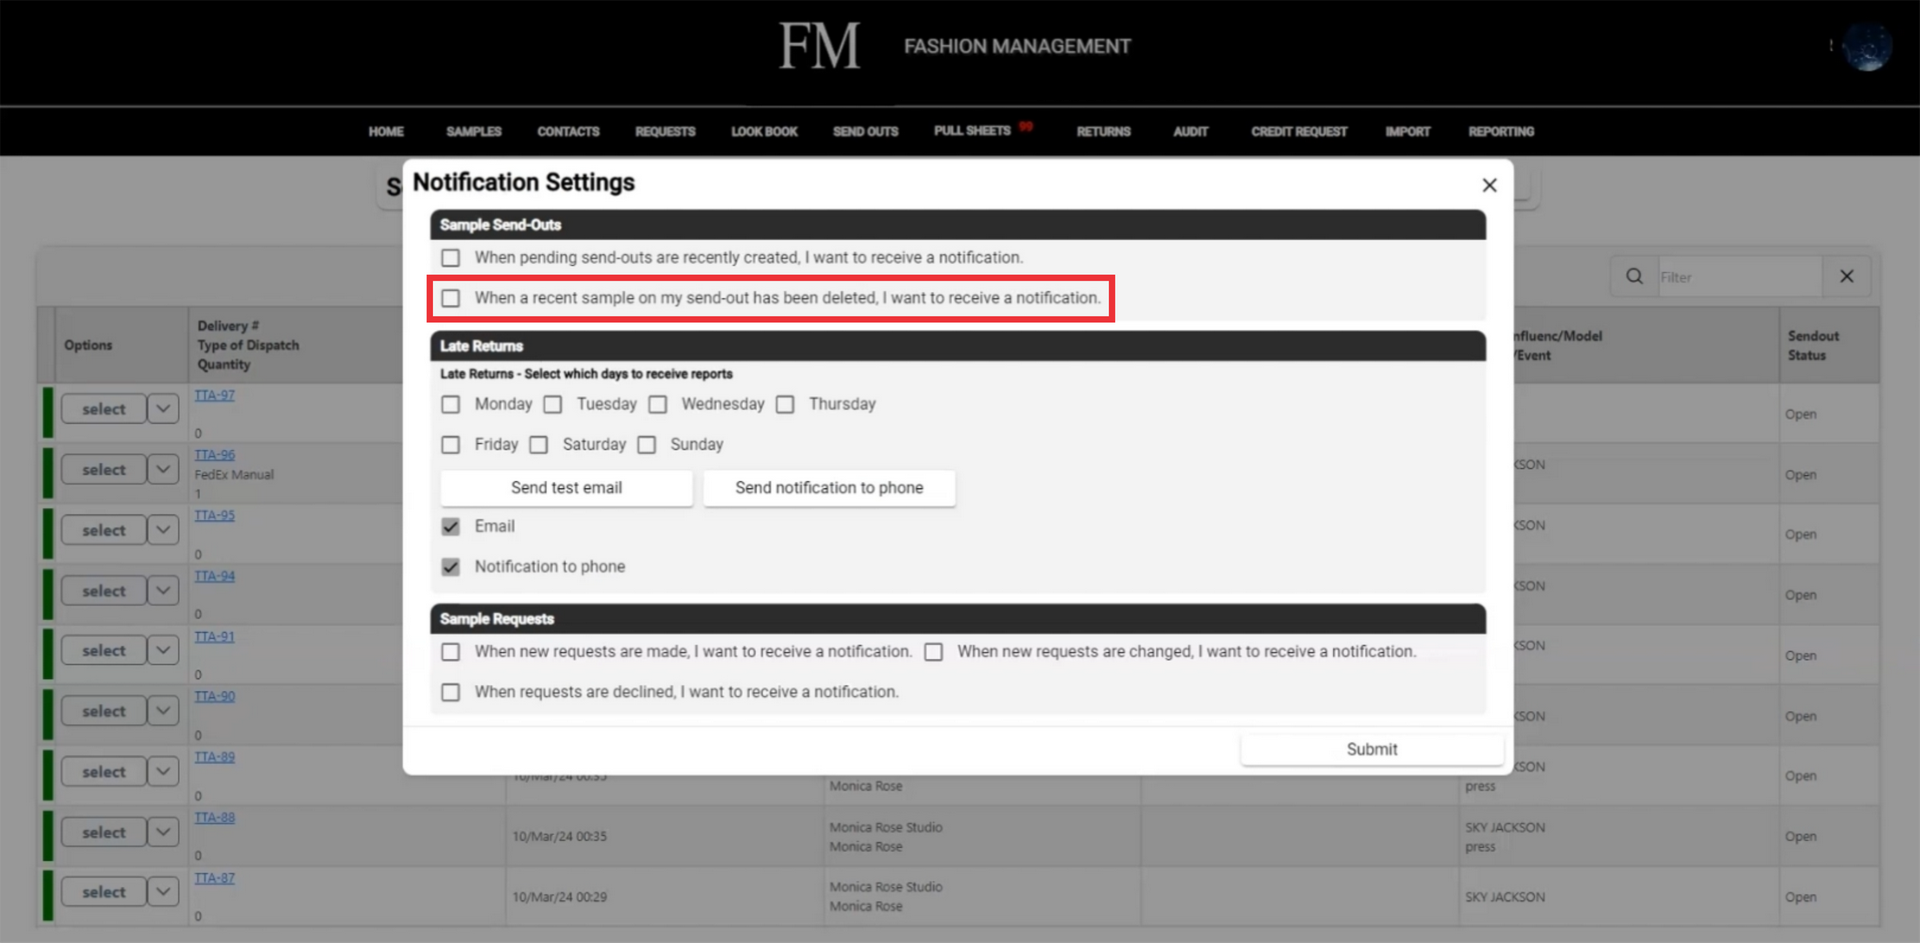
6. Mark this section if you want receive notification when recent sample on my send out has been deleted.
7. To select days nofity about late returned samples. Select days you want to receive report notifications.
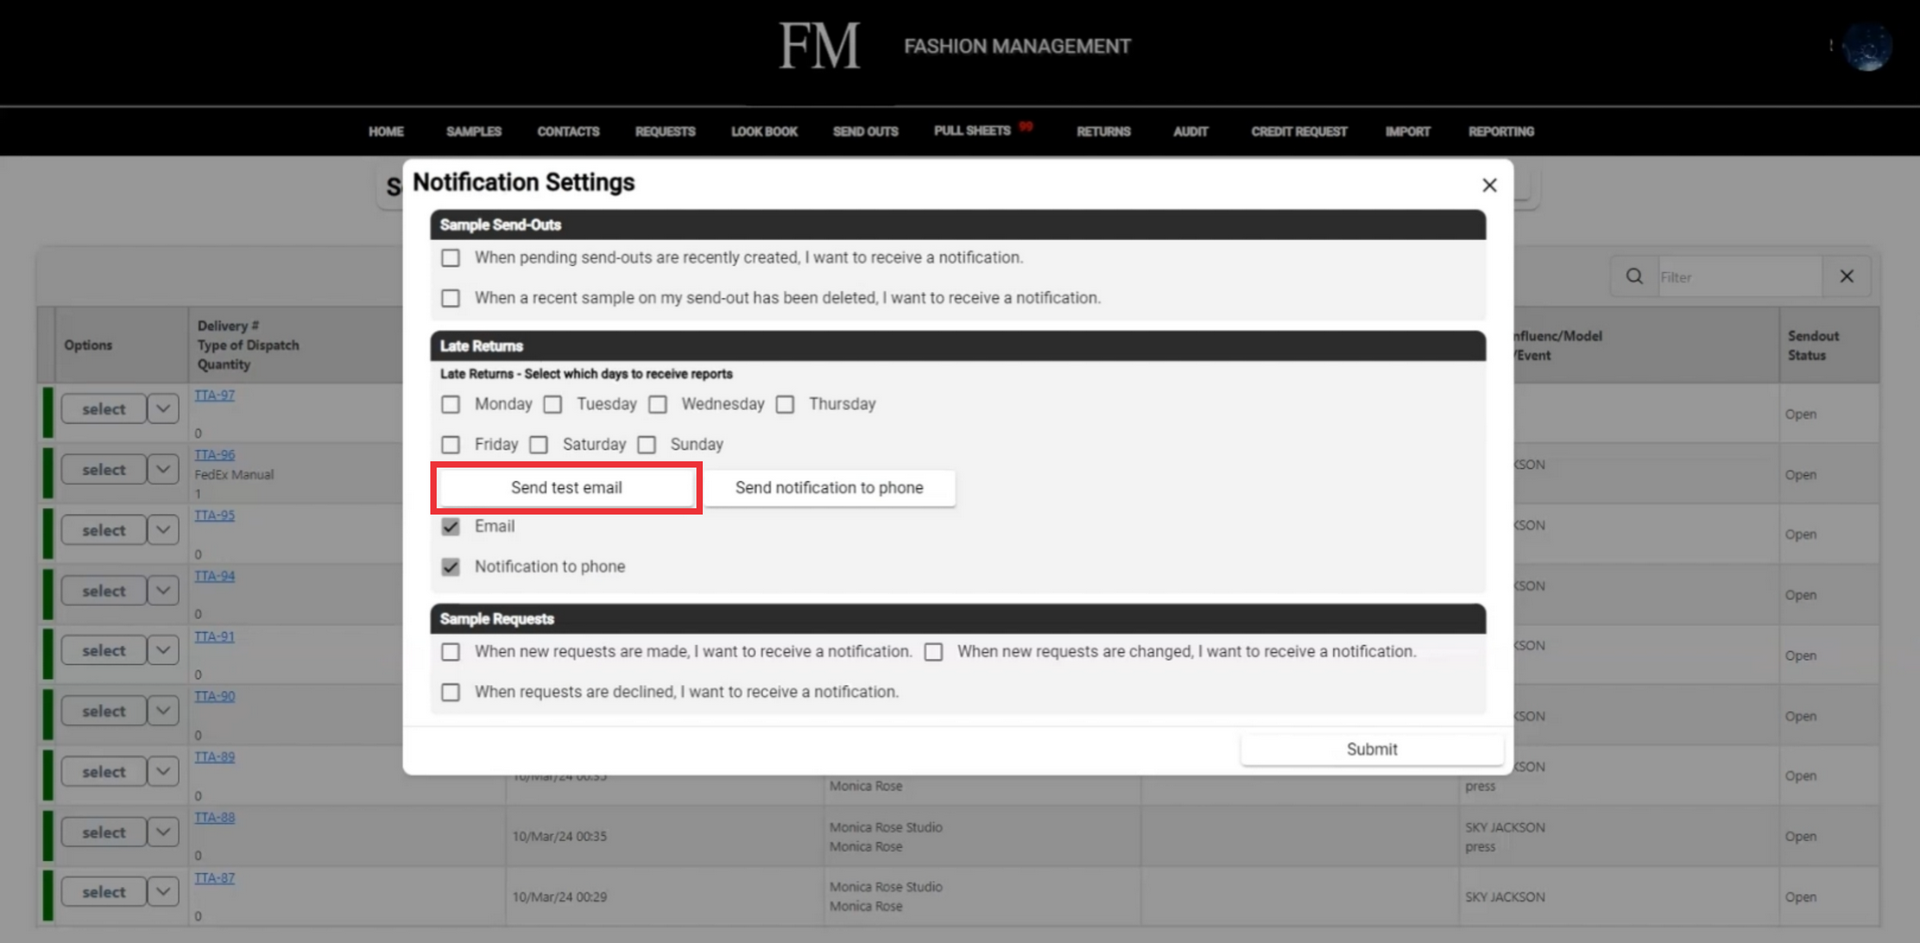
8. Click the "Send test email" to check notification incoming email properly working.
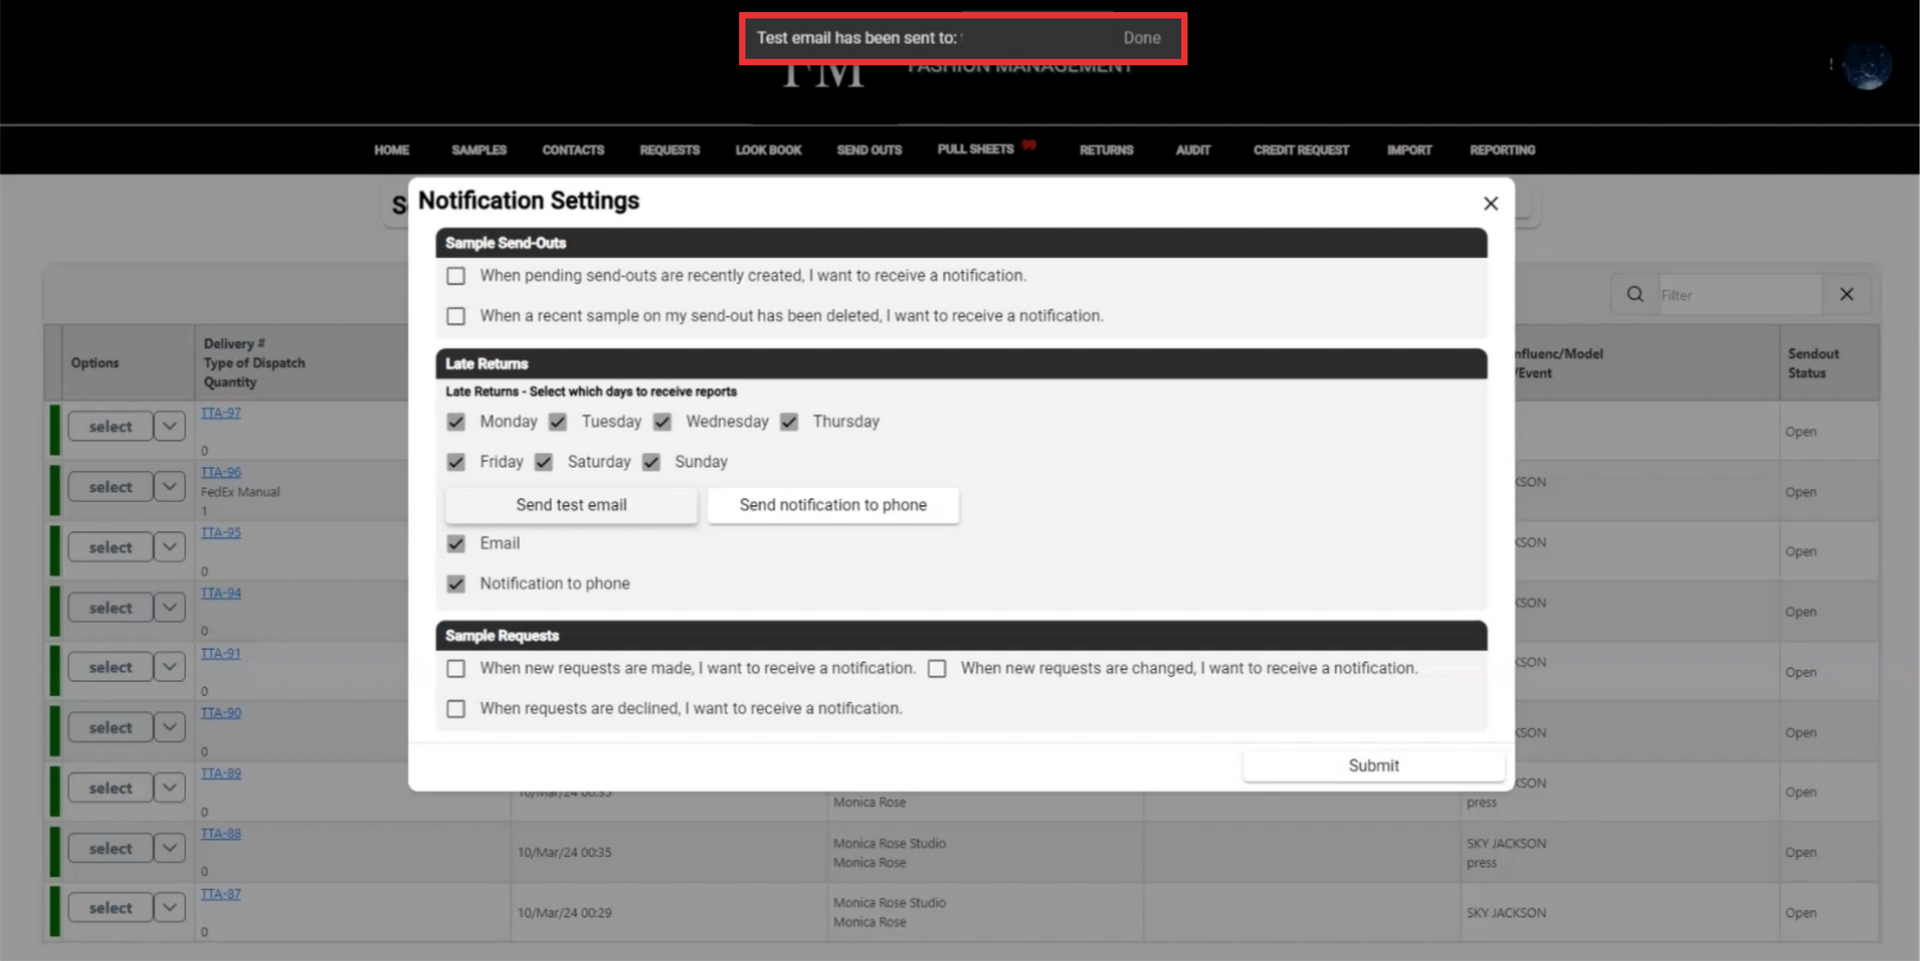
9. Message about succesible email message wil appear the middle upper screen.
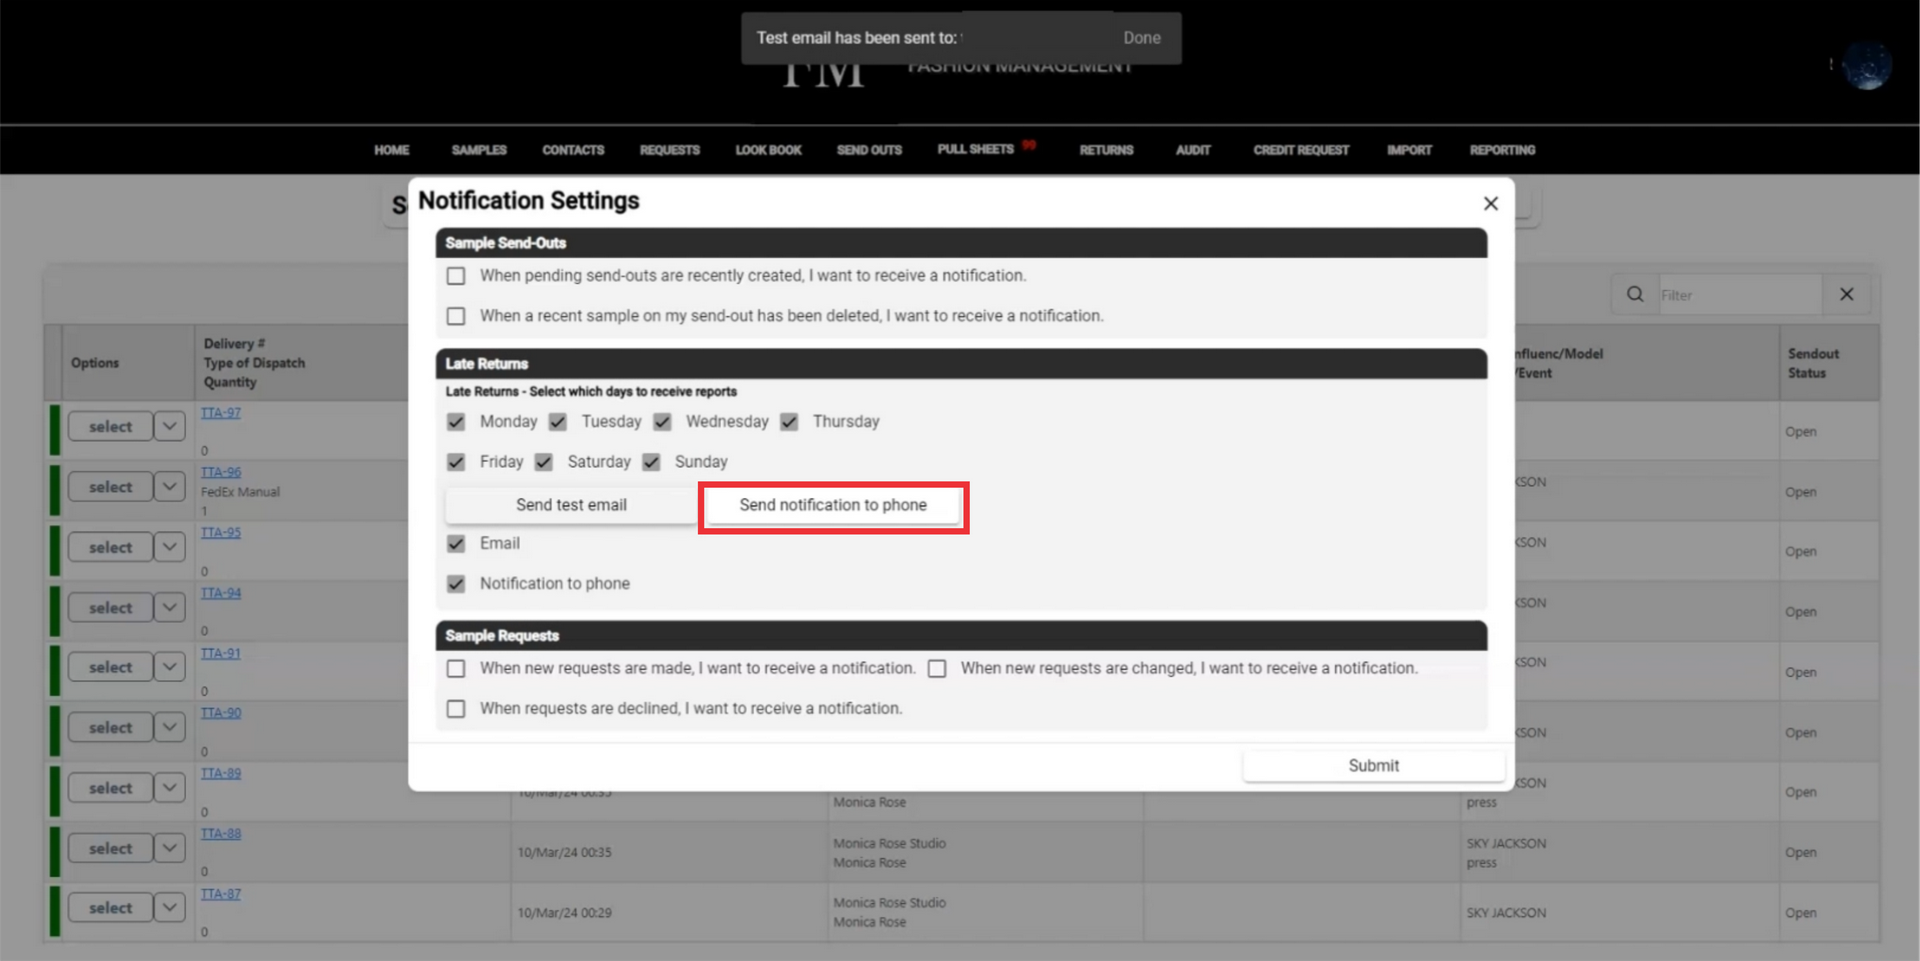
10. To Send a test notification to the phone click the "Send nofication to phone" button.
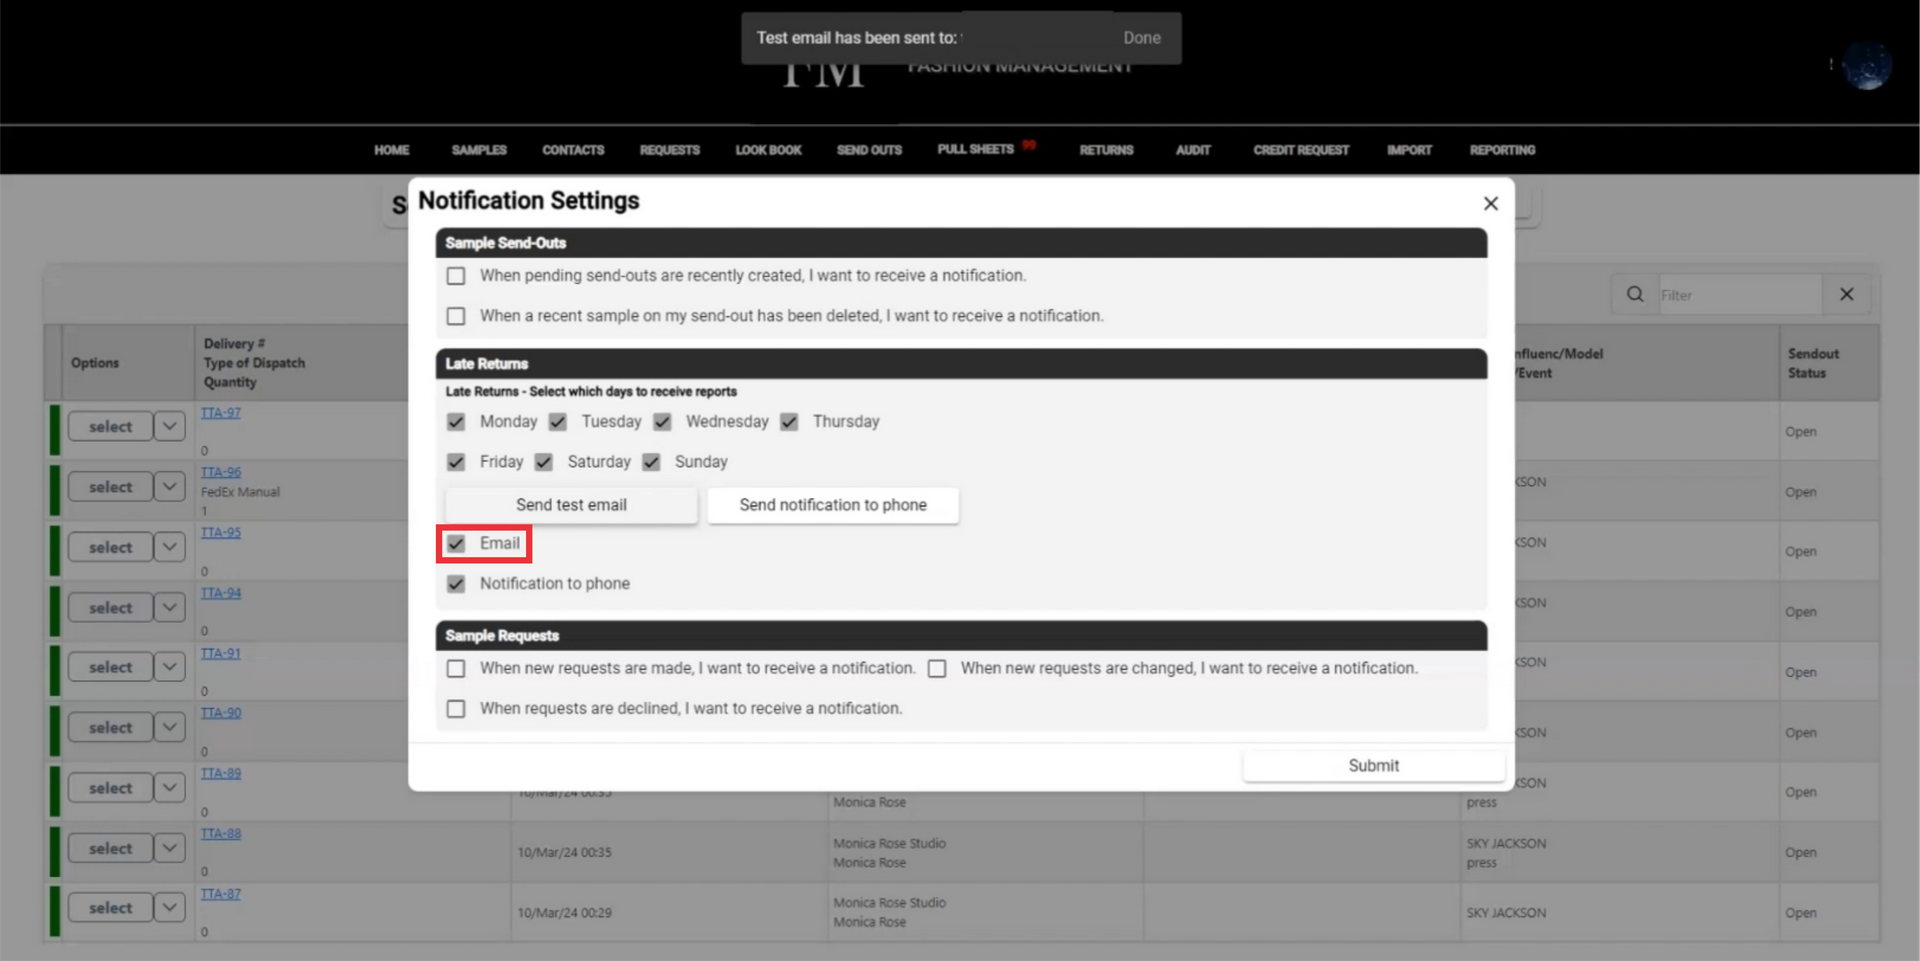
 11. If you dont want to receive email notifications, mark email chekbox button.
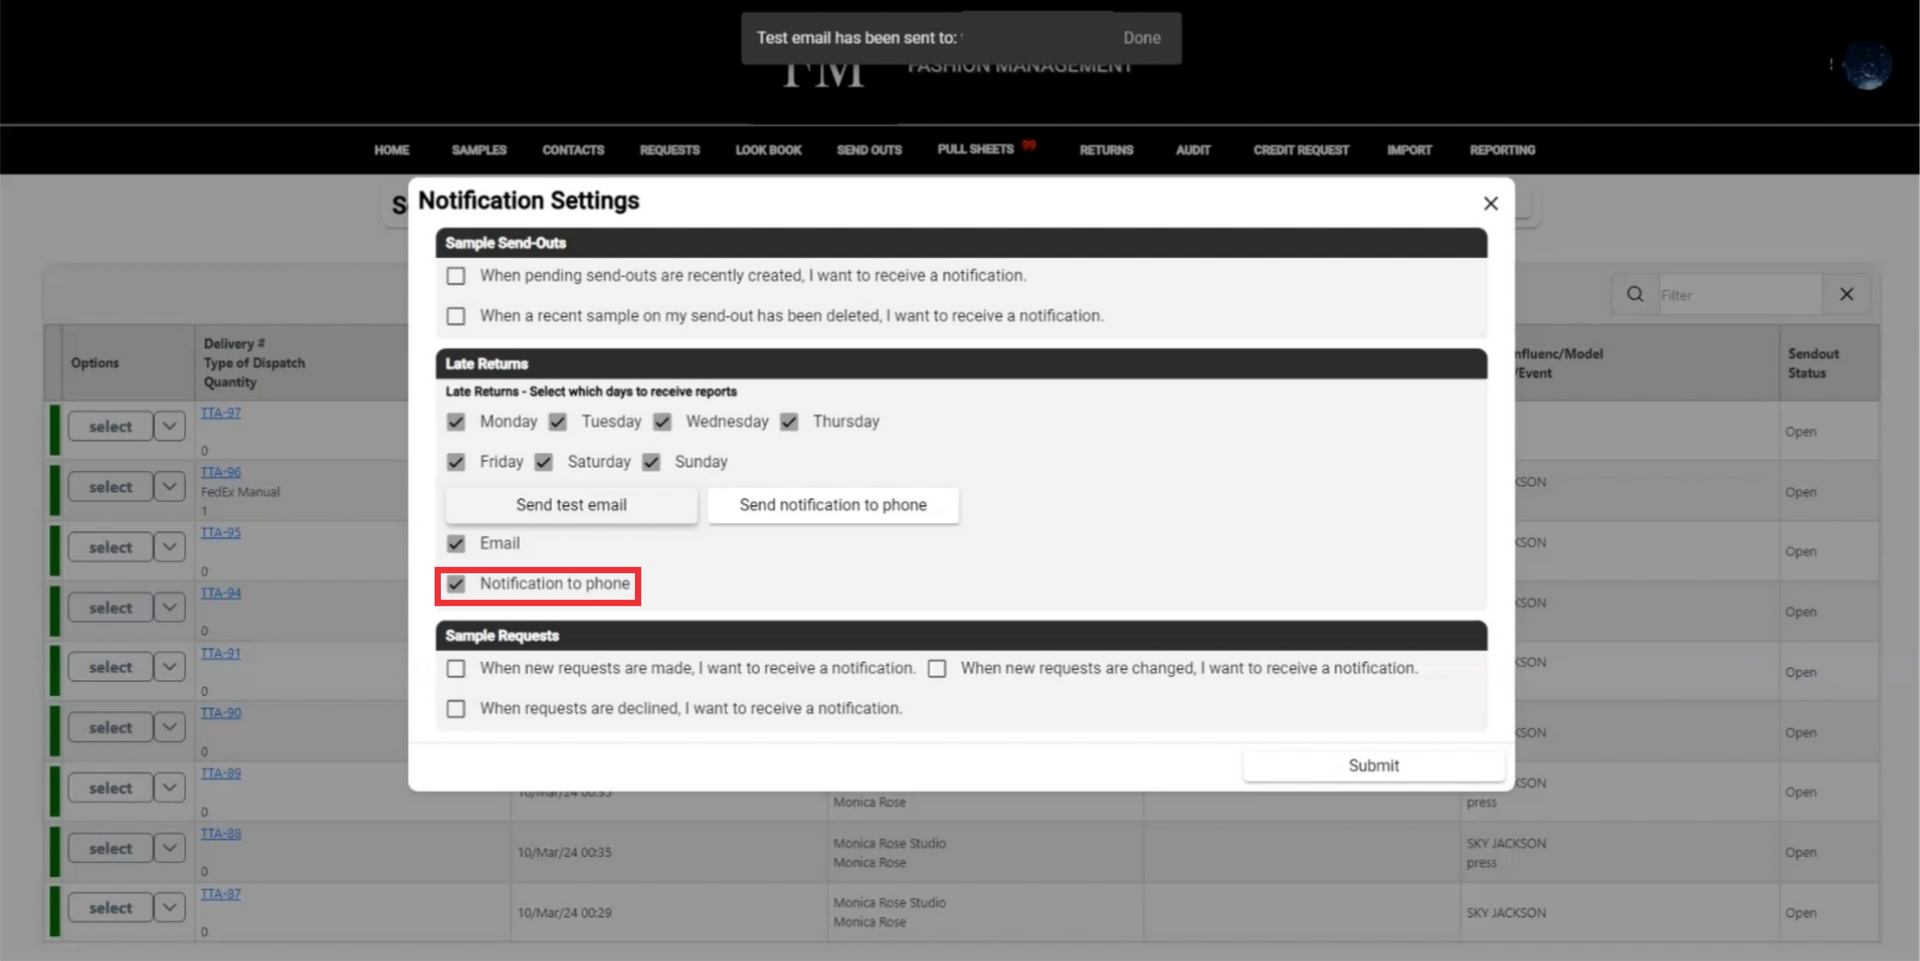
12. If you dont want to receive phone notifications, mark "Notification to phone"chekbox button.
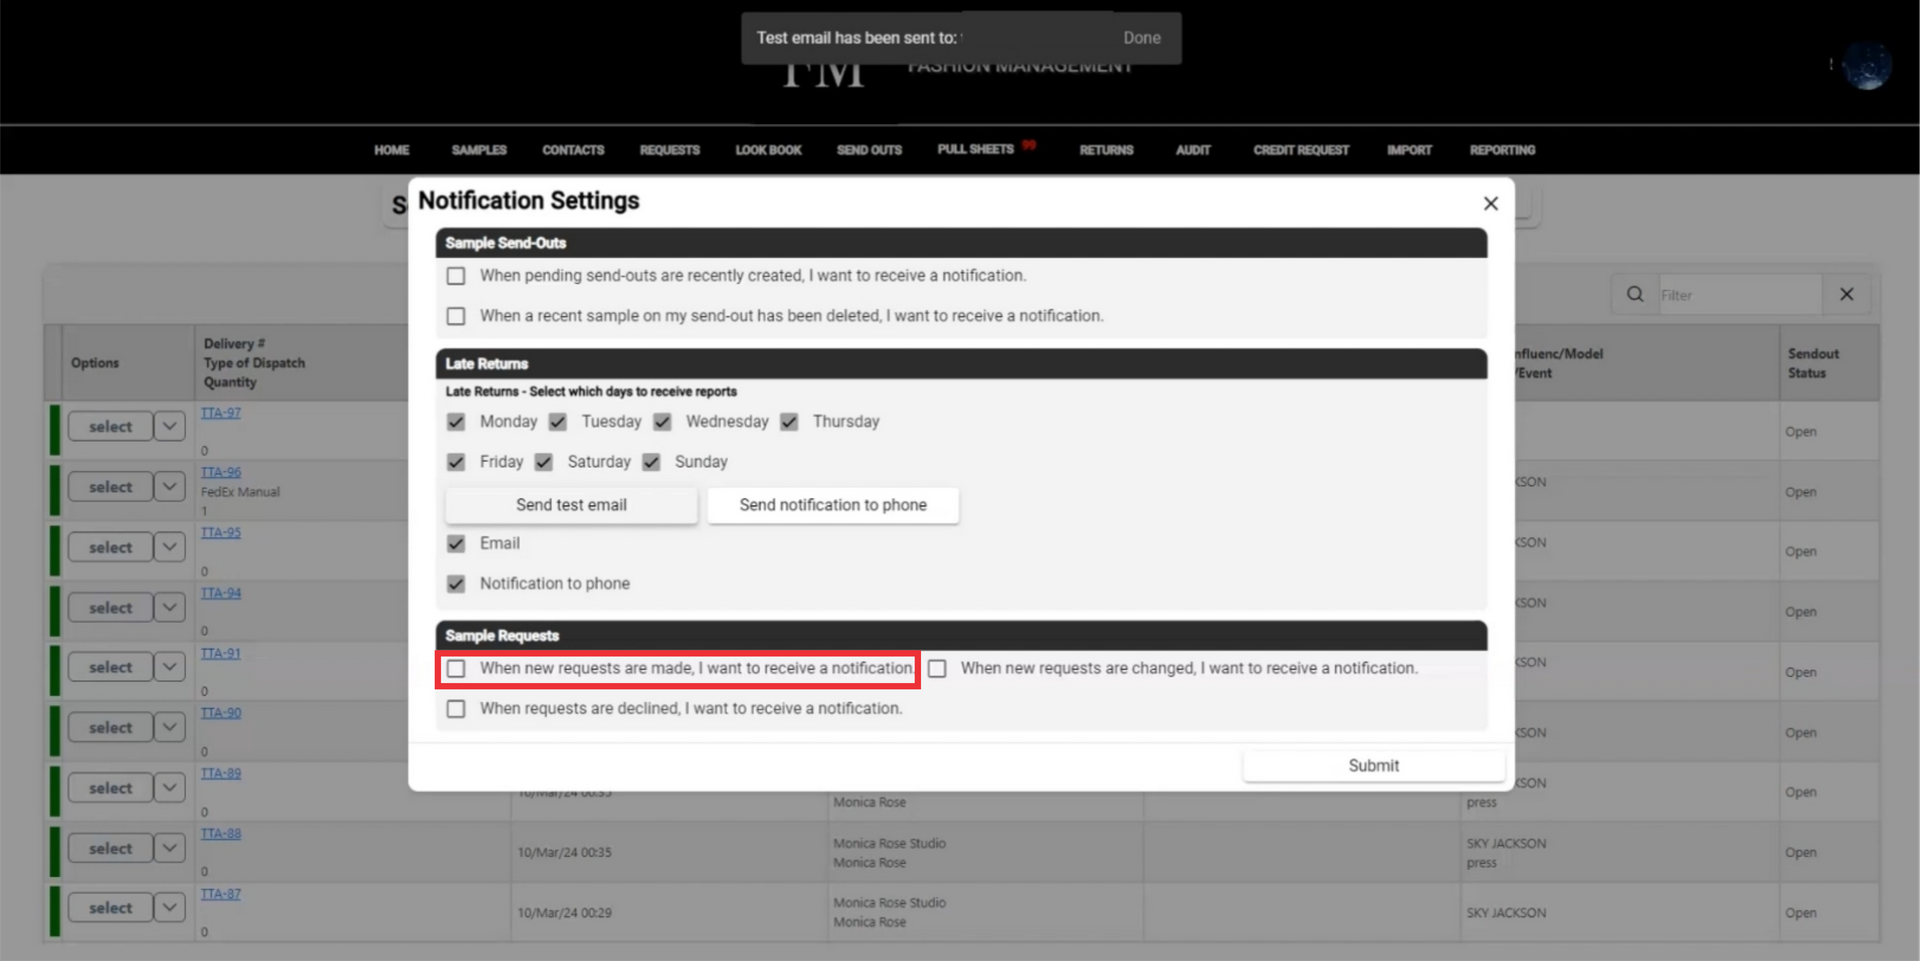
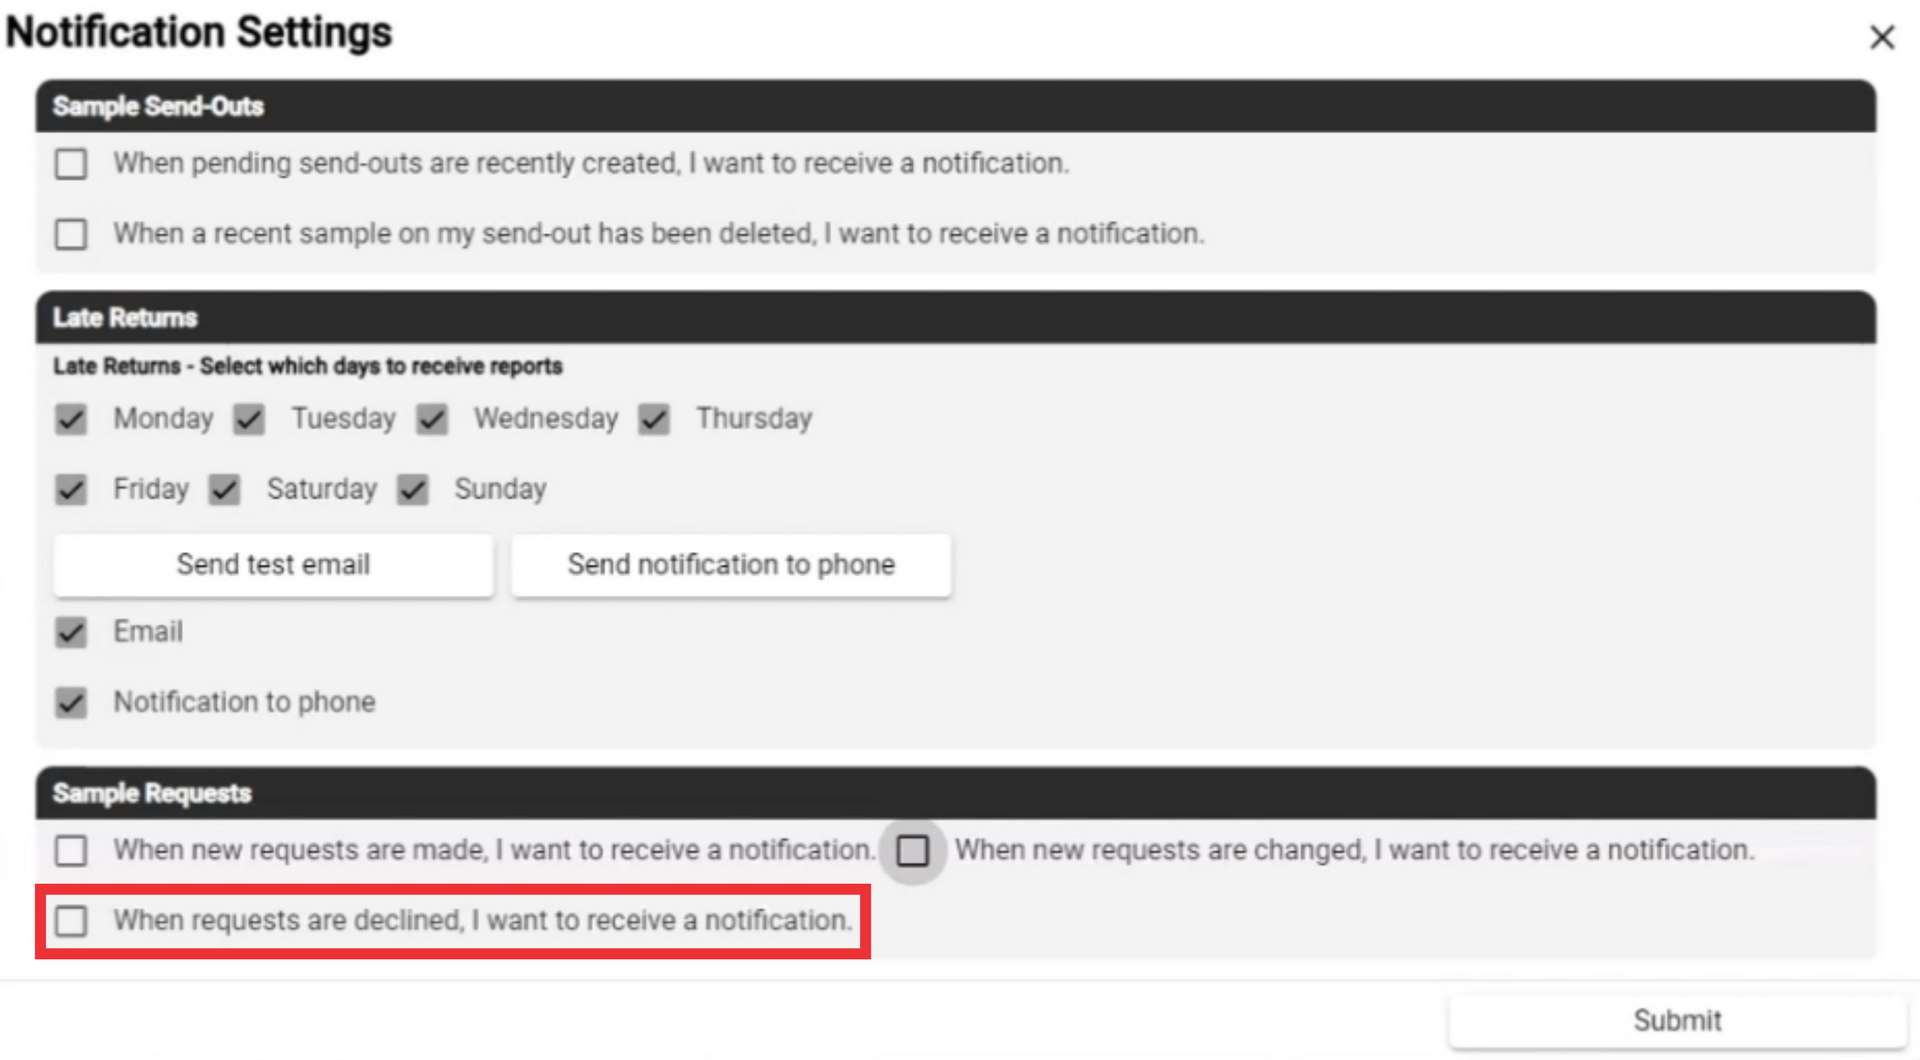
13. Mark the samlpe request checkbox if you want to receive a notification ehn request are declined.
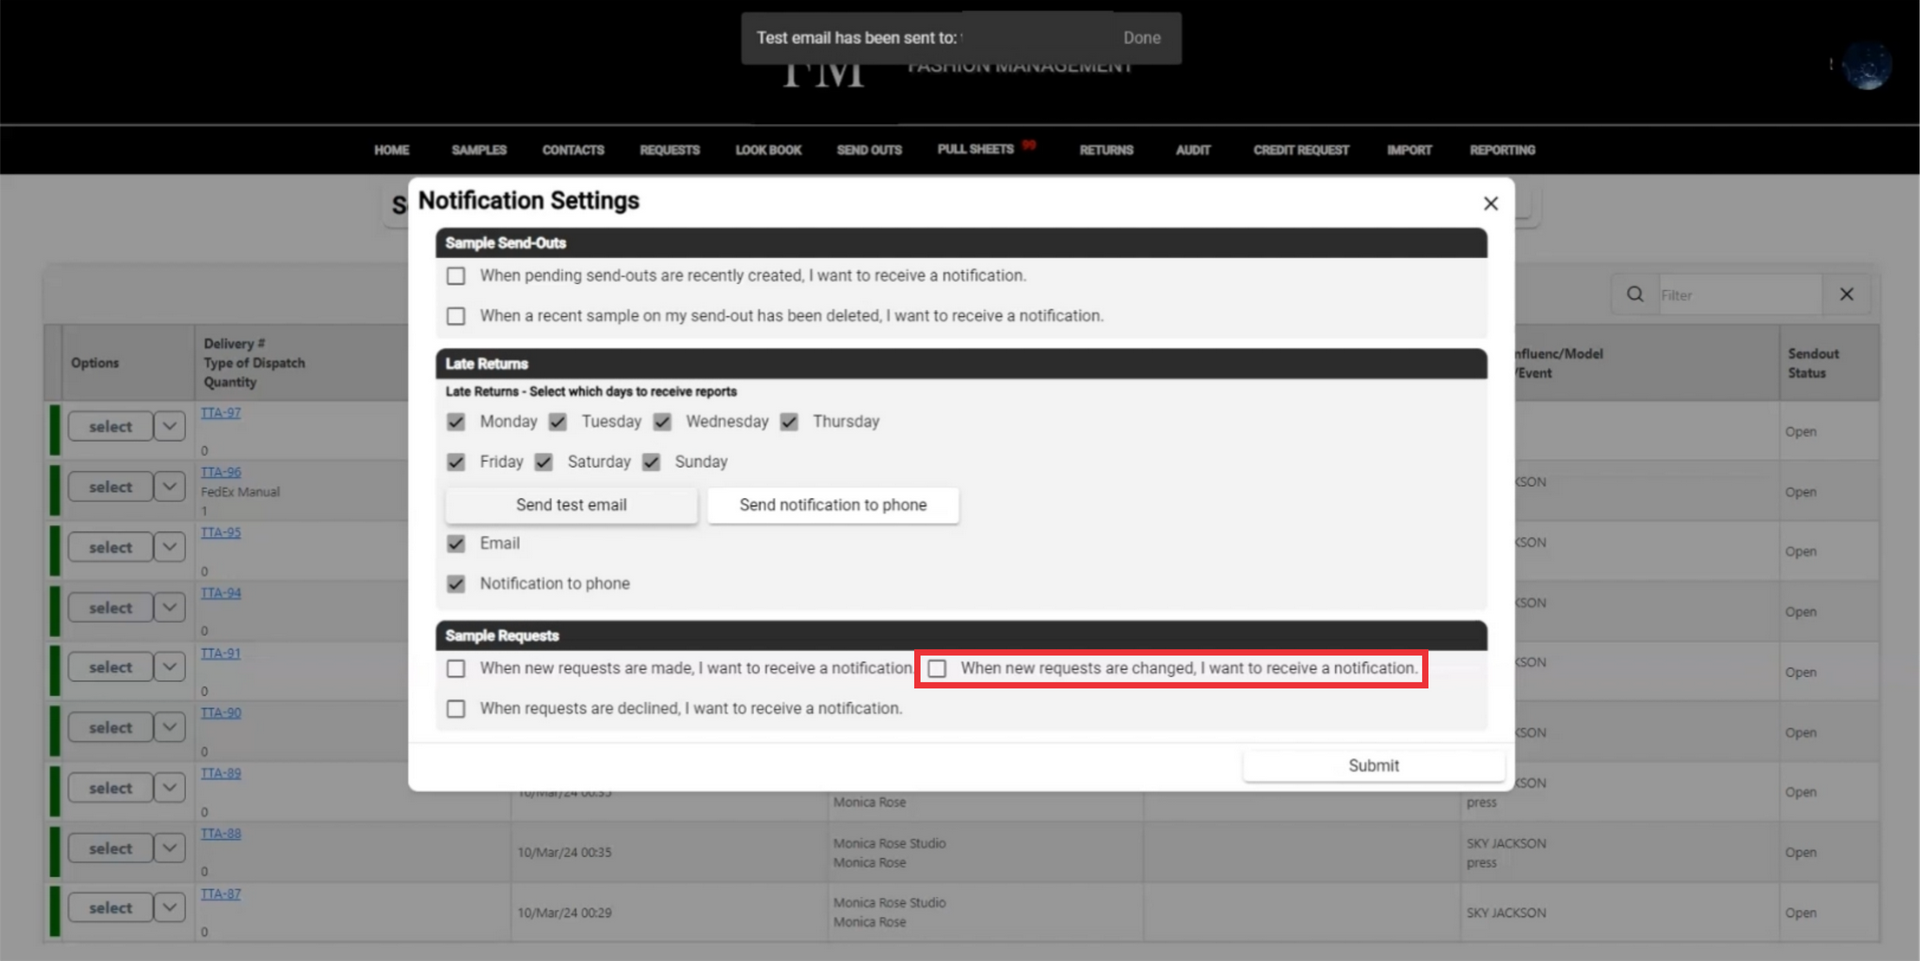
14. Mark the samlpe request checkbox if you want to receive notification when requests are changed.
15. Mark the samlpe request checkbox to receive notification when request are declined.
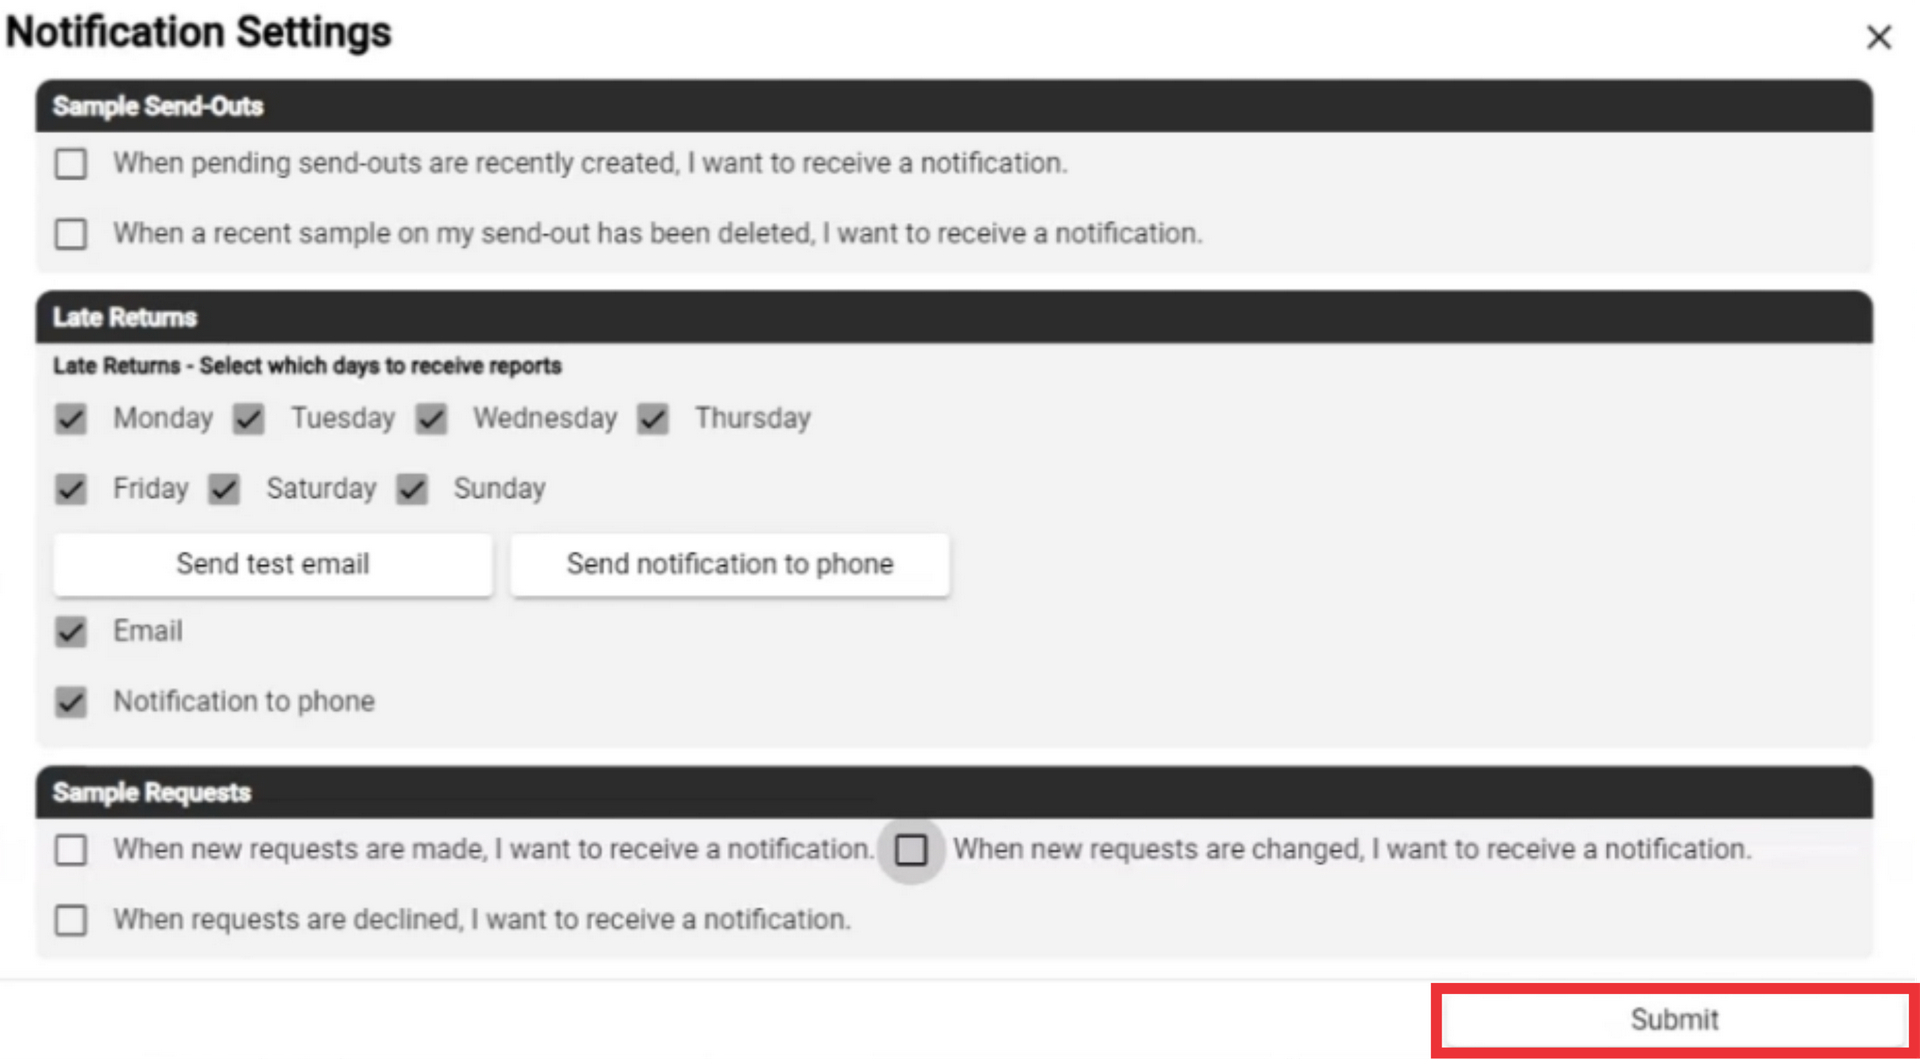
16. Click the "Submit" button to confirm and update notification settings.
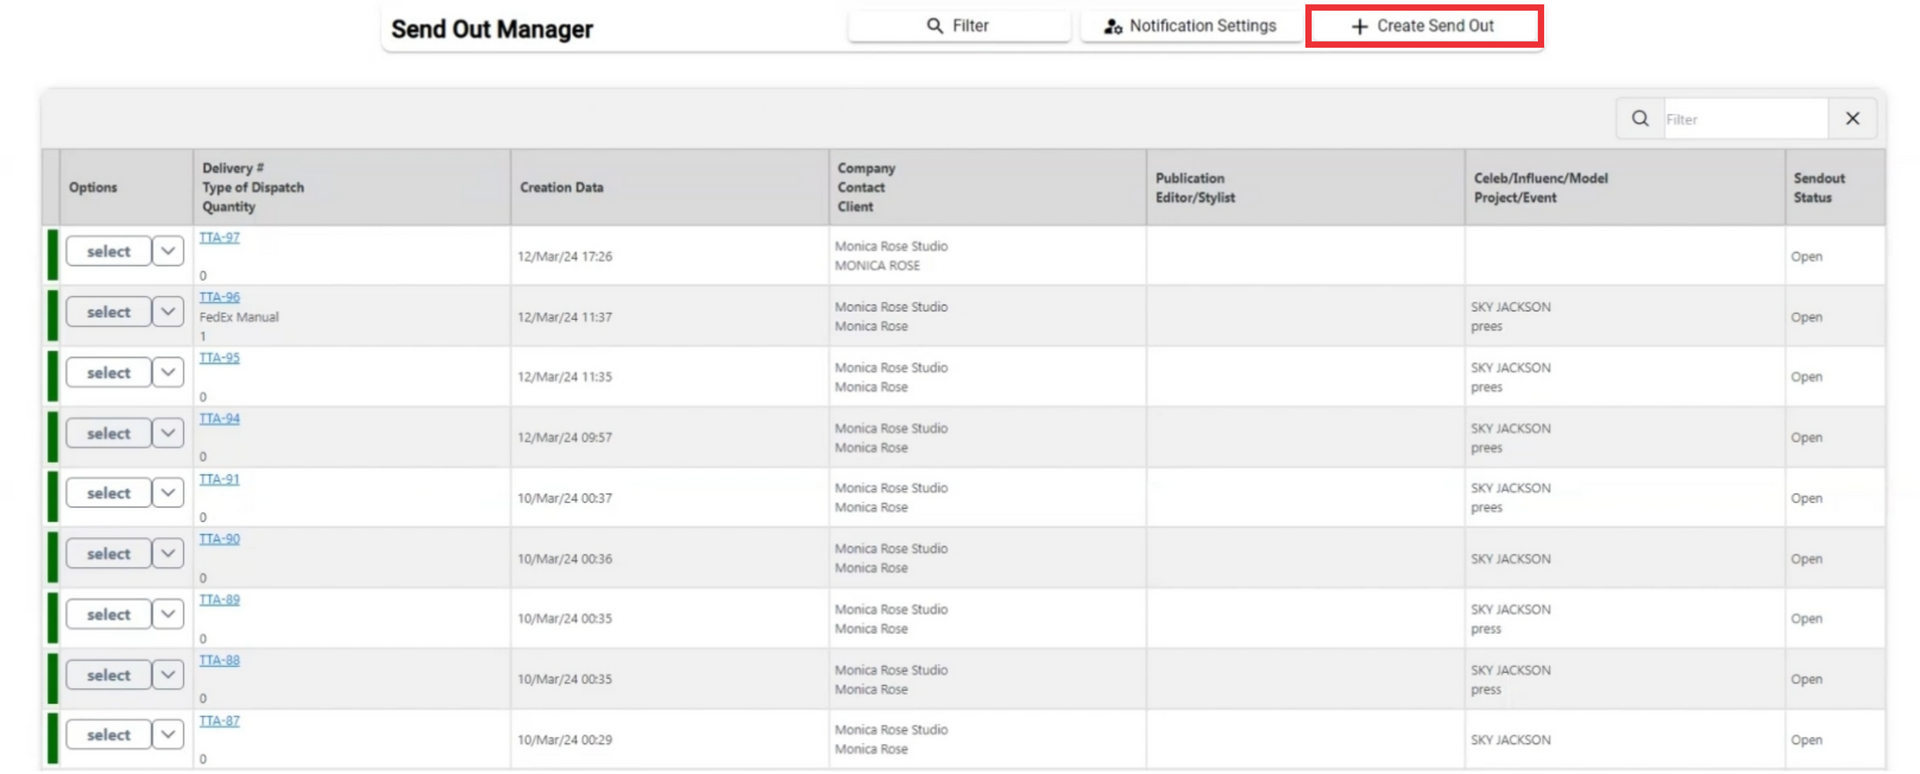
17. For the create new send out document click the "Create send out" button.
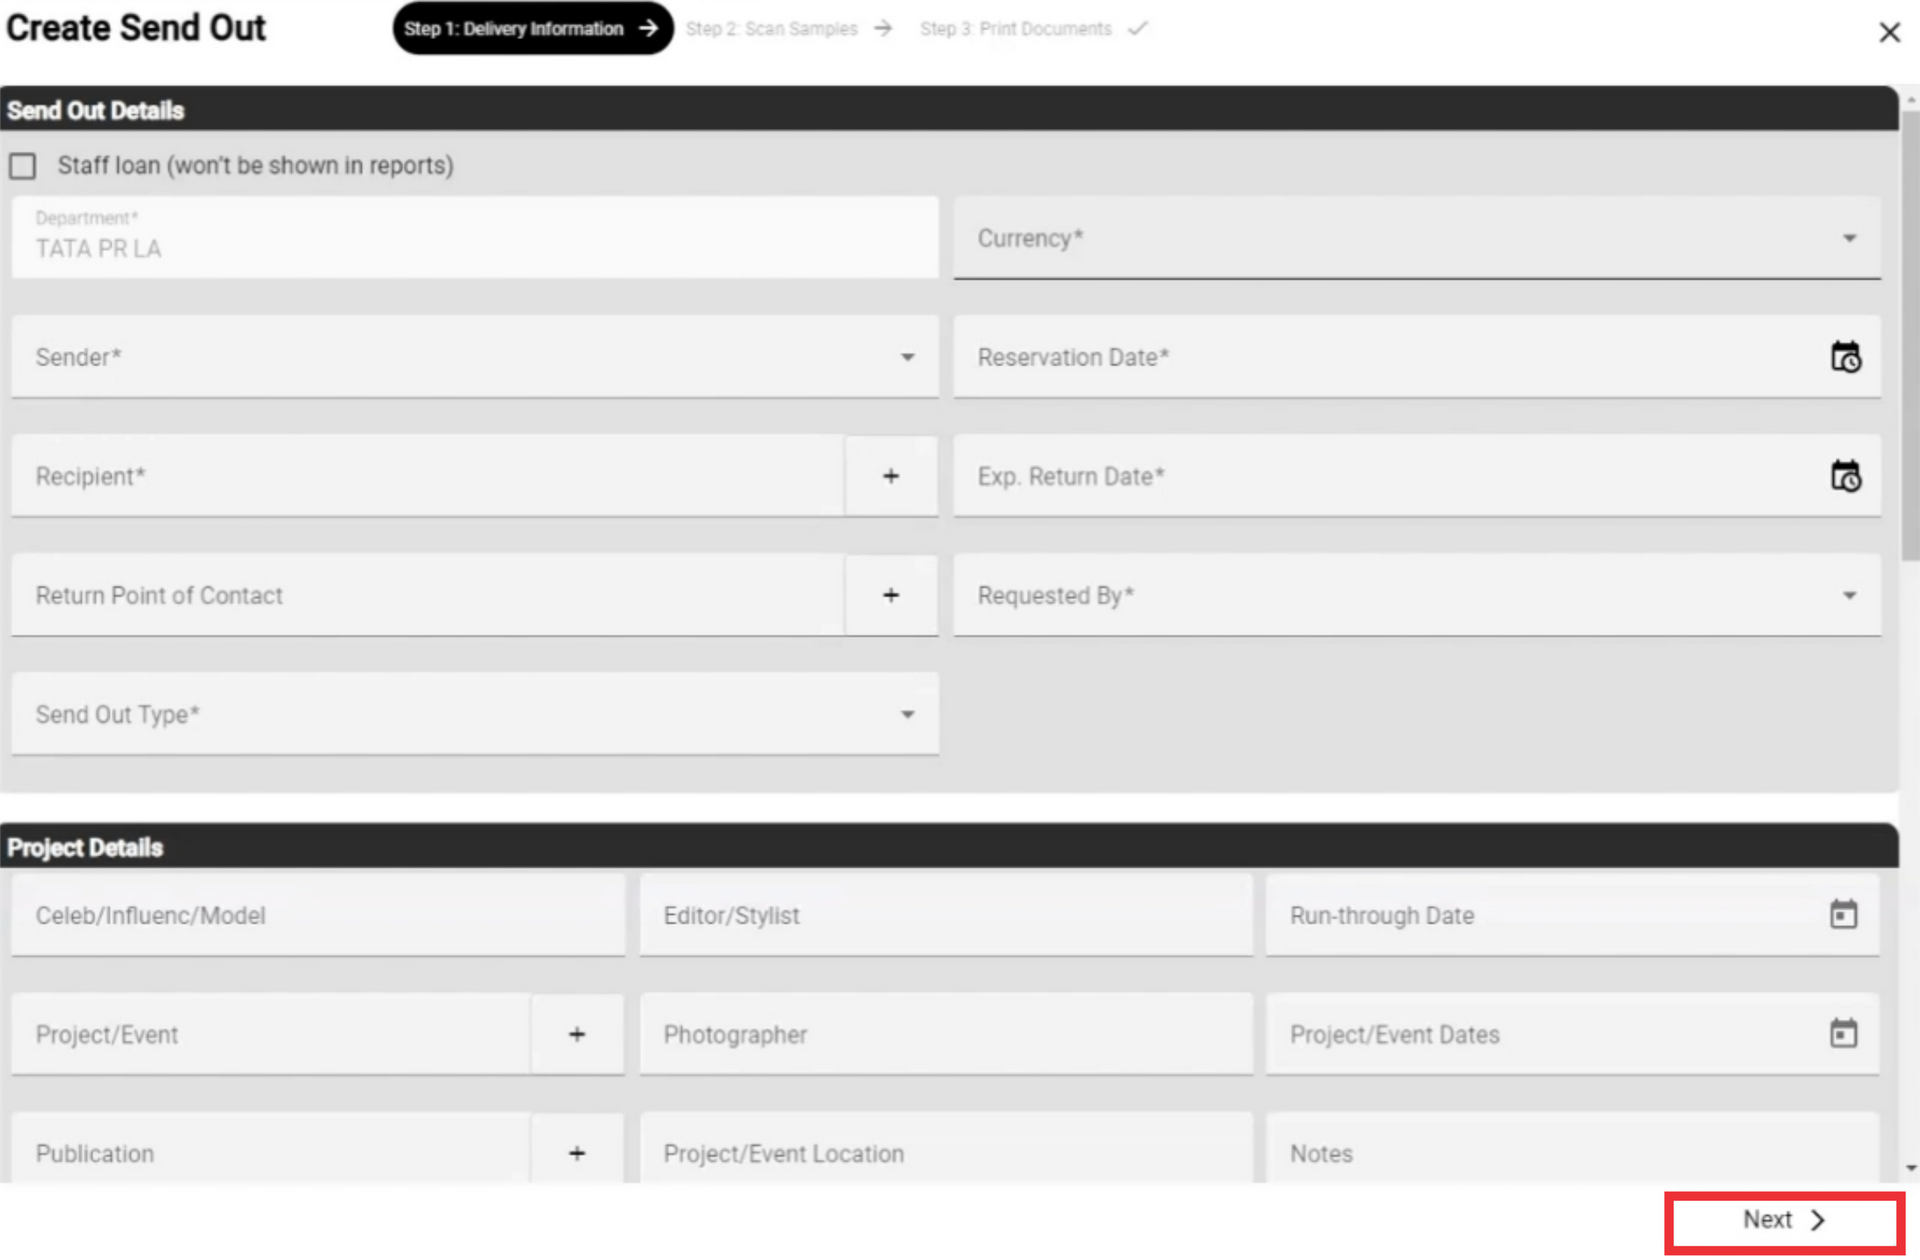
18. Fill all mandatory and optionaly other fields/ All mandatory fields are marked with asteriks * After filling field click the next button.
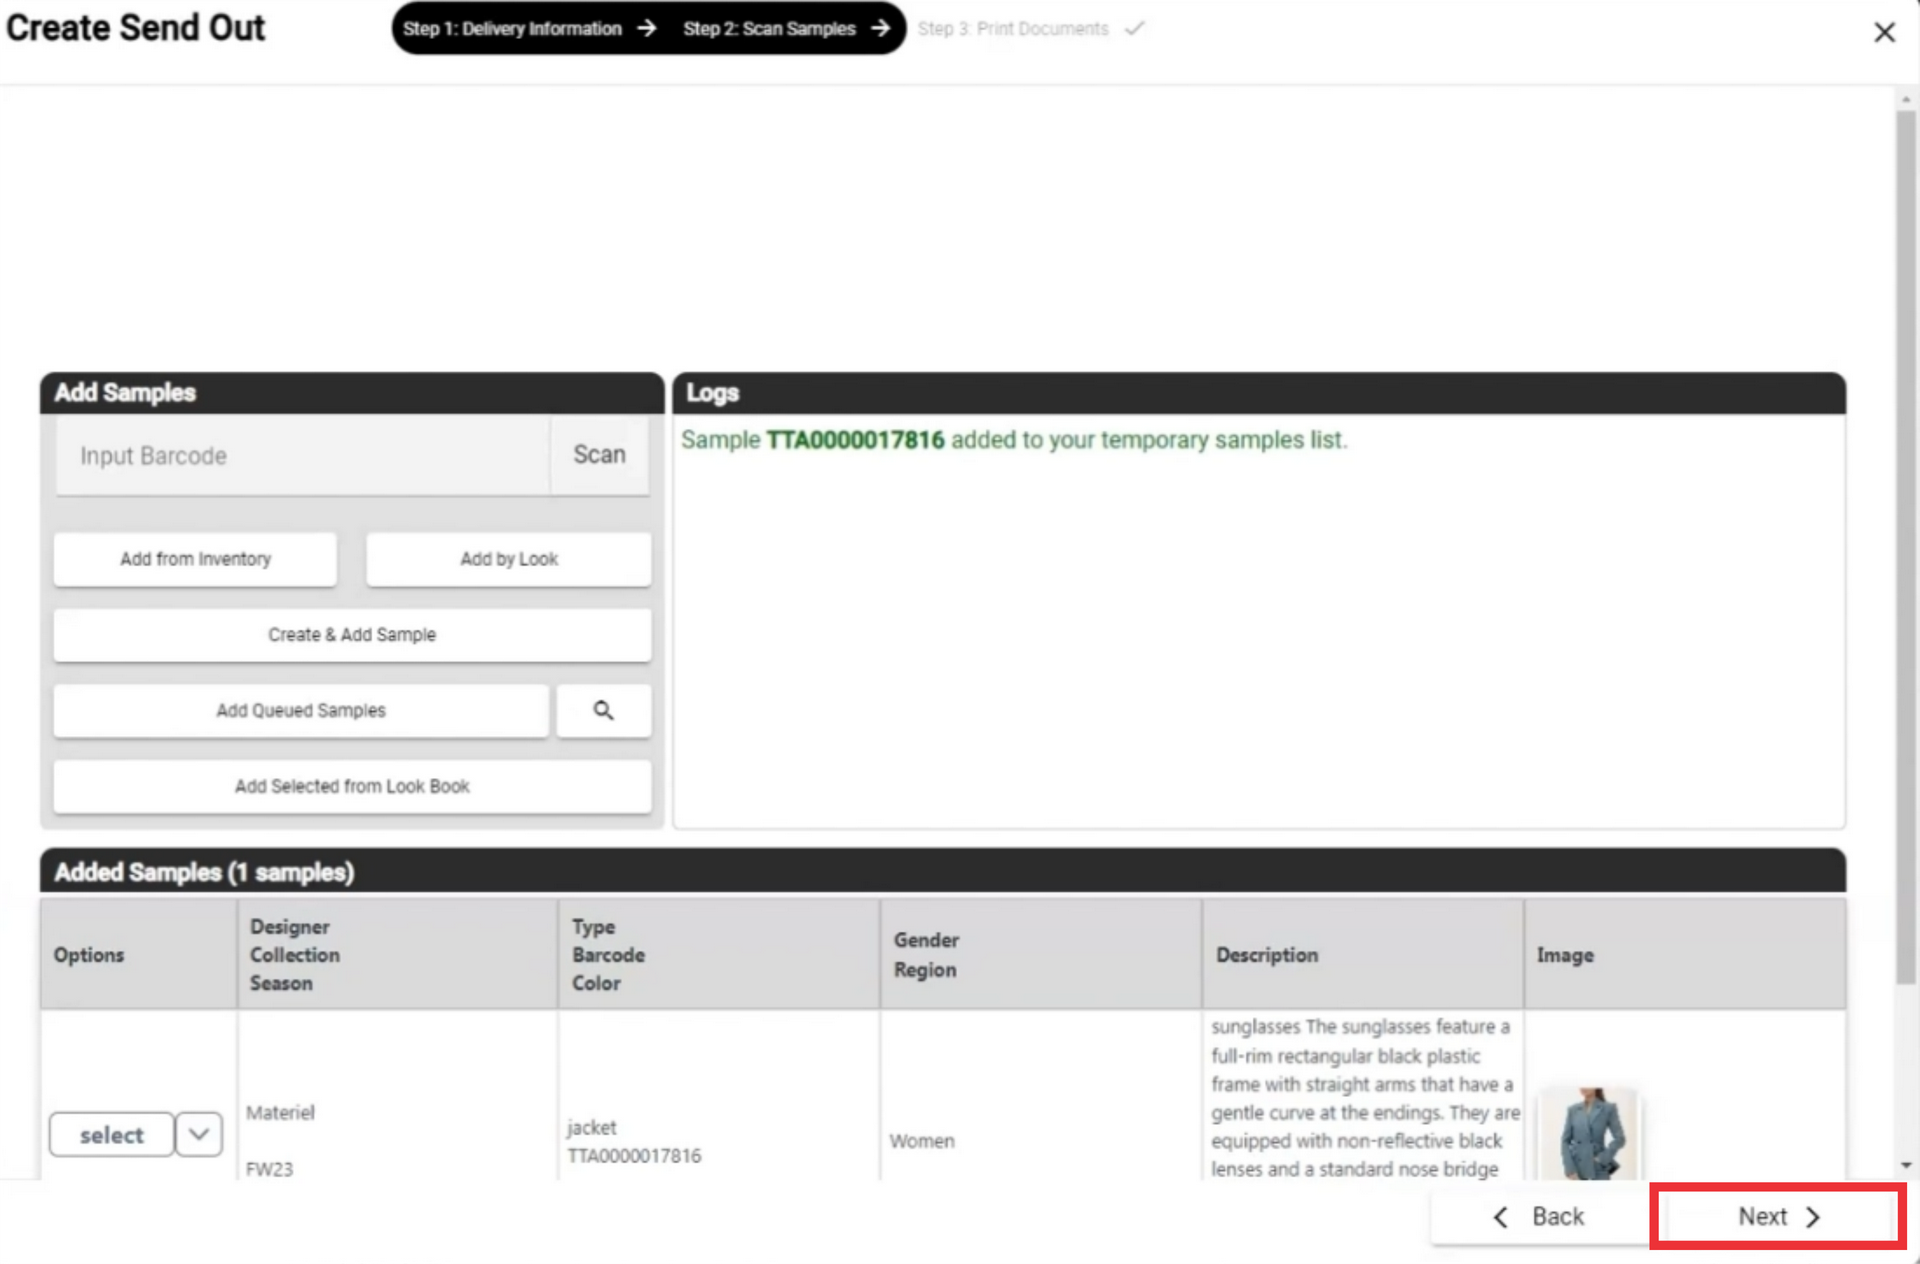
19. In second step you can add new sample manually, Add sample from inventory, Add sample by Look, Create and add sample, Add Queued Samples, Add Selected from look book.
after adding desired samples click the Next button.
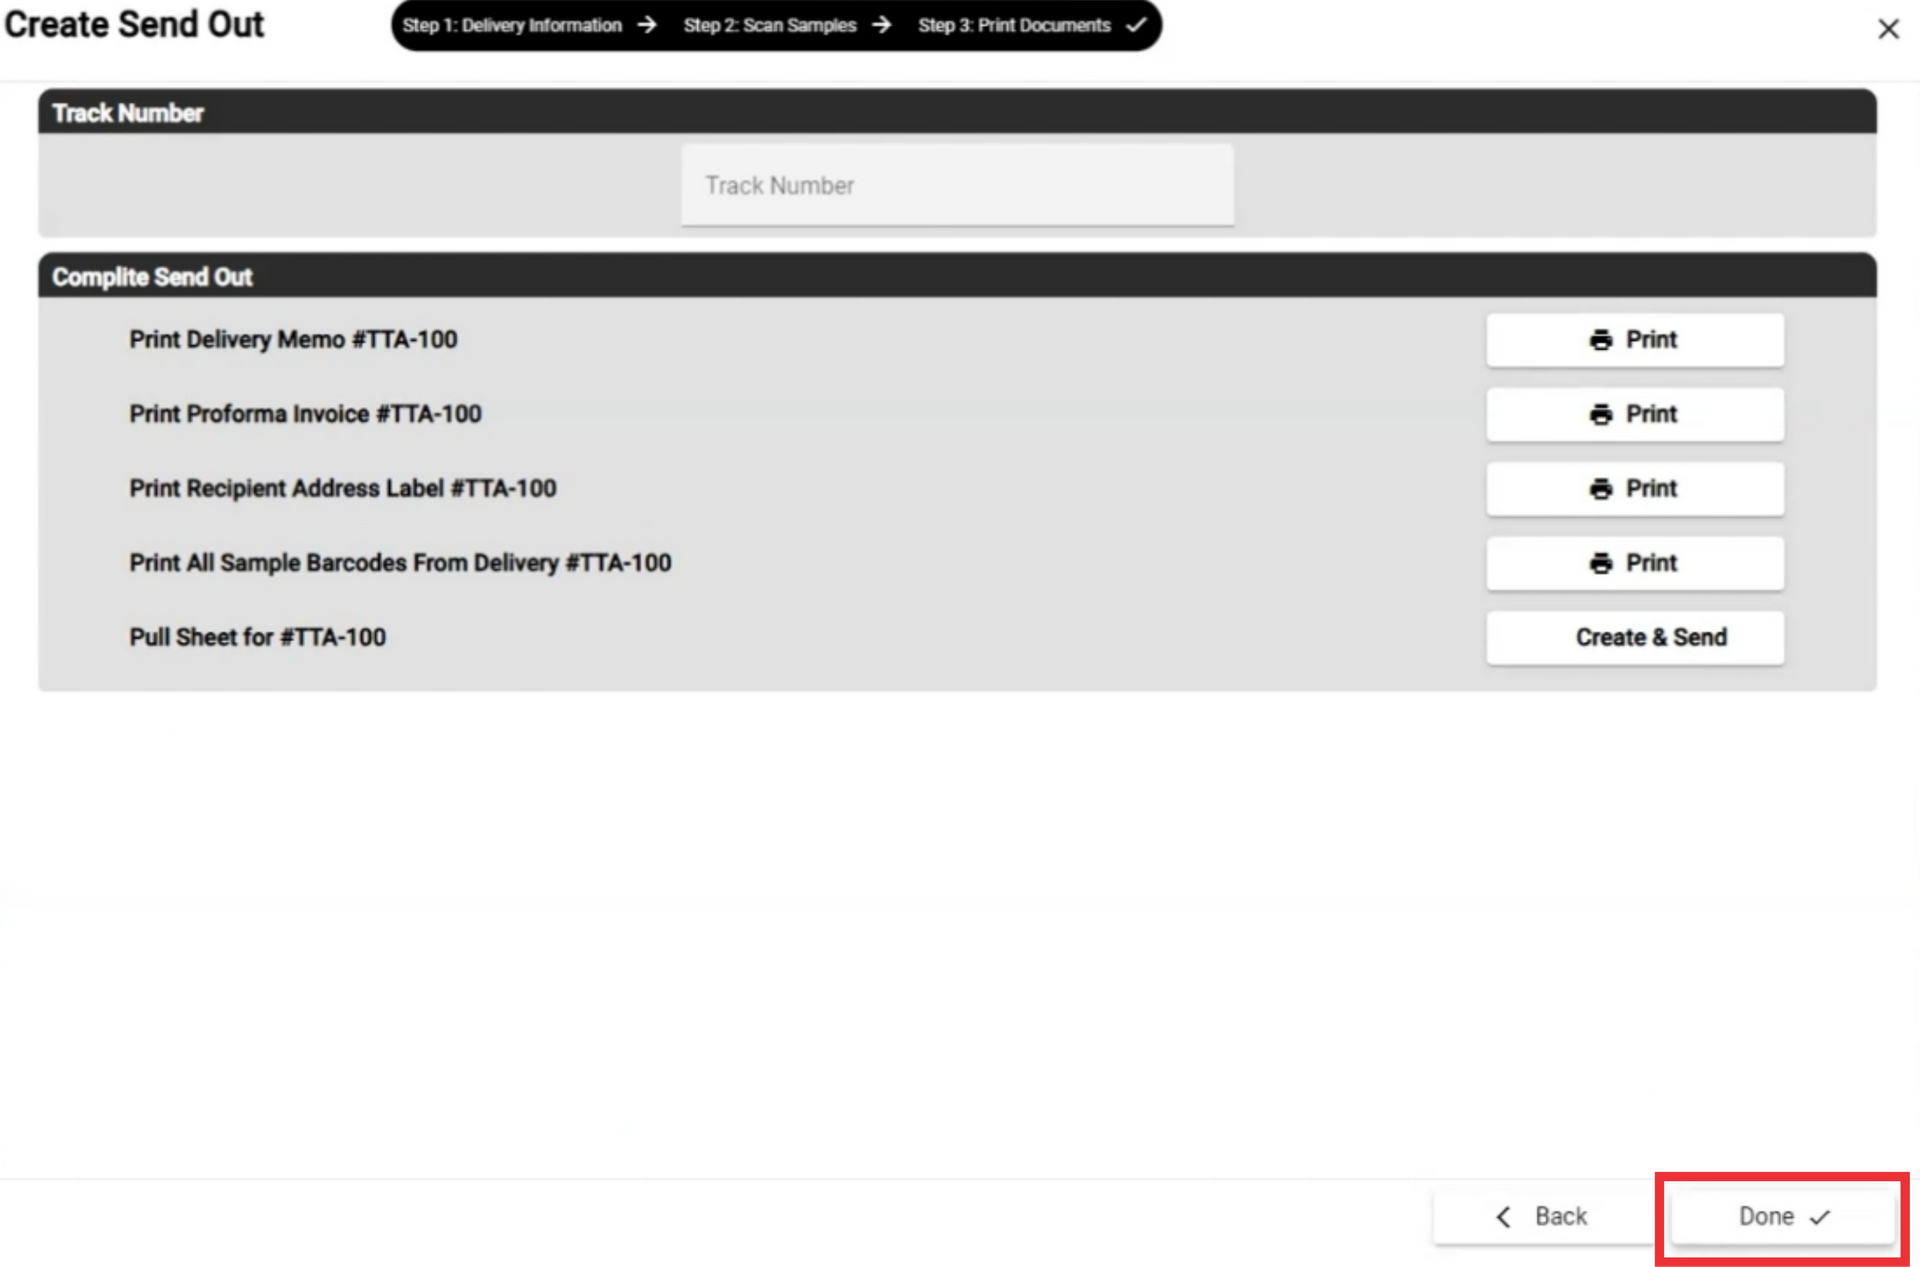
20. Enter tracking number in the field.
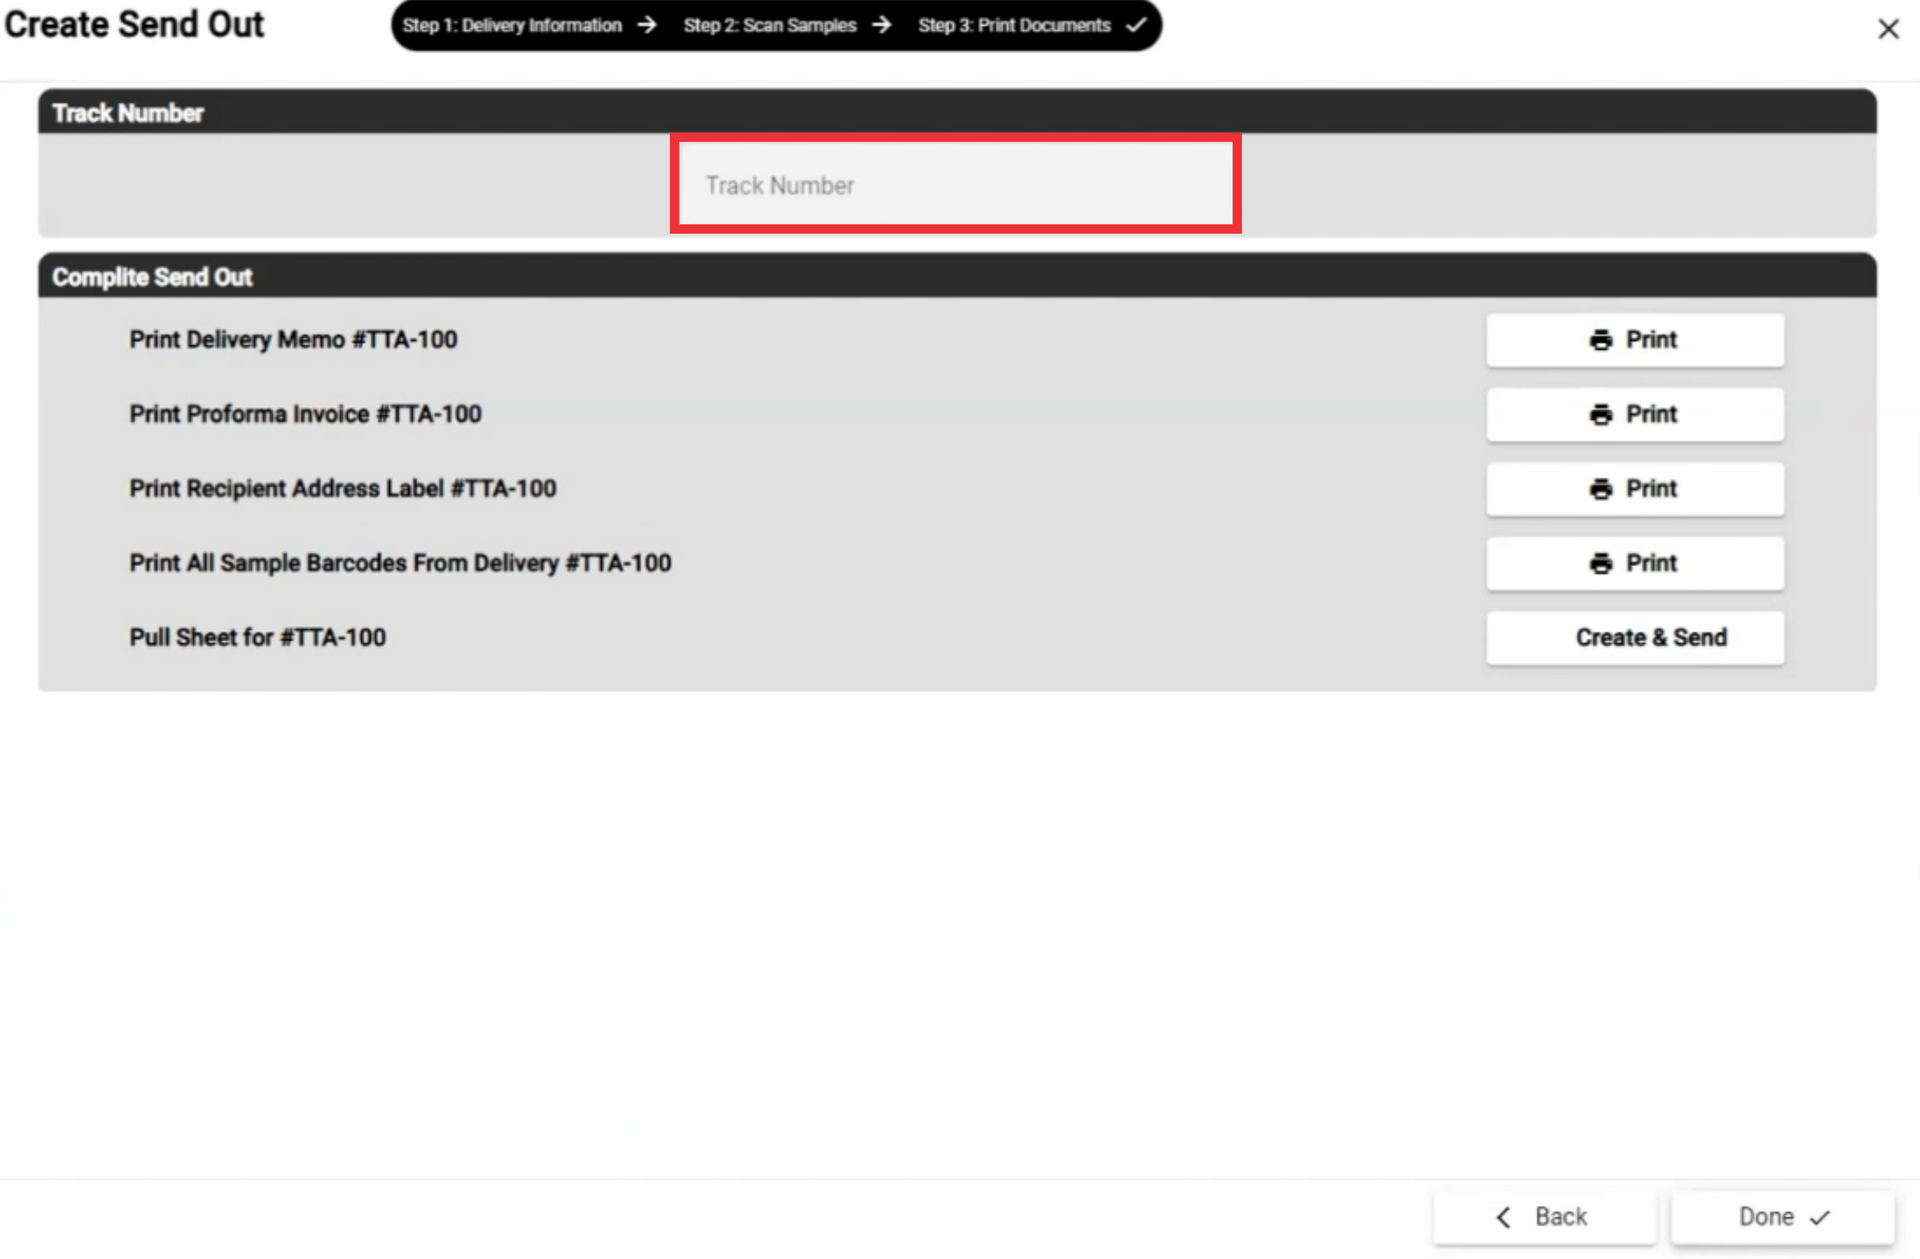
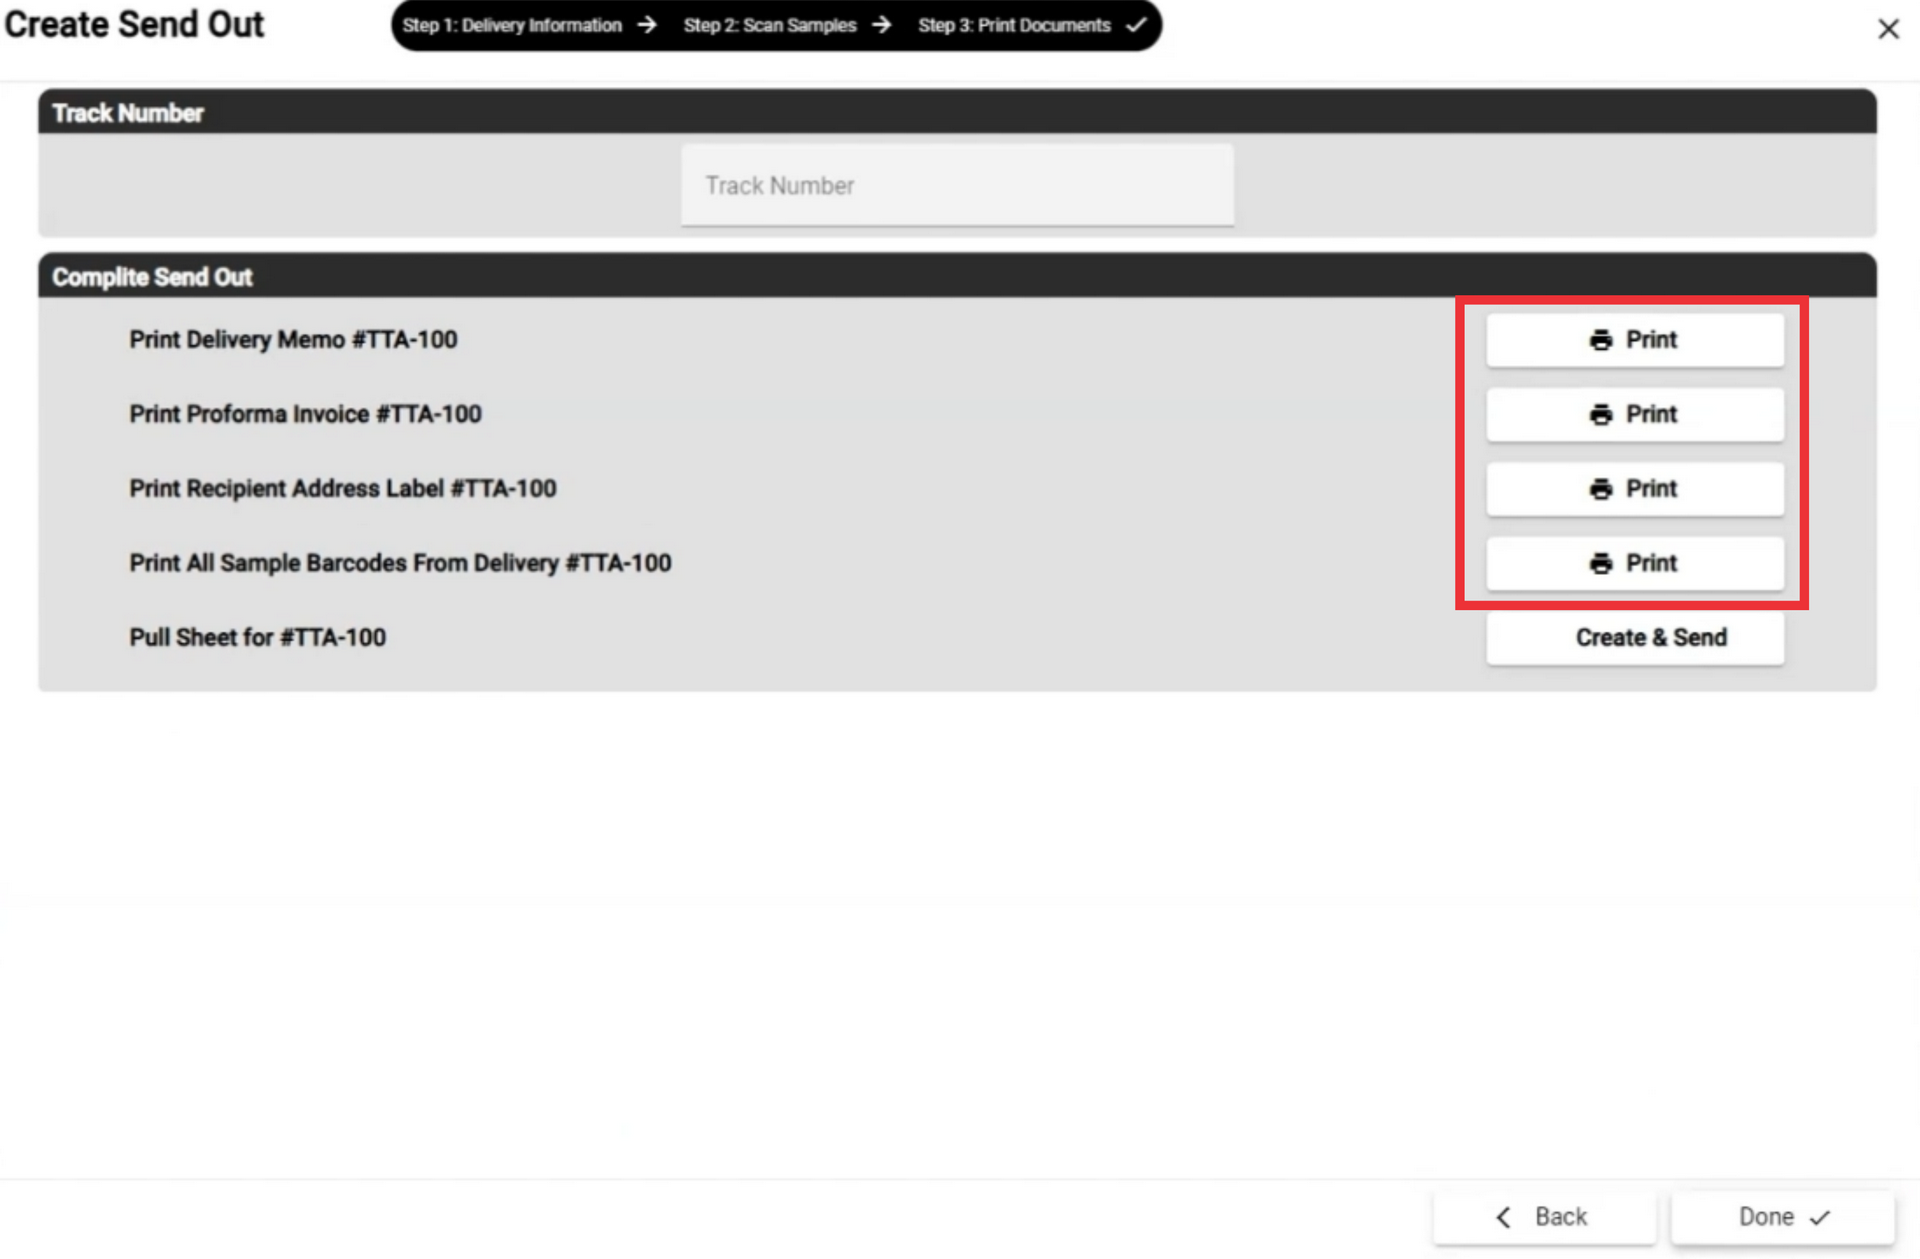
21. Click the print button to view and print send out documents.
22. If desired you can create and send pull sheet document to email.
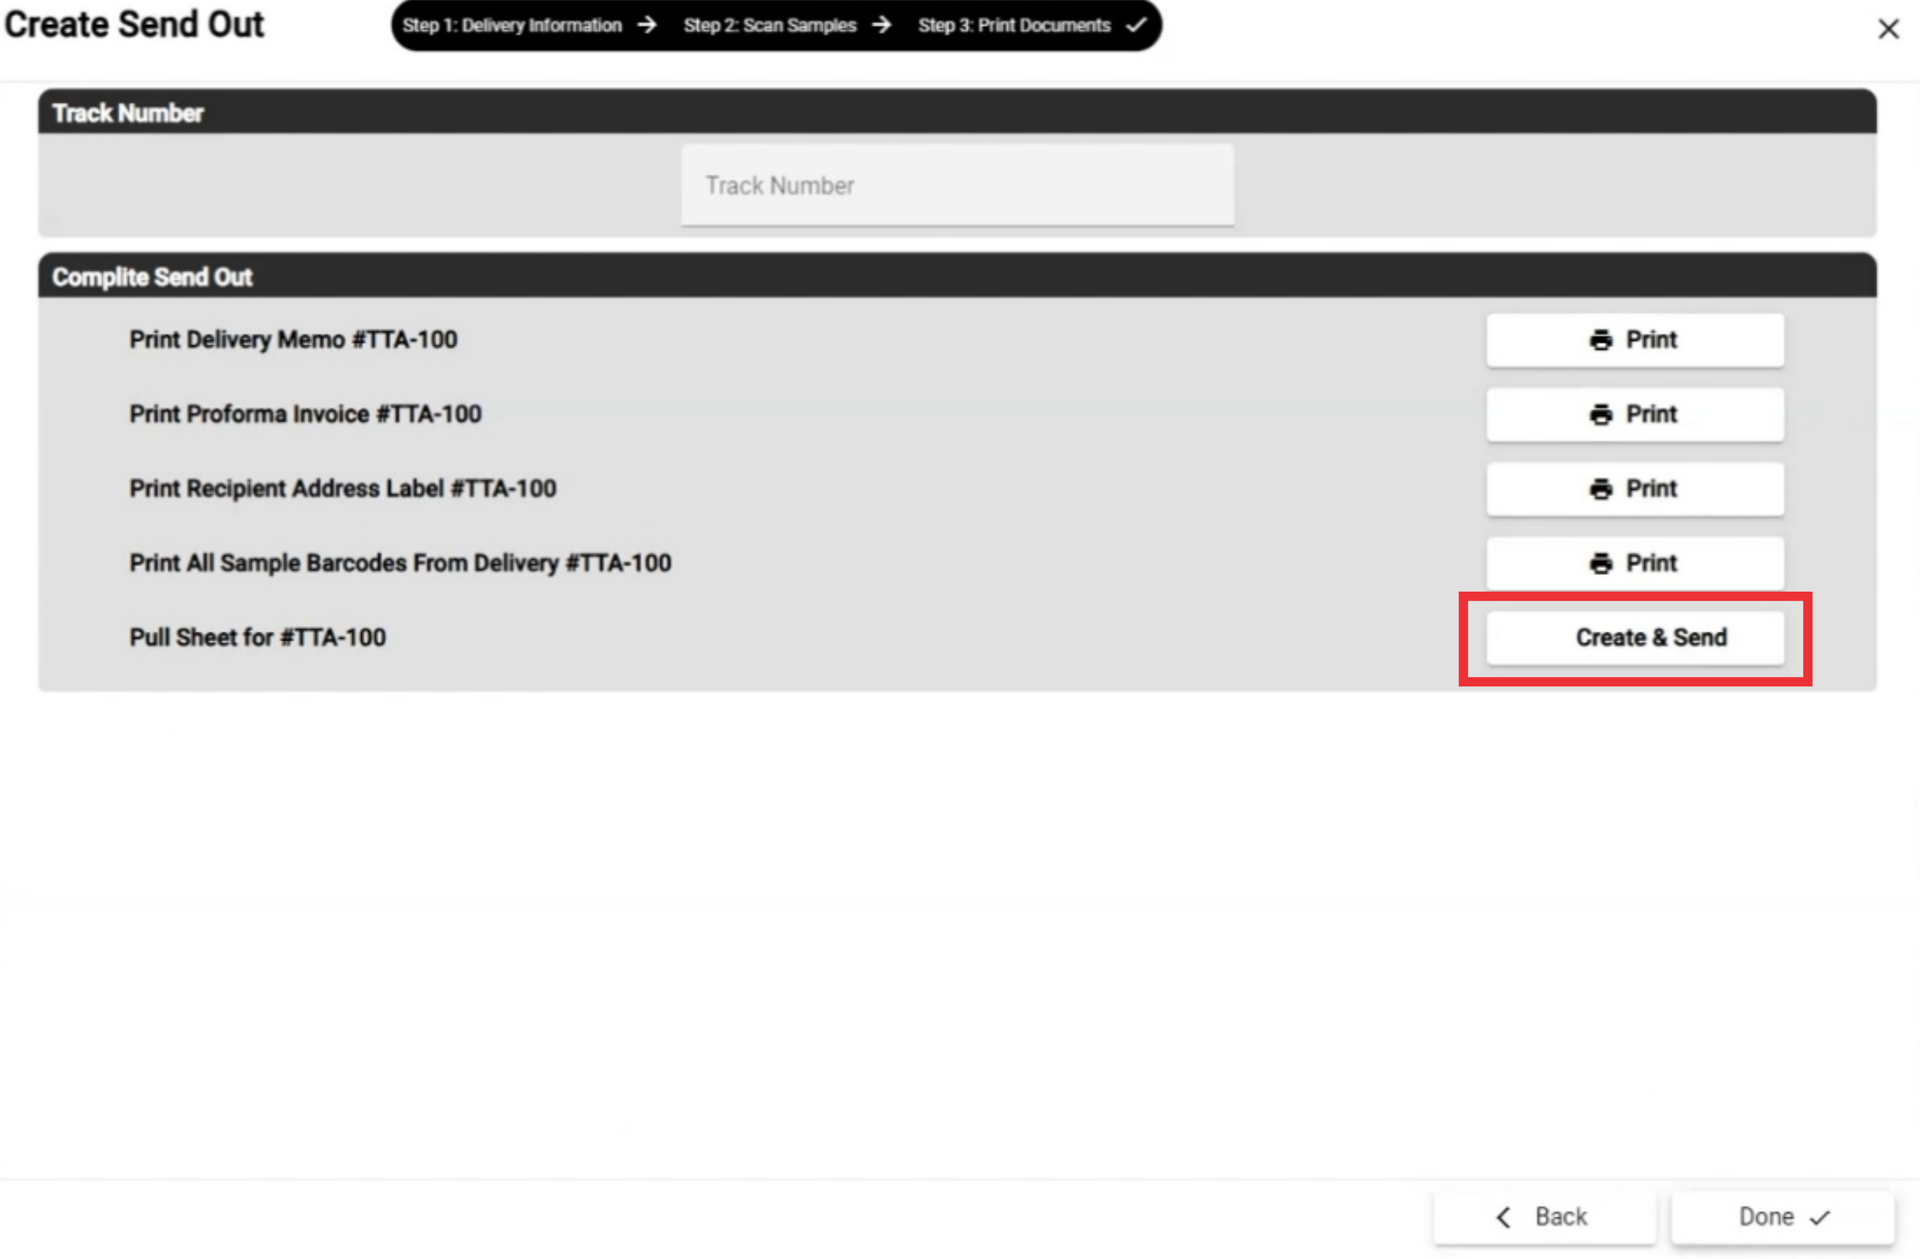
23. For the create send out document click the done button.
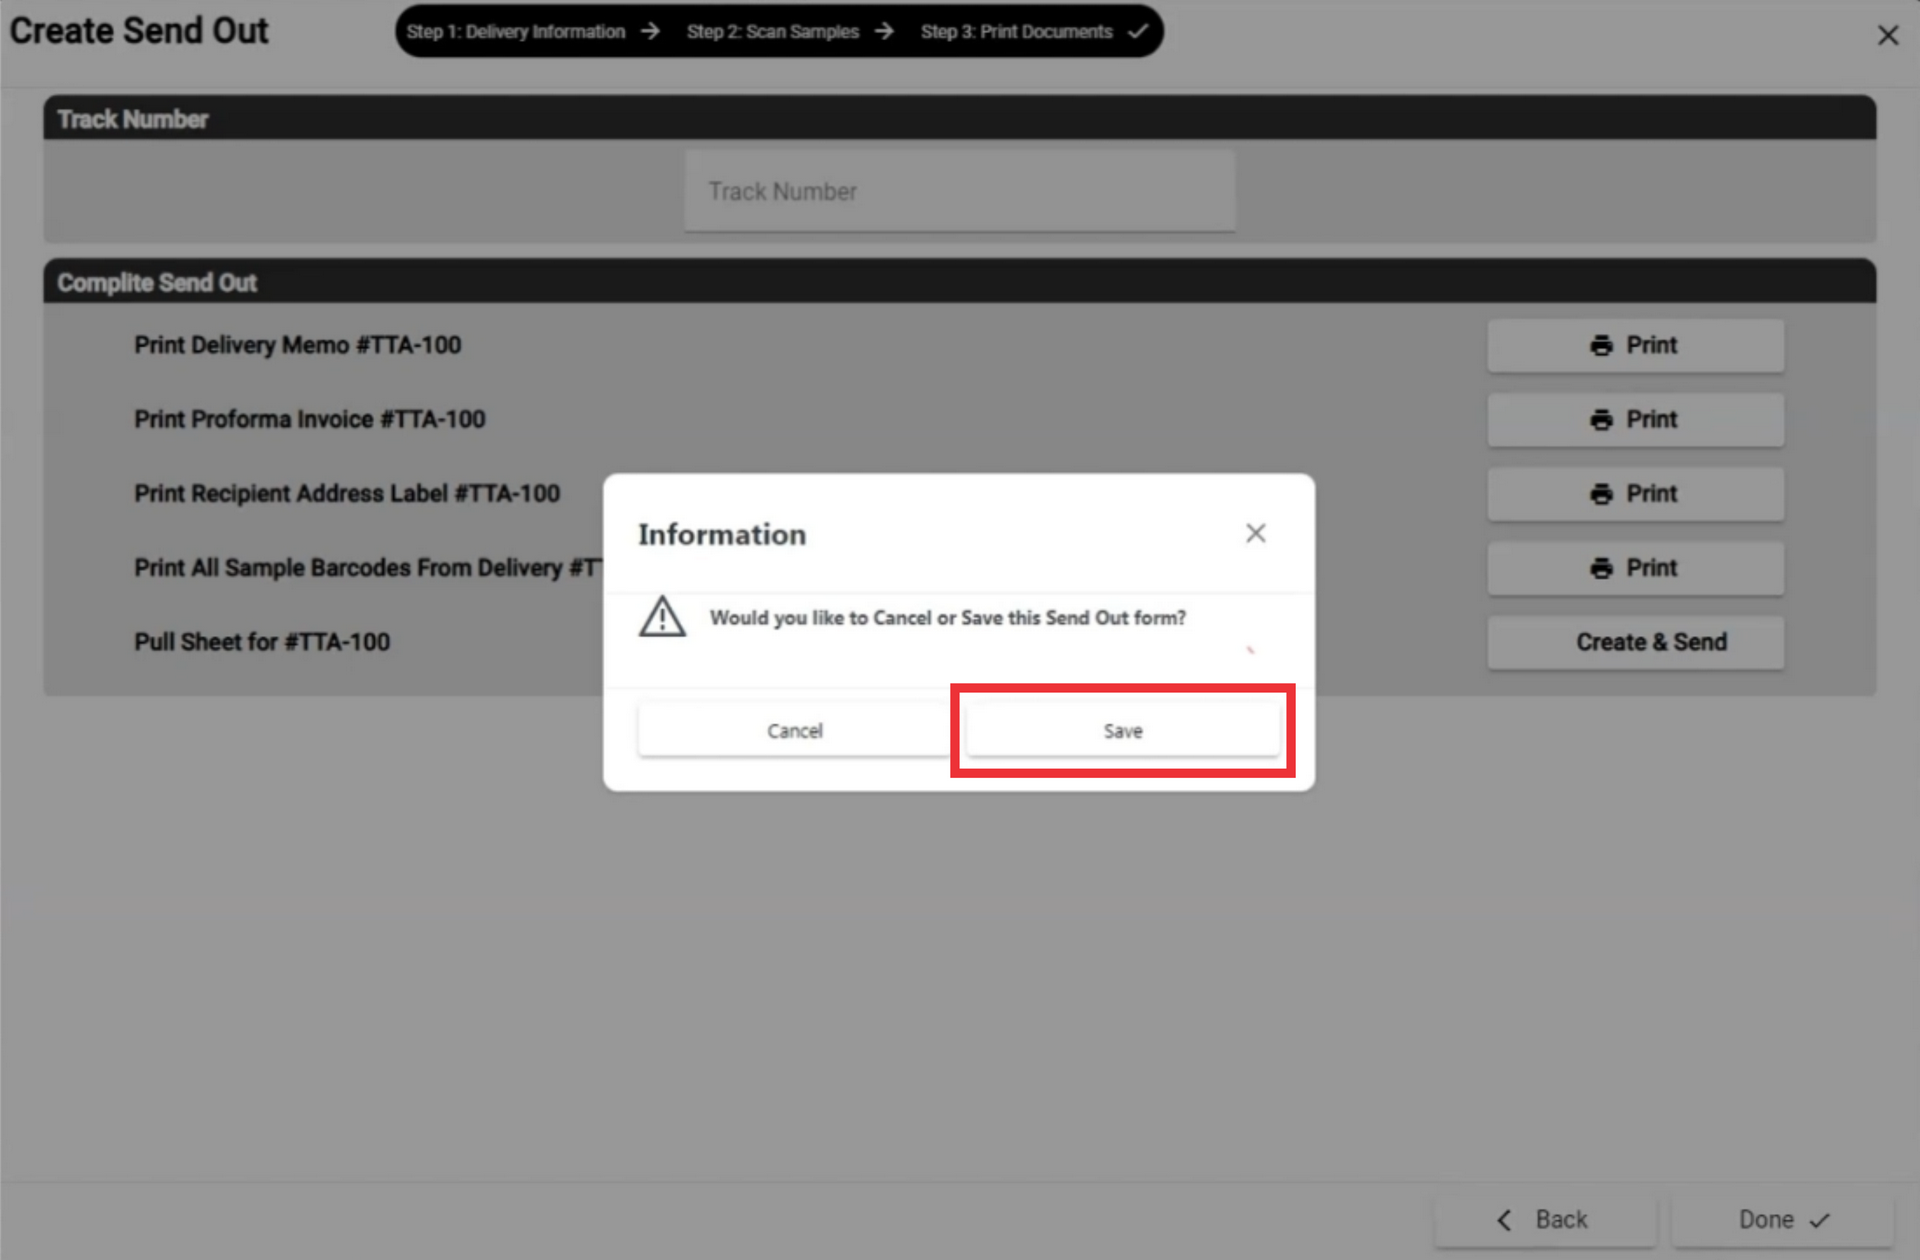
24. Click the yes button to confirm.
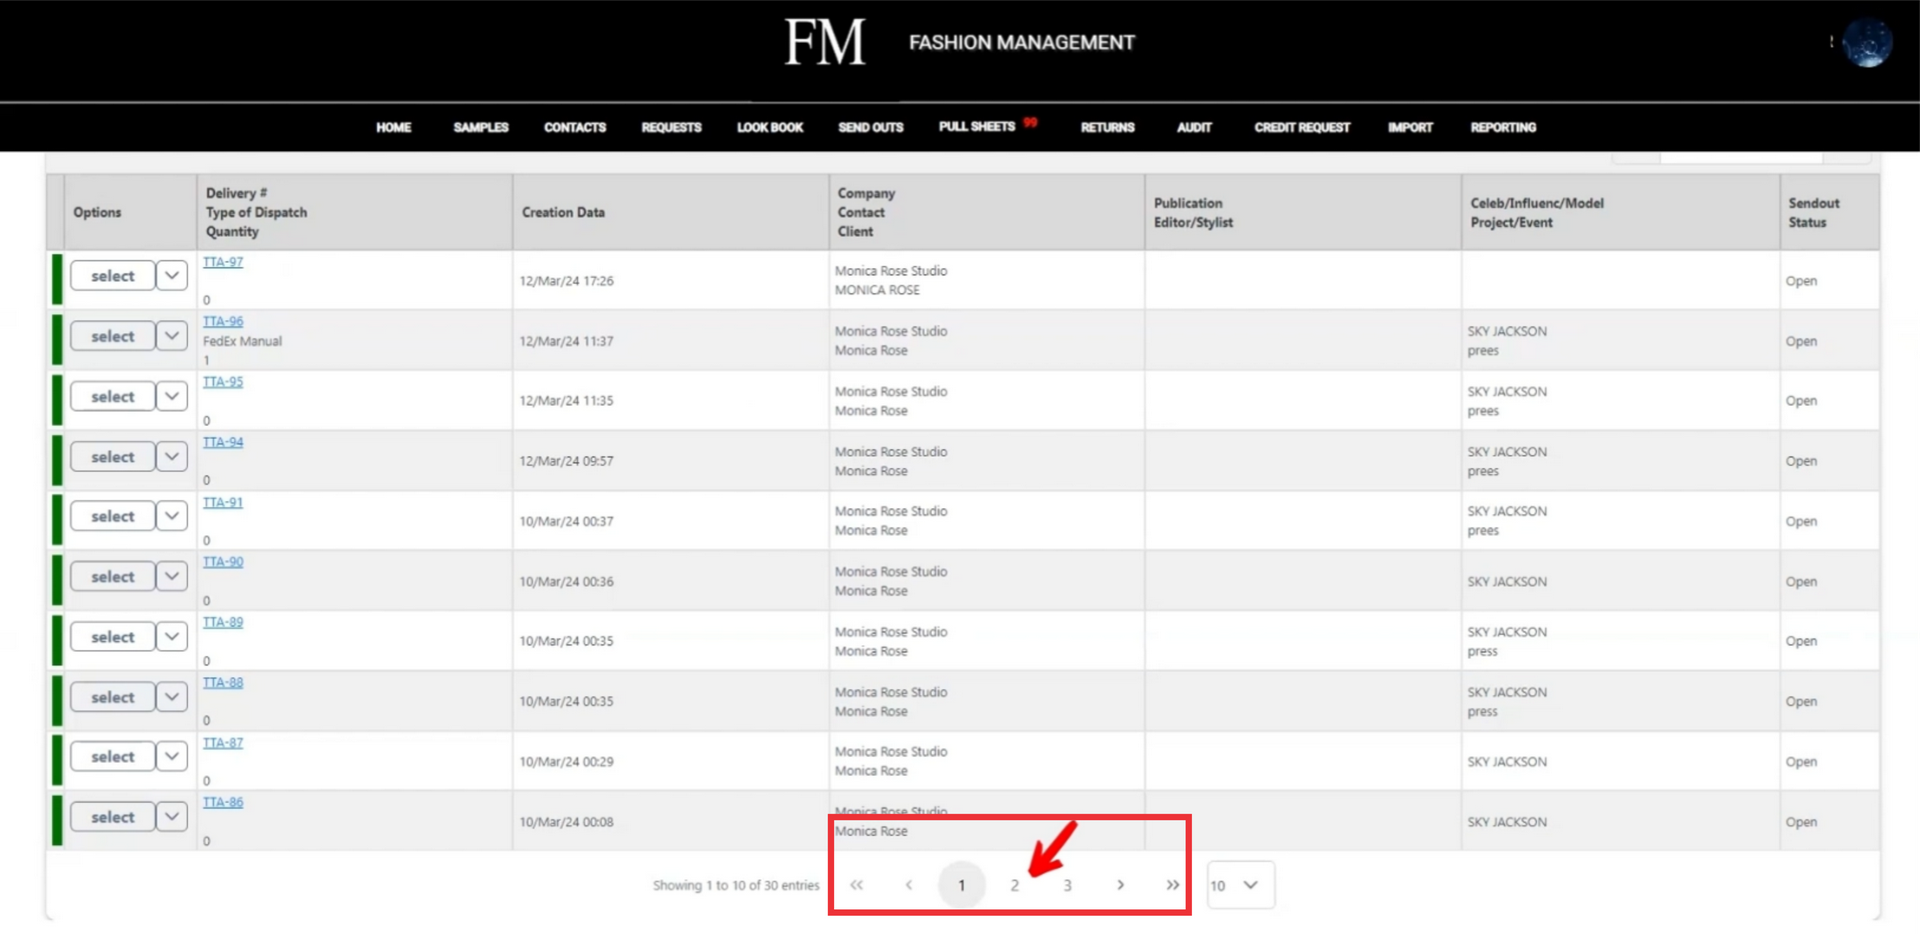
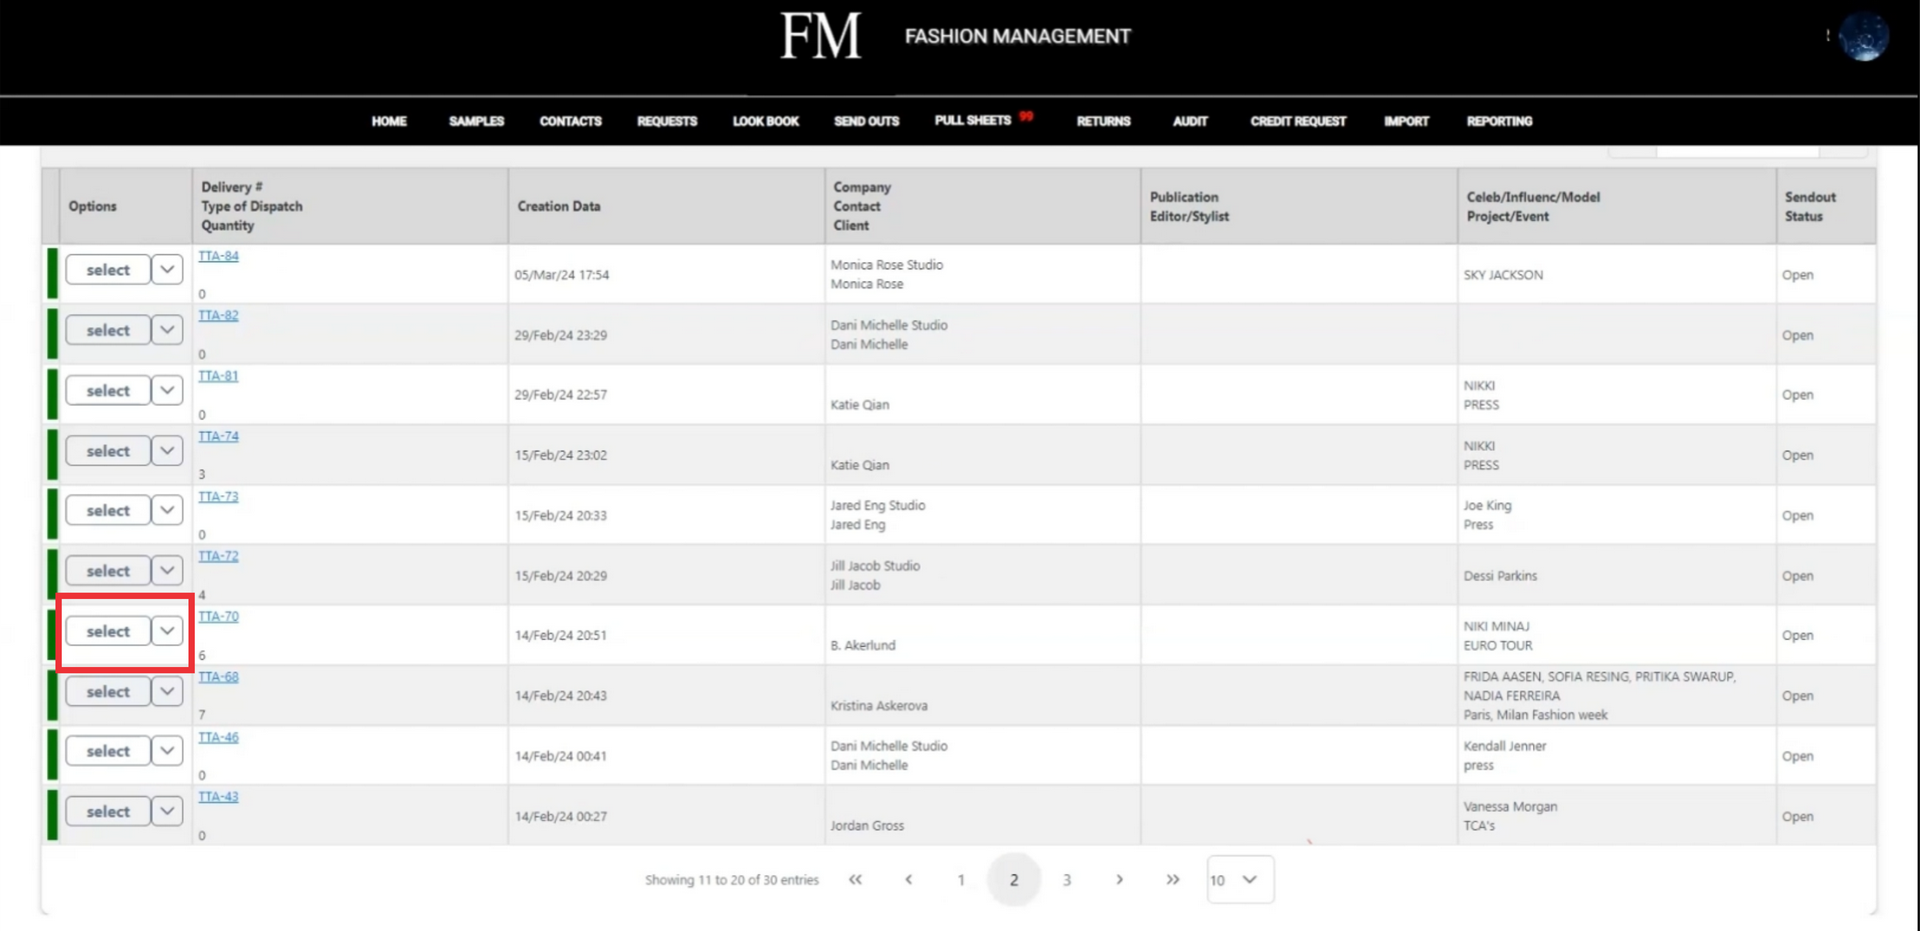
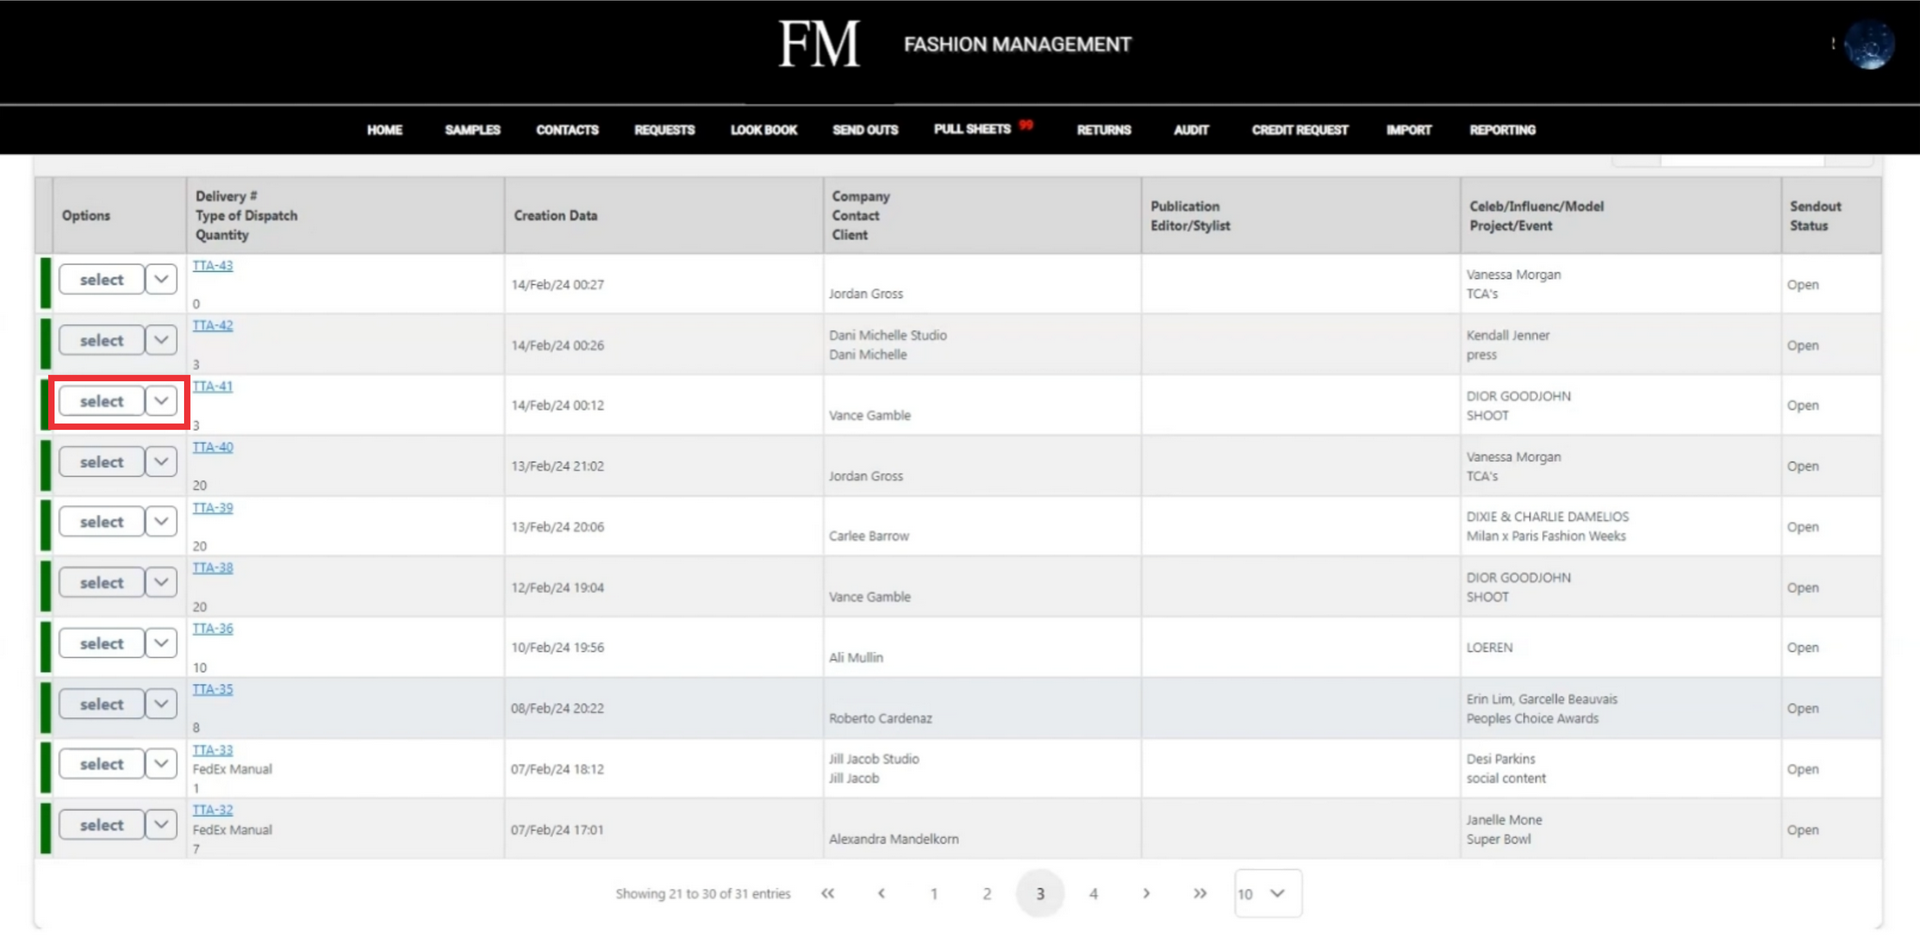
25. To view a next page in the list send out documets you have created click the next page button.
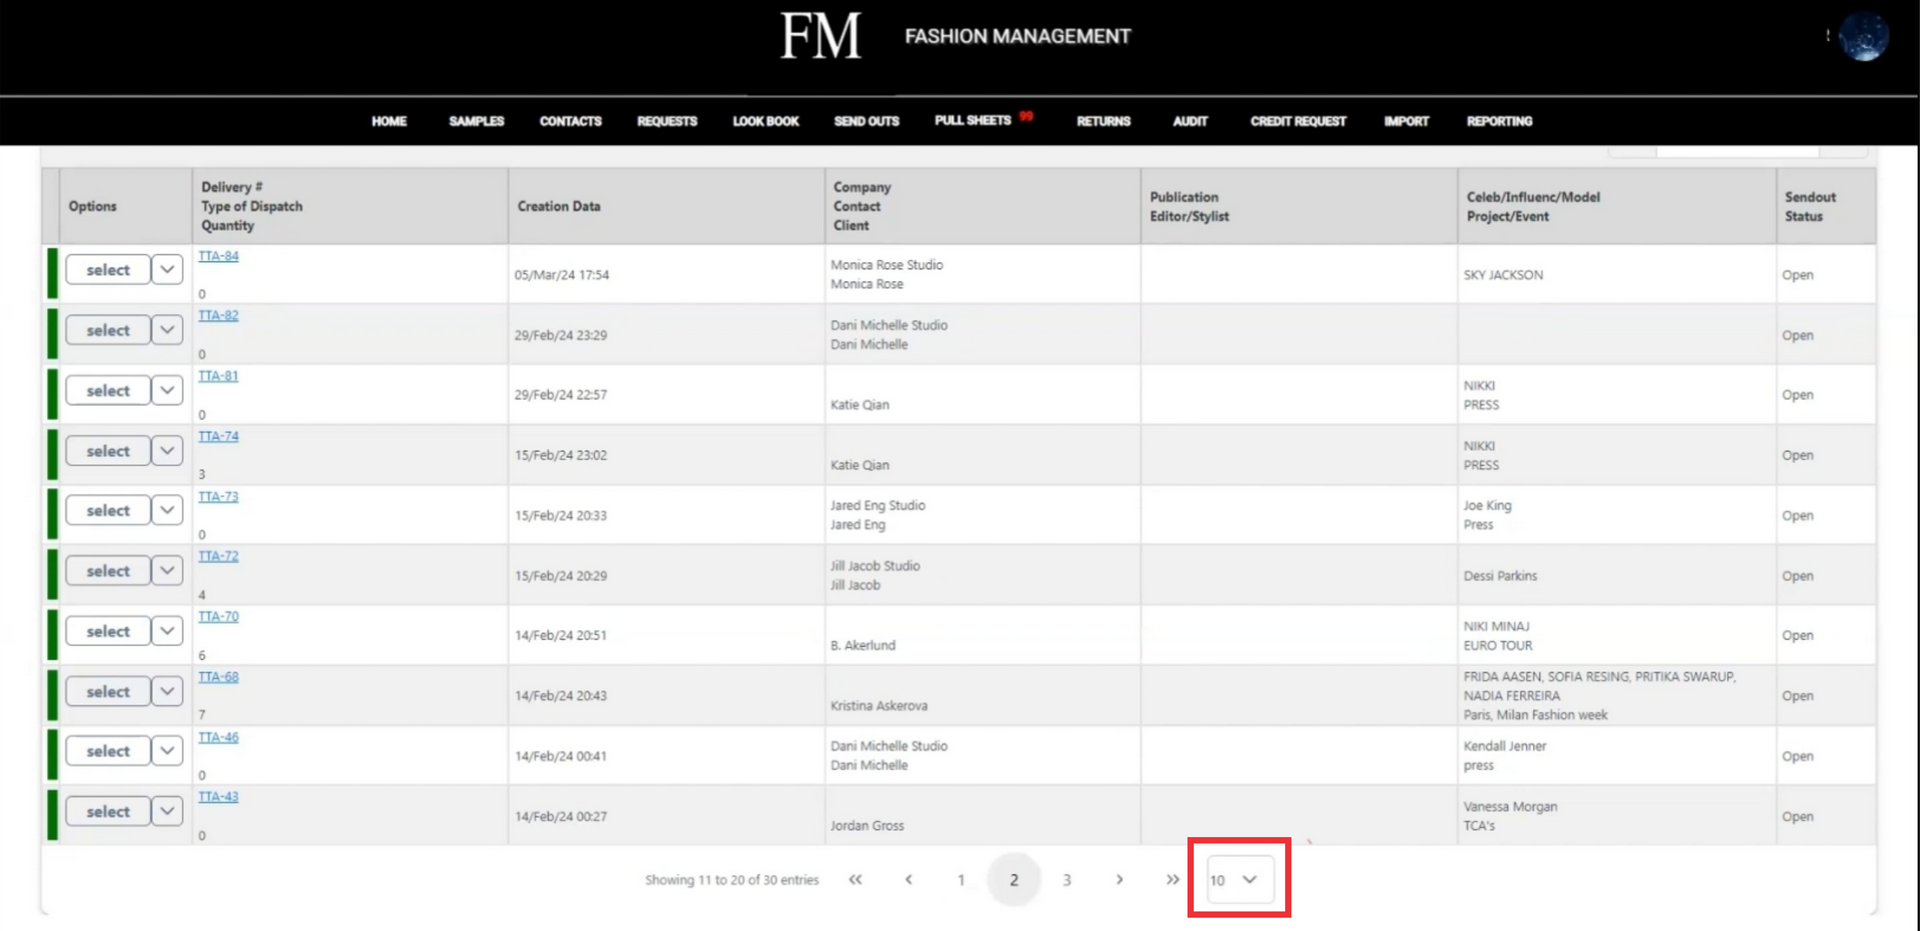
26. Click the drop down menu and select from the list number how many send outs you want to view on one page.
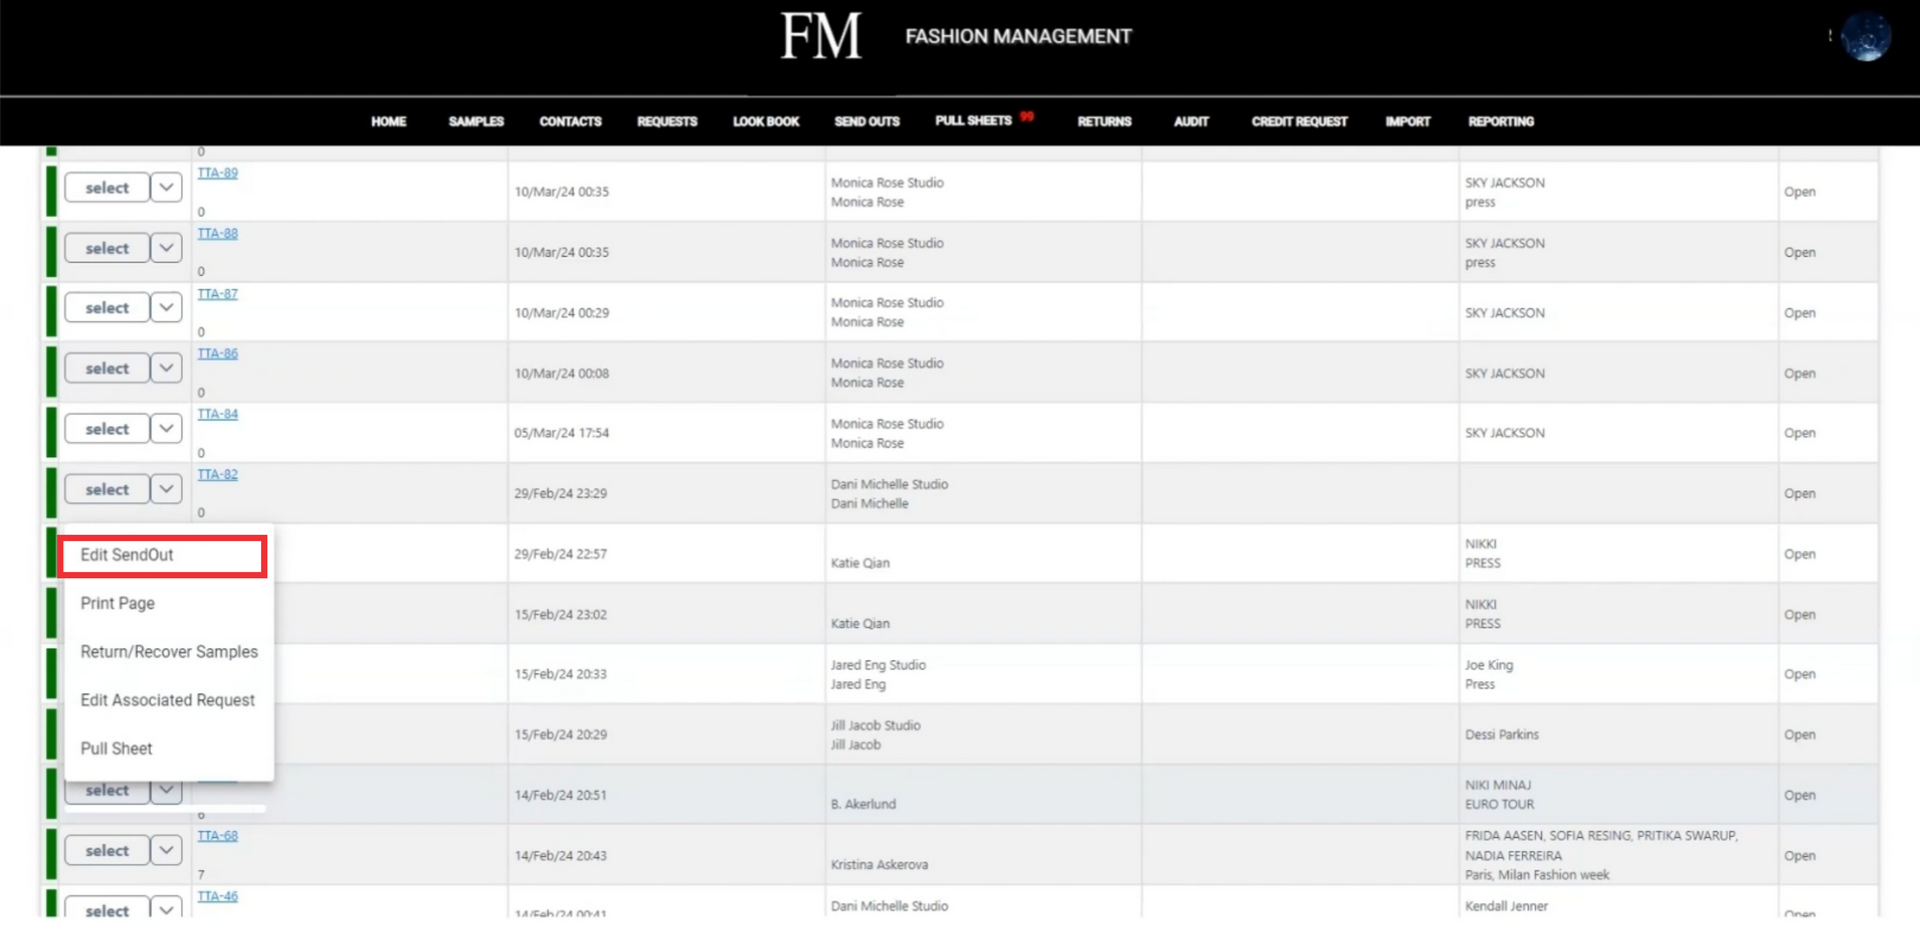
27. Click the "Select" button to view send out document options.
28. Click the Edit send out button.
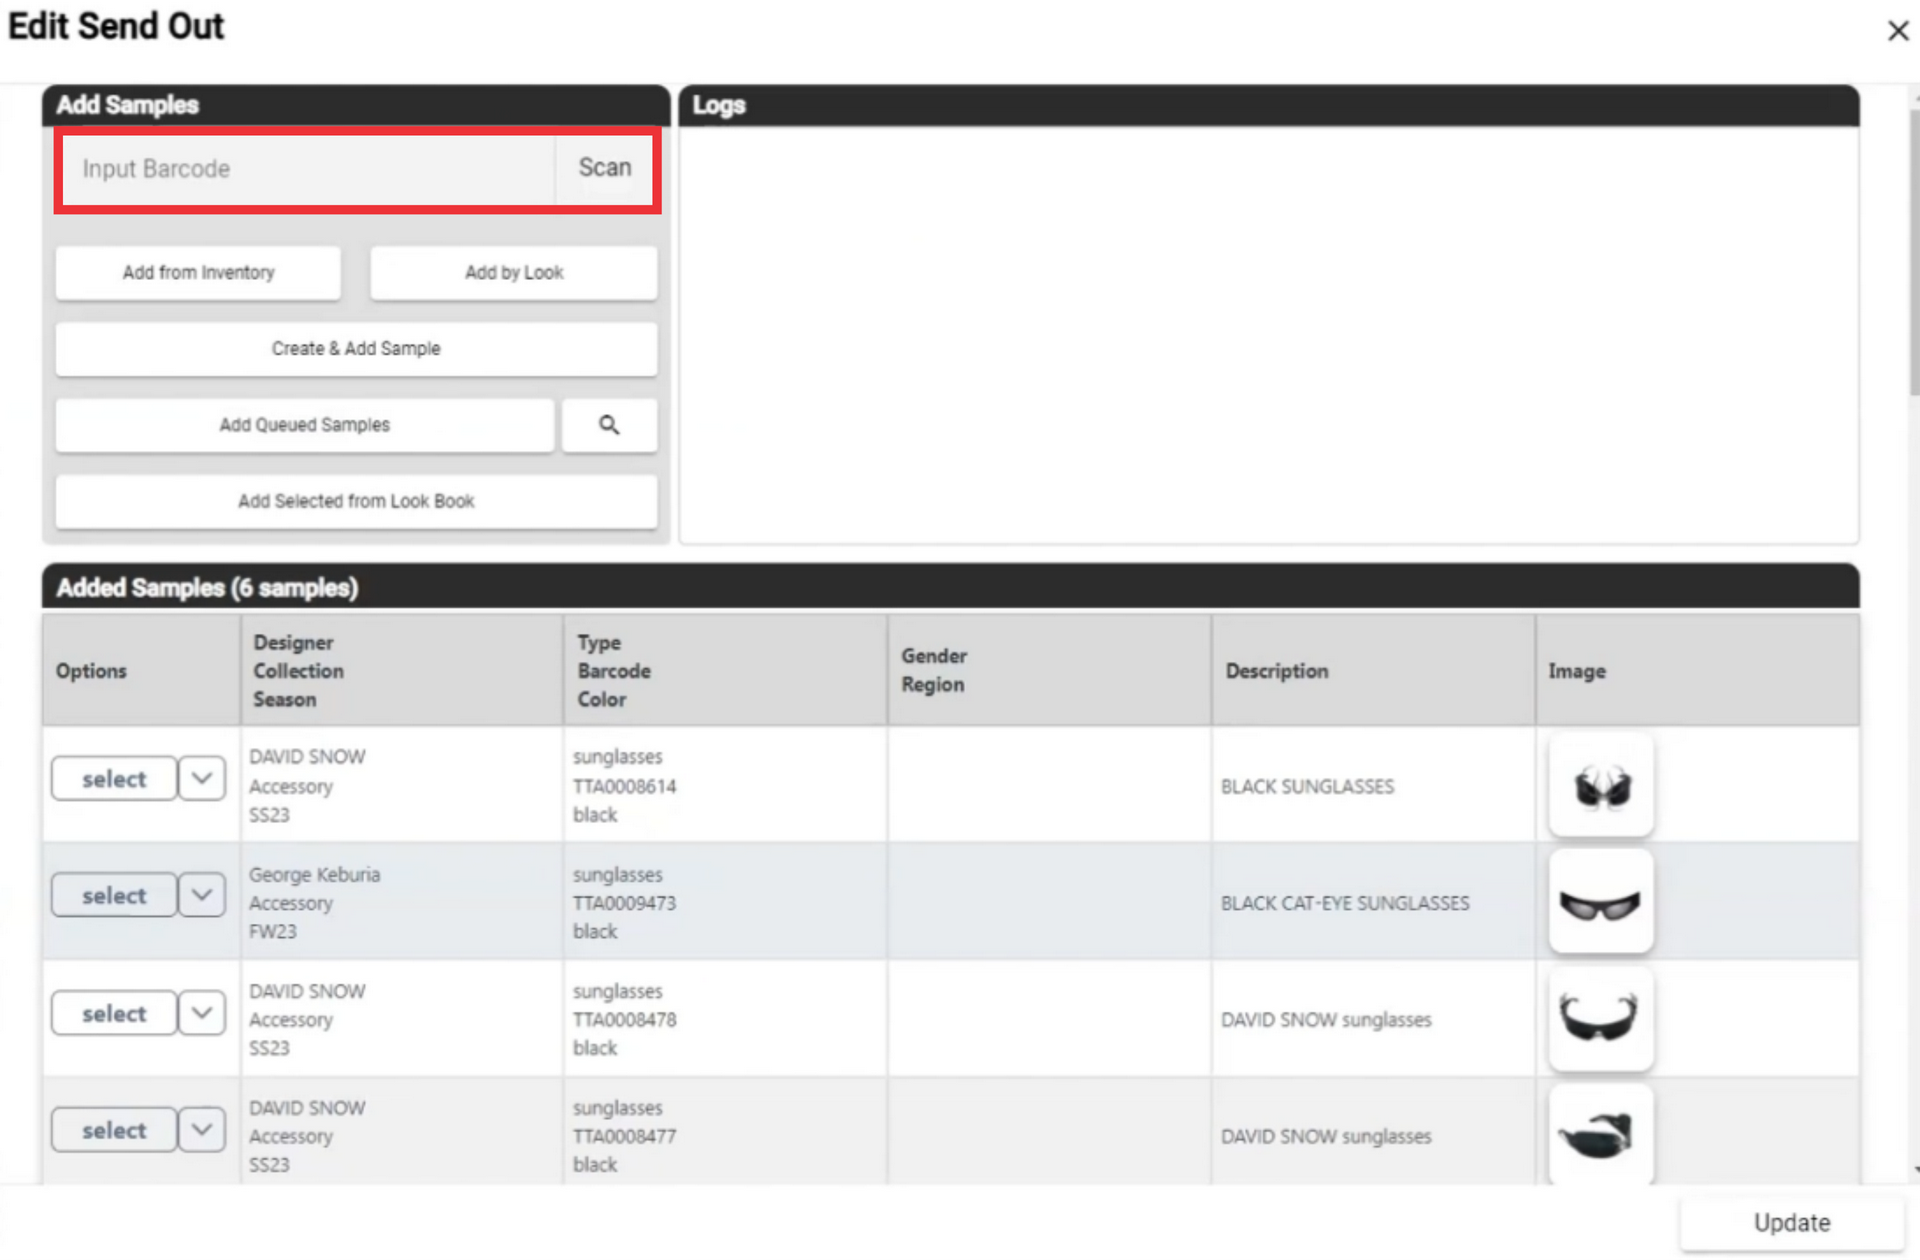
29. input sample barcode number and click the scan button to add sample manually.
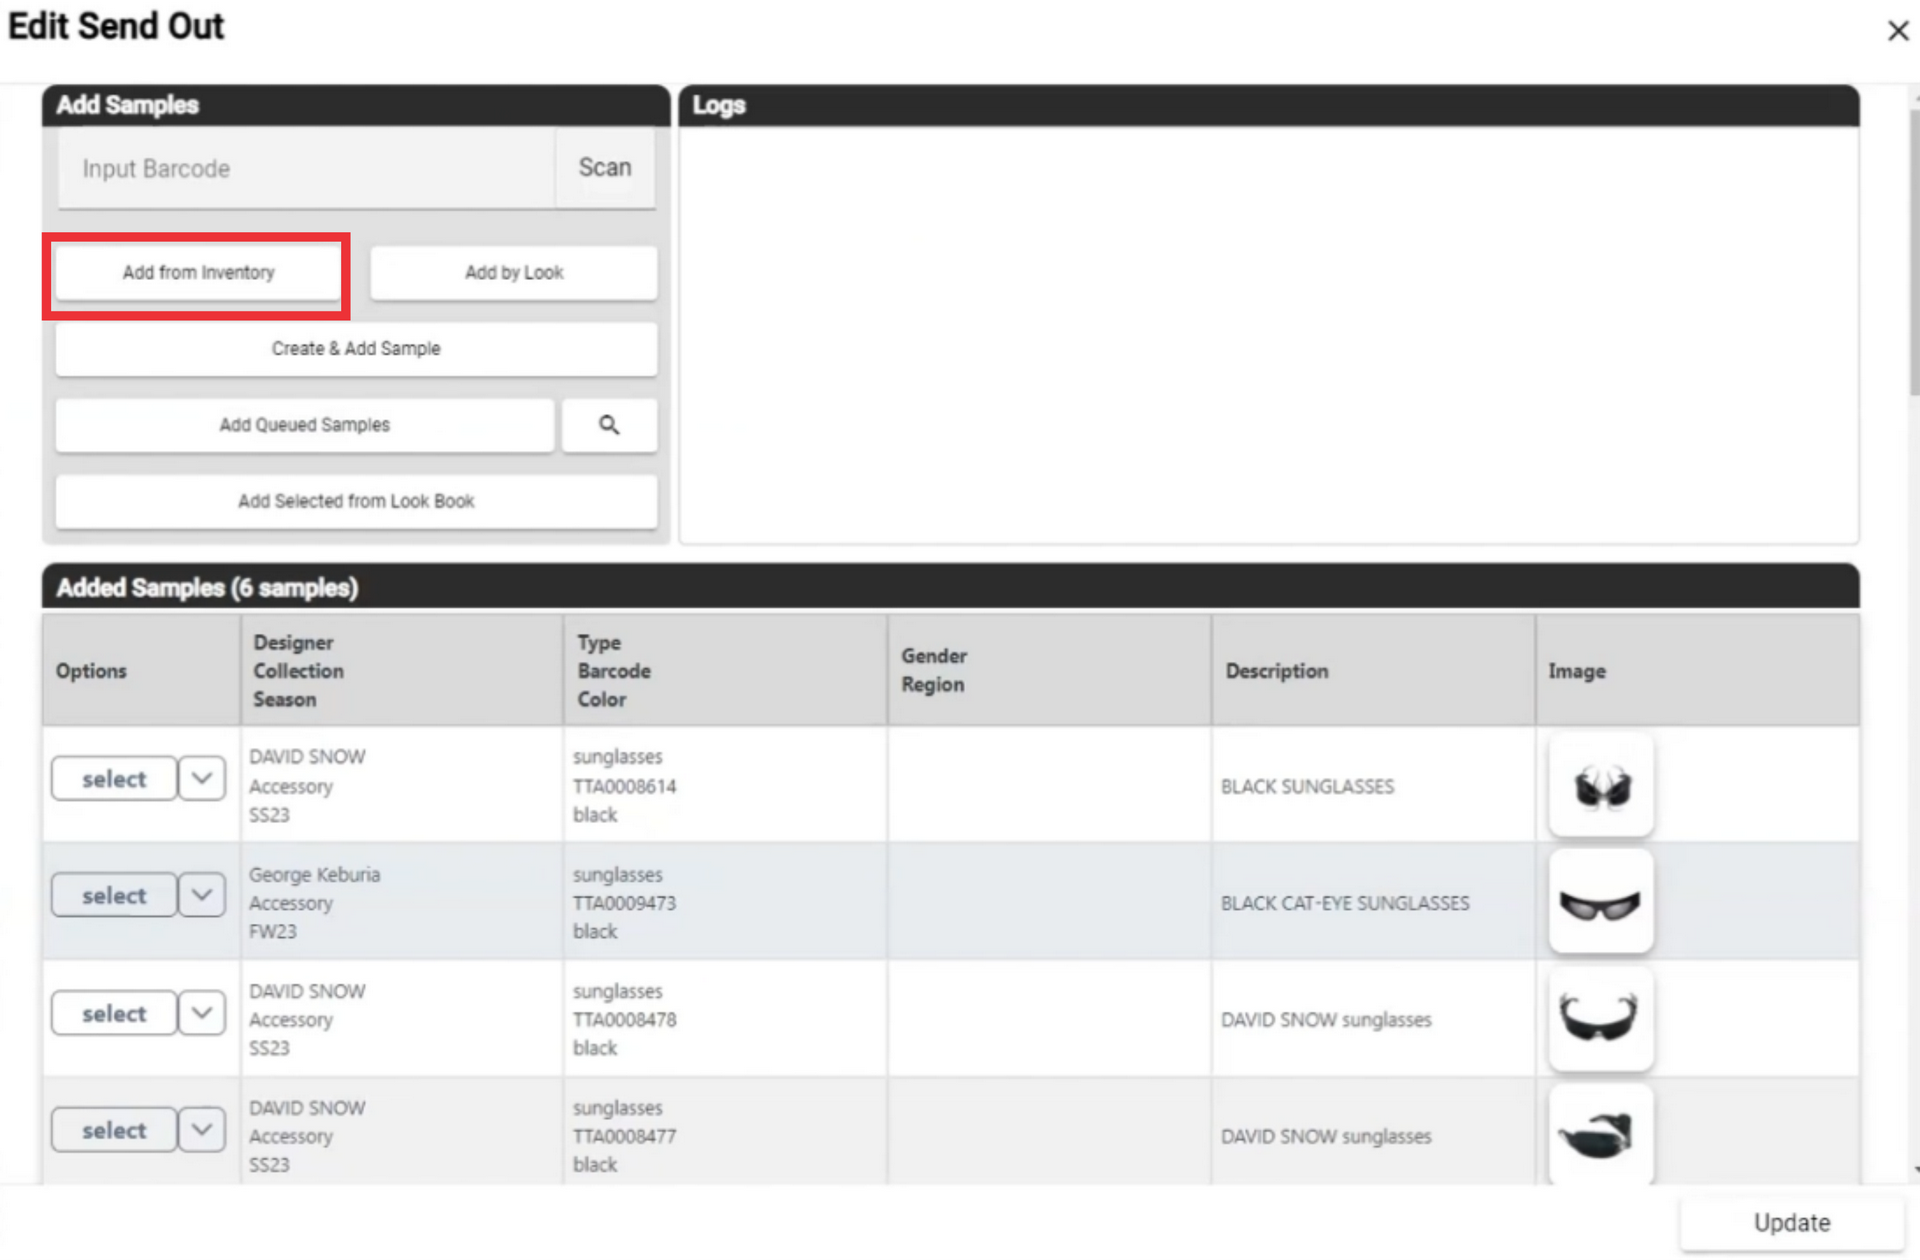
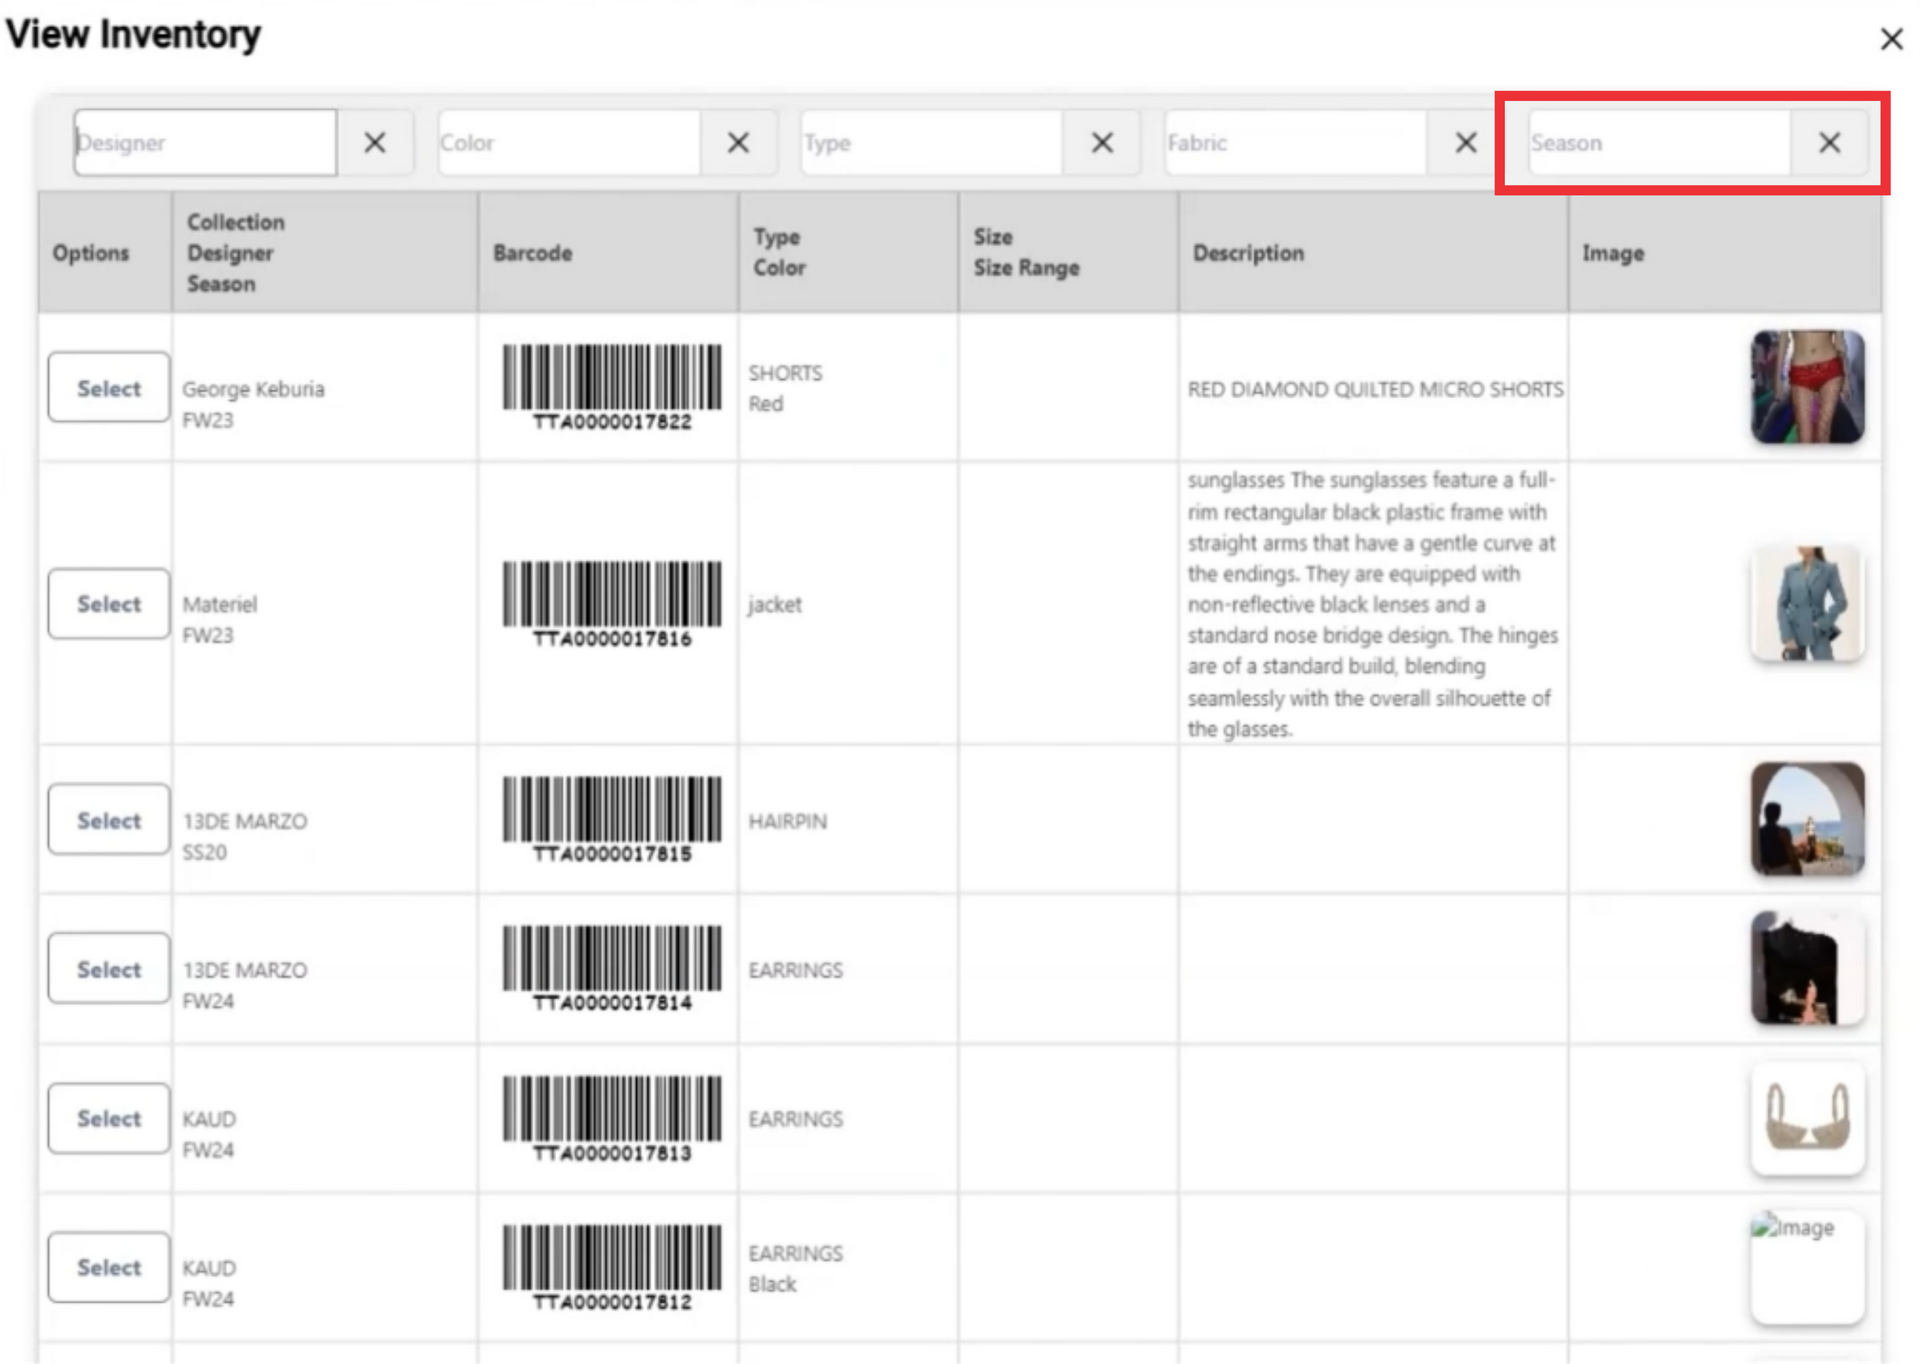
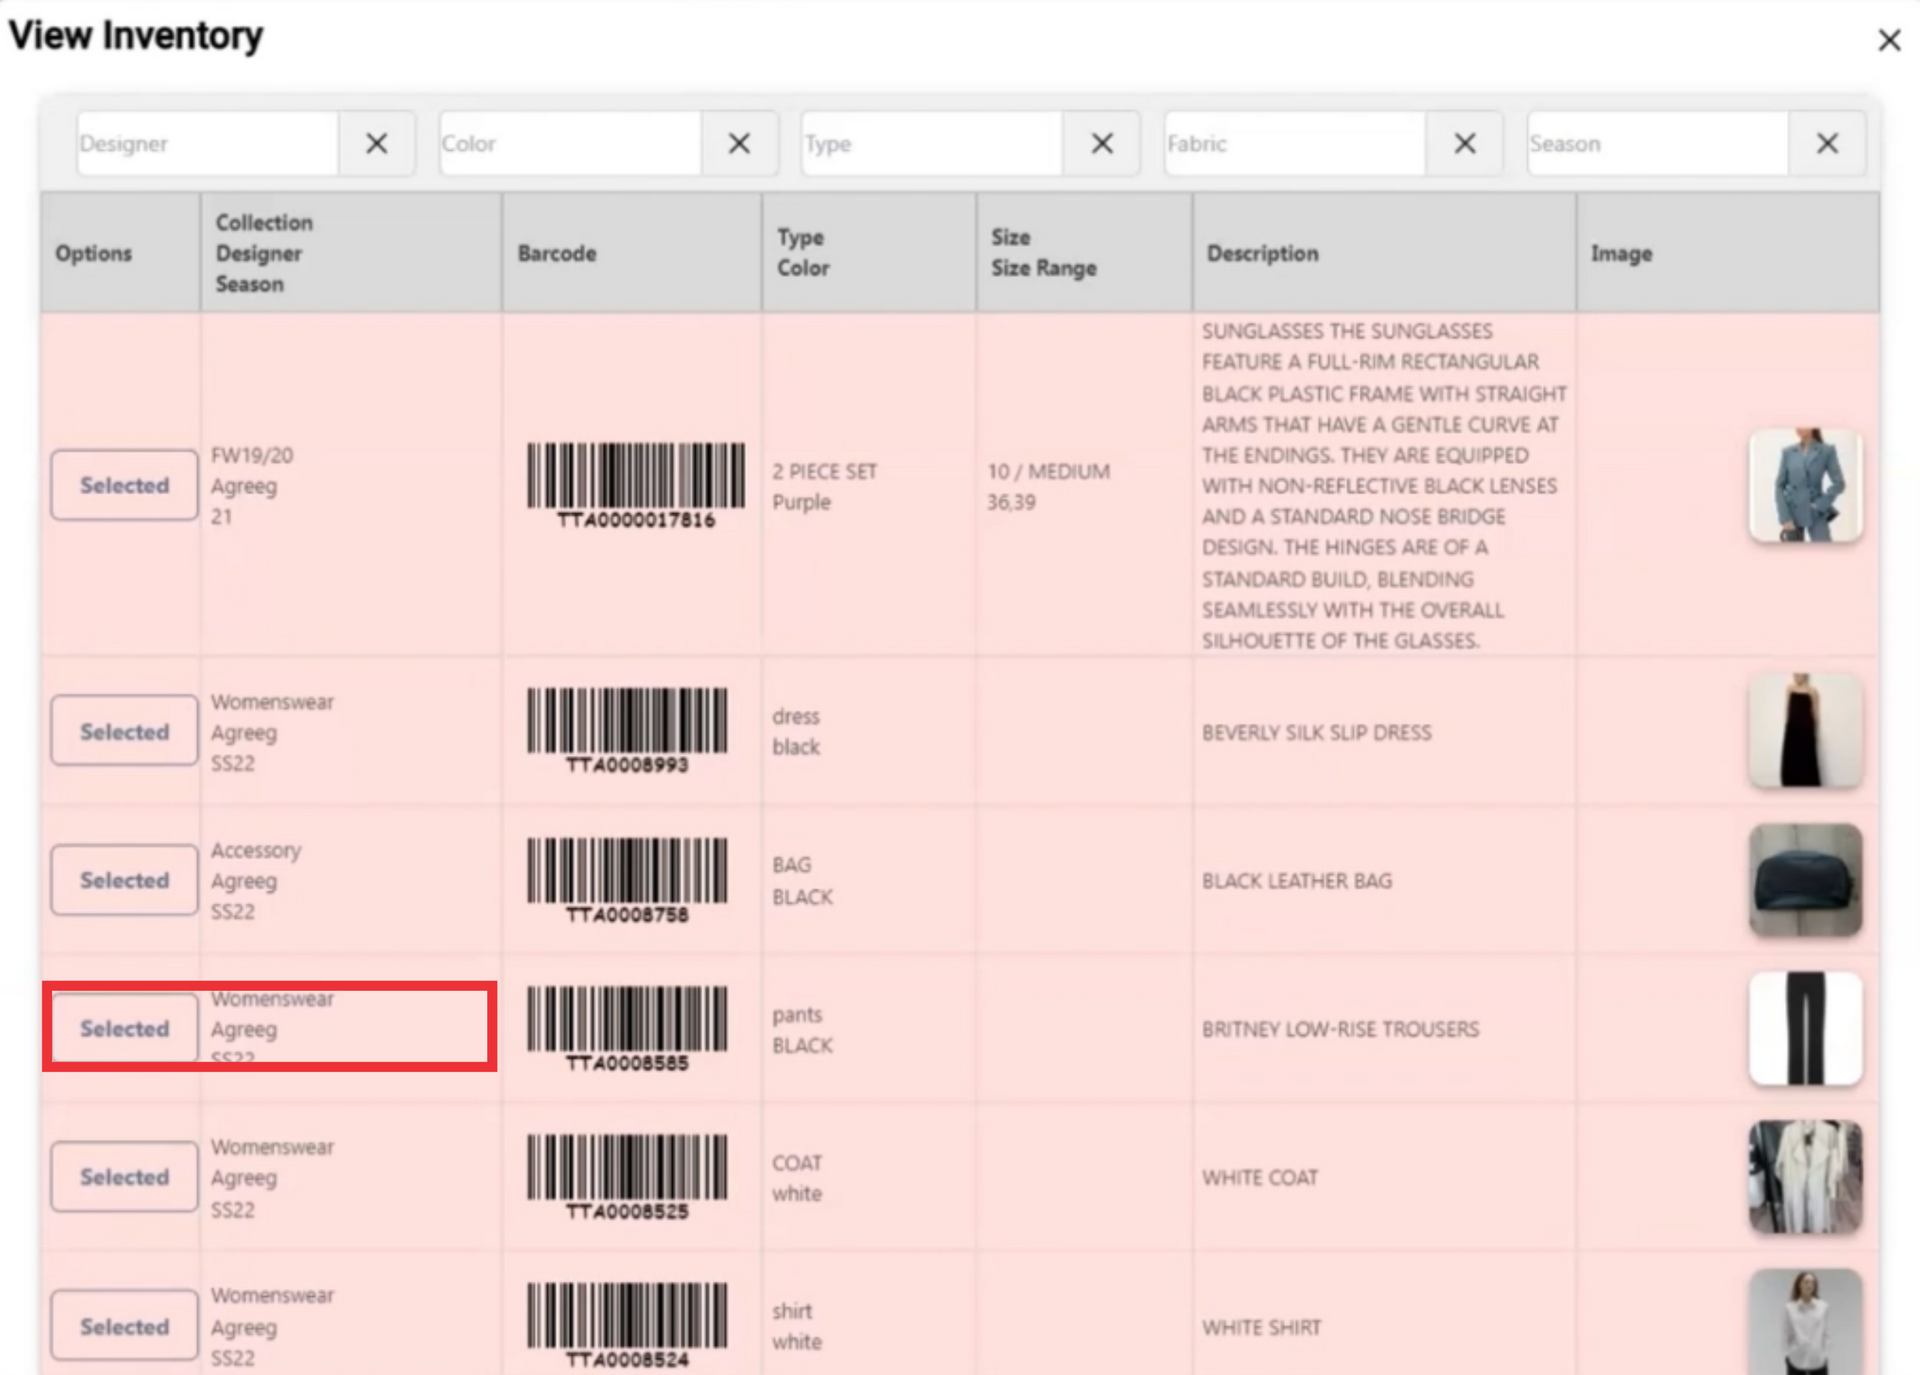
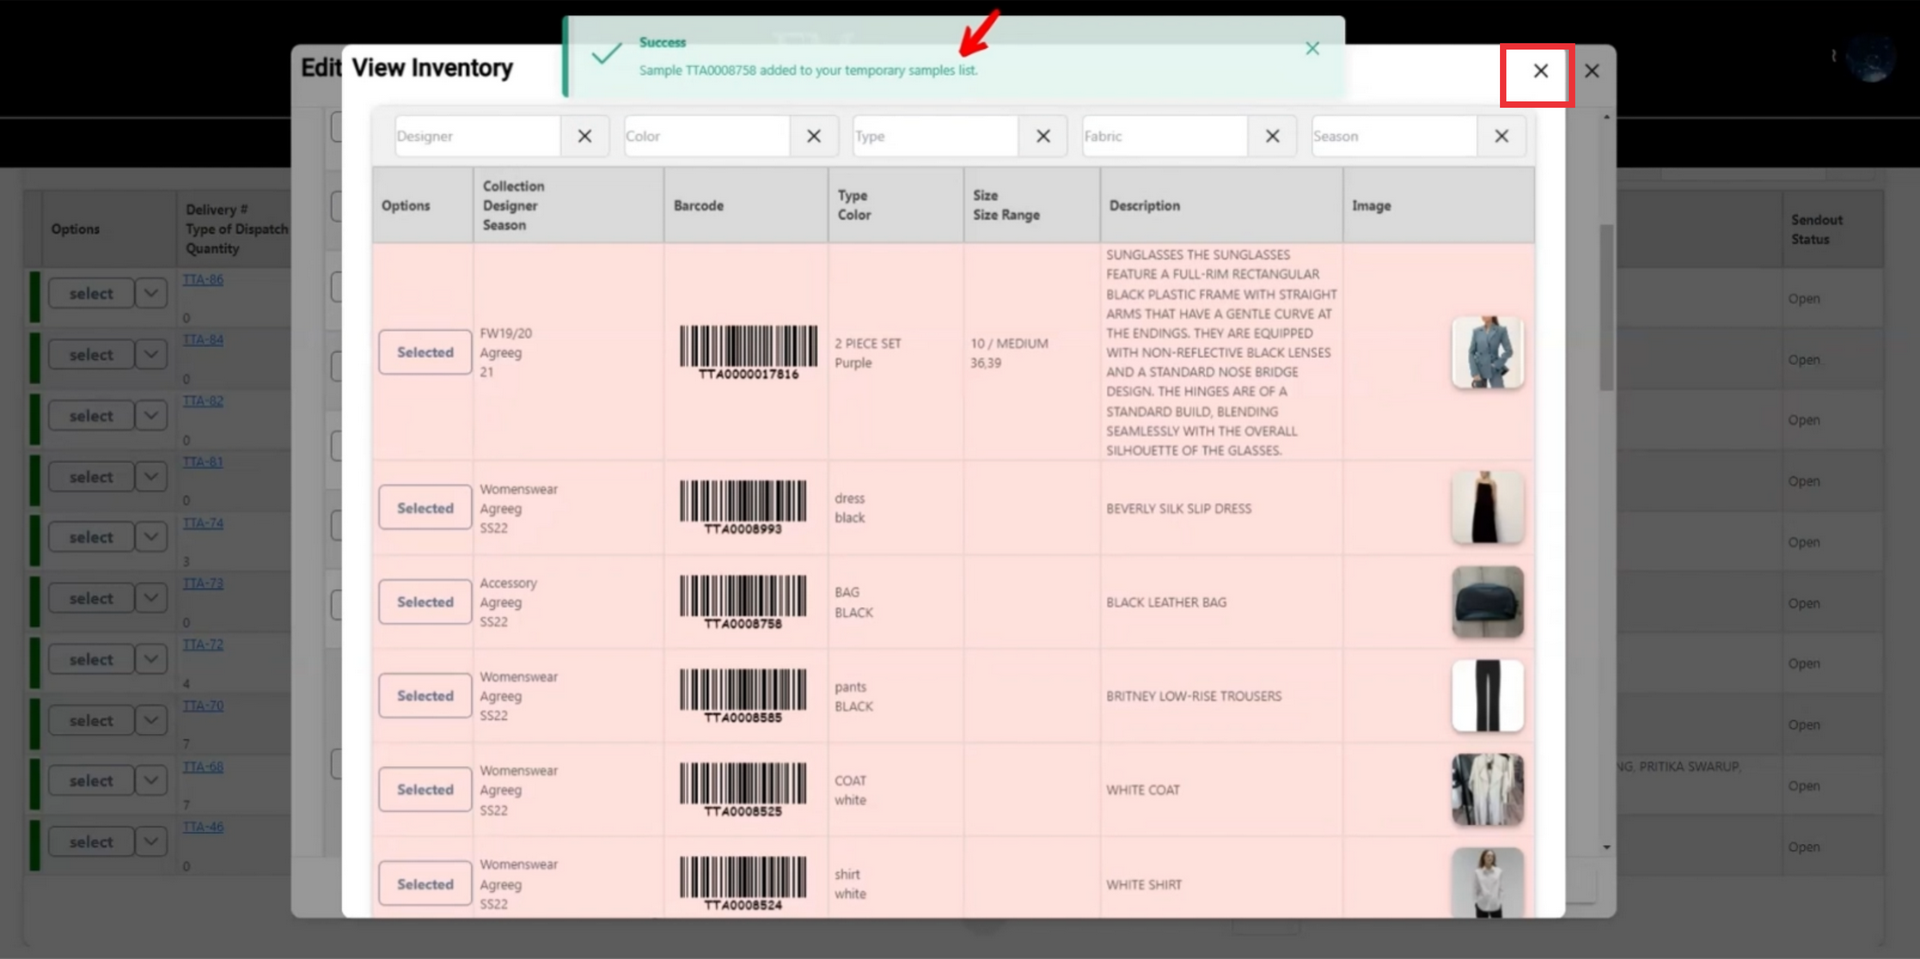
30. Click the "Add from your inventory" button to add sample fro you samples list.
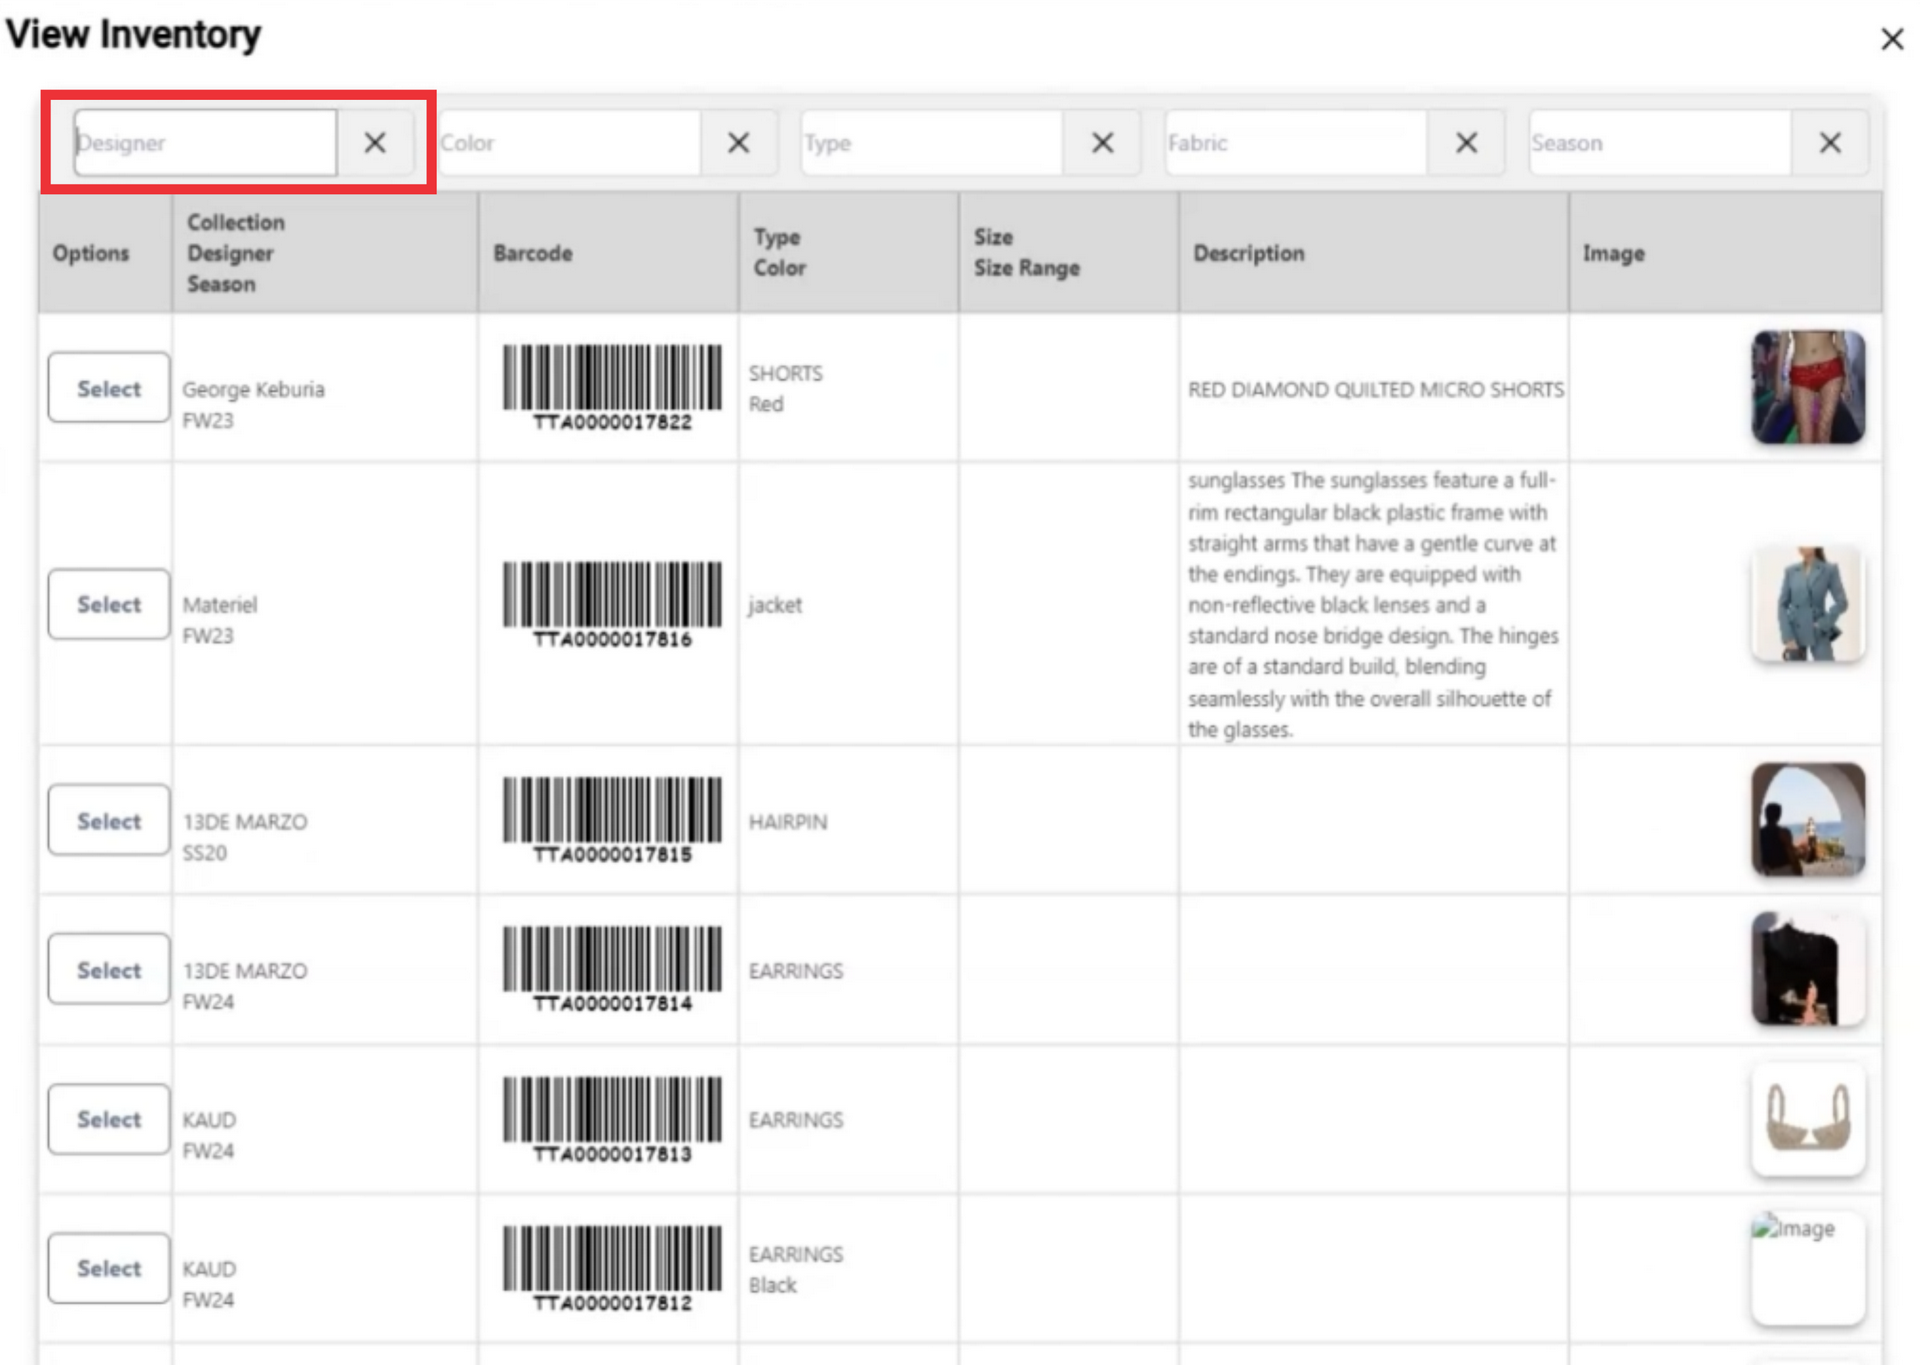
31. If desired search samples using filters by designer.
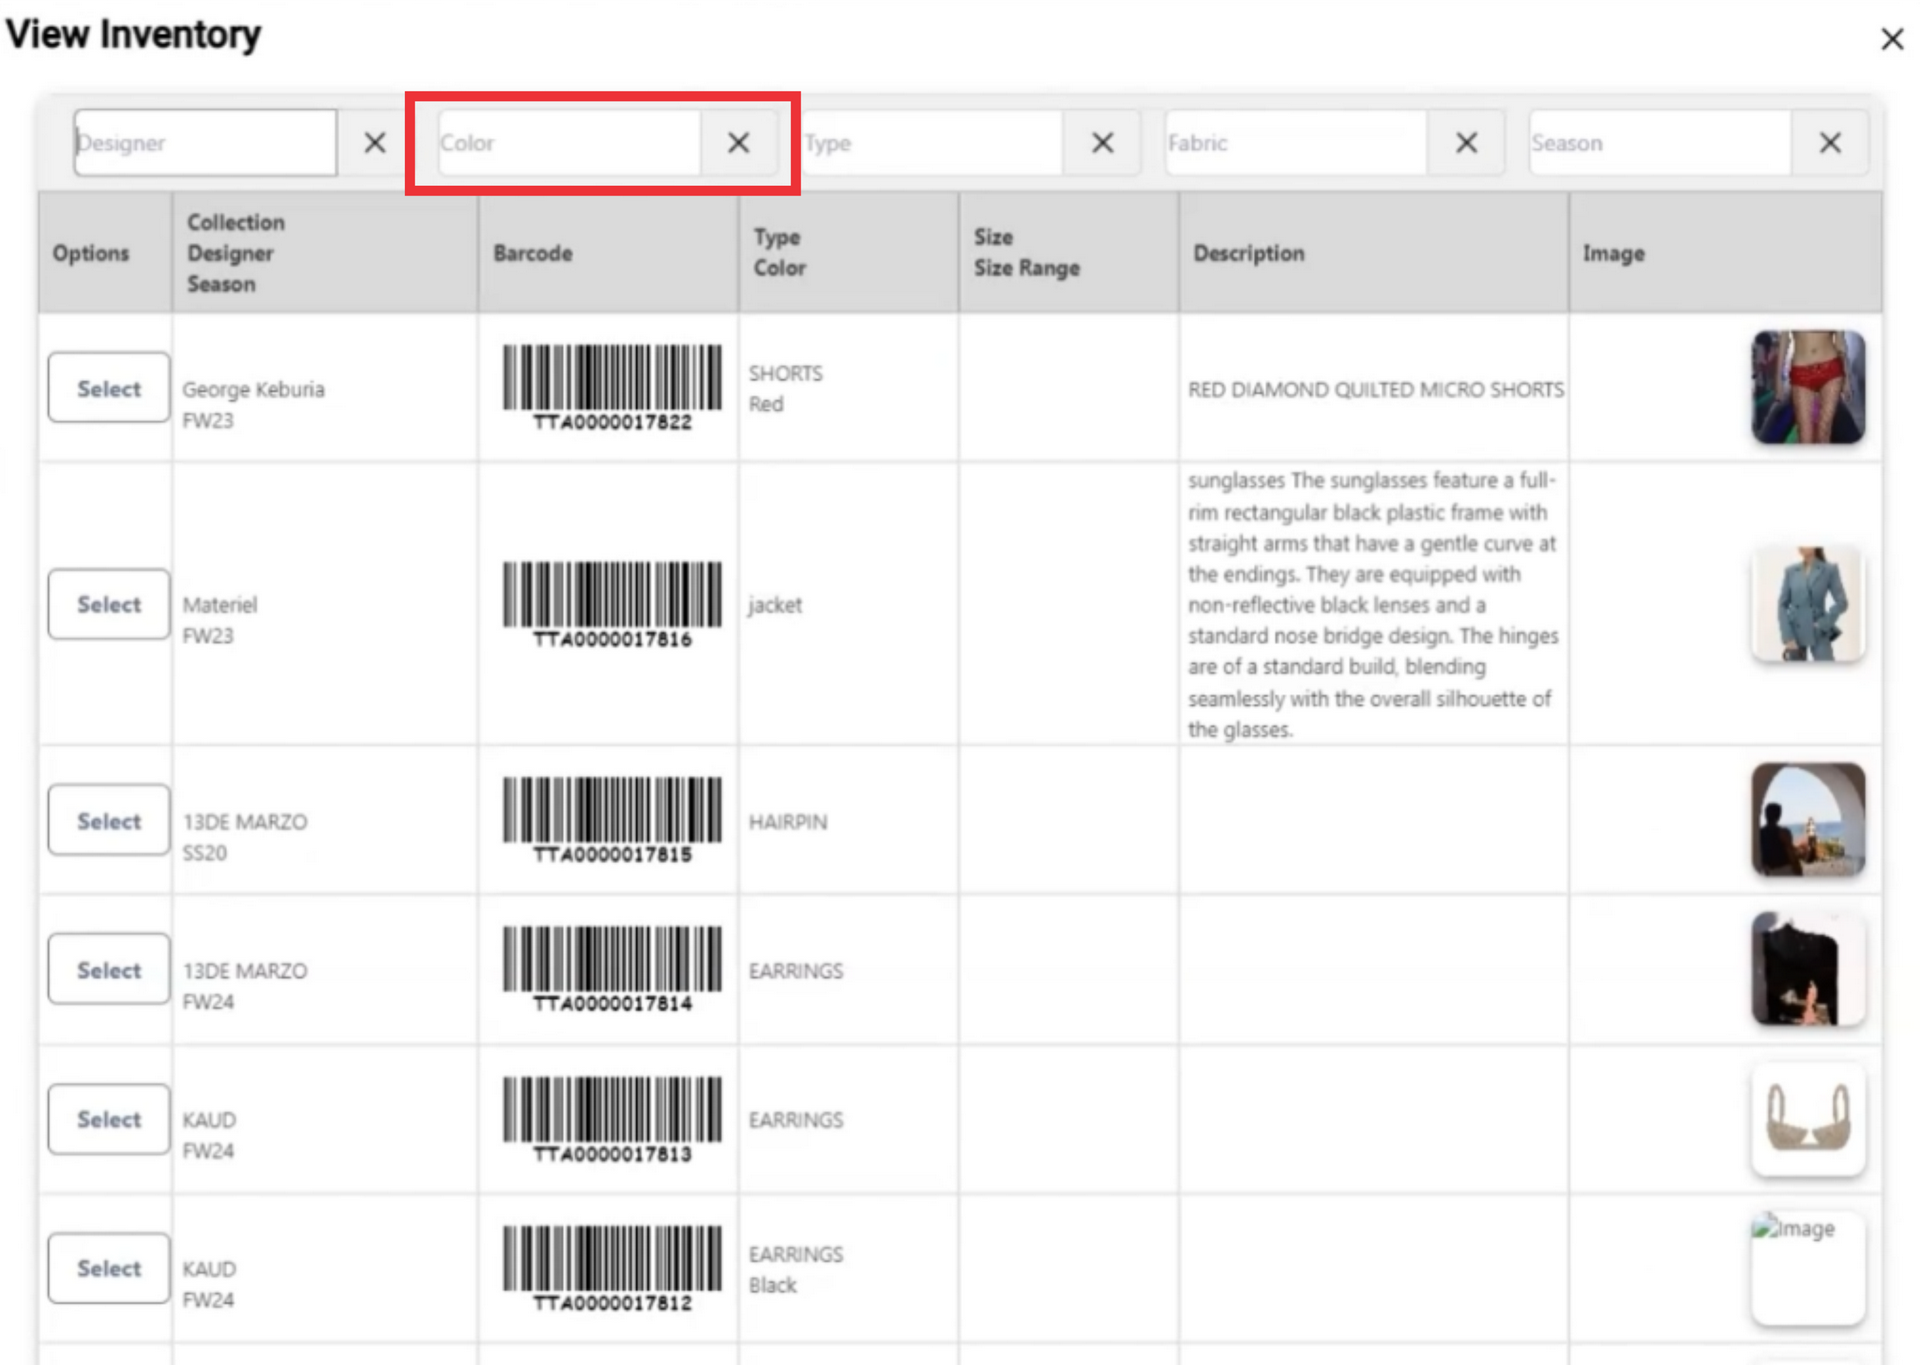
32. If desired search samples using filters by color.
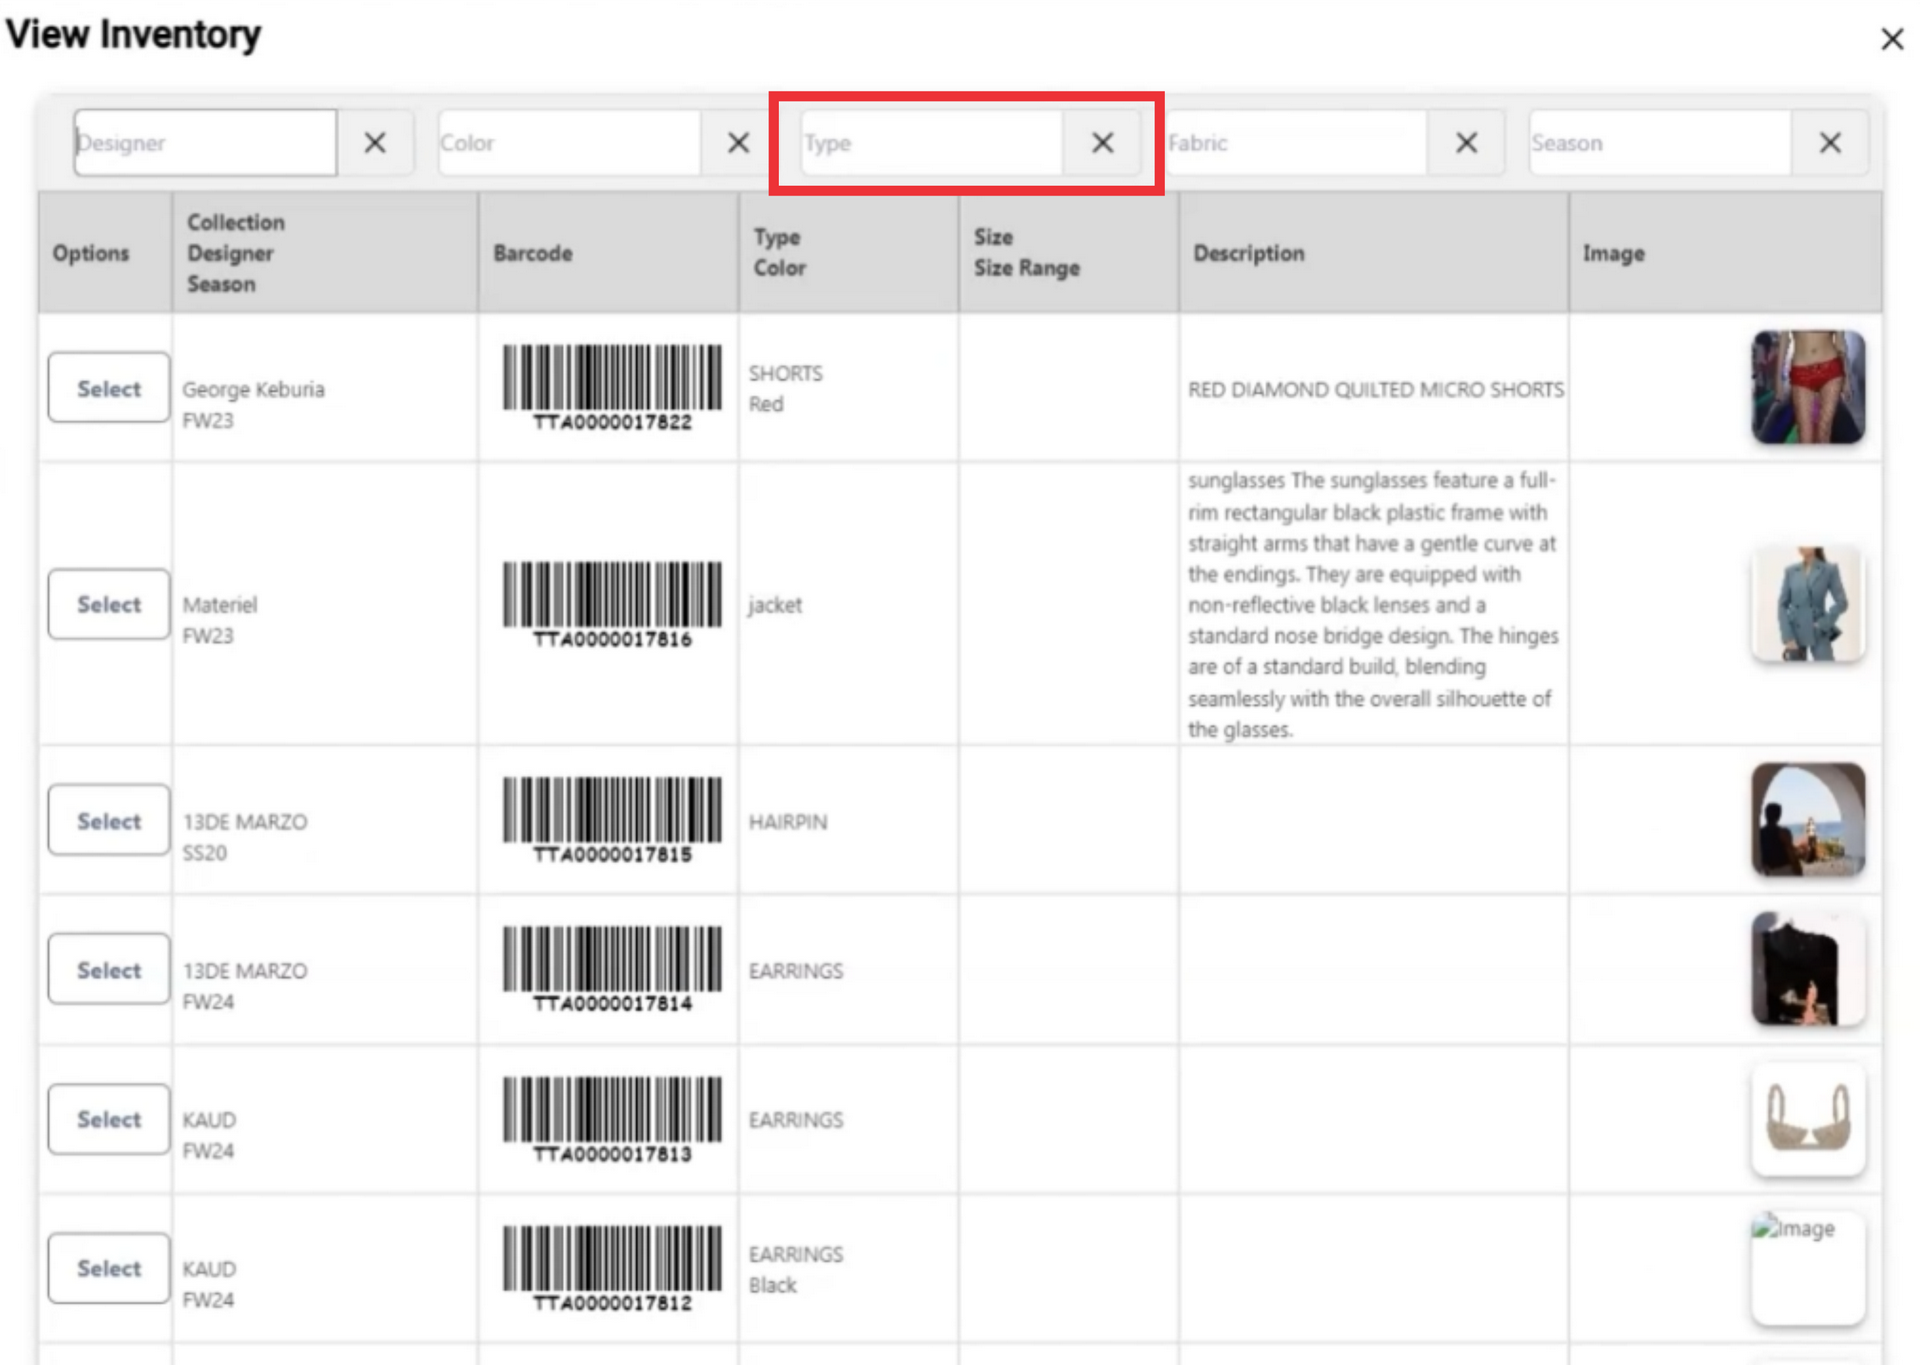
33. If desired search samples using filters by type.
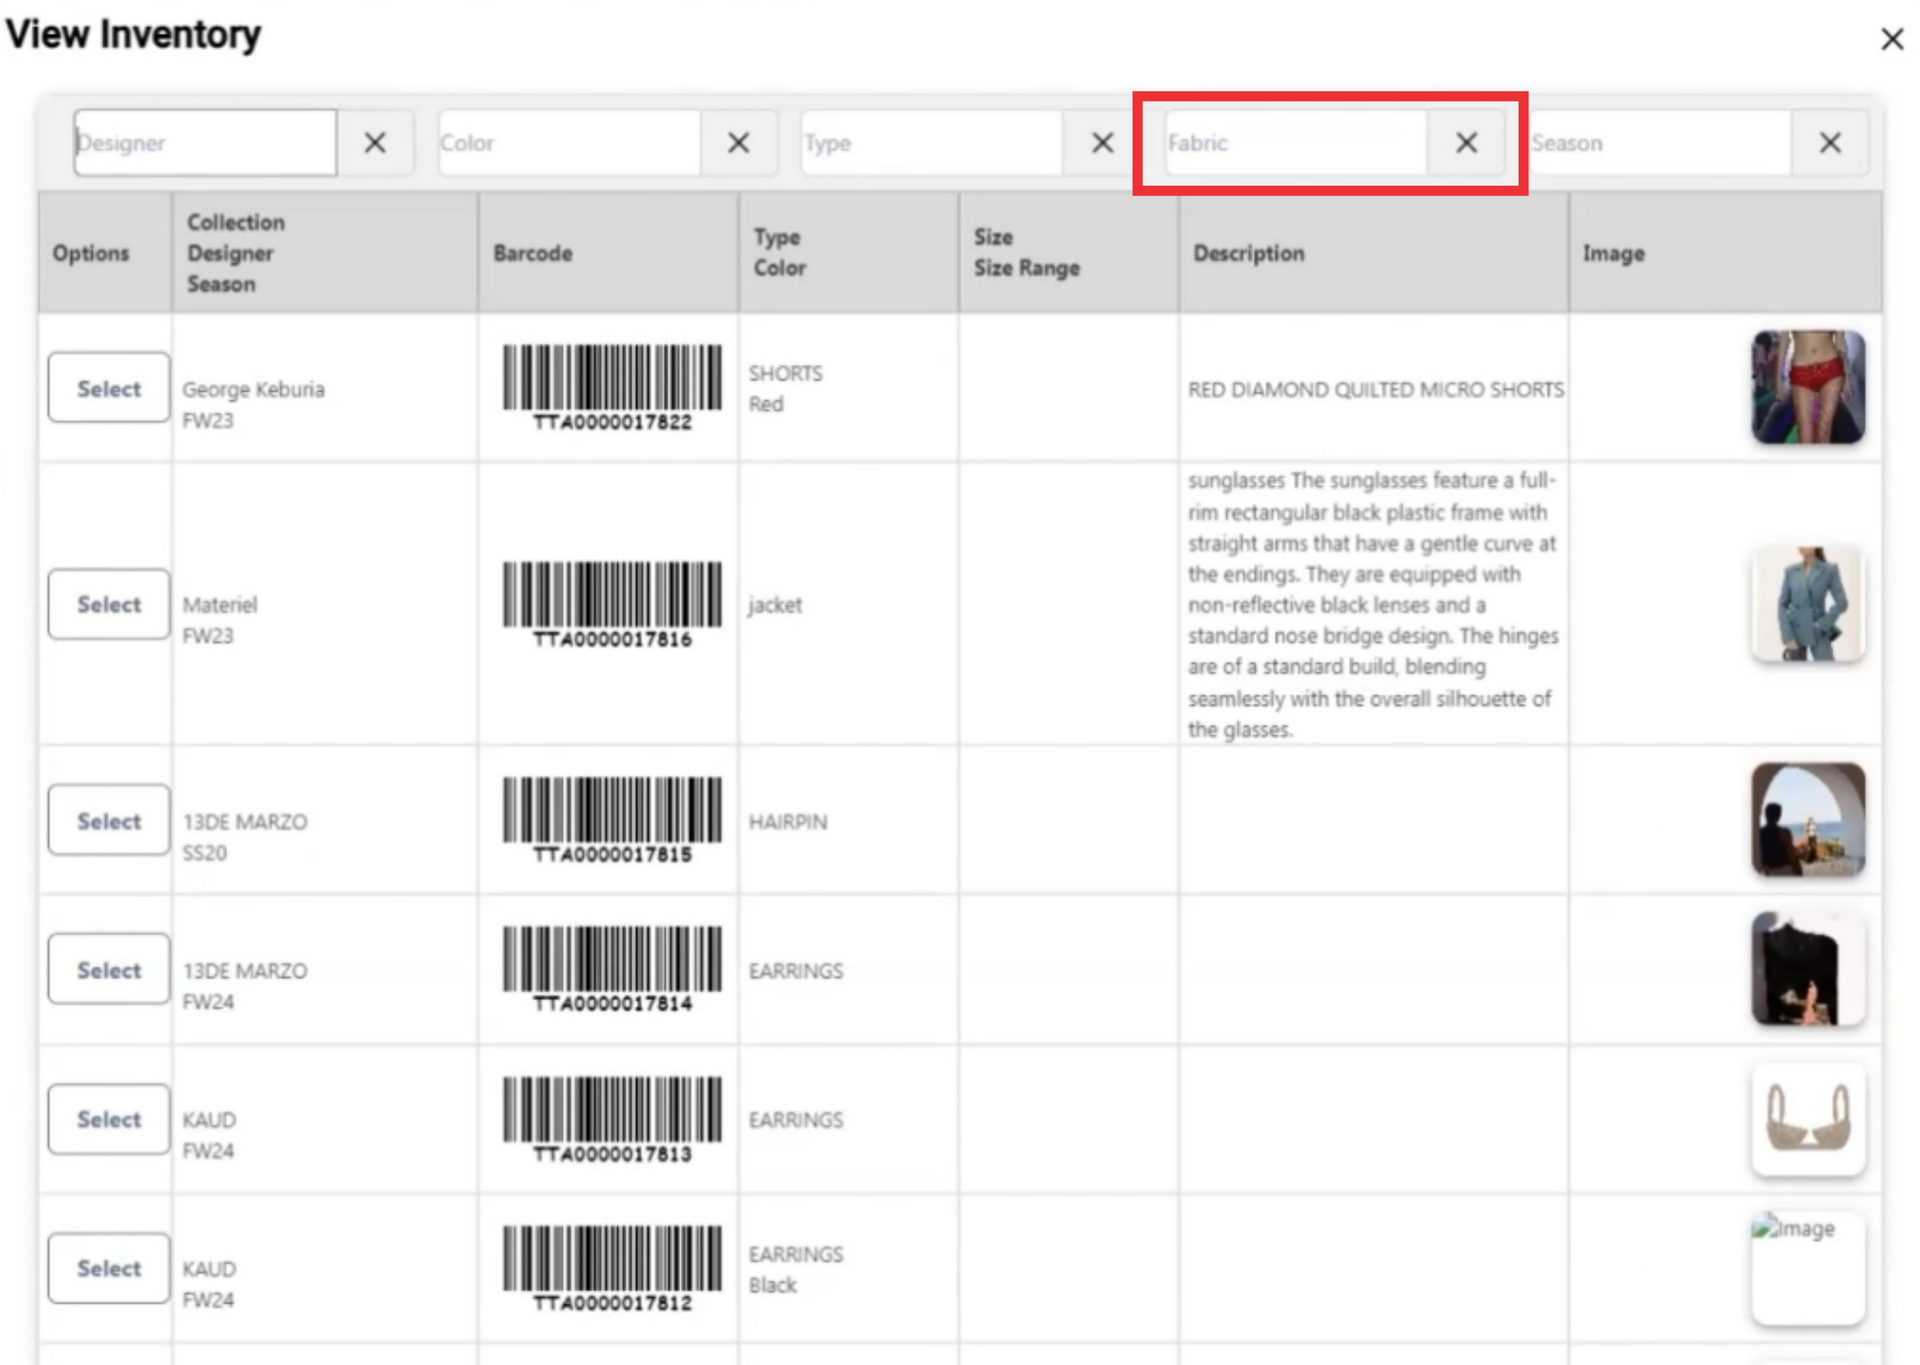
34. If desired search samples using filters by Fabric.
35. If desired search samples using filters by season.
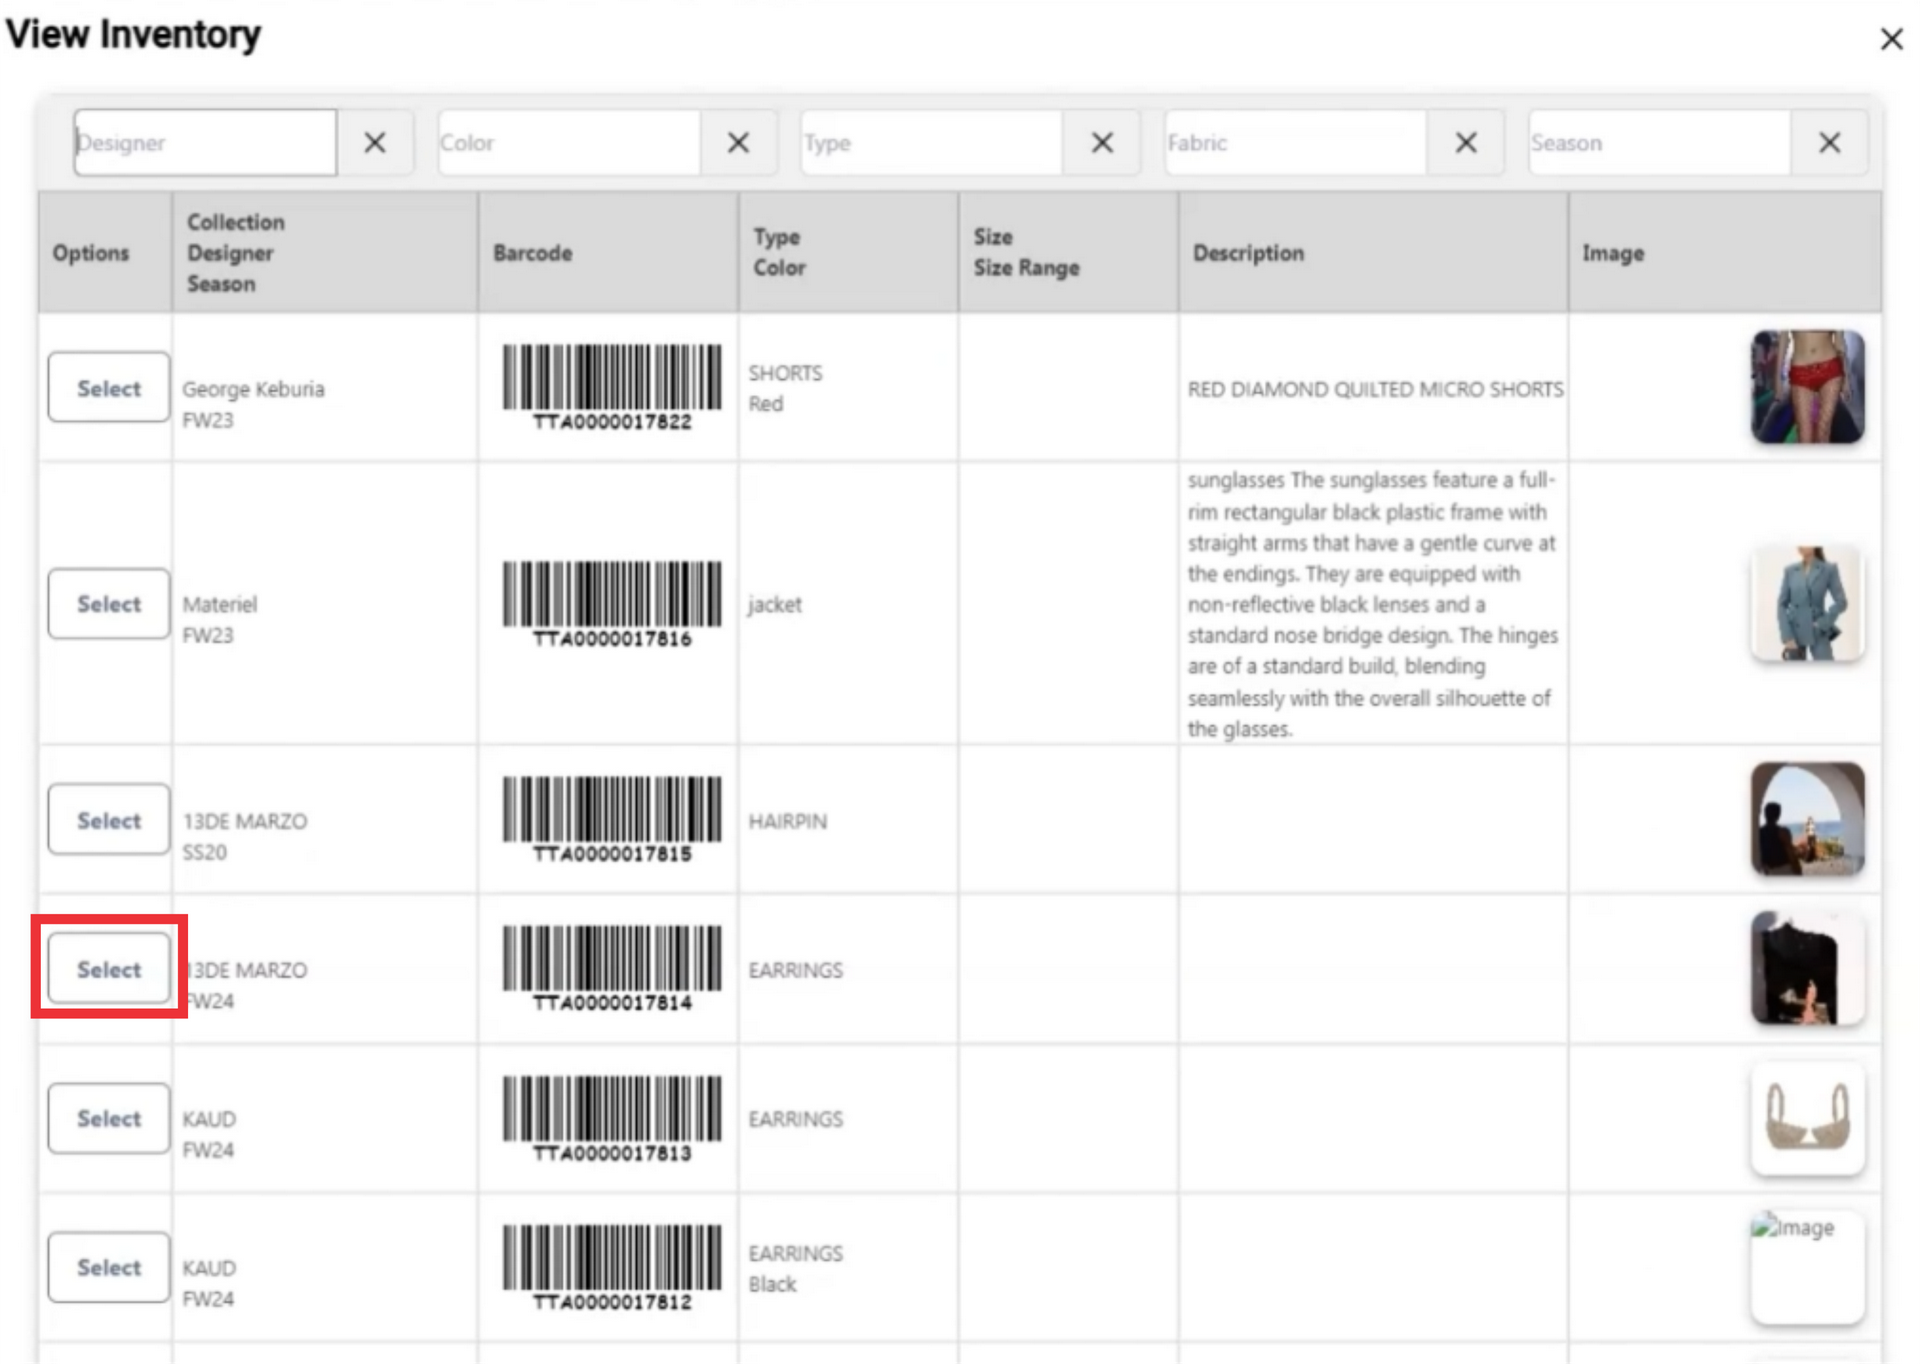
36. Click the select button add sedired sample from your inventory to send out.
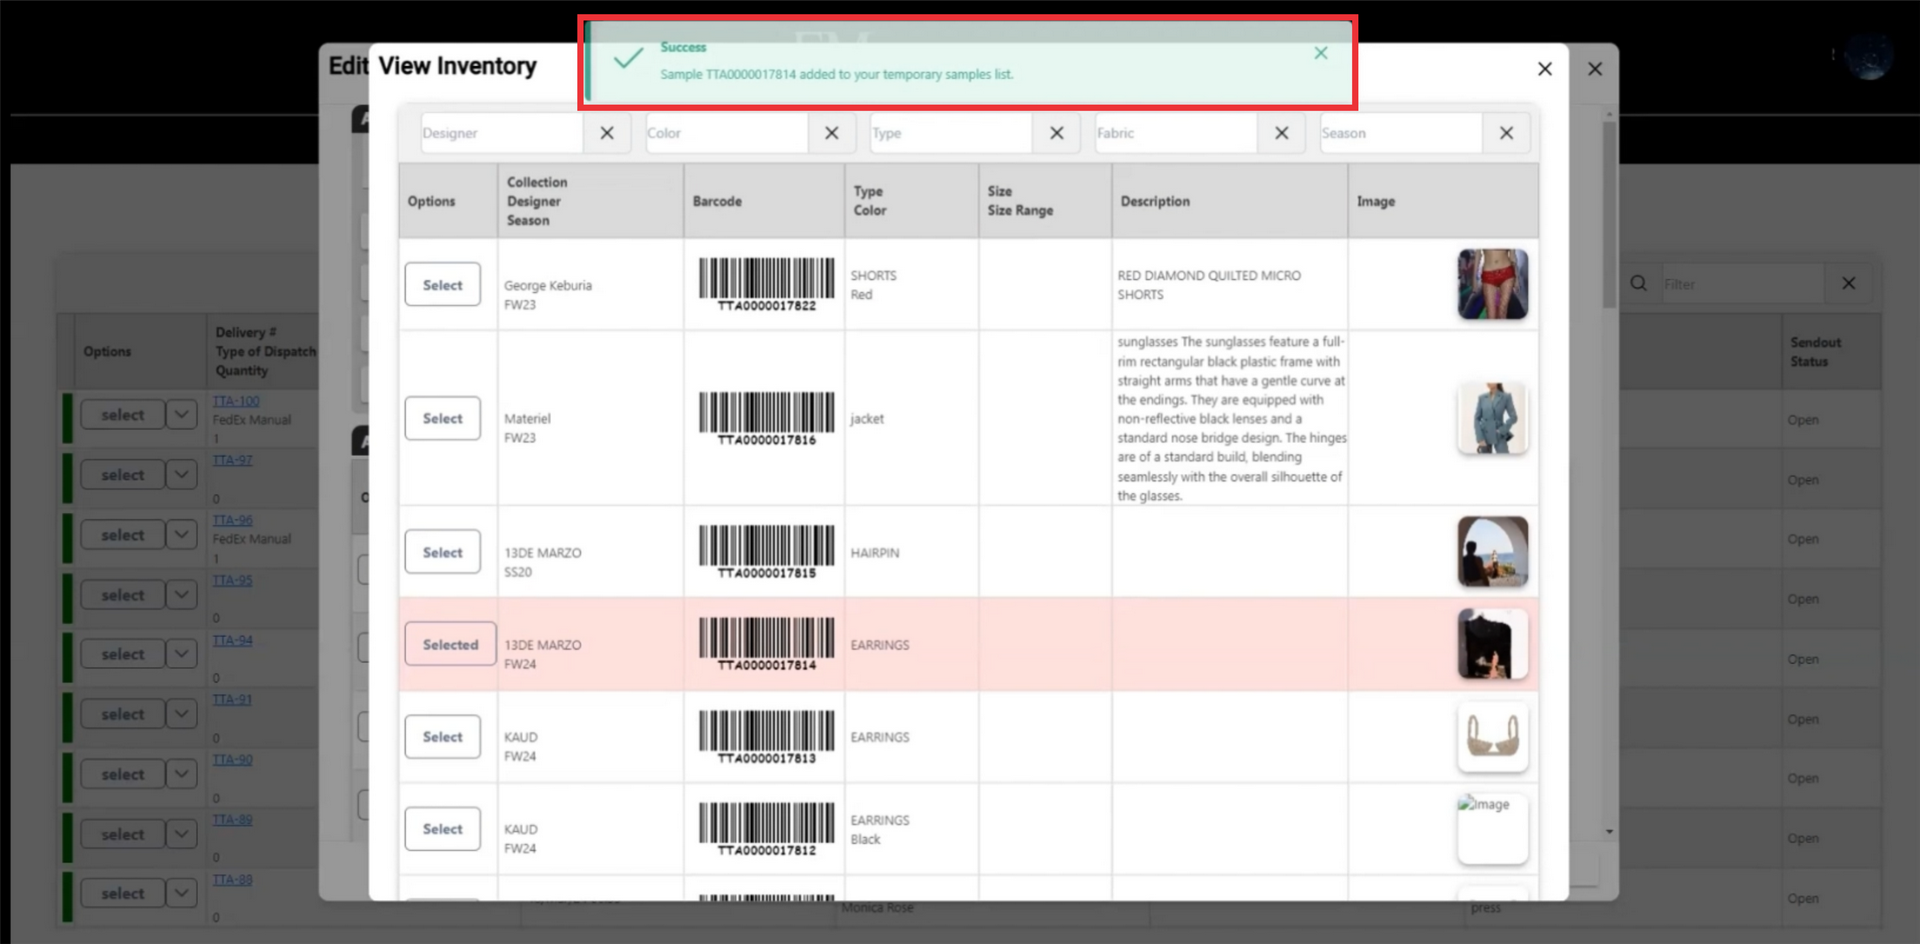
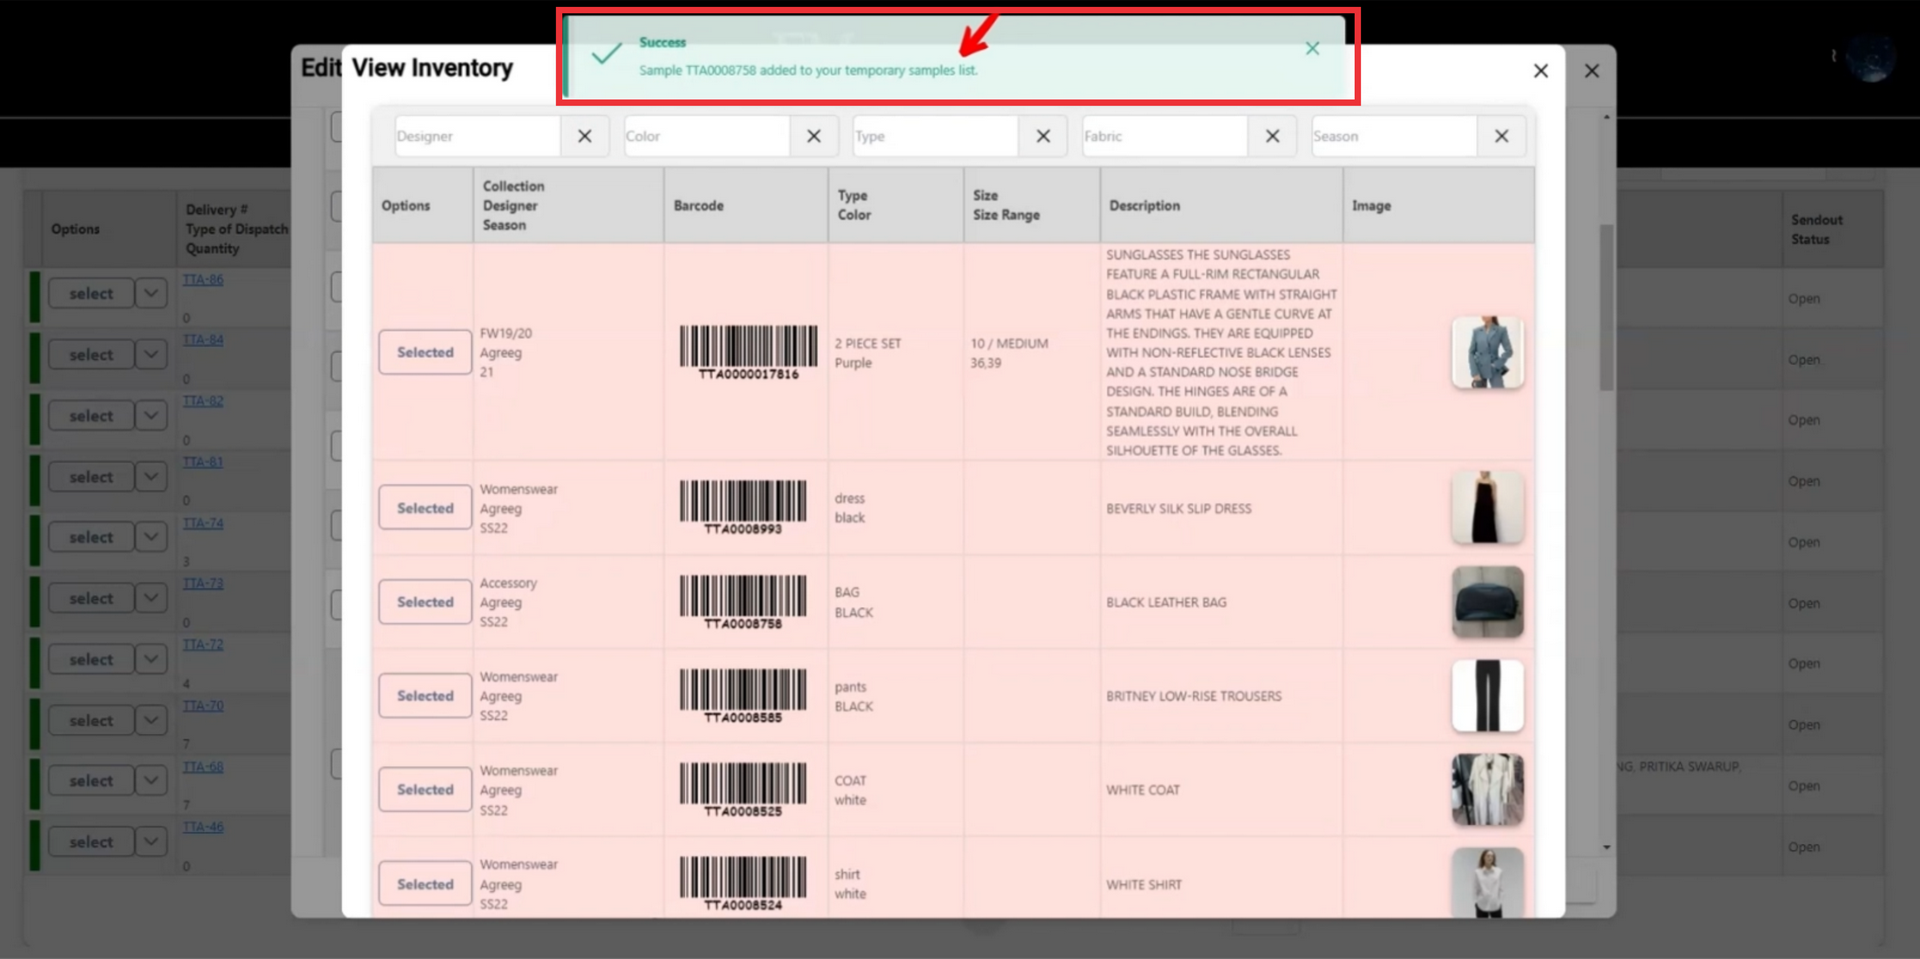
37. A message about adding a sample to send out list will appear in upper middle screen.
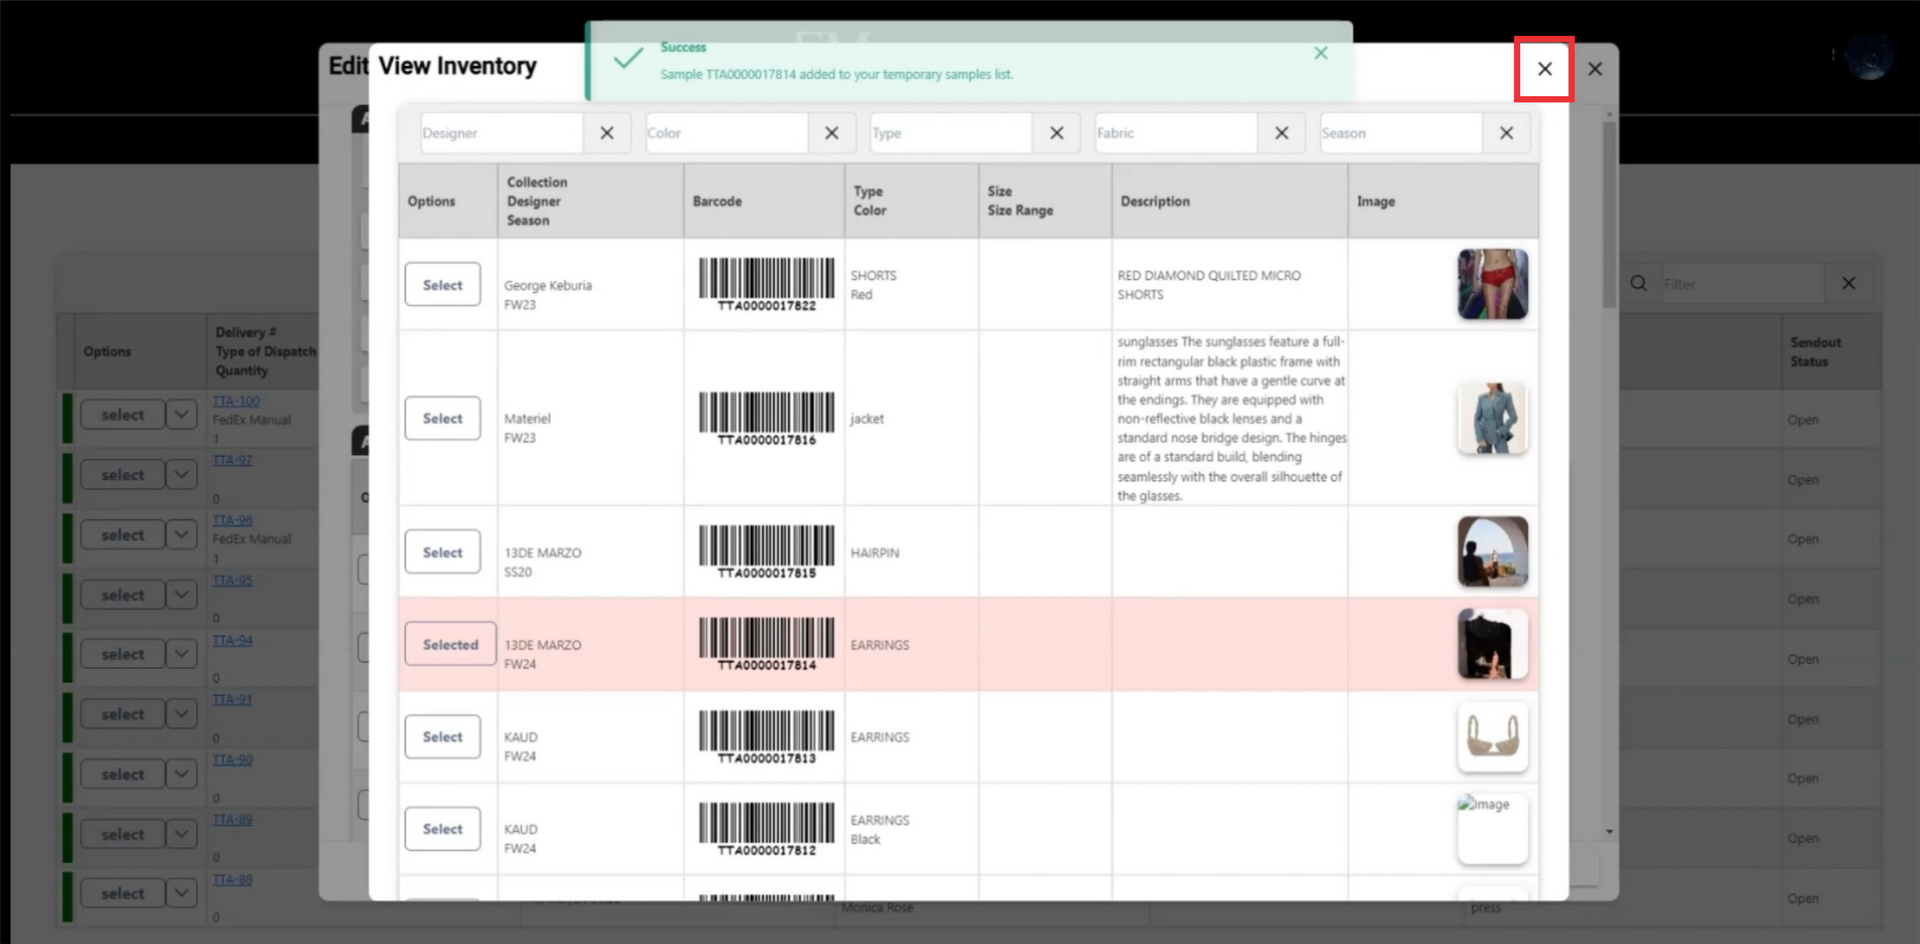
38. Click the "X" buttton to close this window.
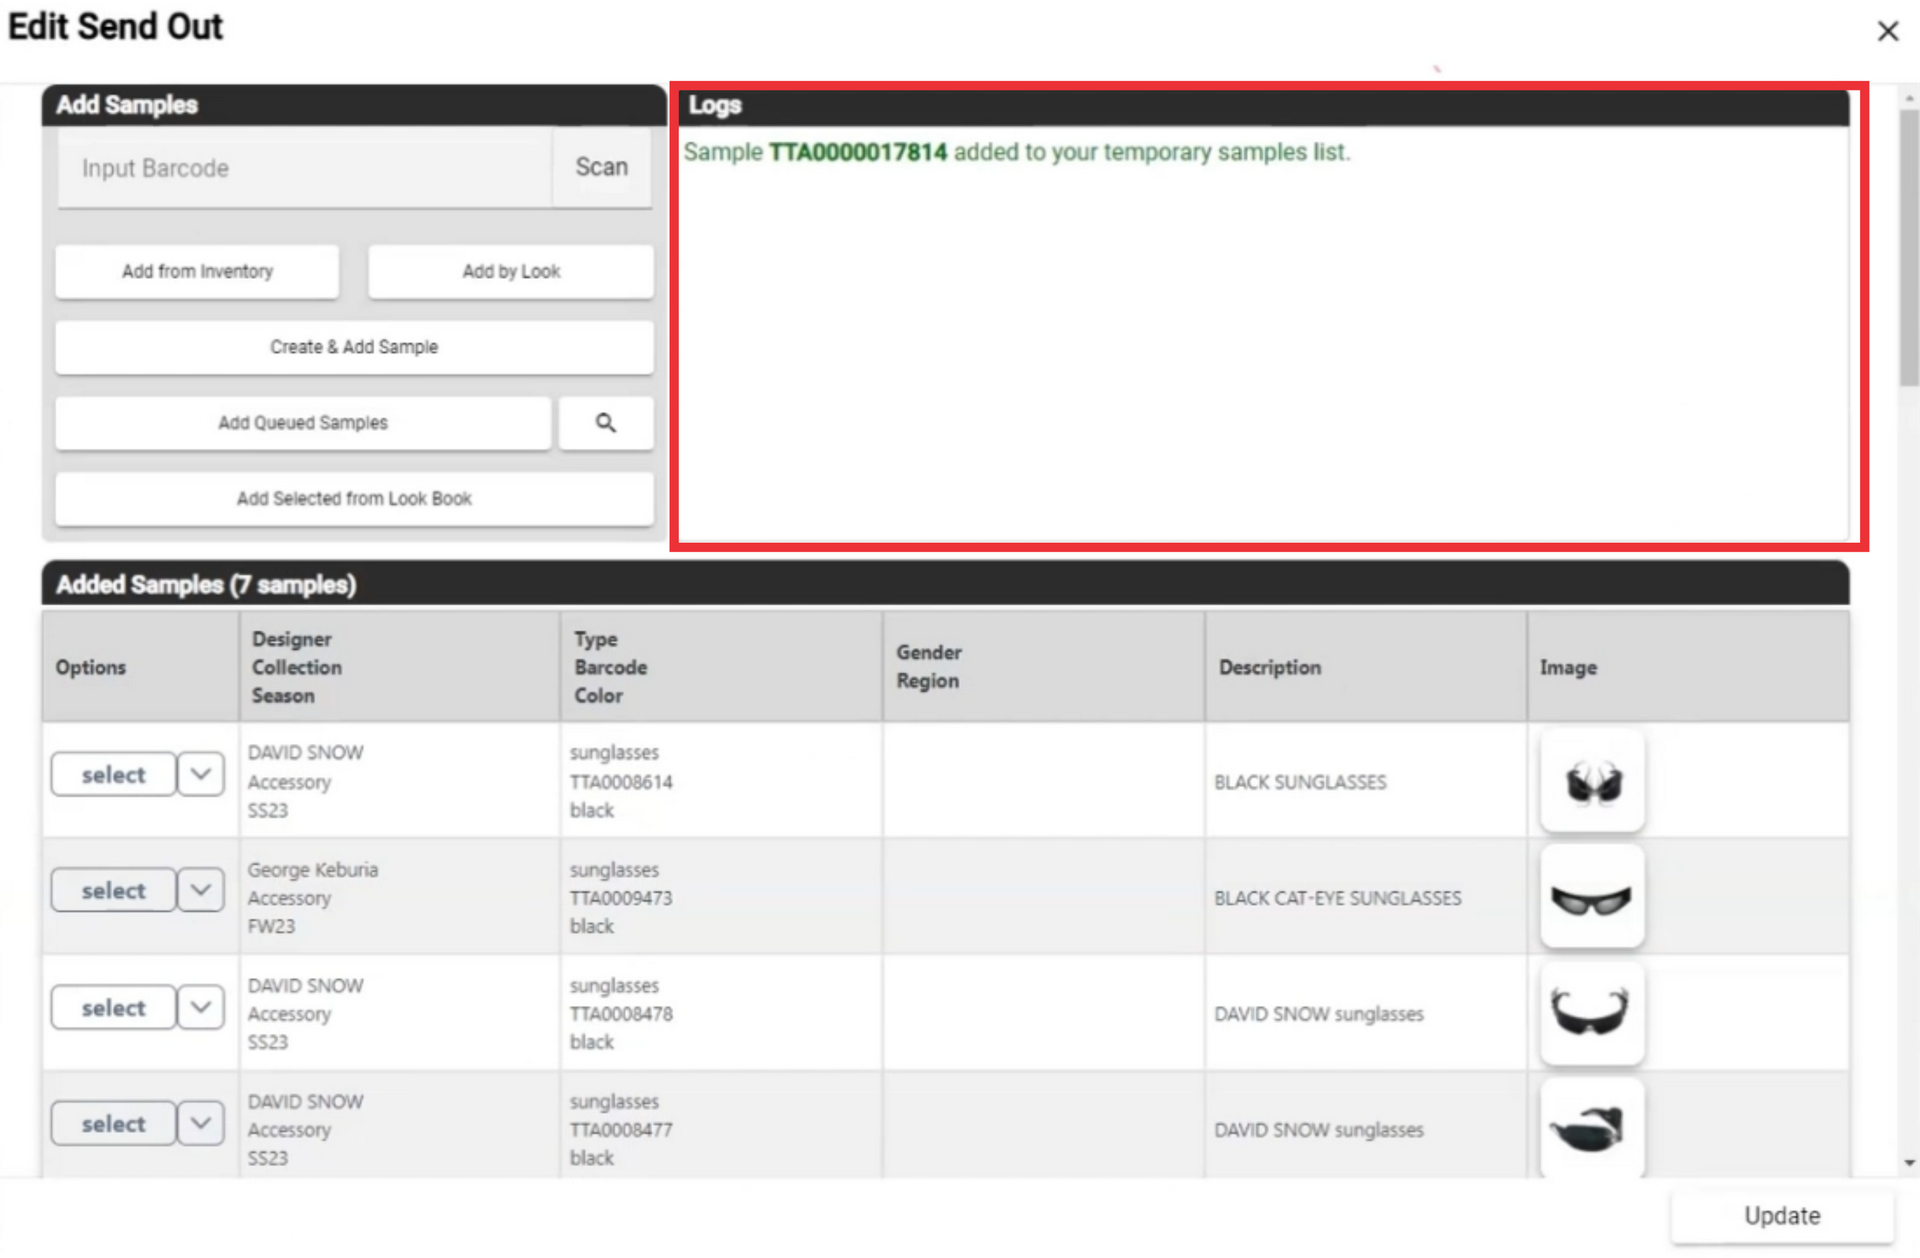
39. The message of the added sample barcode number will appear in the logs.
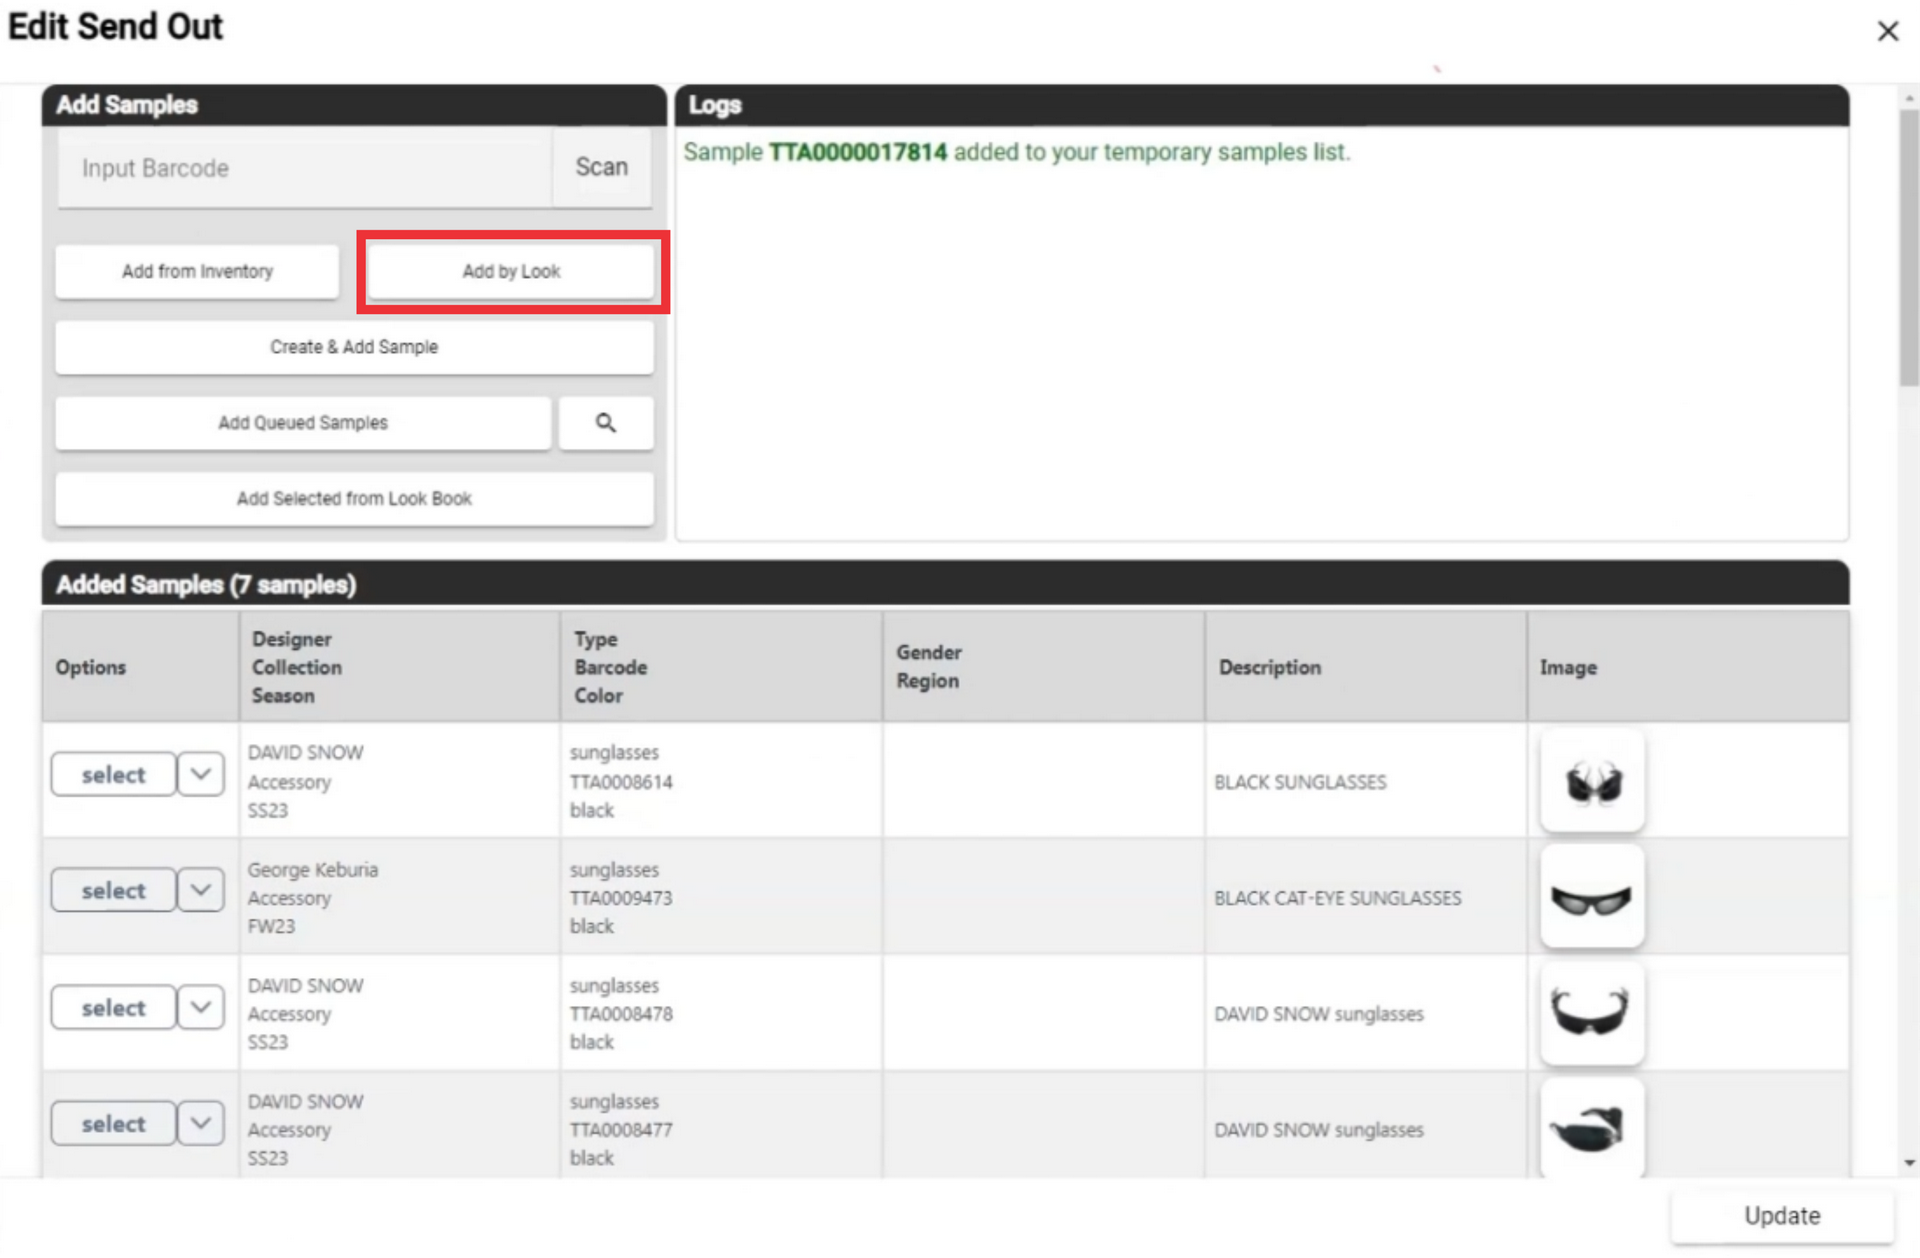
40. Add sample from by look.
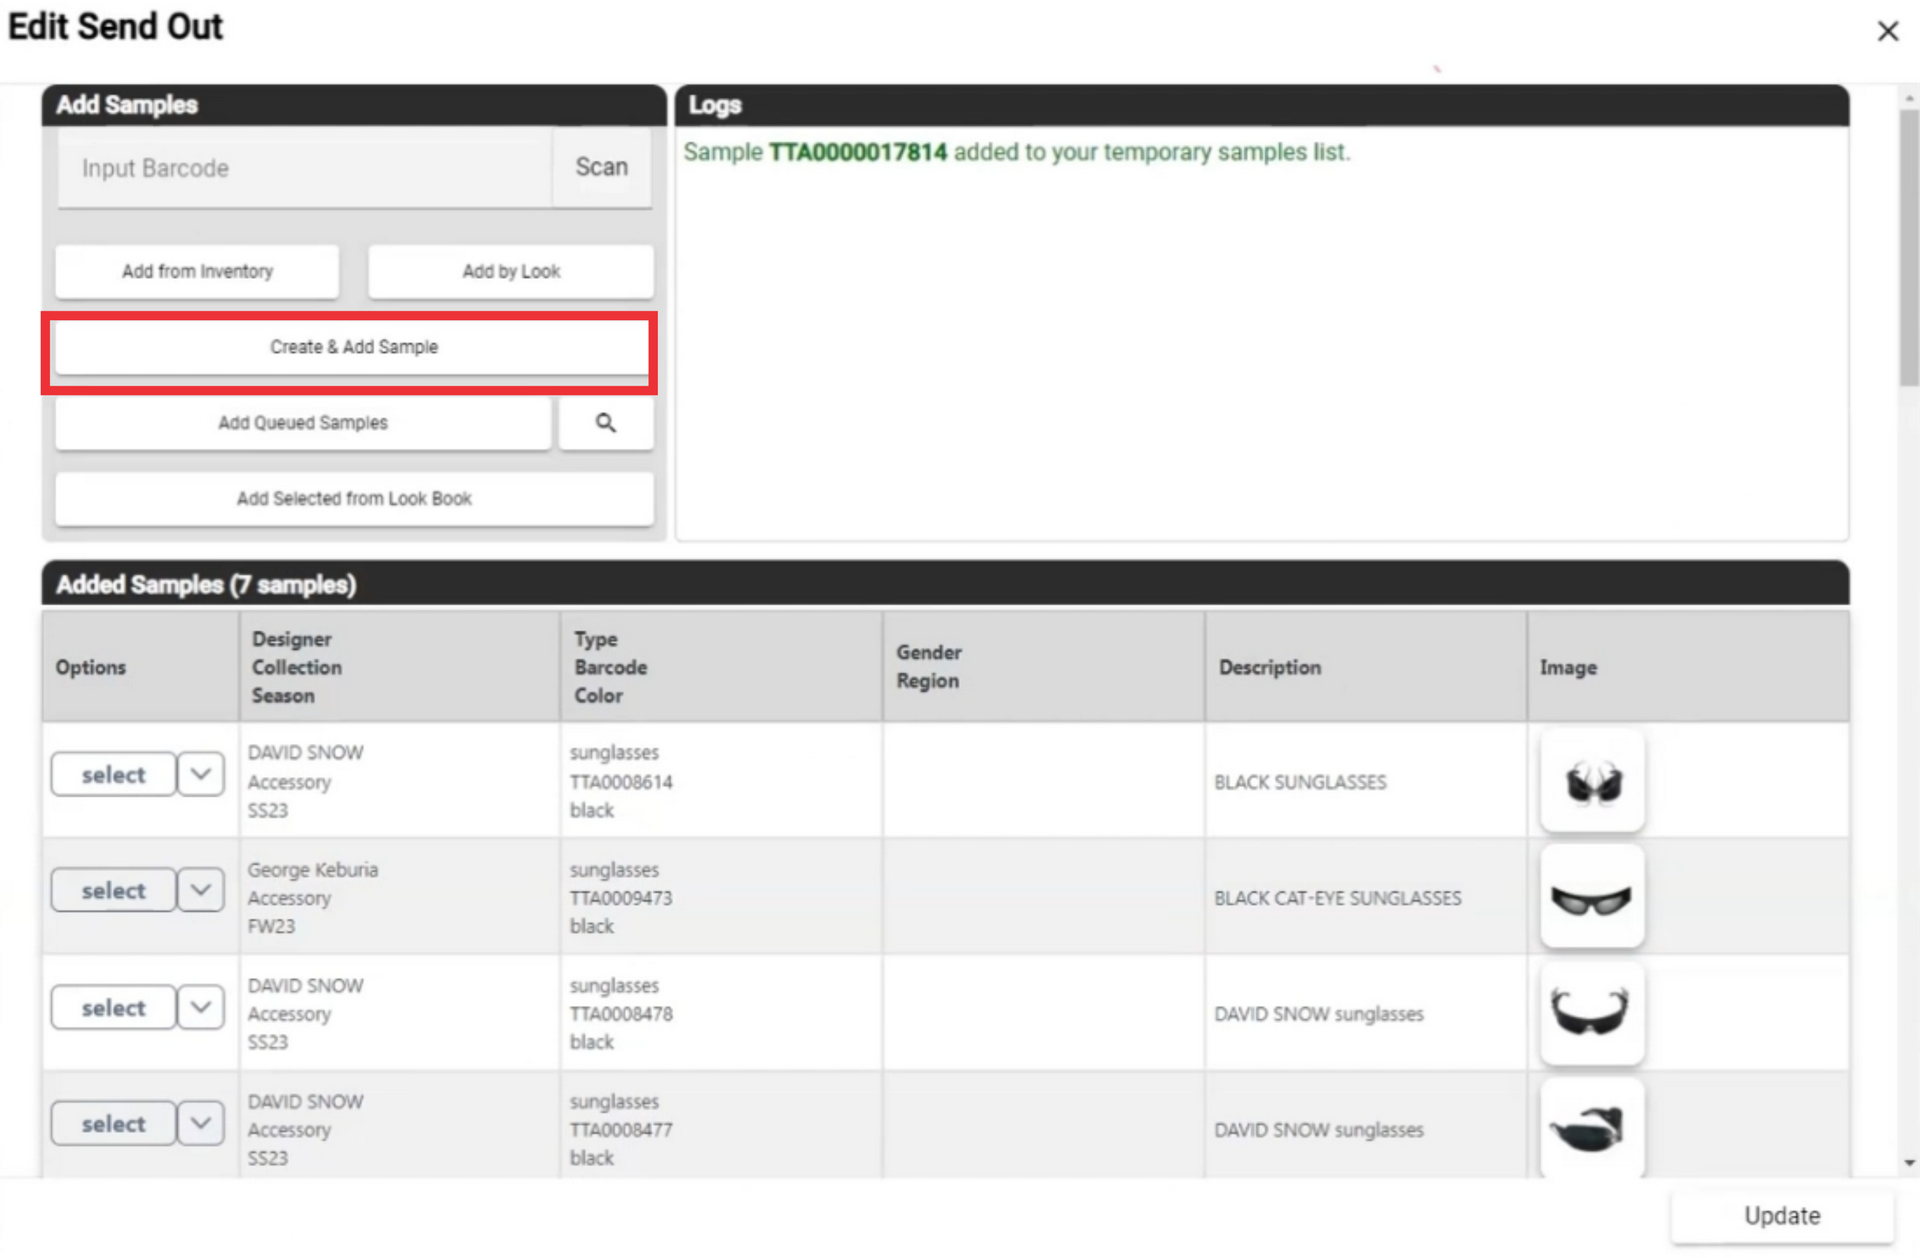
41. Click the "Create and add Sample" button.
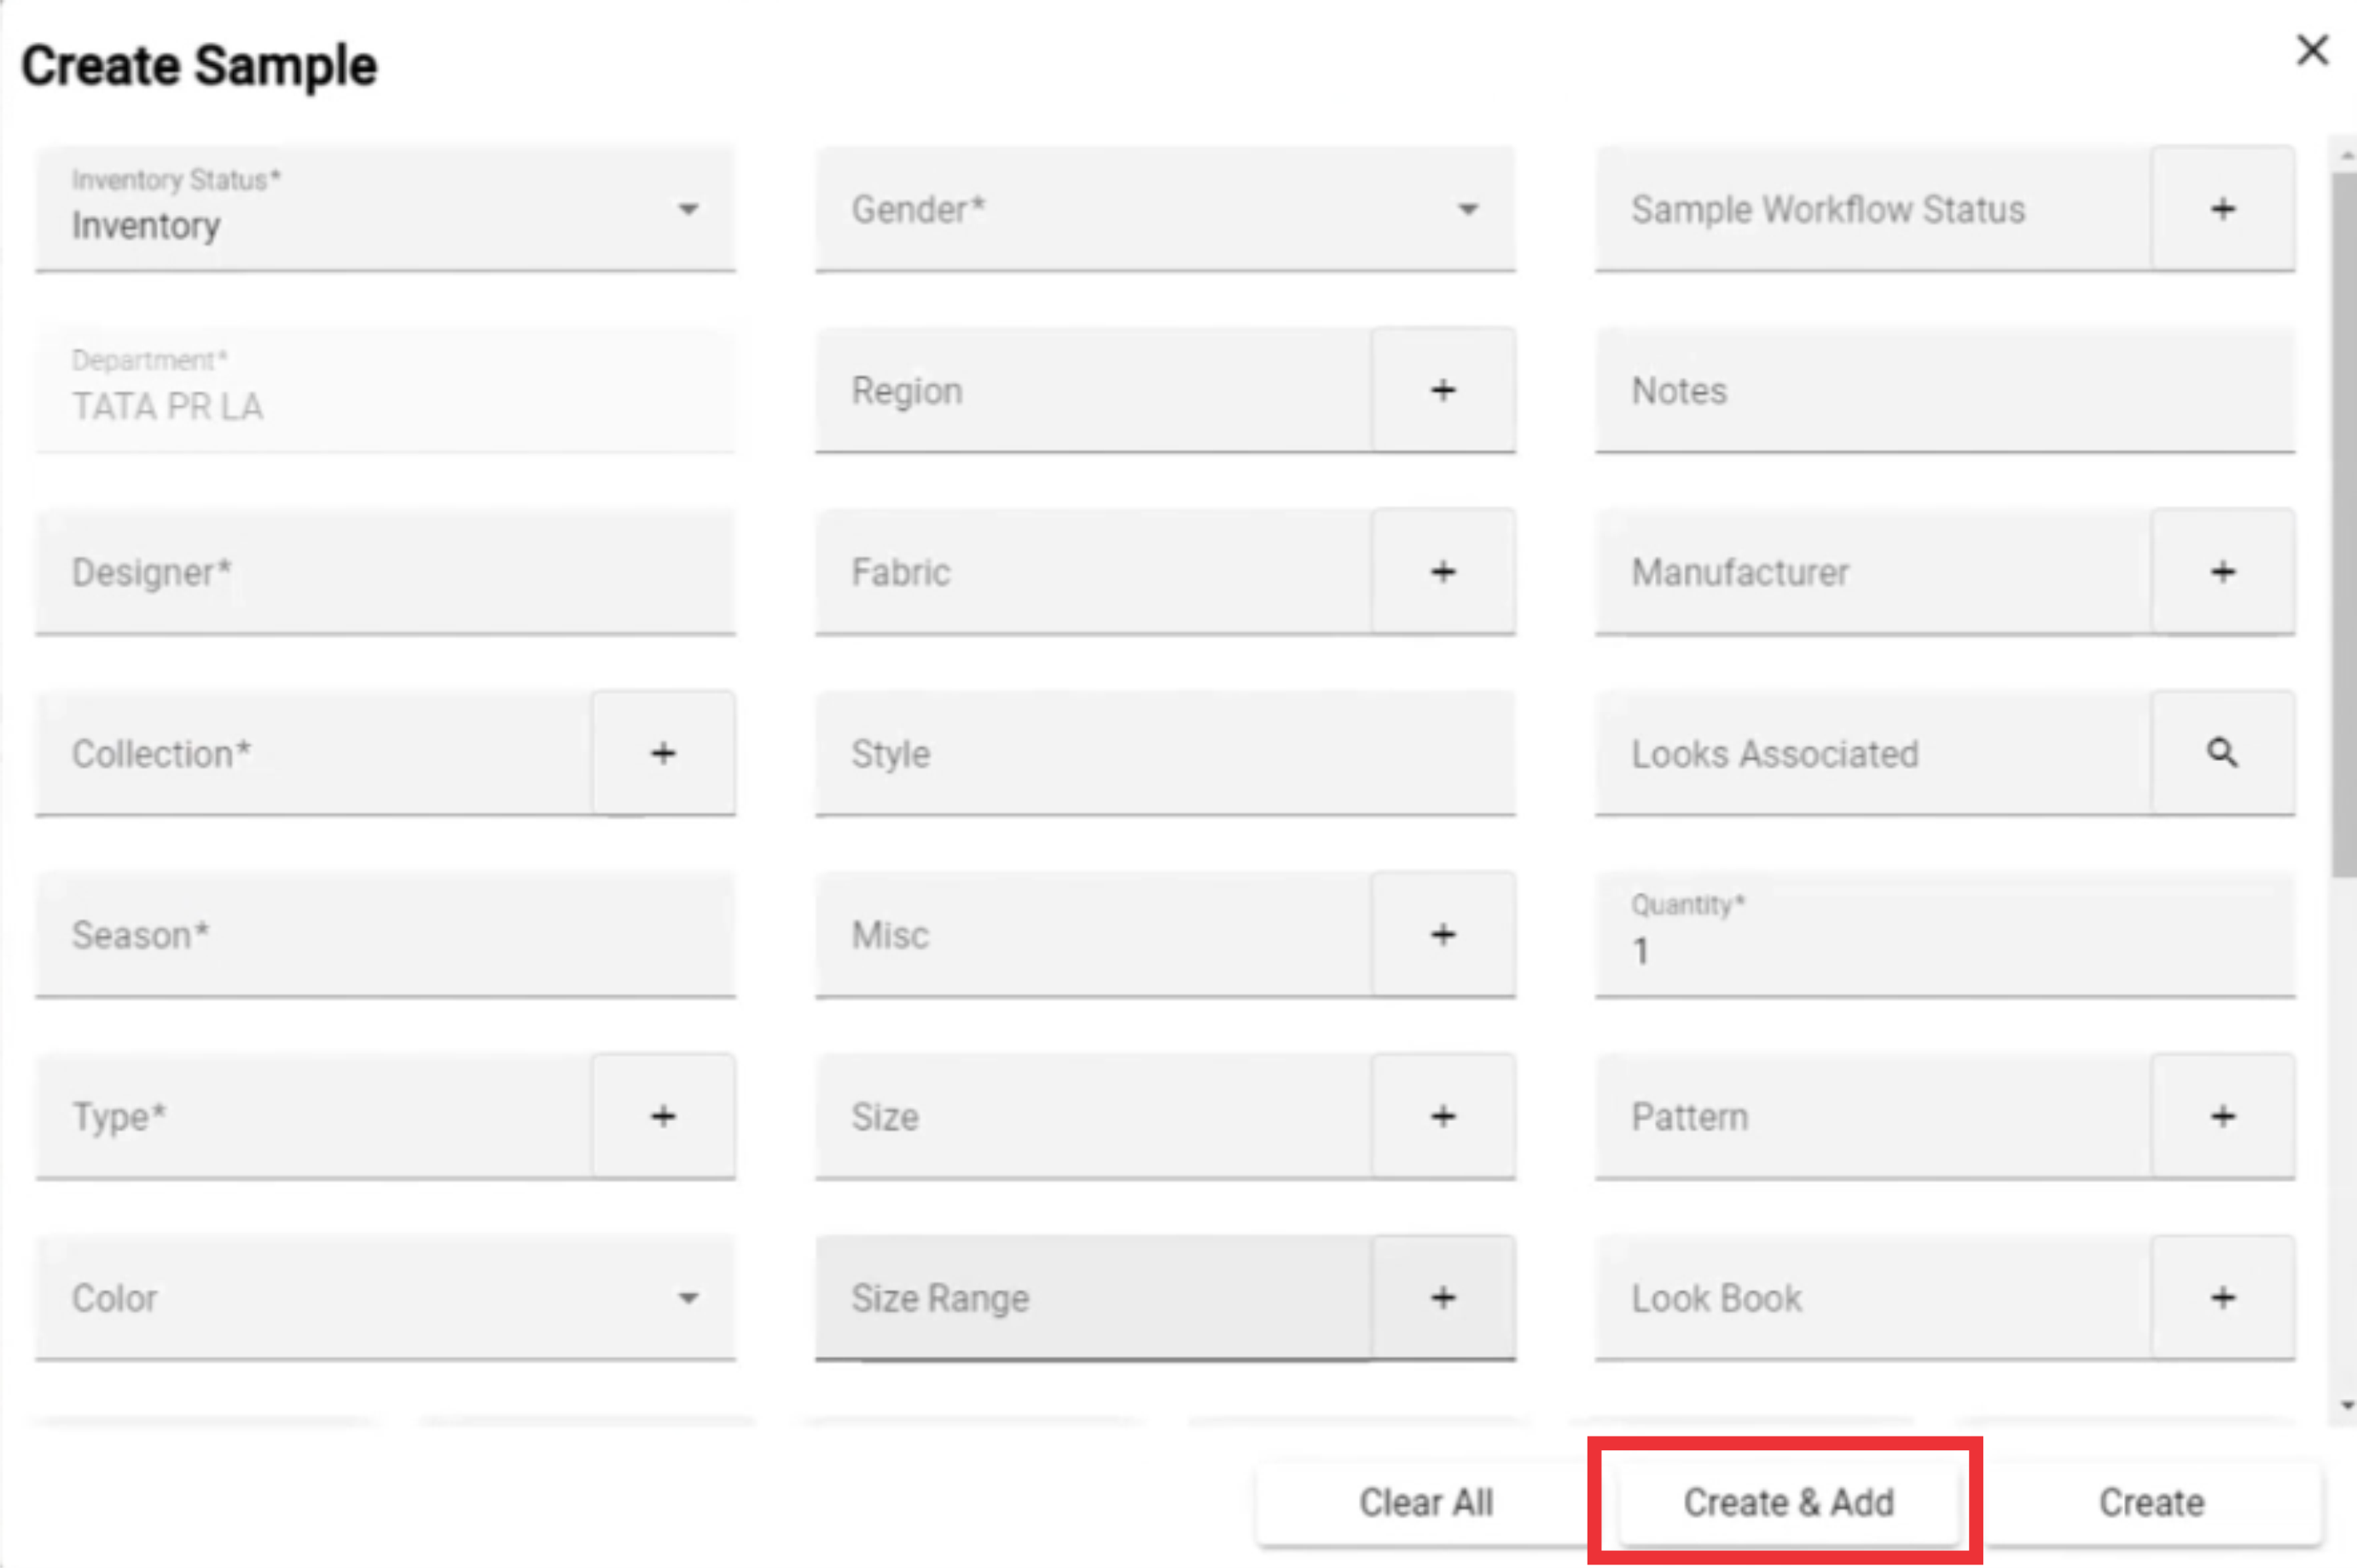
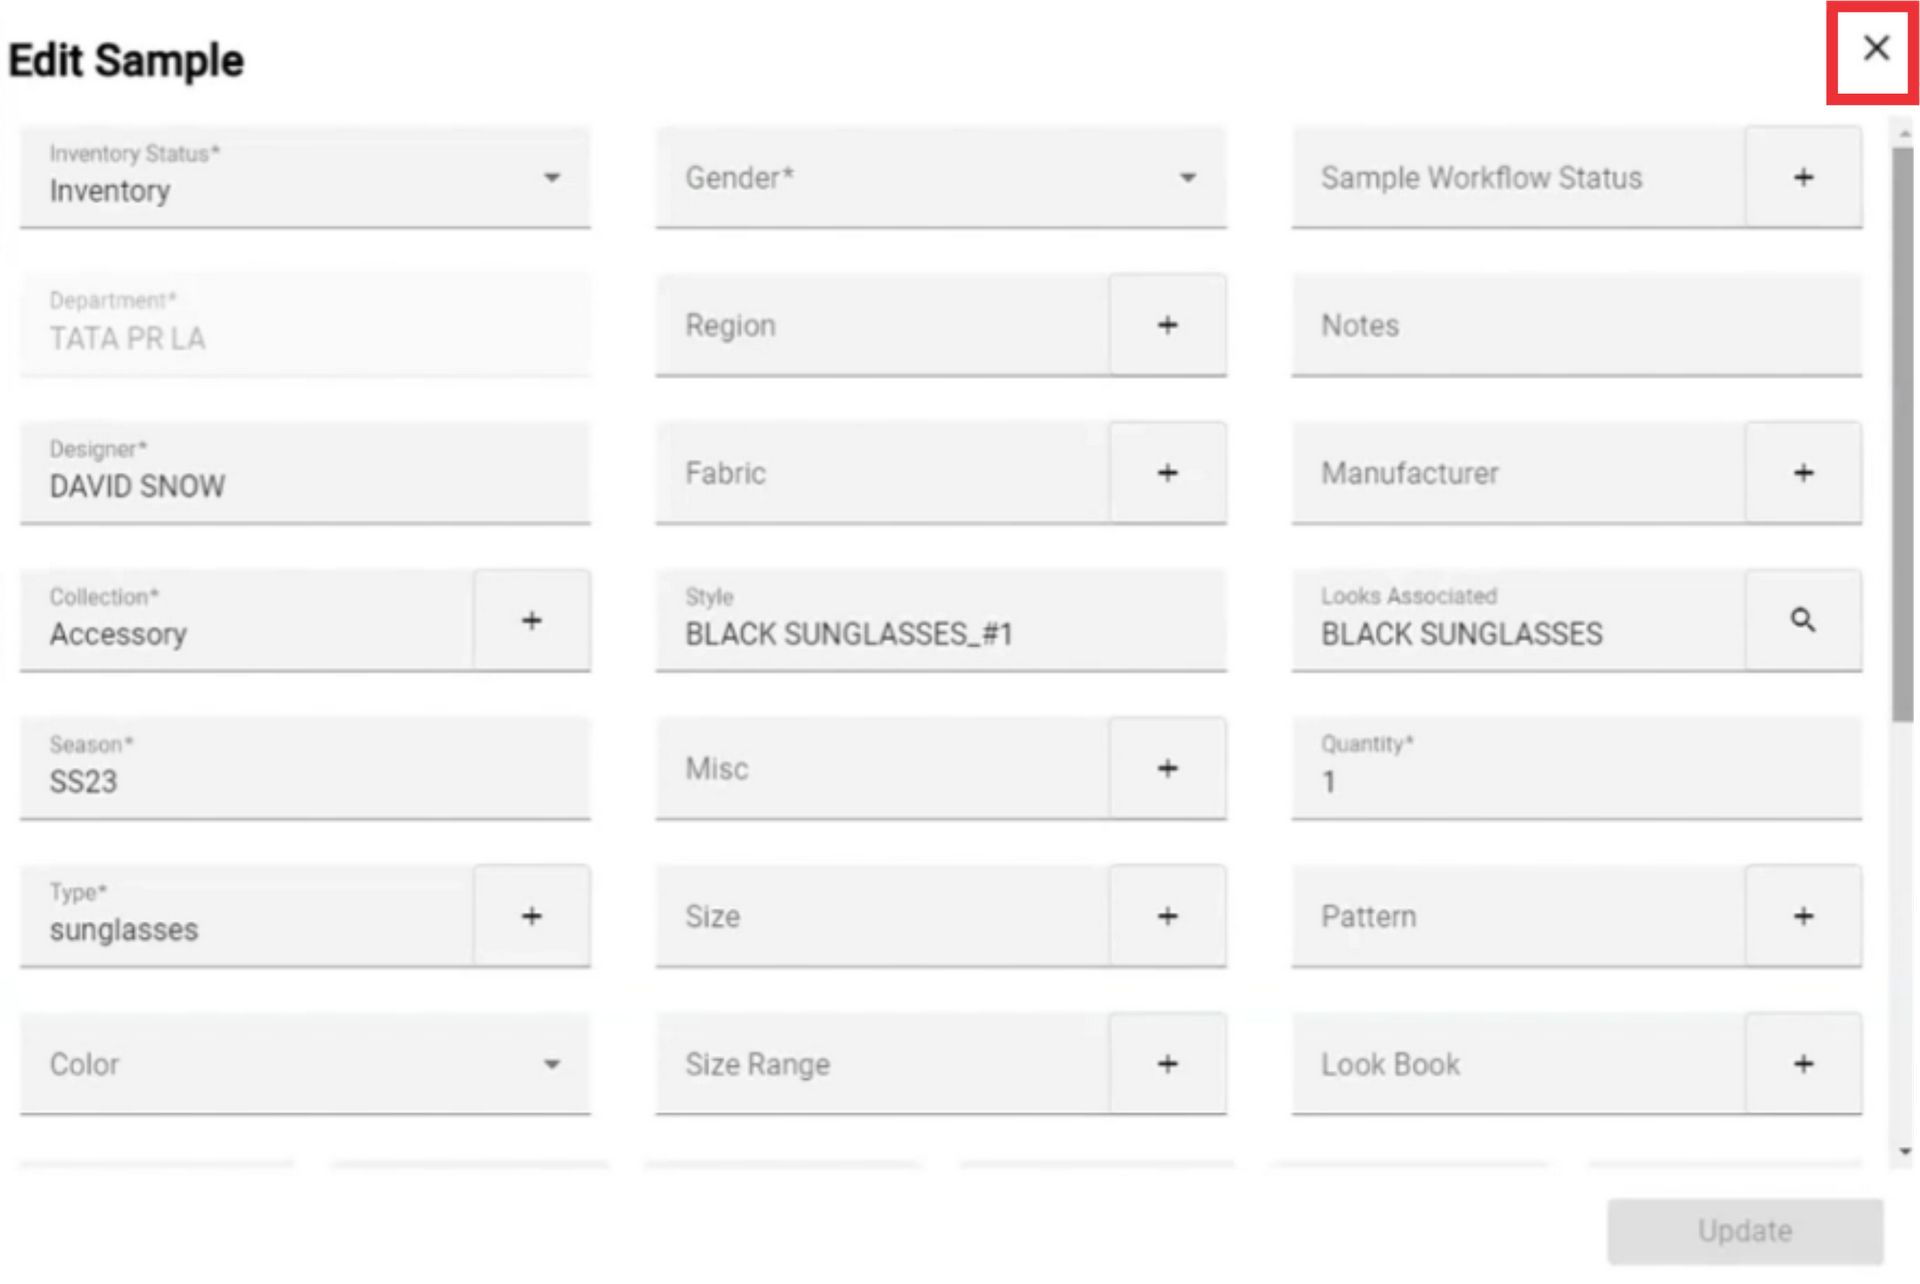
42. Fill all mandatory and optionaly other fields. All mandatory fields are marked with asteriks * After filling field click the Create and add button.
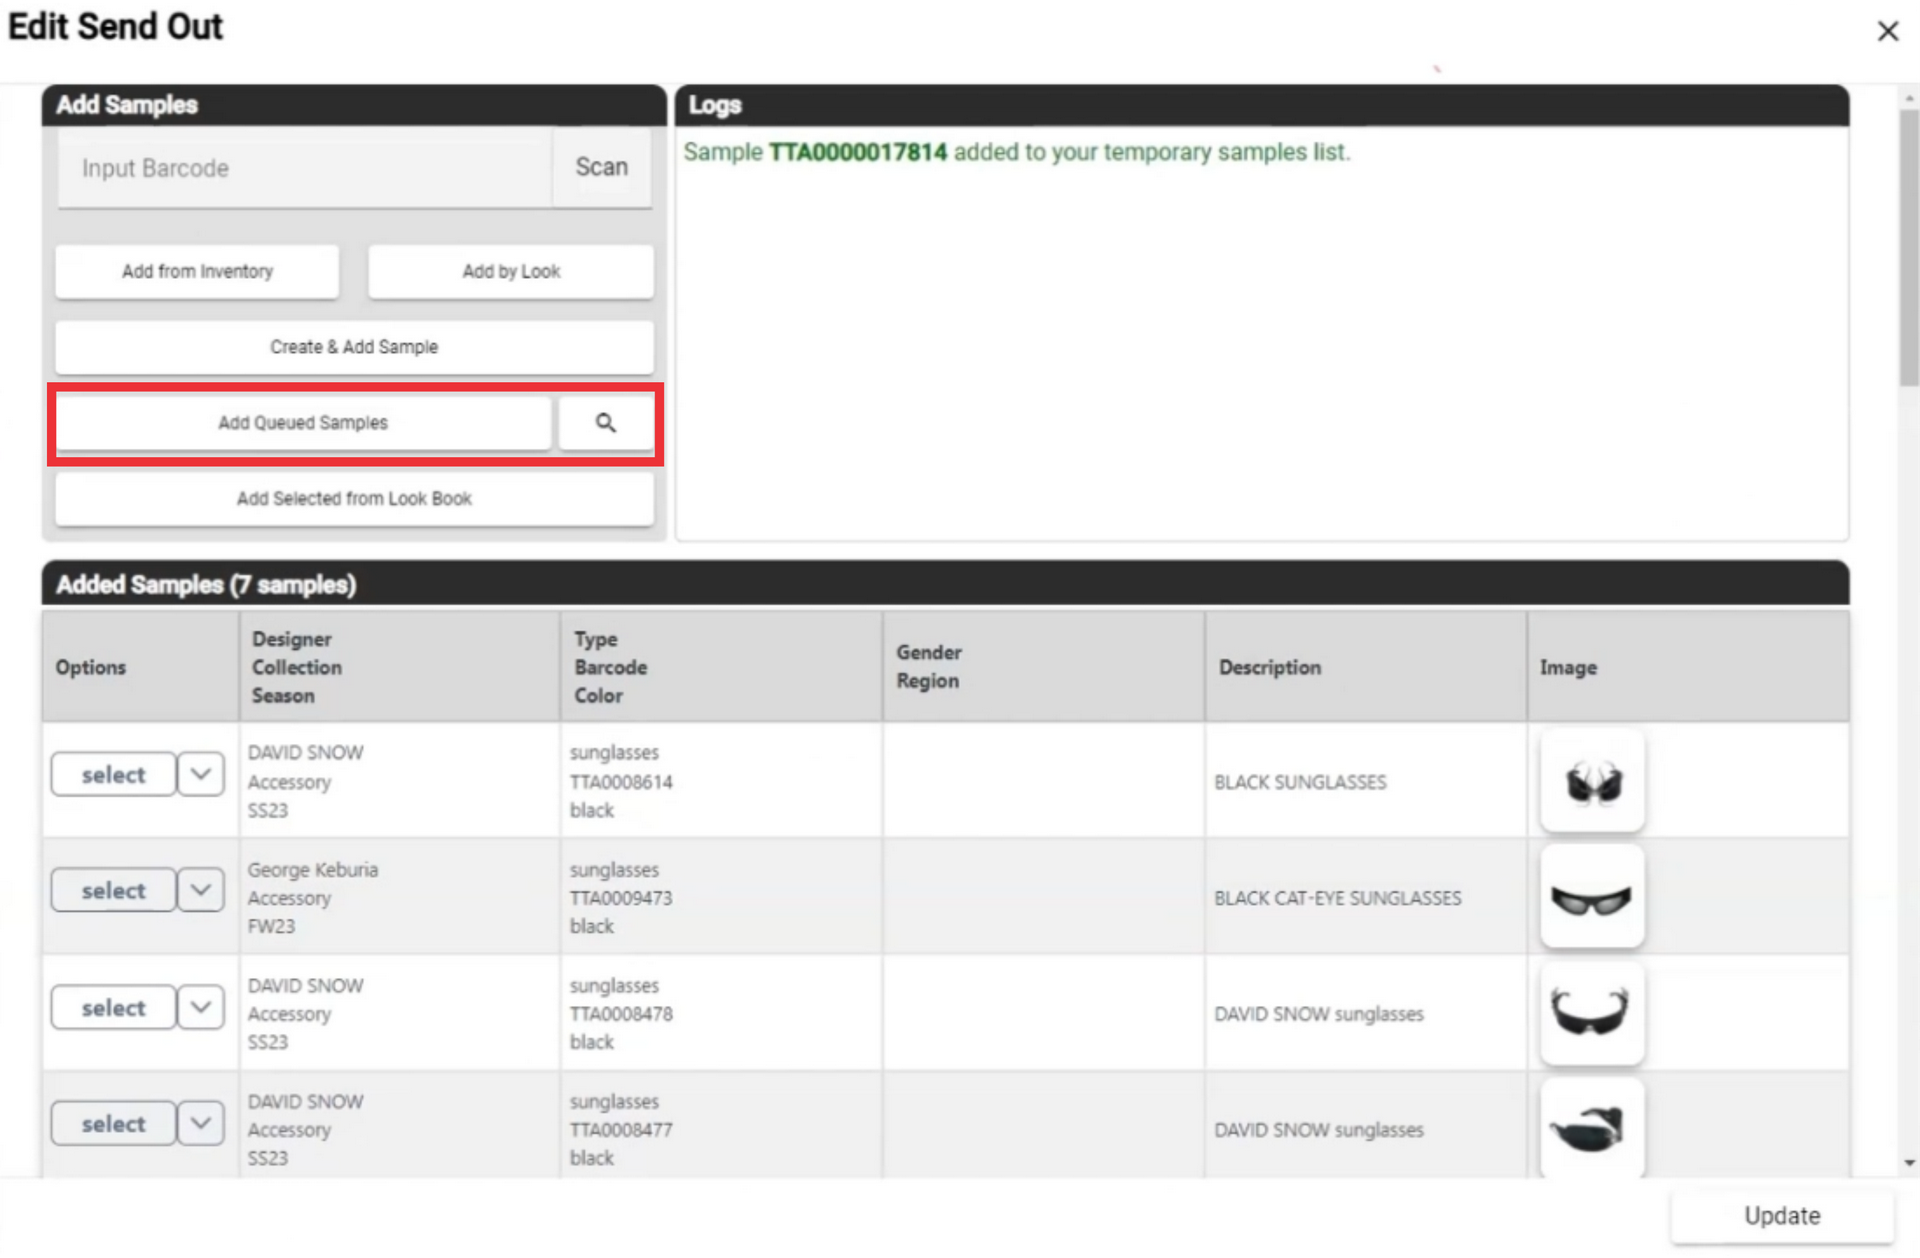
43. If desired add Queued Samples.
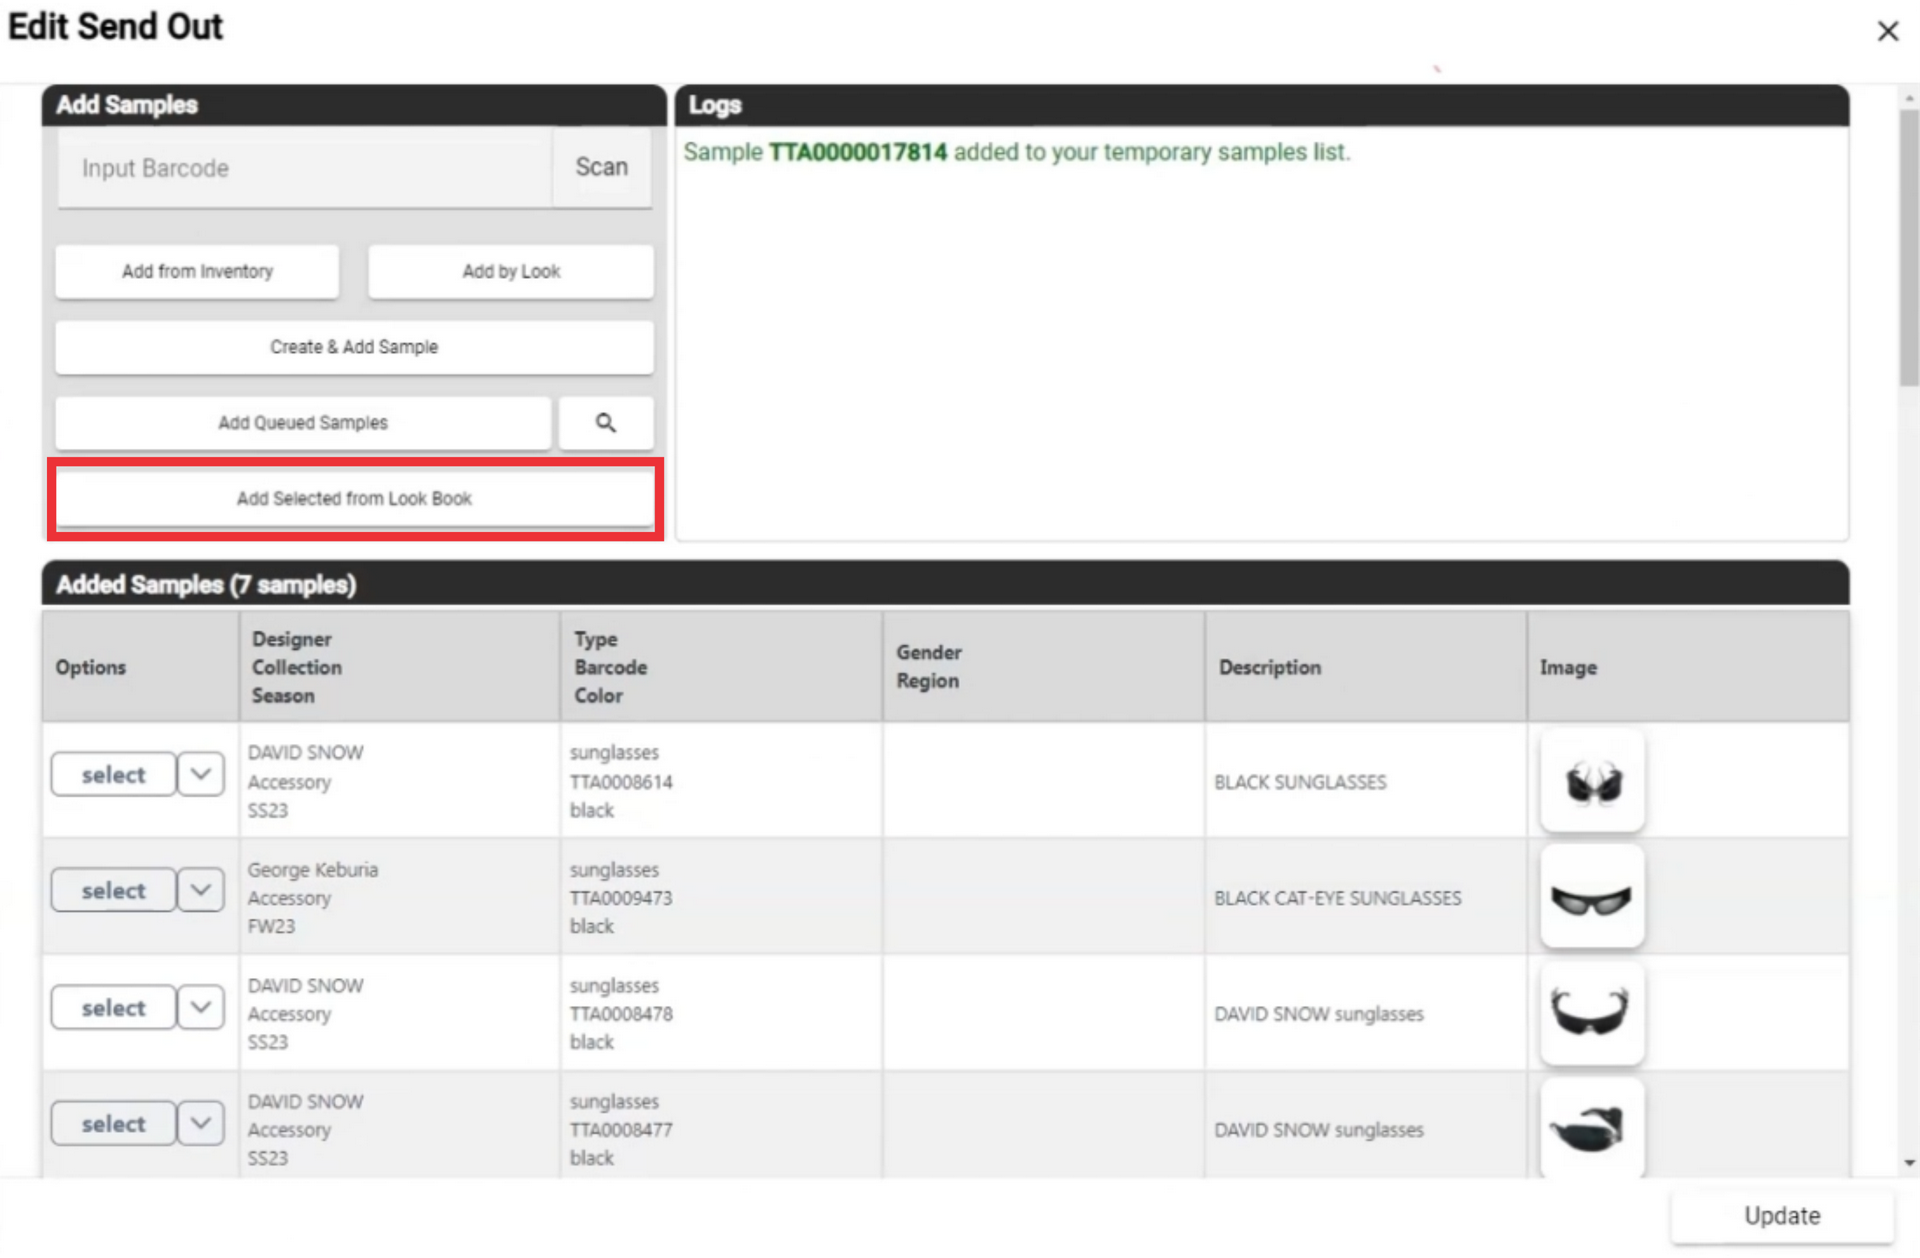
44. If you desired you can add samples from look book.
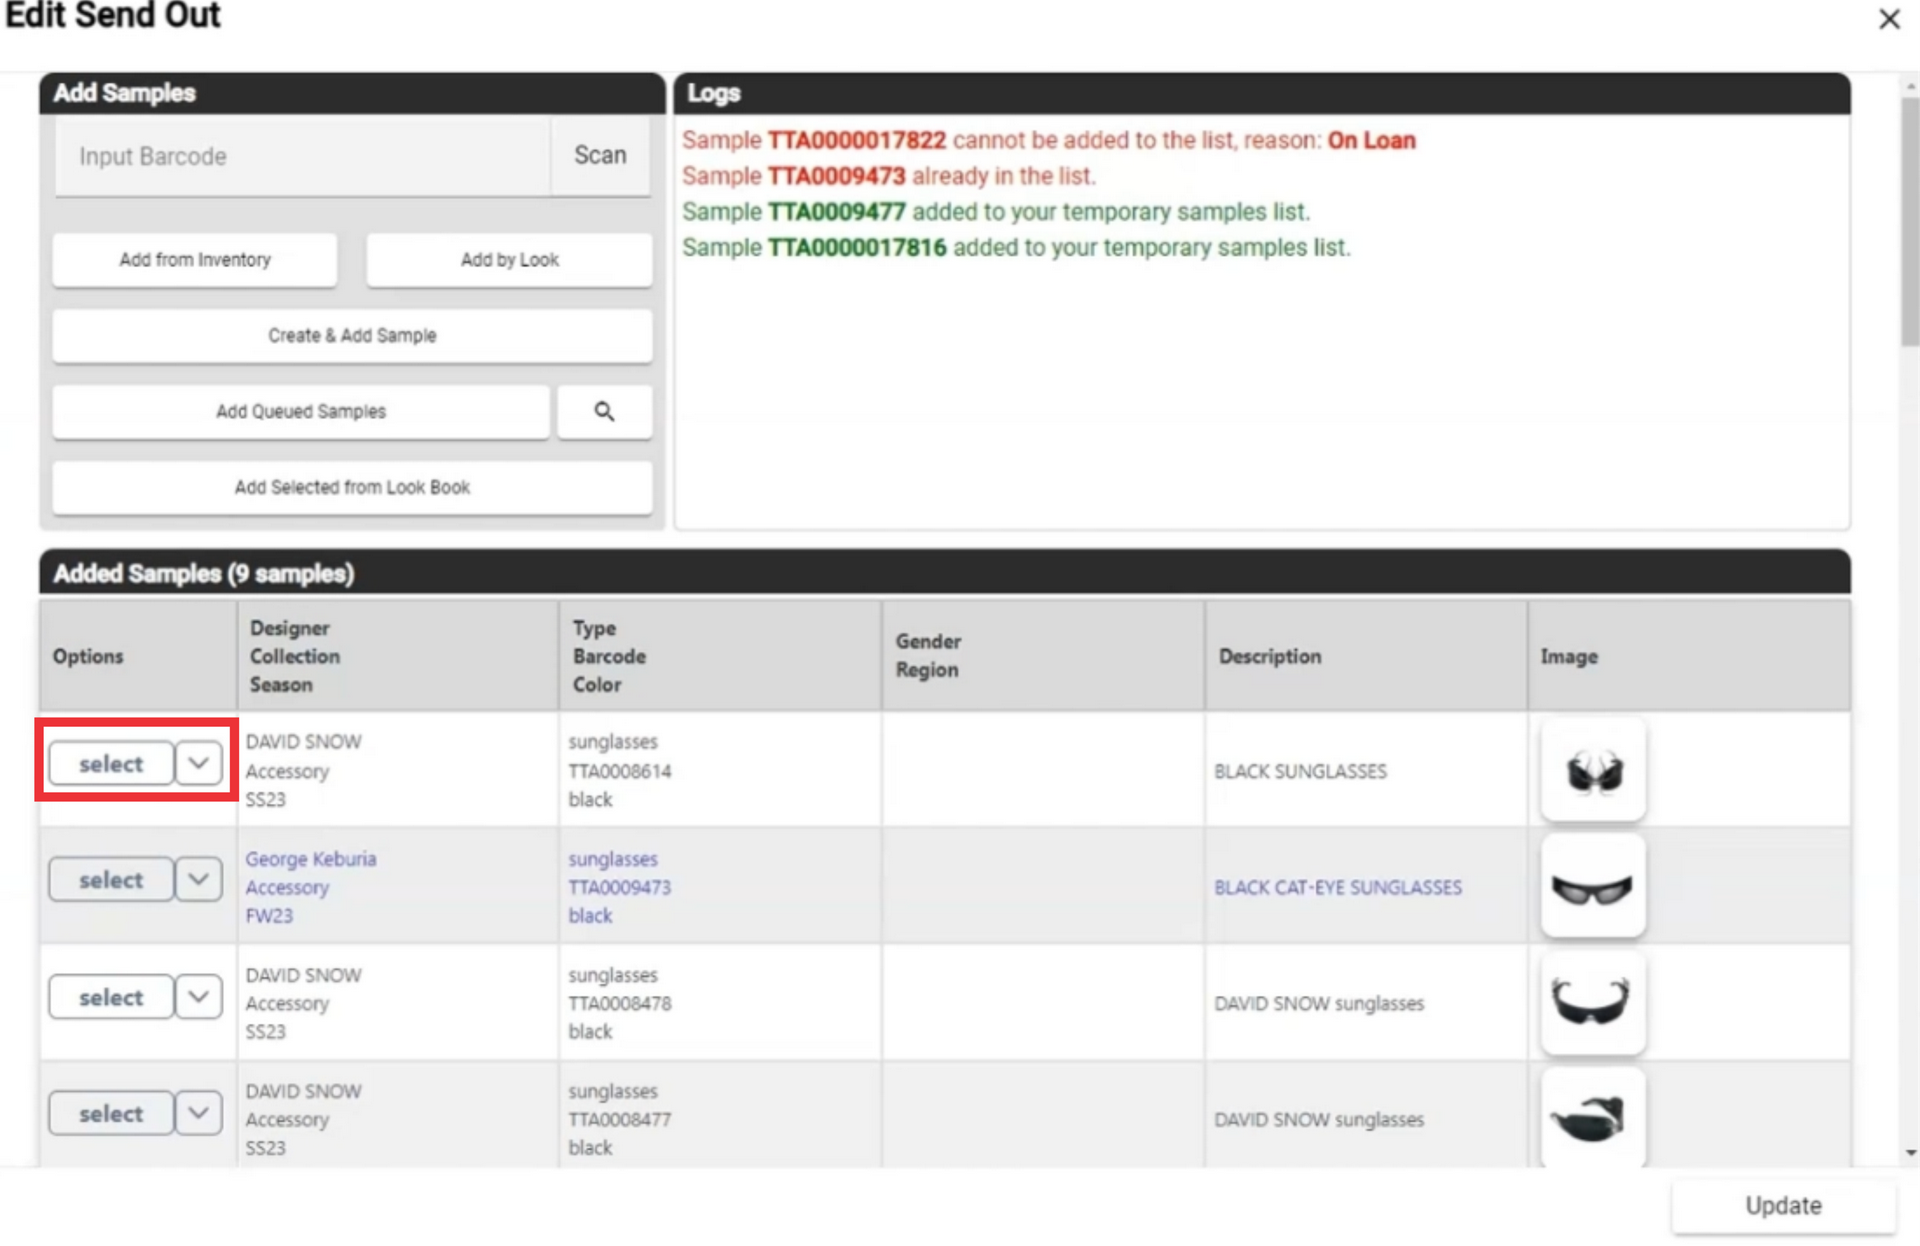
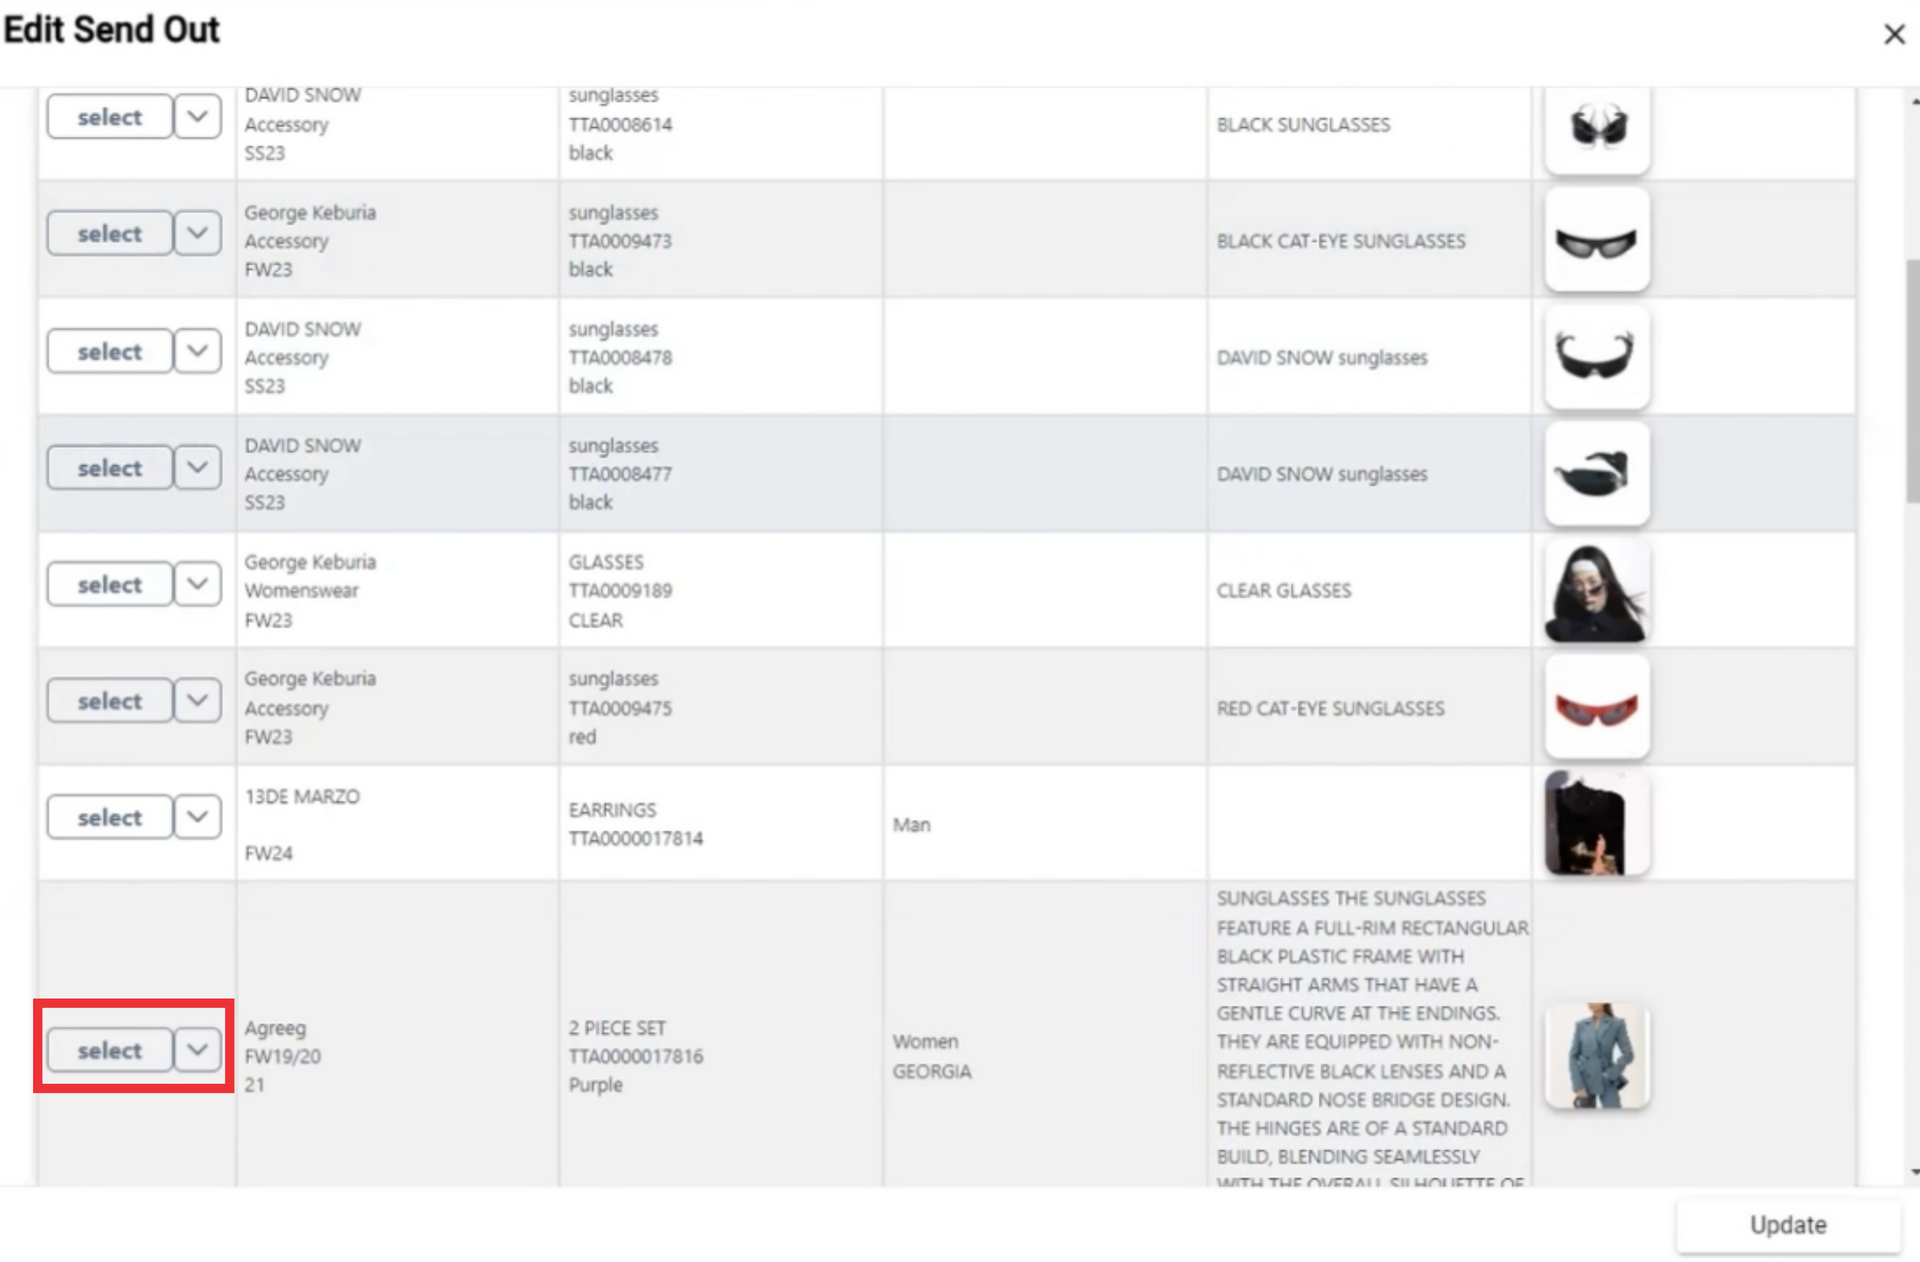
45. Click the select button to view added sample options.
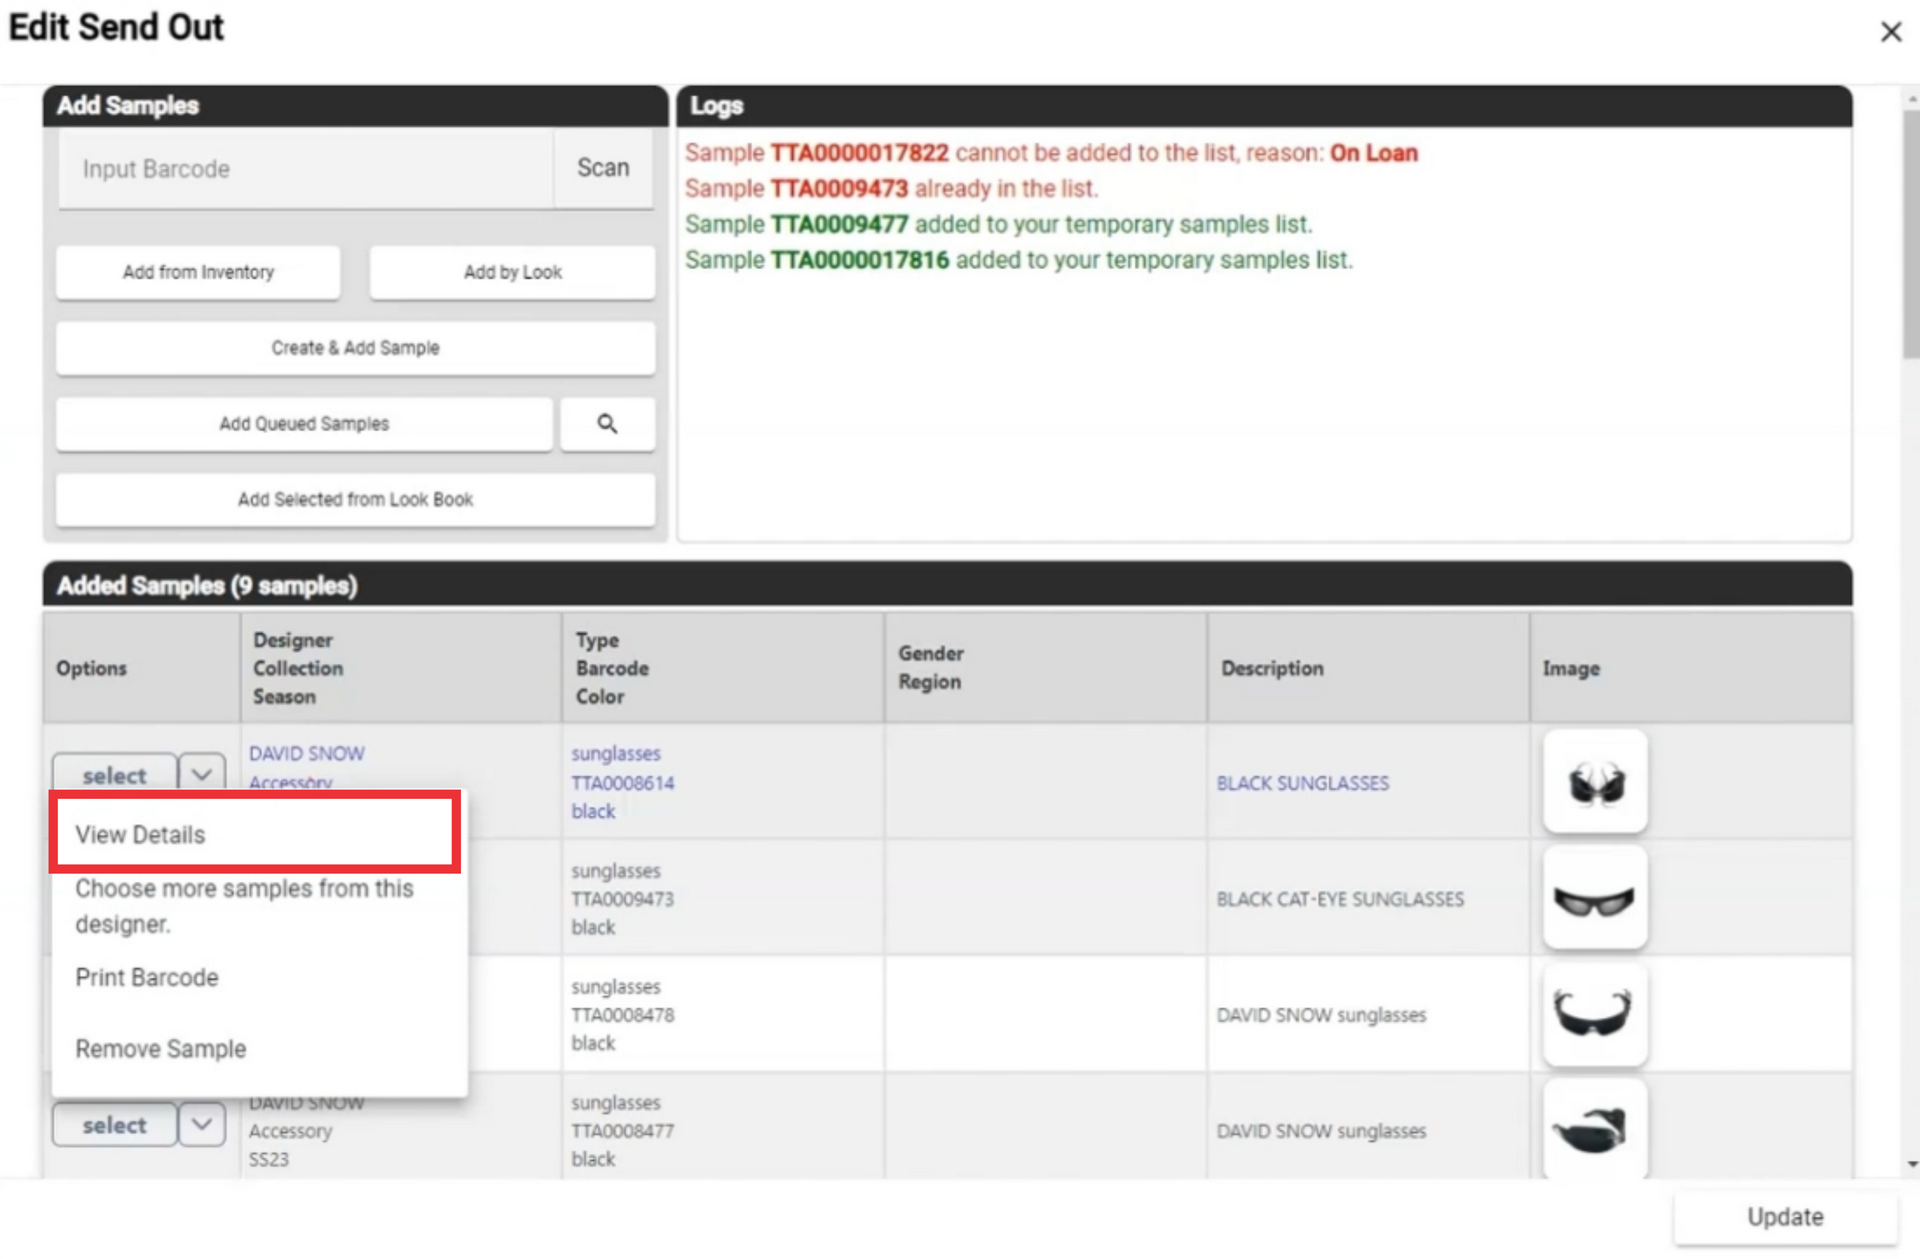
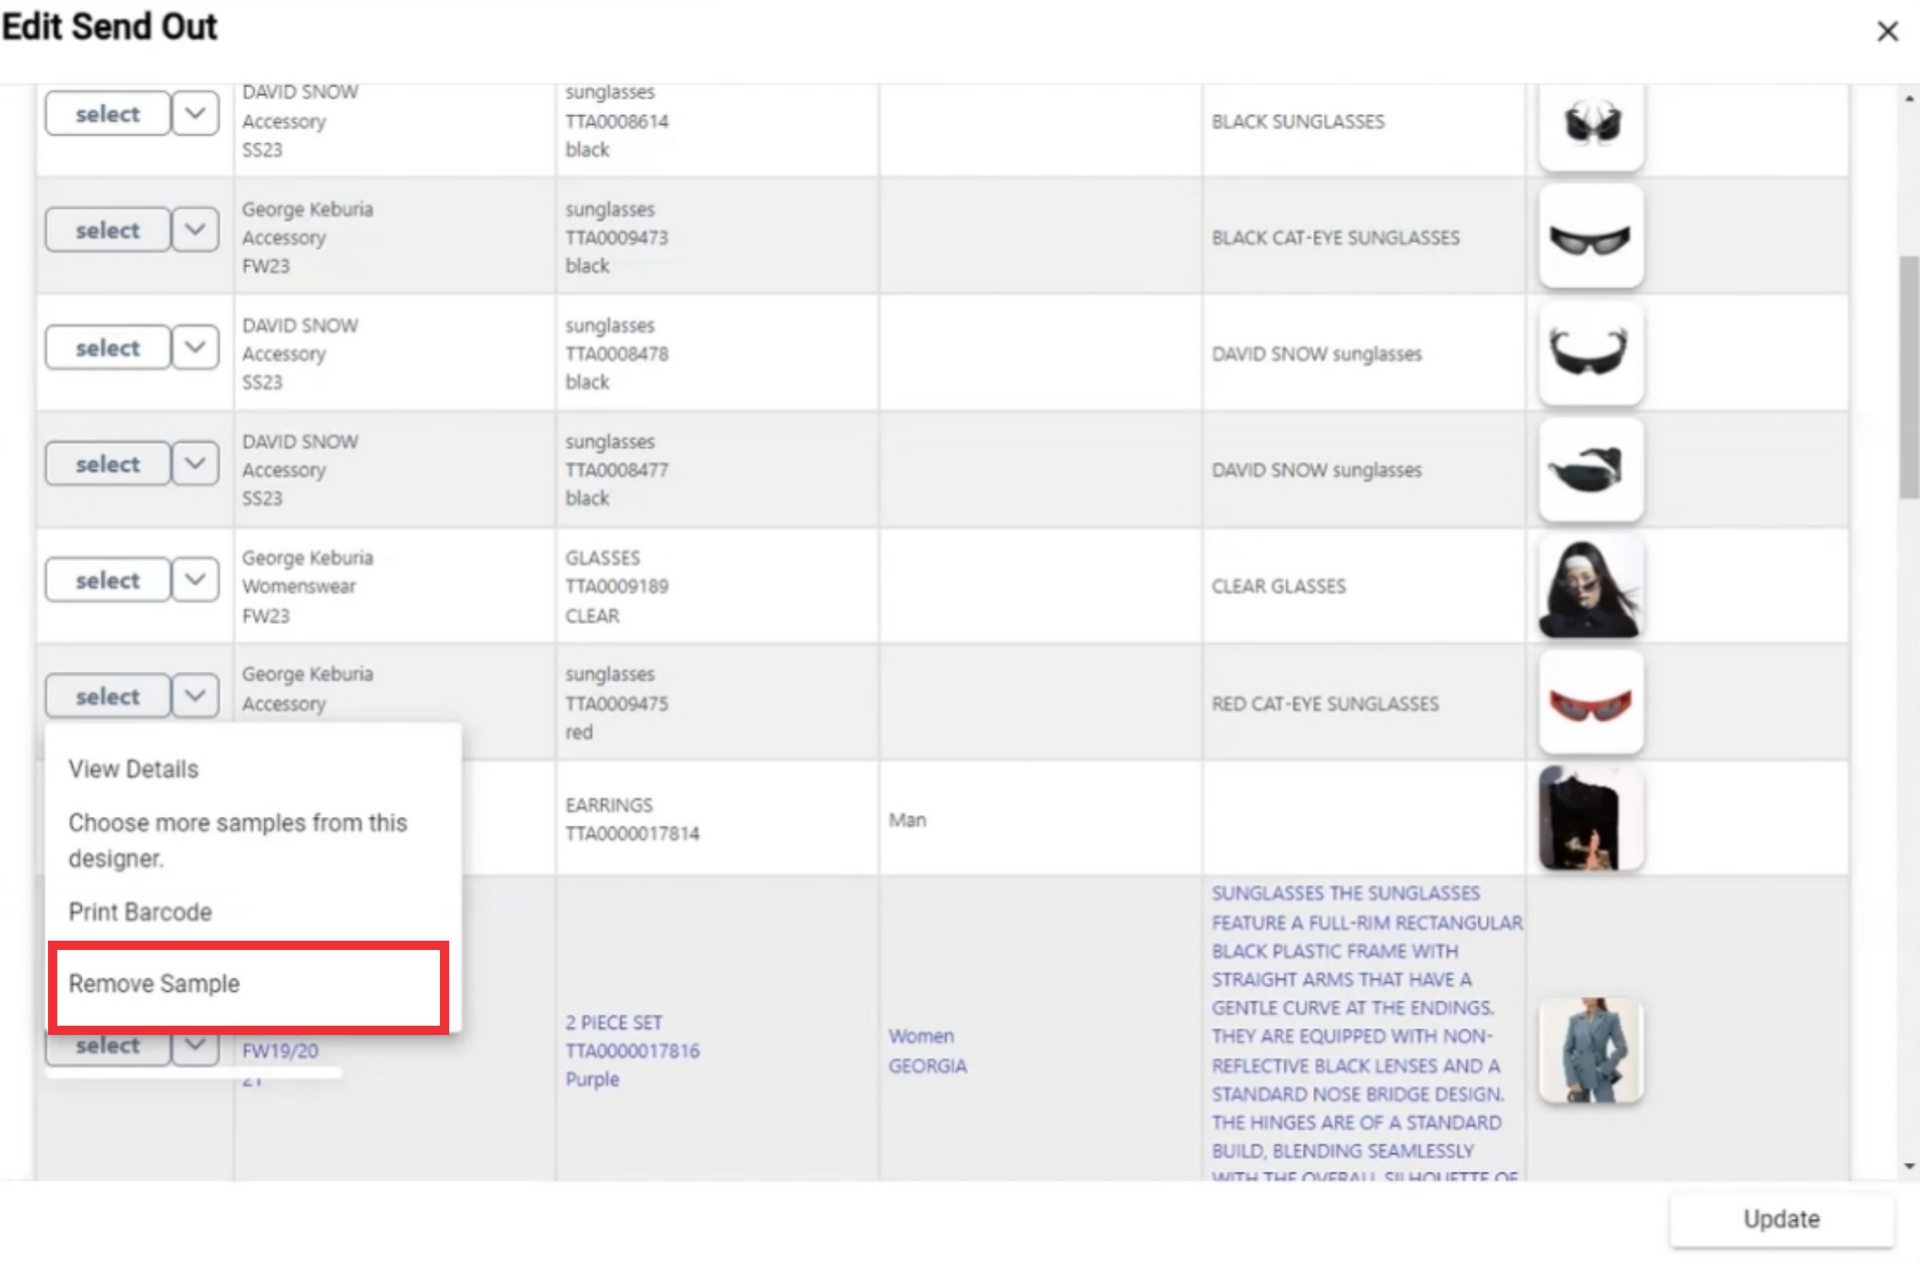
46. Click the "View Details" to view sample details.
47. Click the "X" button to close the Sample details window.
48. Click the select button to view added sample options.
49. Click the button to choose and add more samples from this designer.
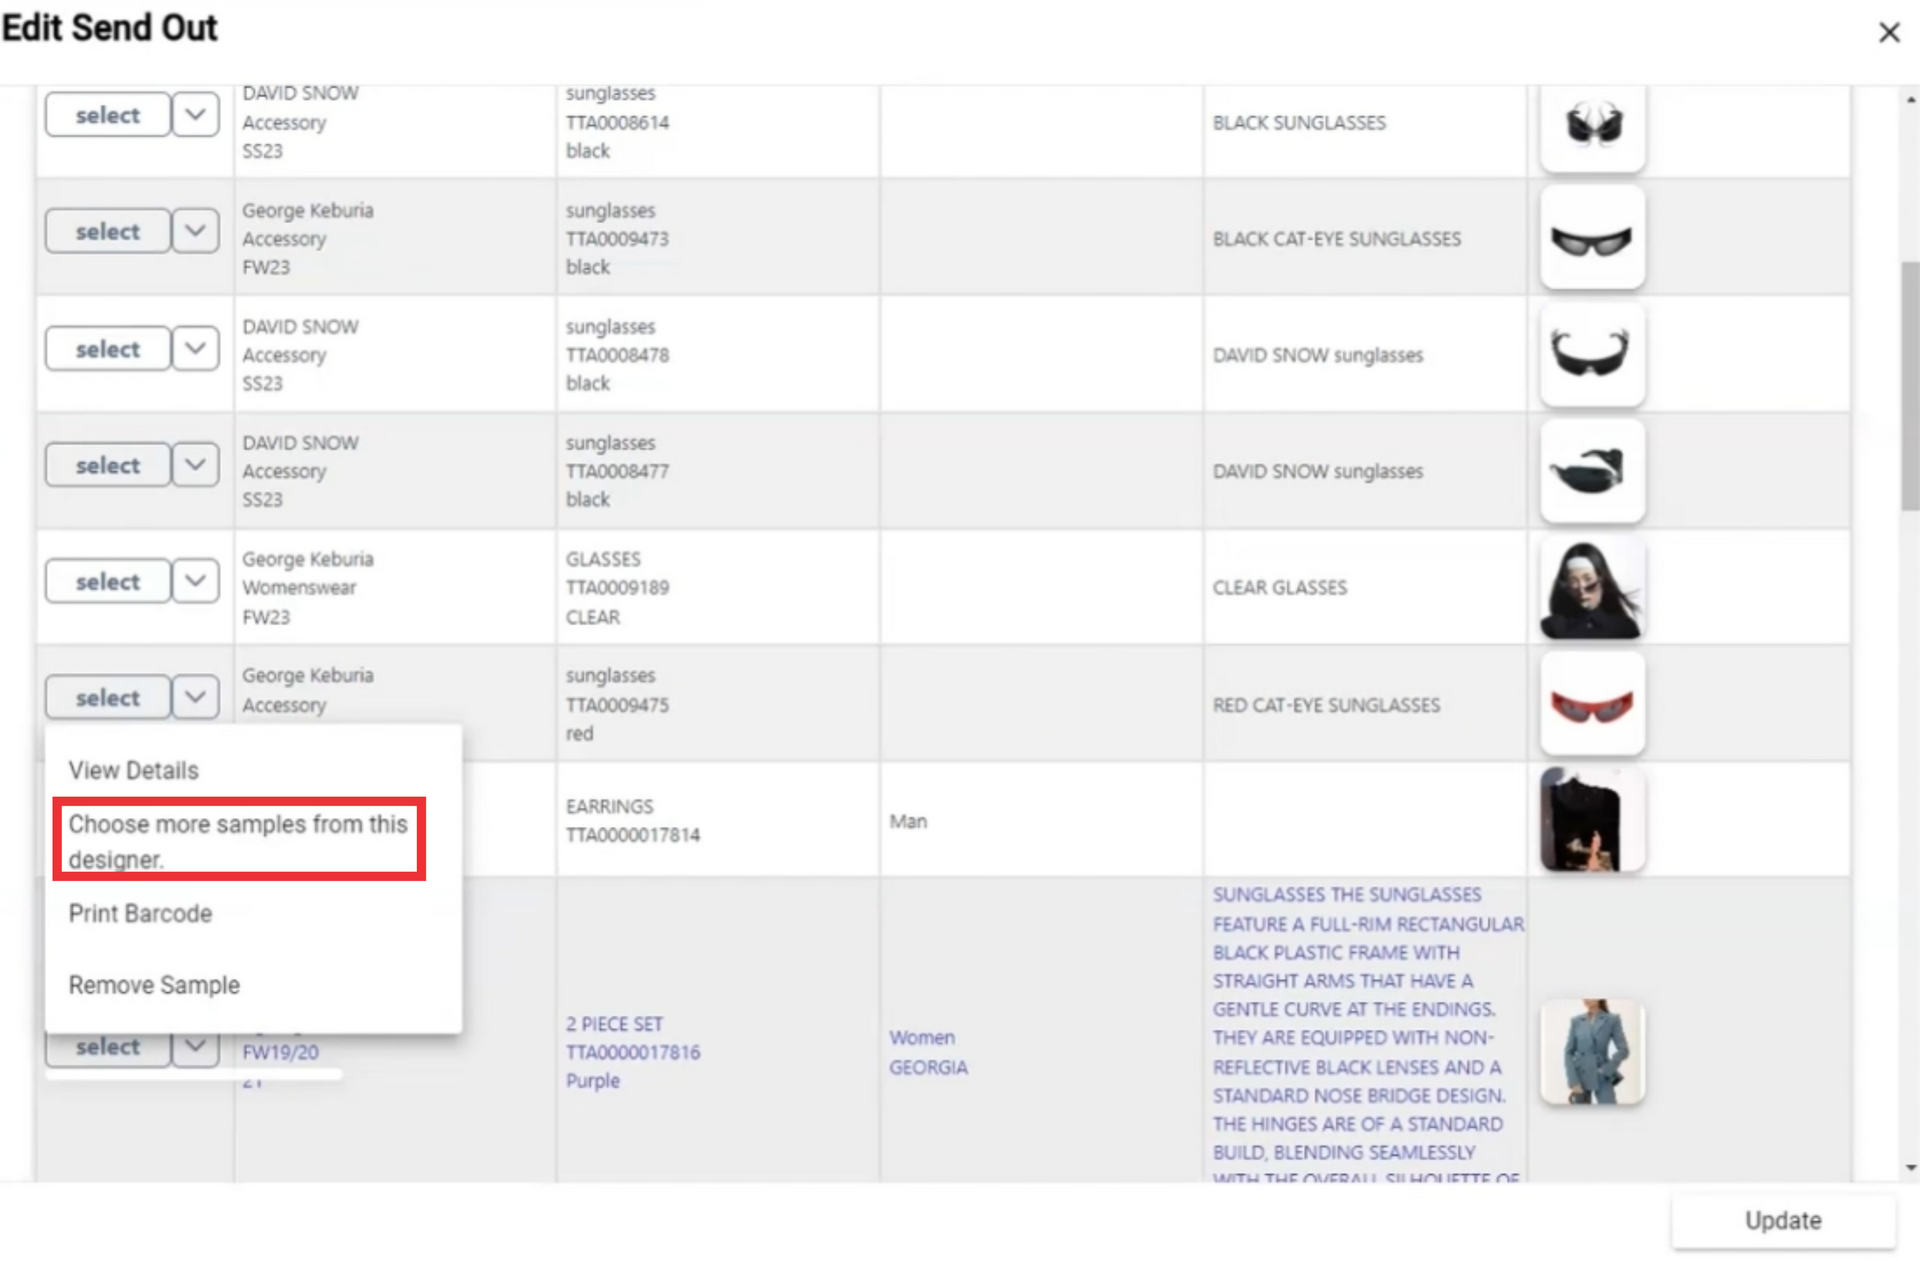
50. Click the select button to add desired sample from this designer.
51. A message about adding a sample from this designer will appear on middle upper screen.
52. Click tye "X" button to close this window.
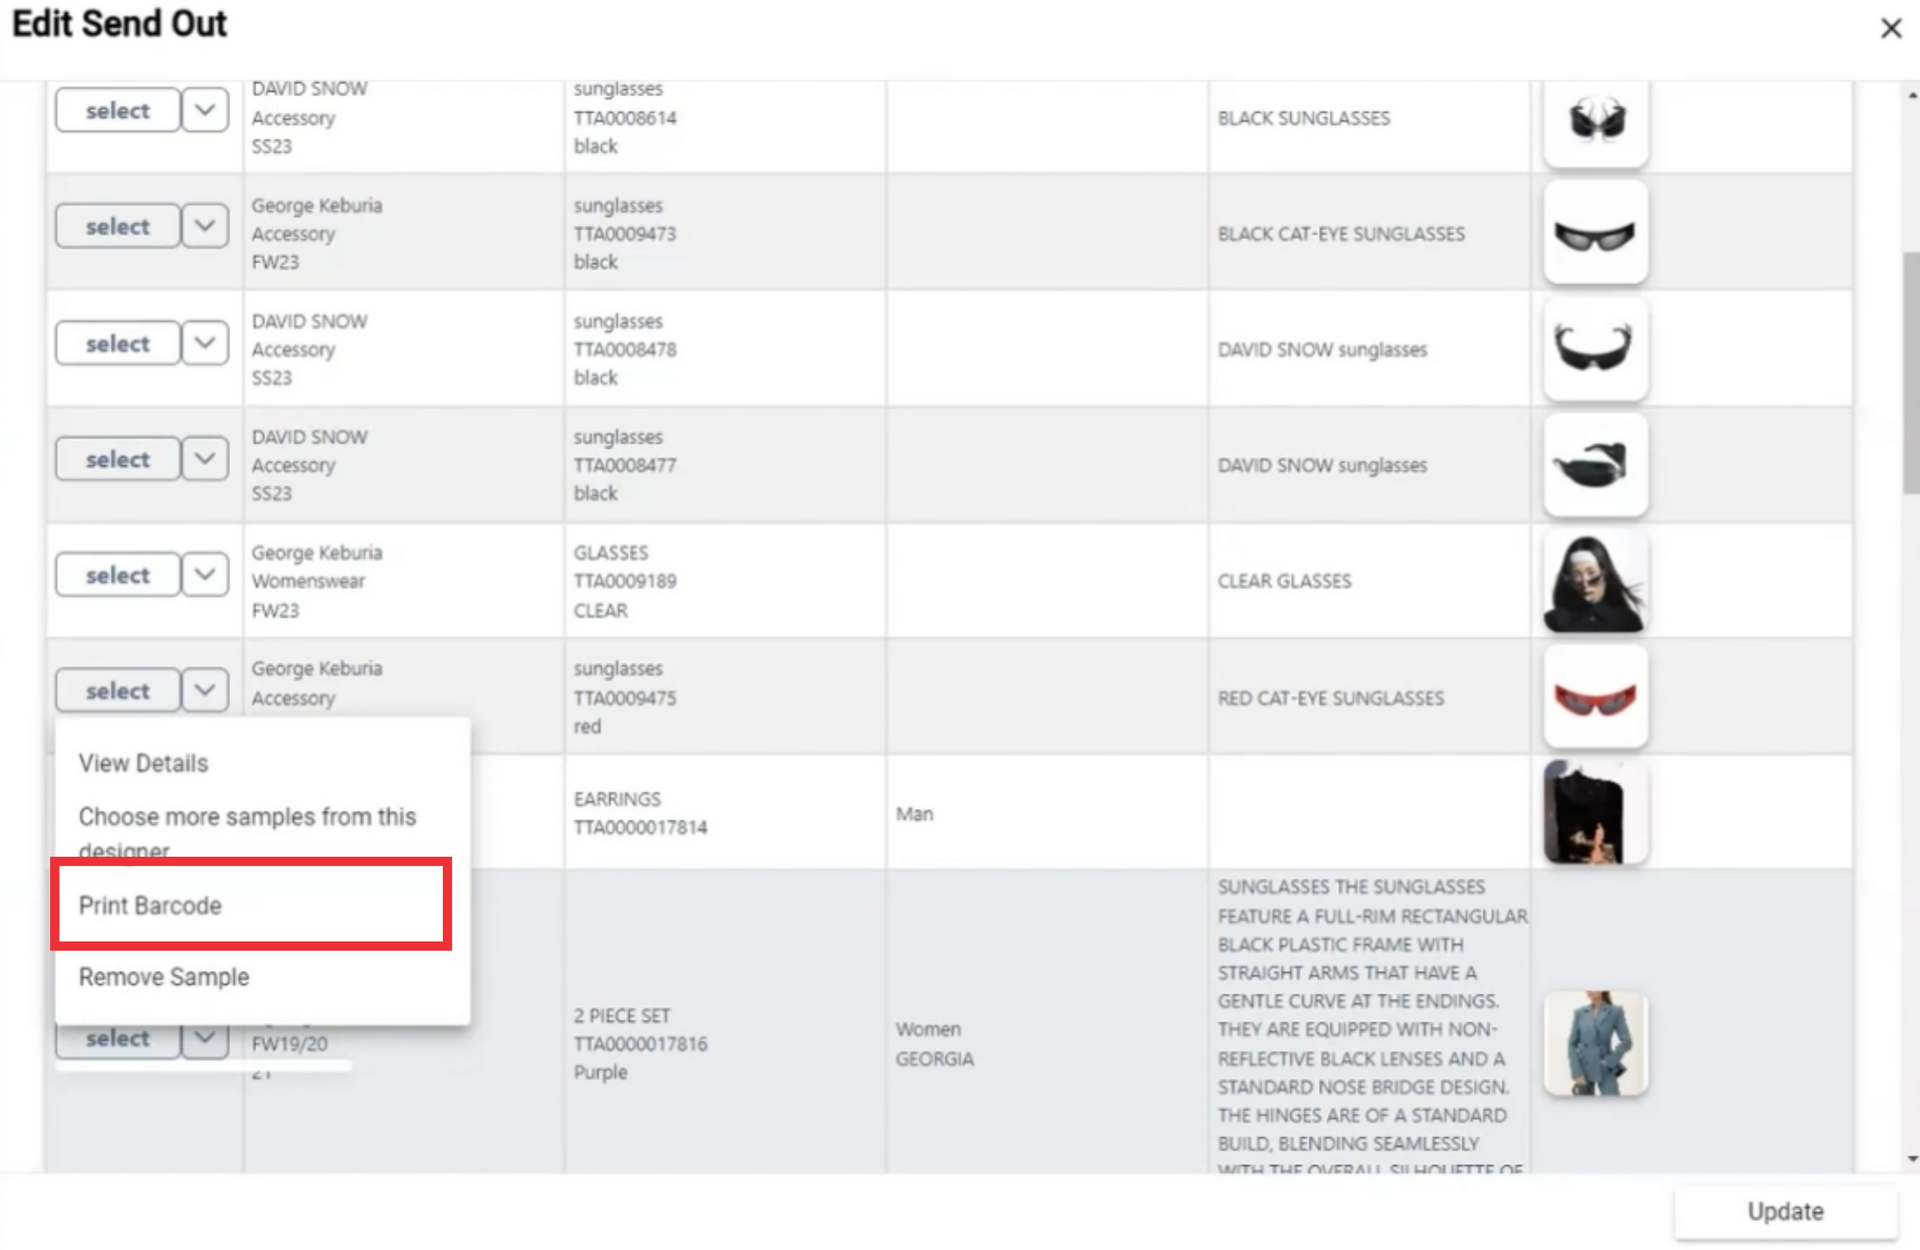
53. Click the select button to view added sample options
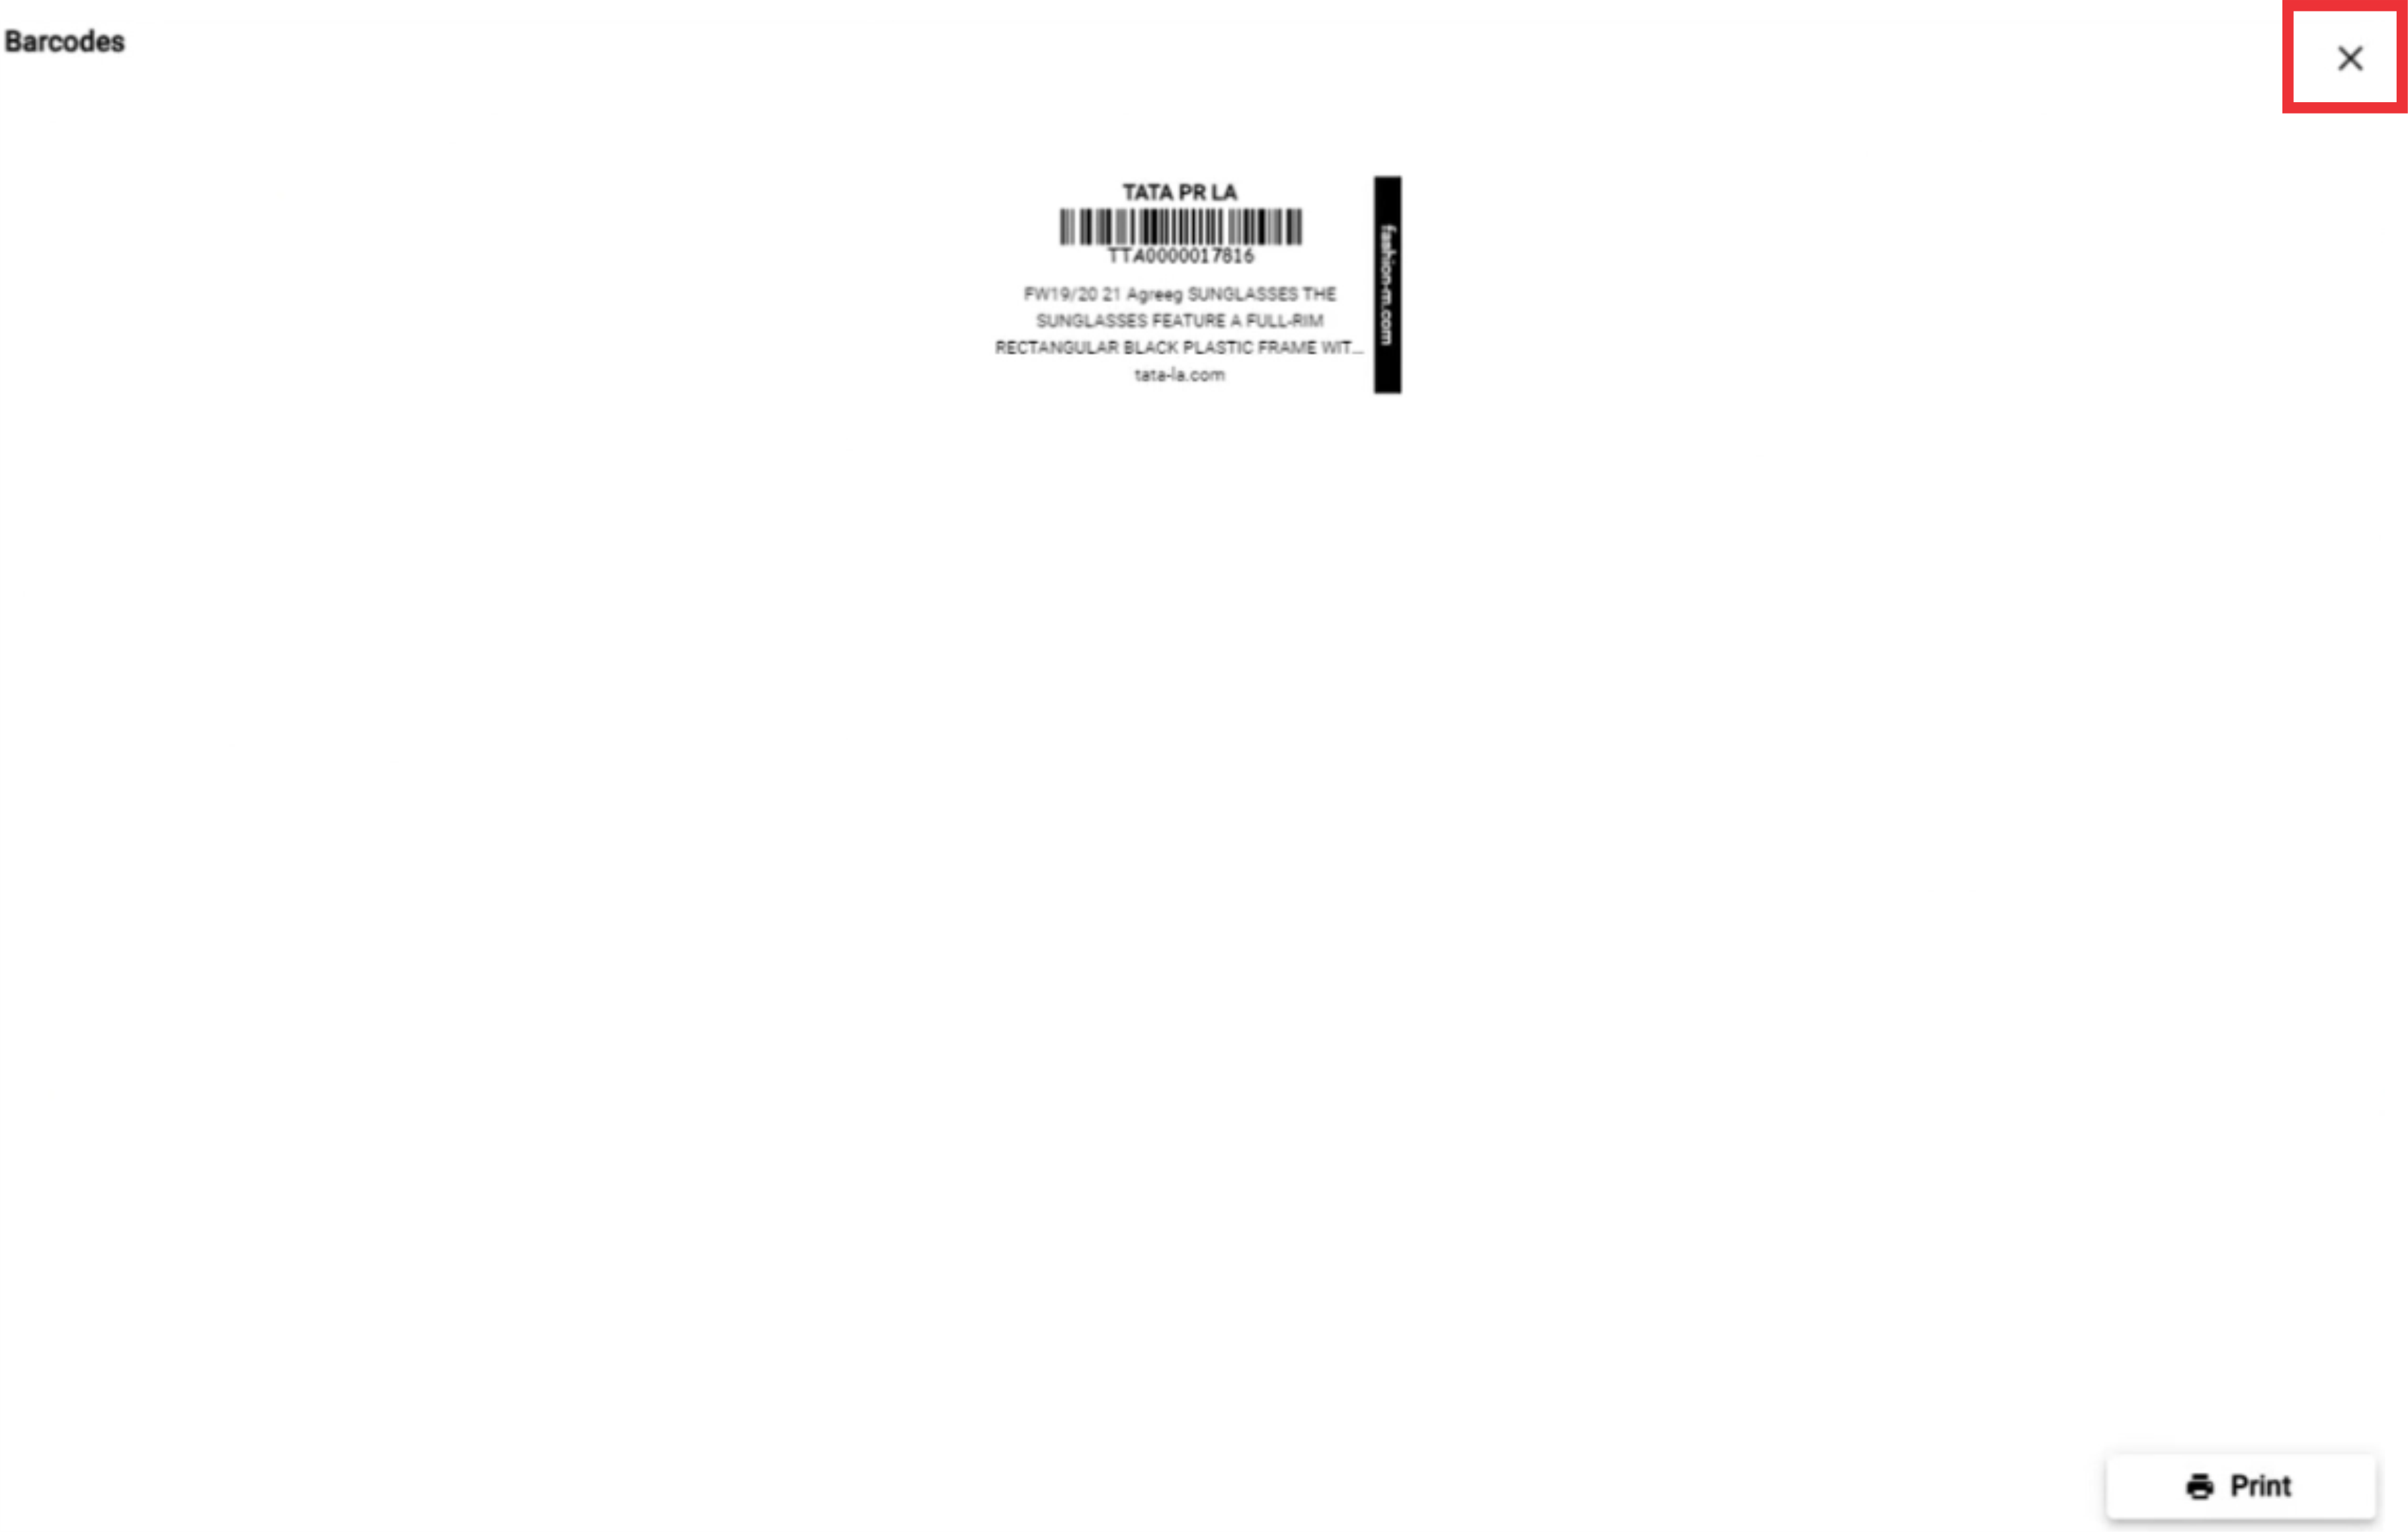
54. To view and print a Sample Barcode click the "Print barcode" button.
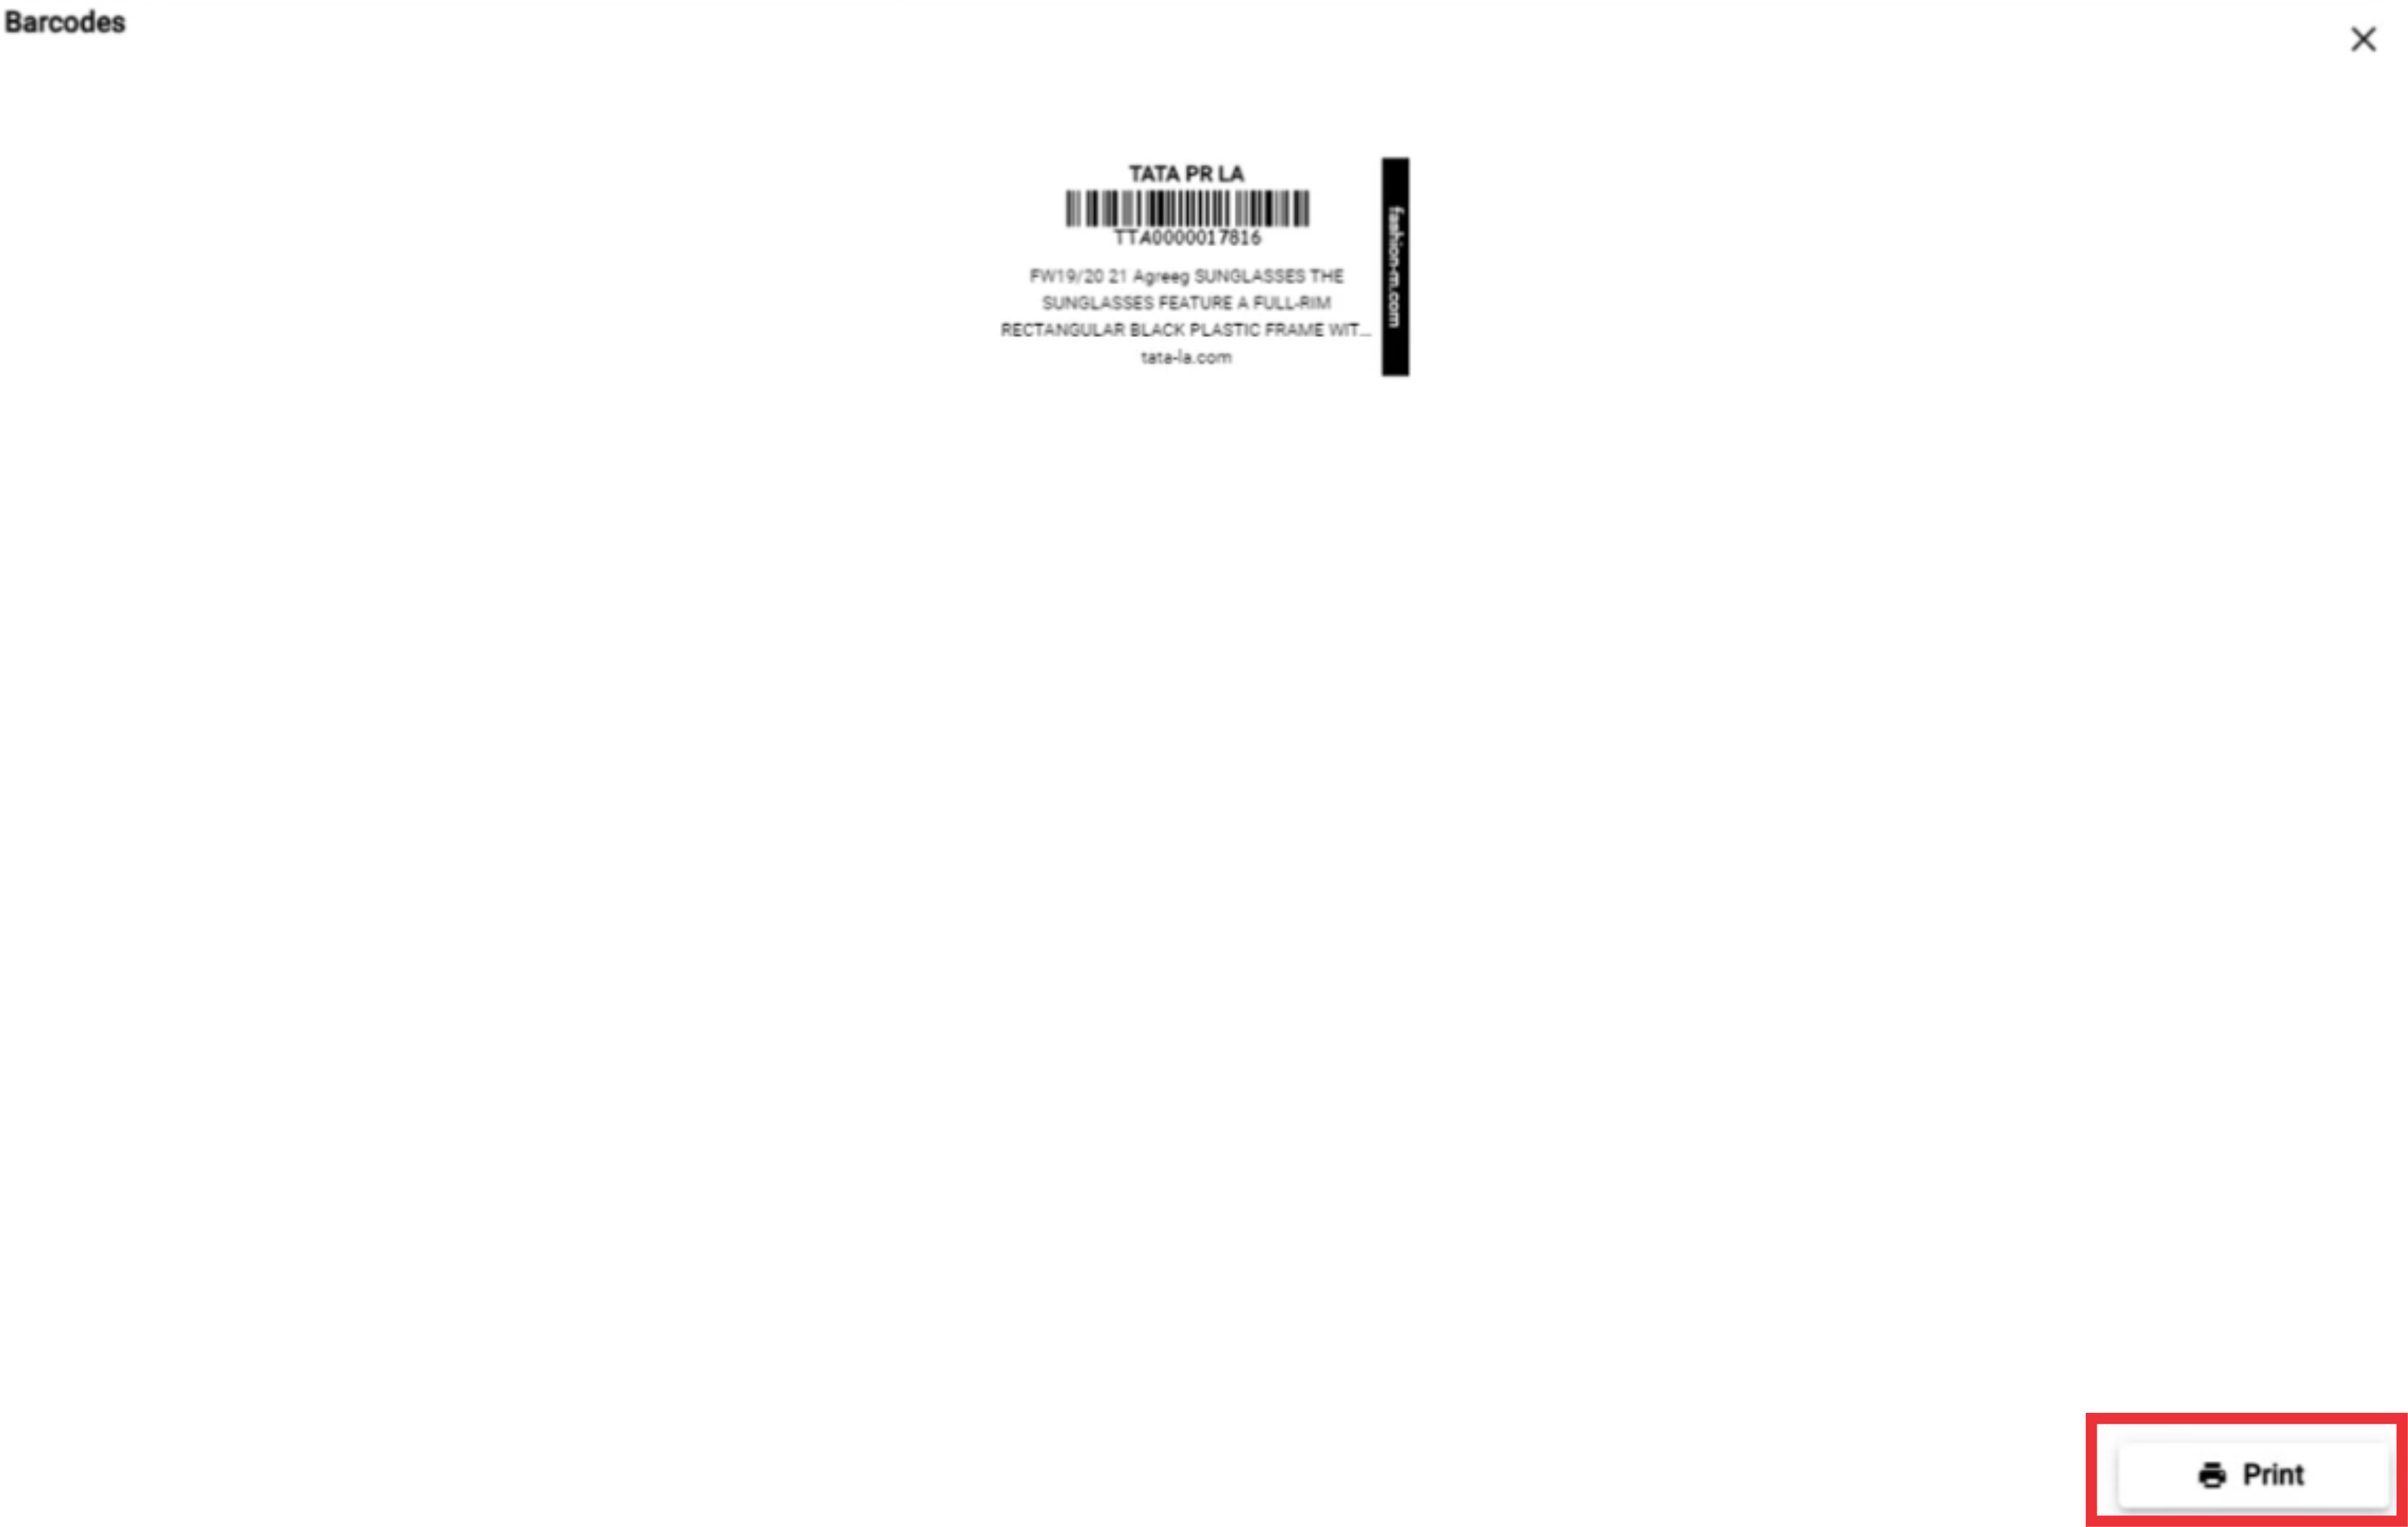
55.Click the Print button.
56. Select printer setting and click the "Print" button.
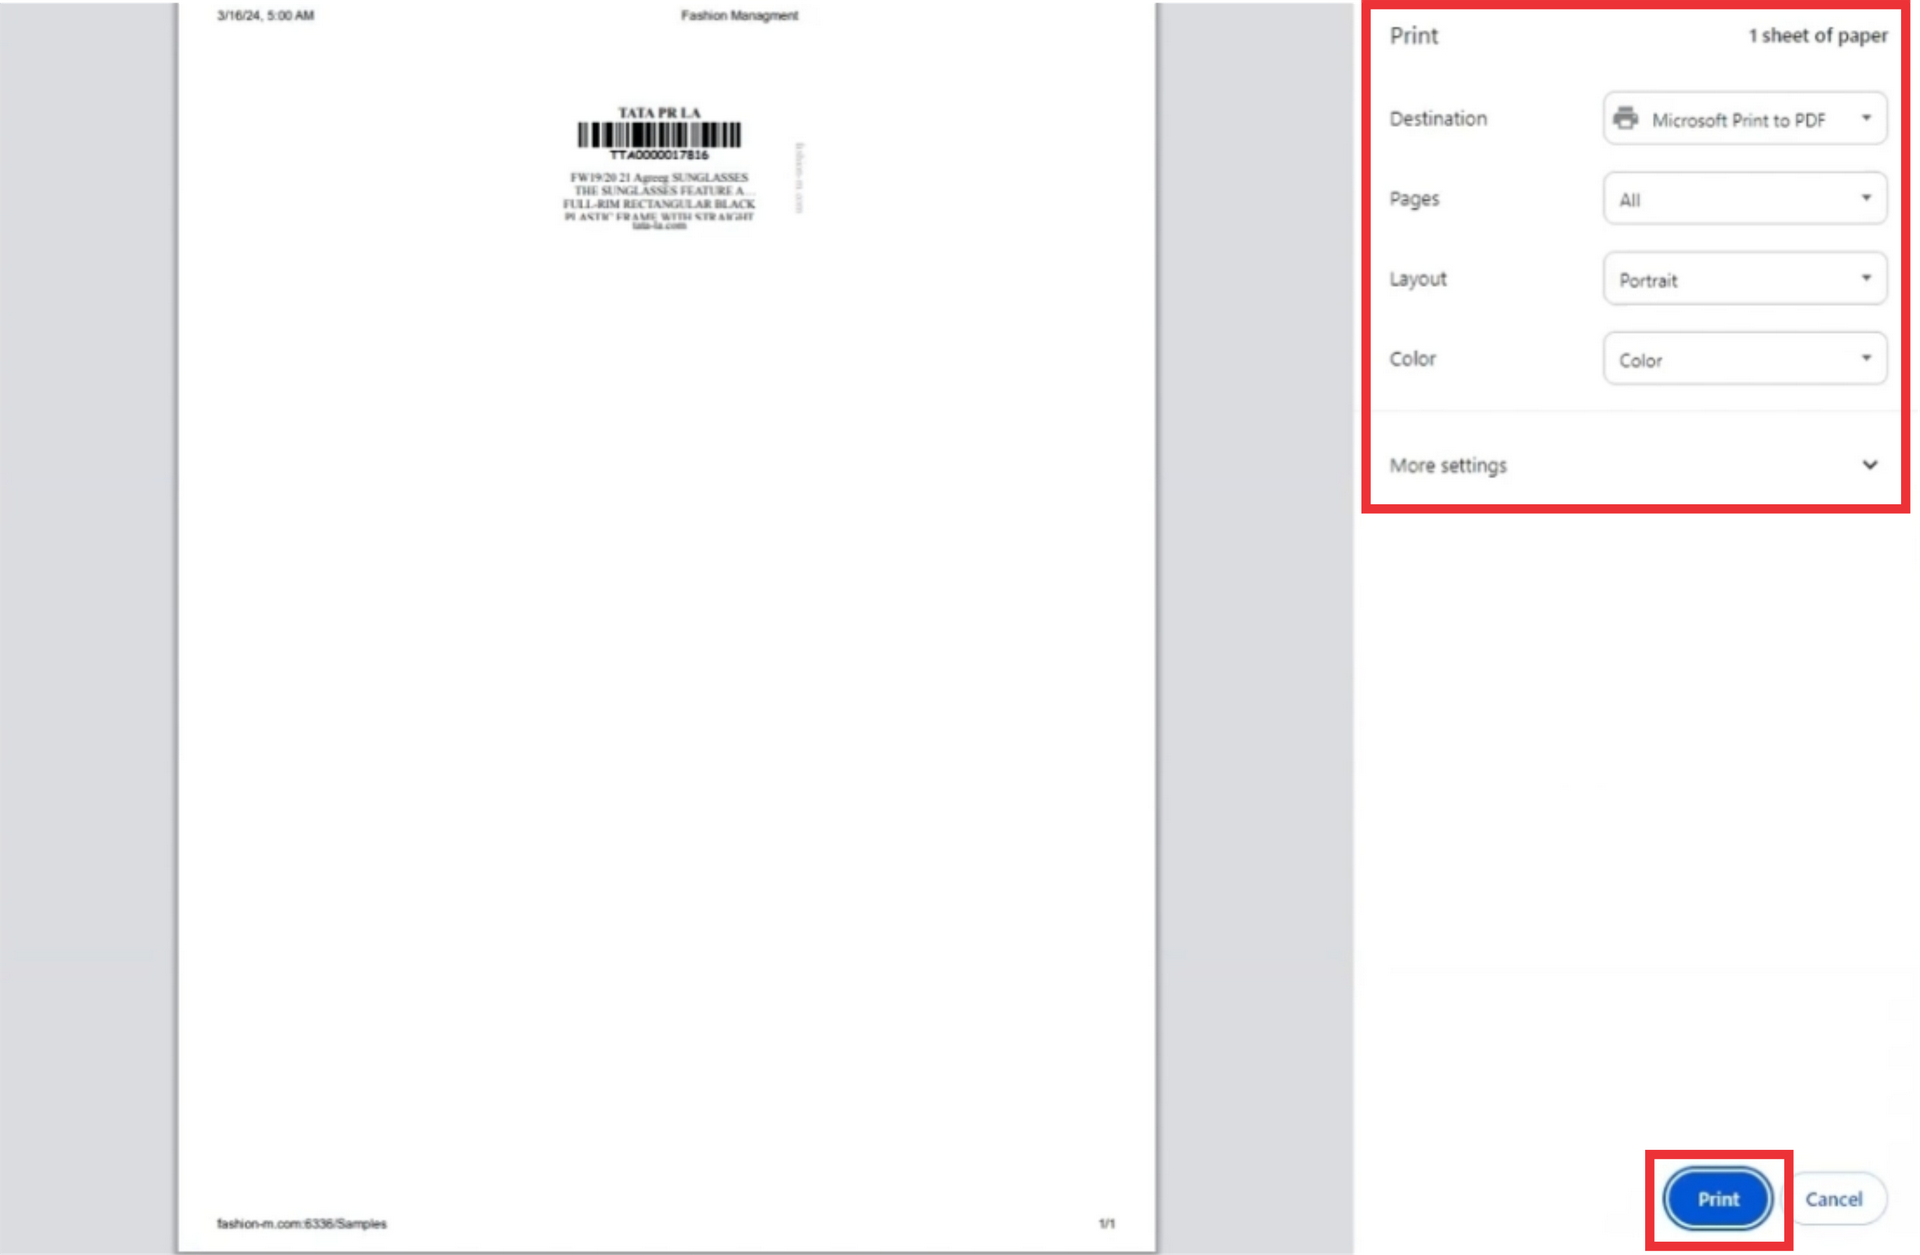
57. Click the "X" button to close this window.
58. Click the select button to view added sample options.
59. For the remove sample from the send out list click the "Remove Sample" button.
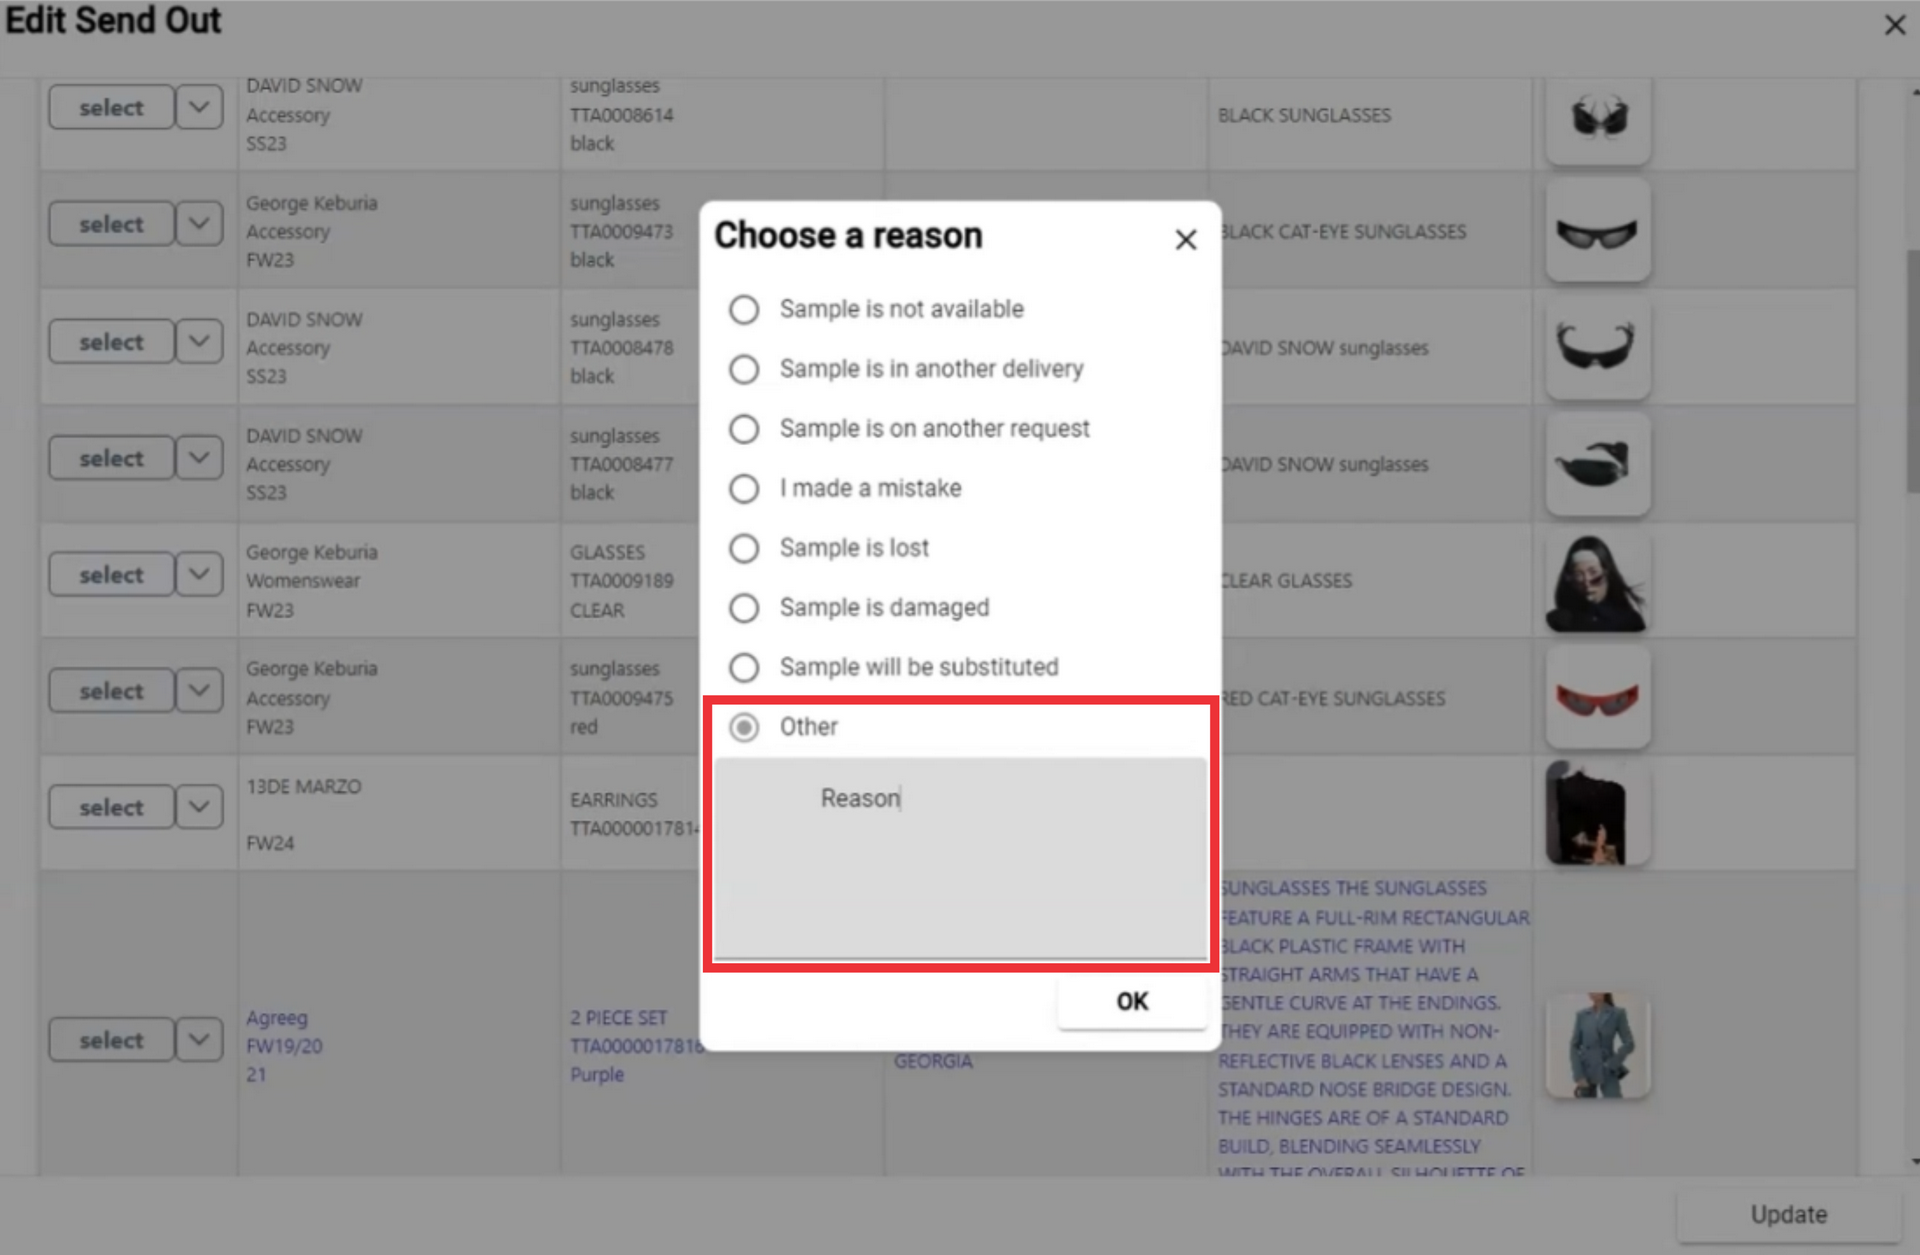
60. Select a removing reason from the list.
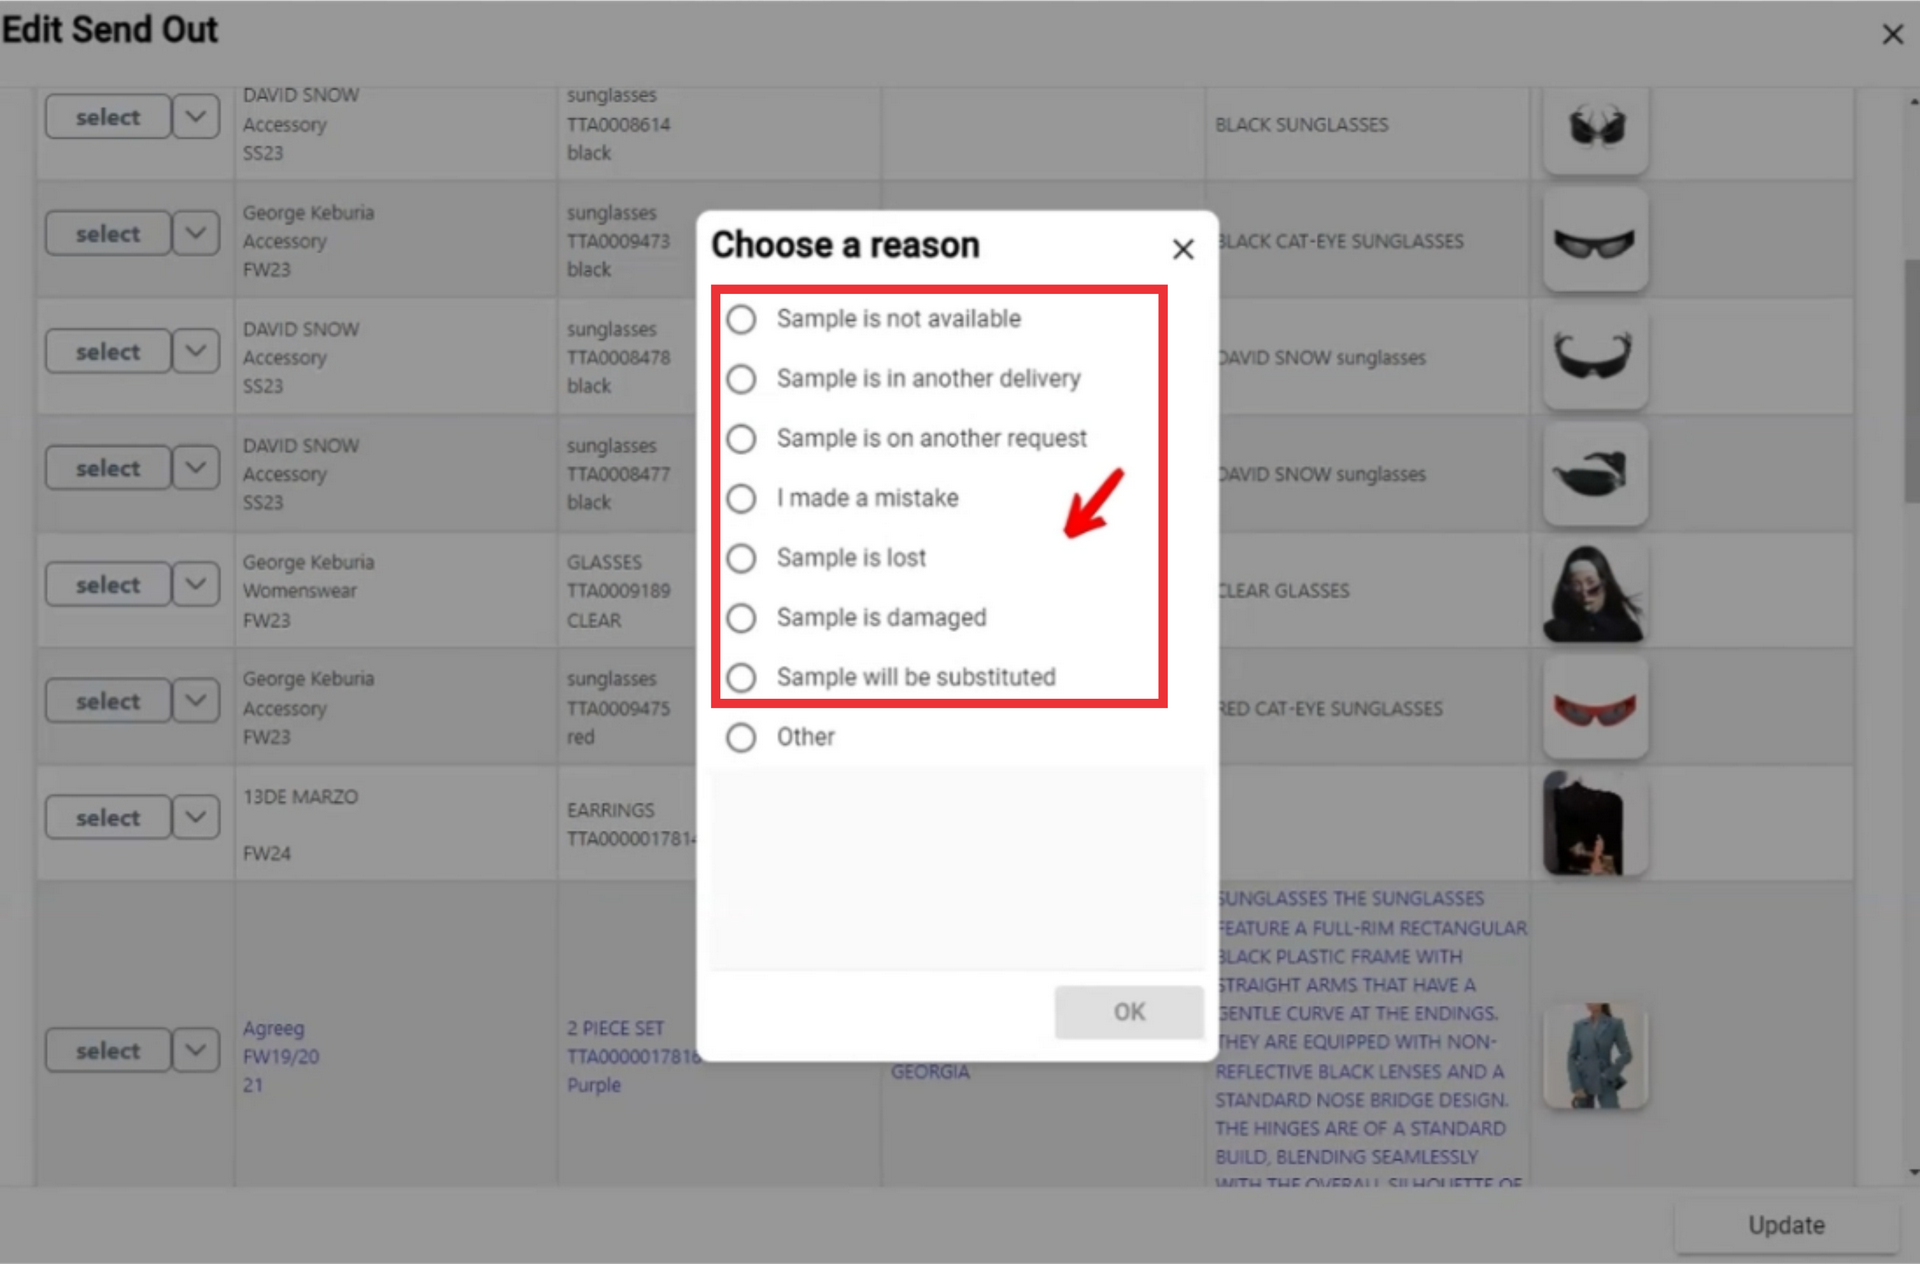
61. If reason is ton in the list click the "Other" dot and enter the reason in the field.
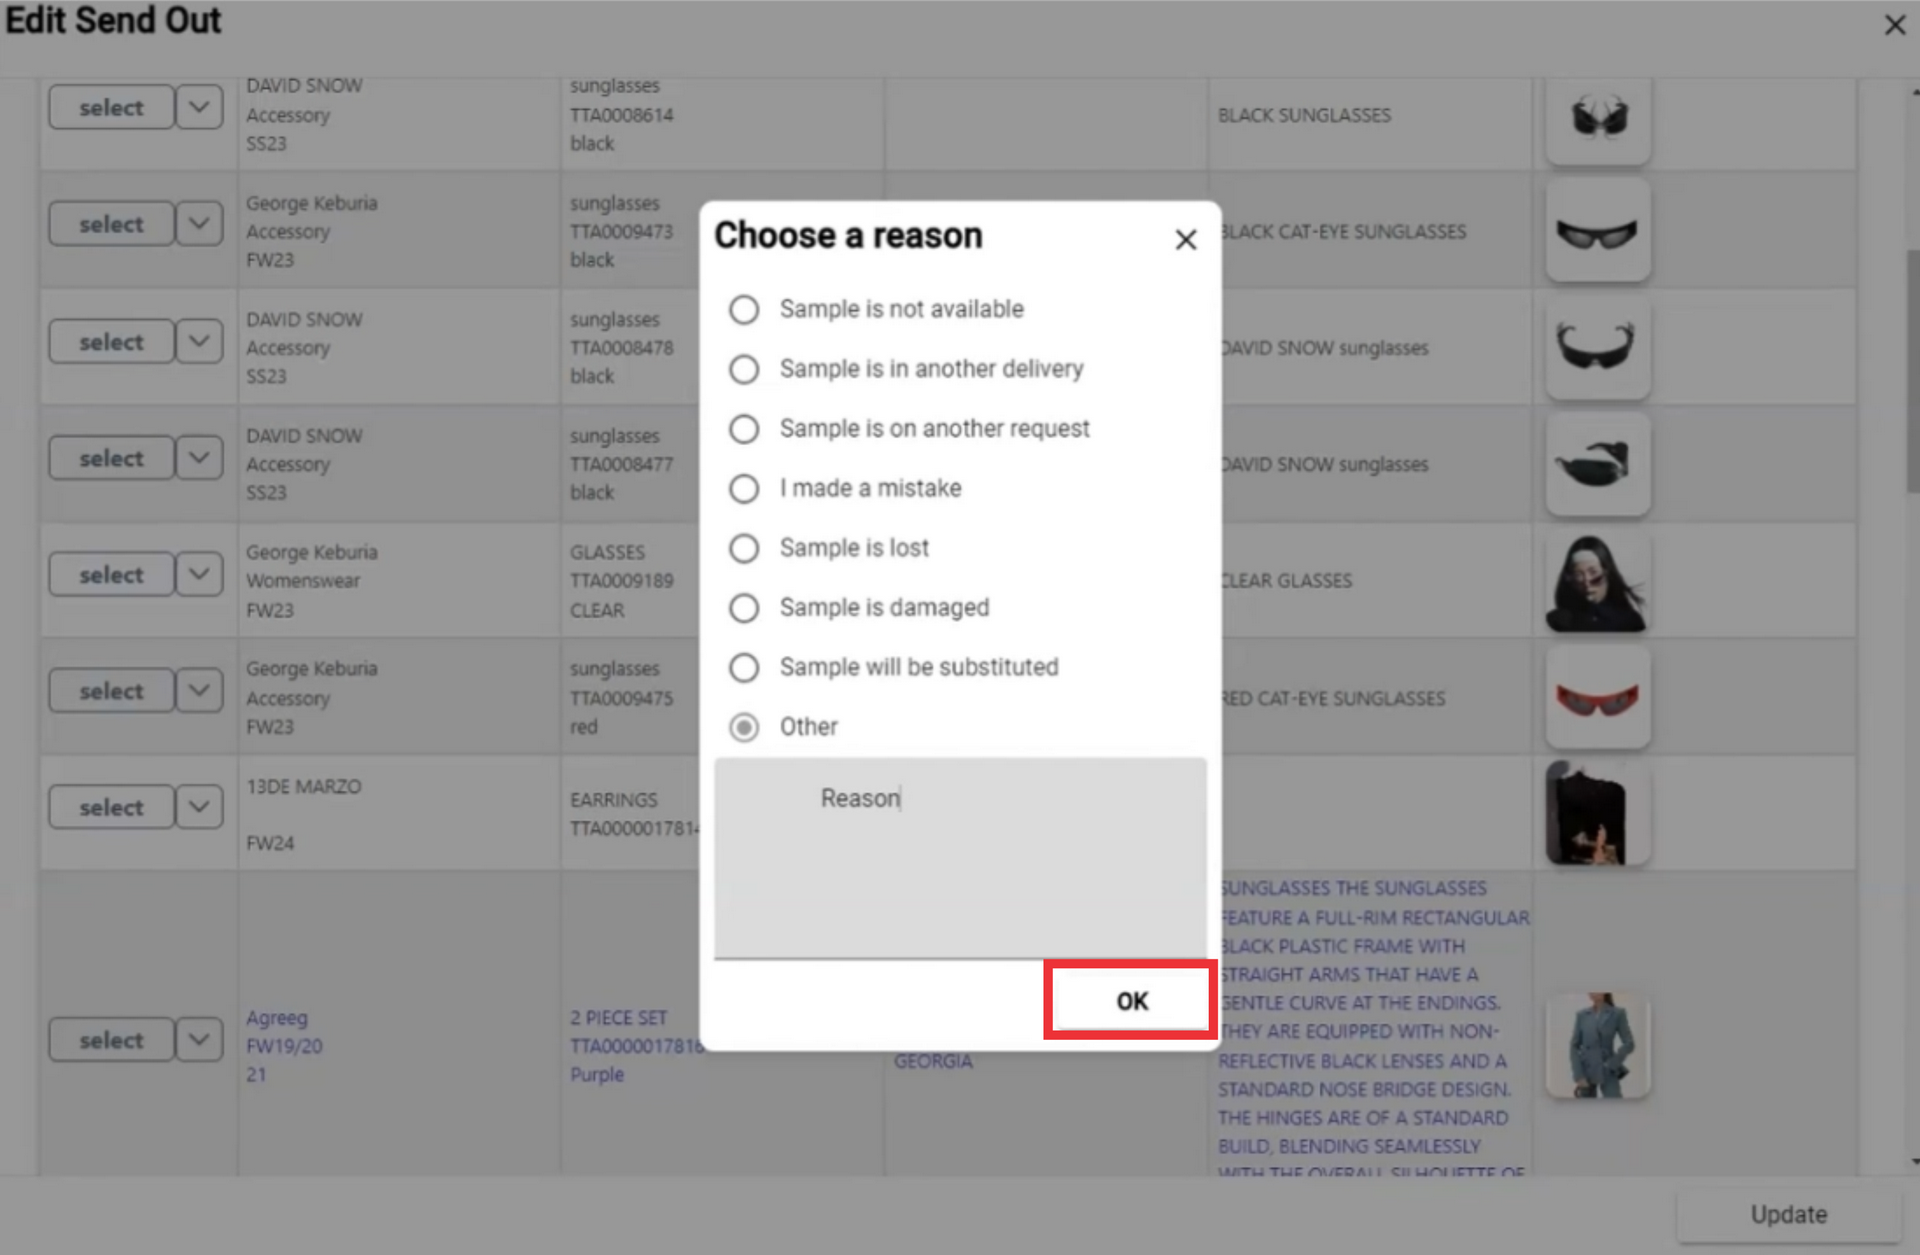
62. Click the ok button to confirm.
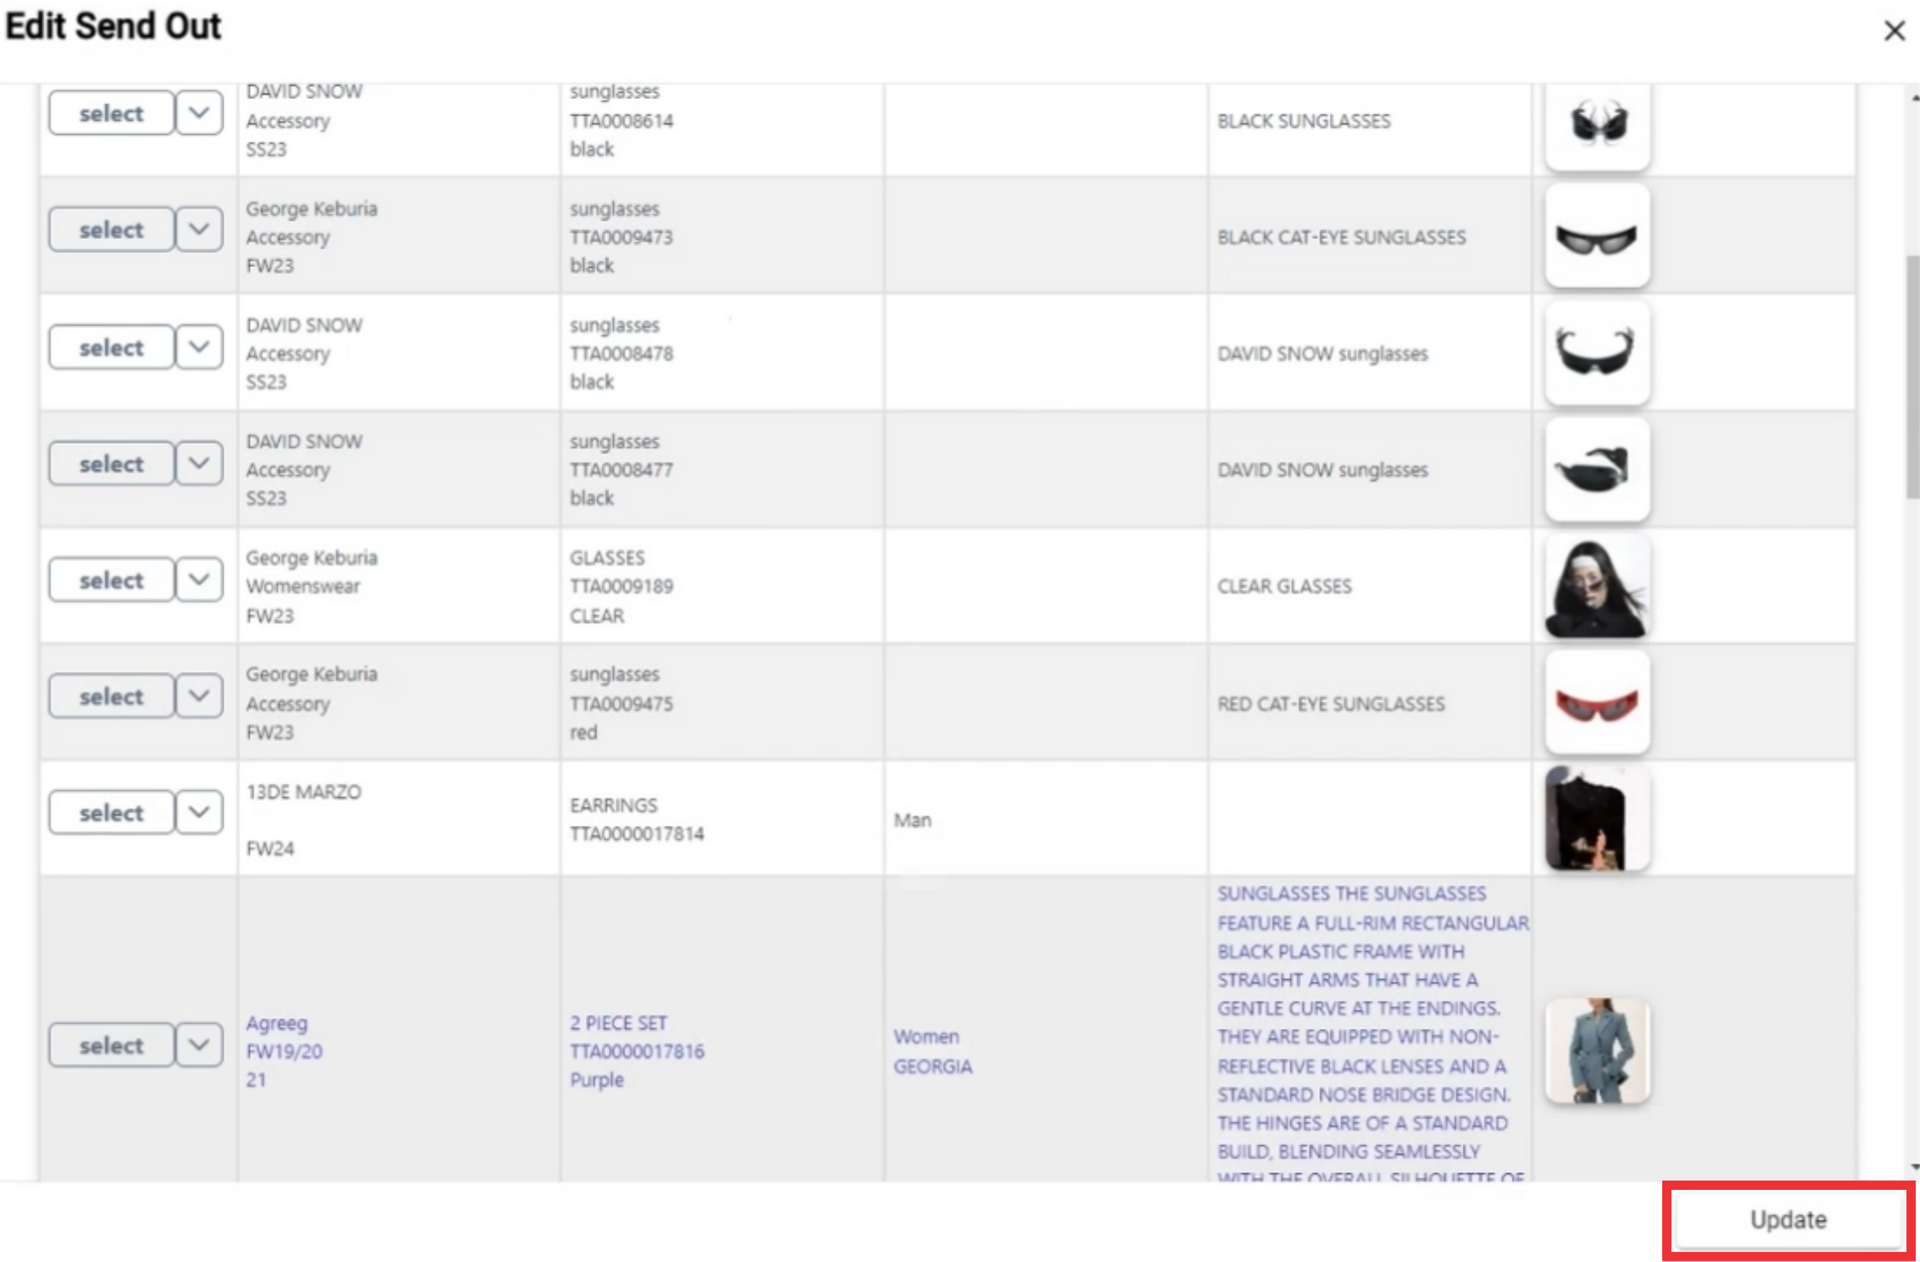
63. Click the "Update" button to save the data.
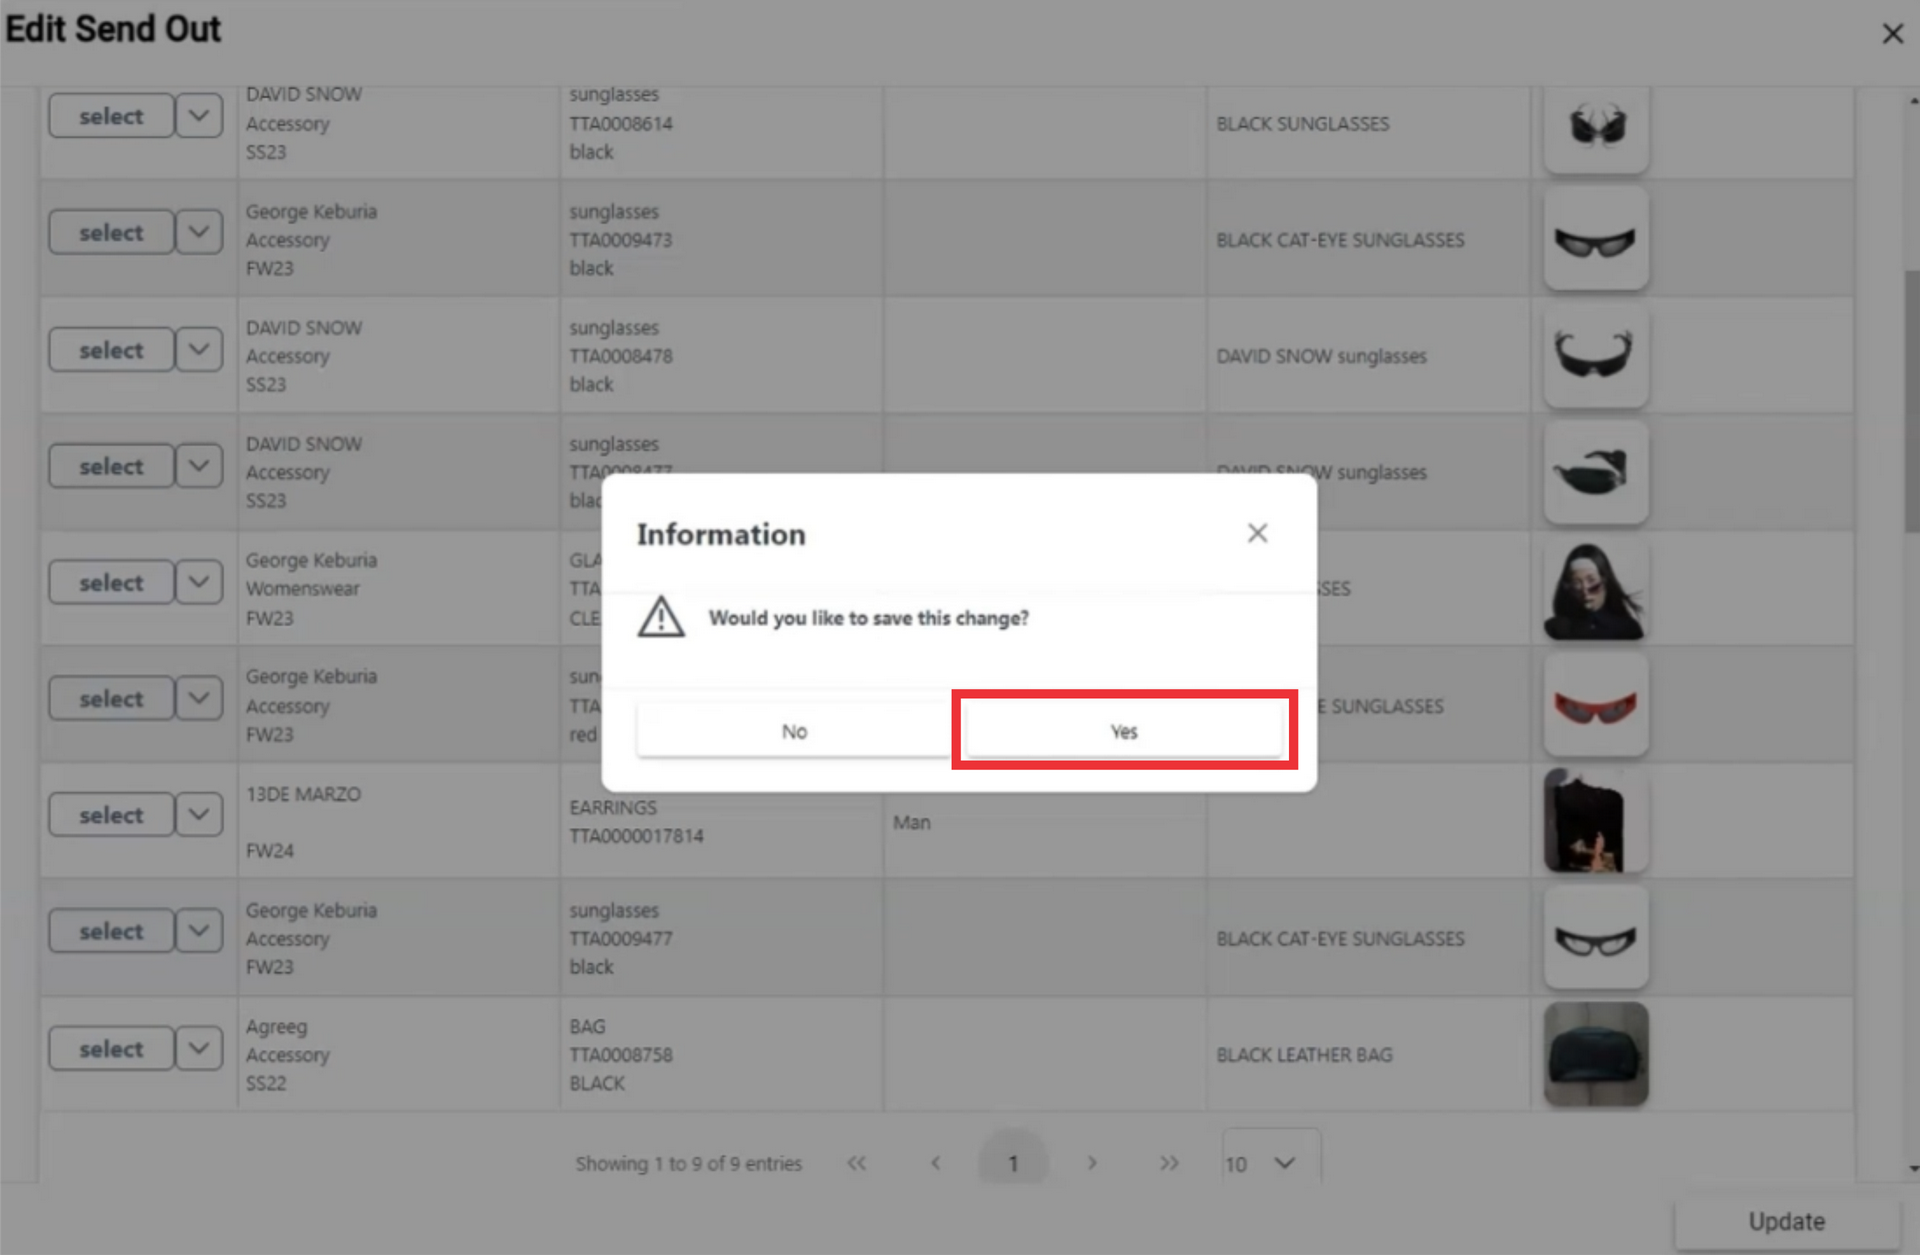
64.Click the "Yes" button to confirm.
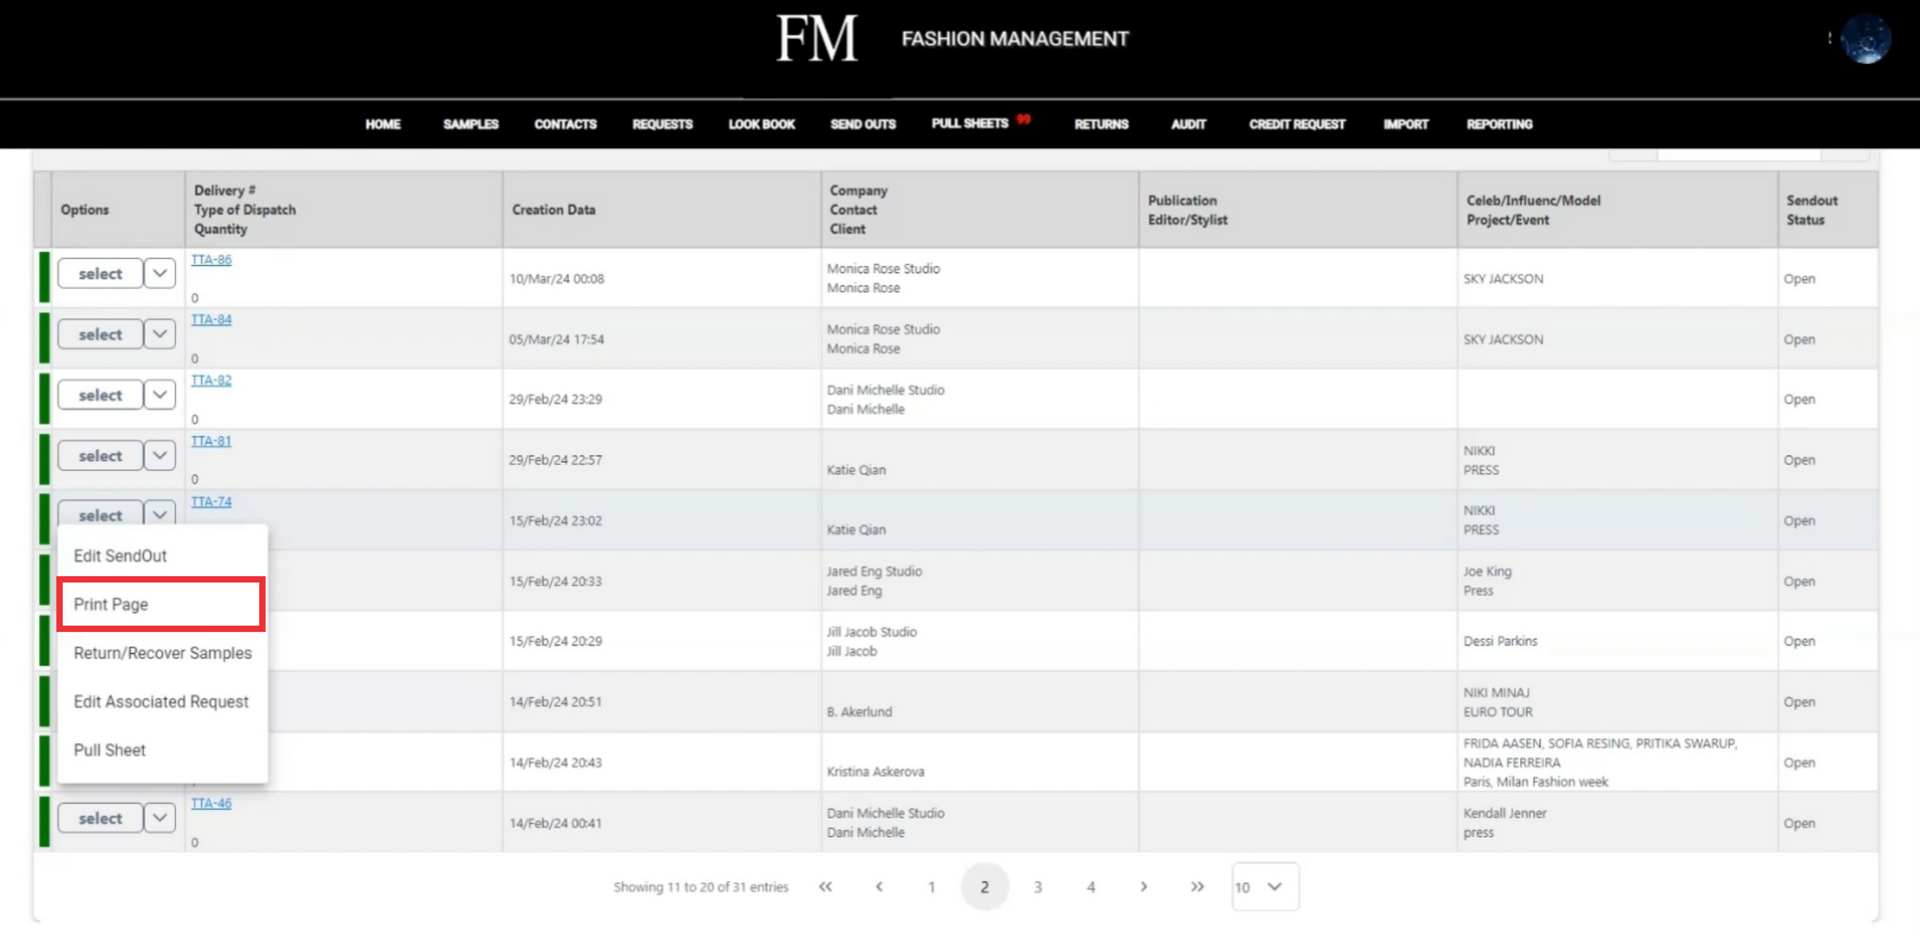
65.Click the Select button to open the menu.
66. For the view and print send out documents click the "Print Page" button.
67. Enter or edit tracking number in the field.
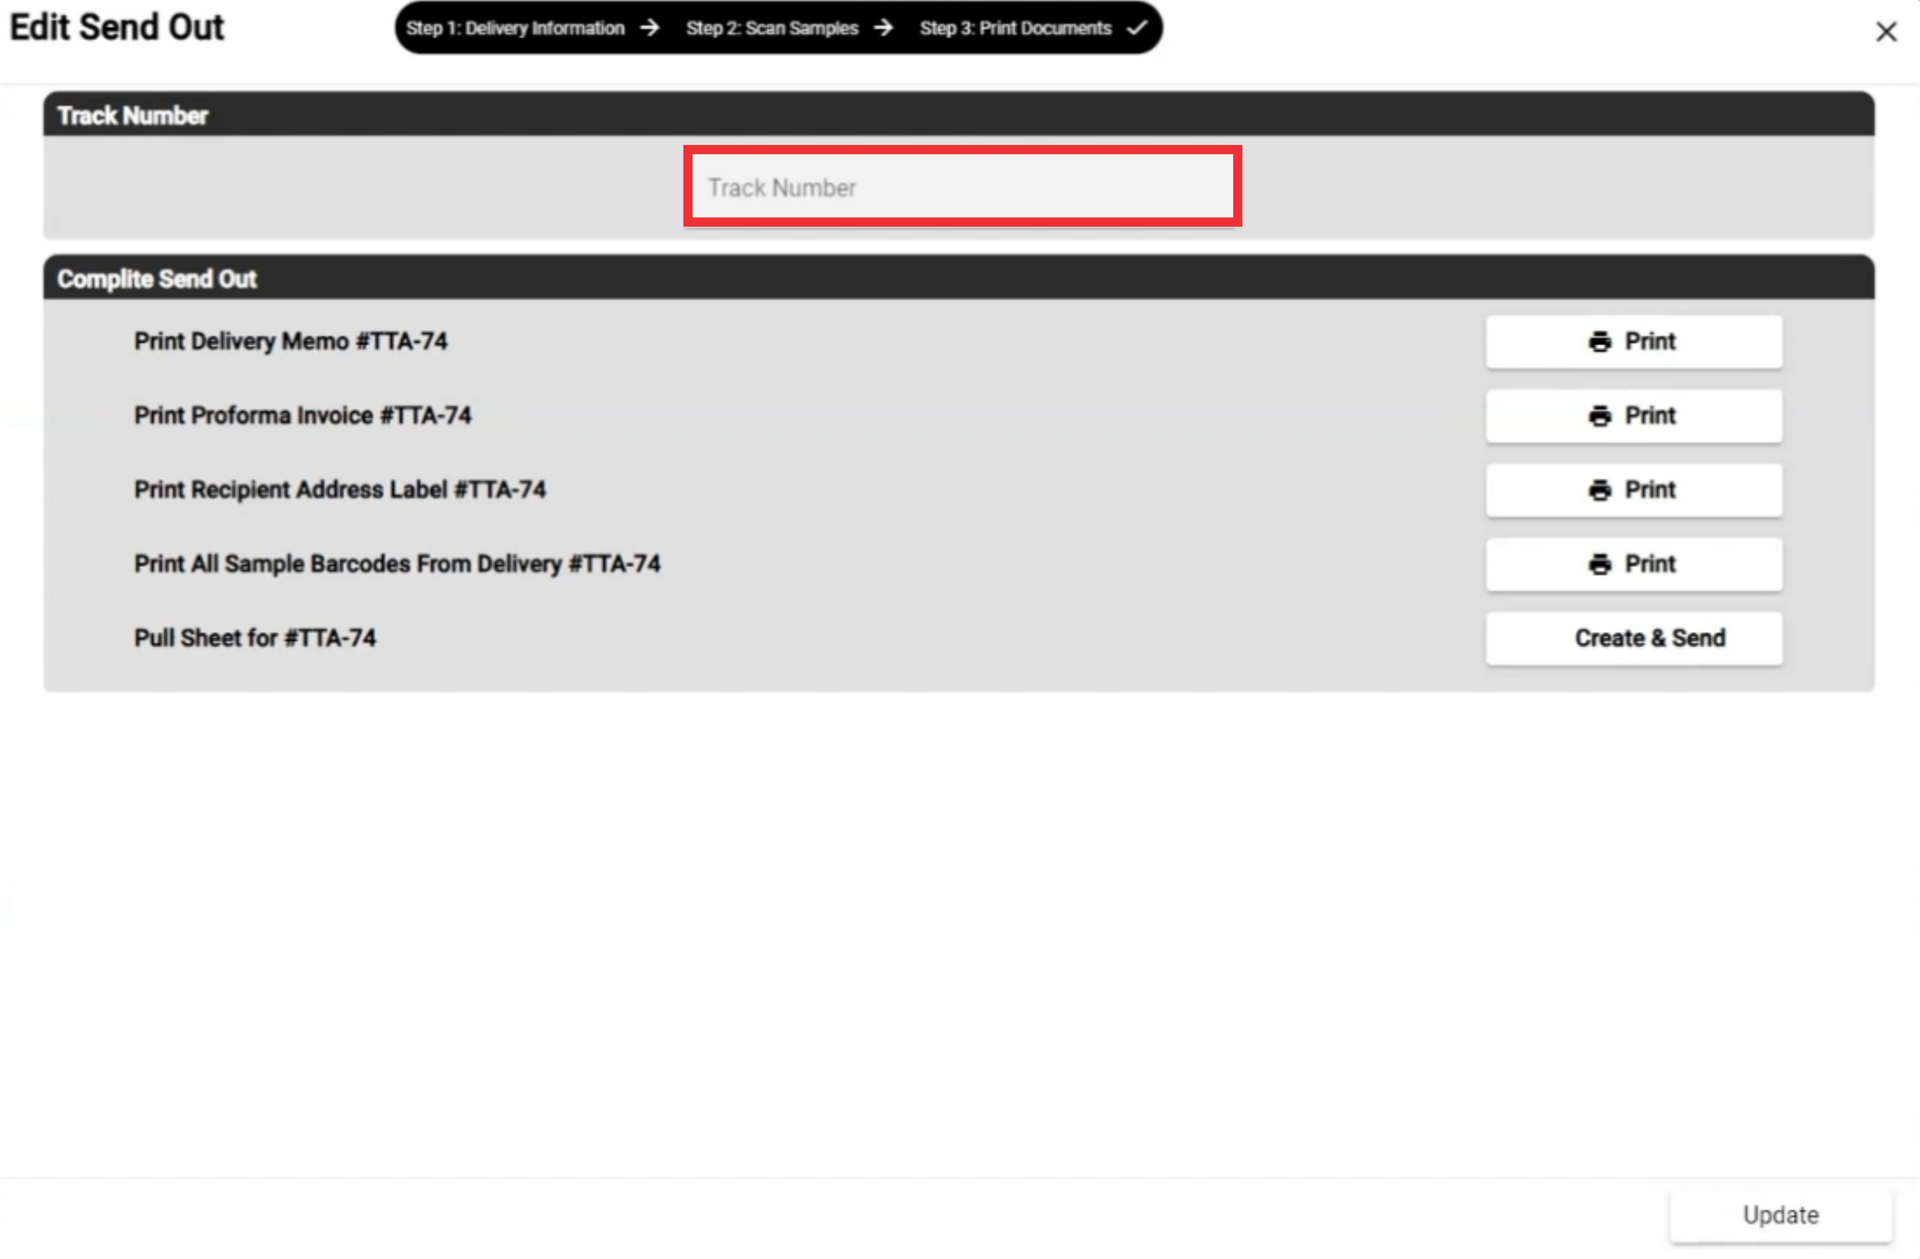
68. Click the Print button to view, send by email, Export and print delivery memo document.

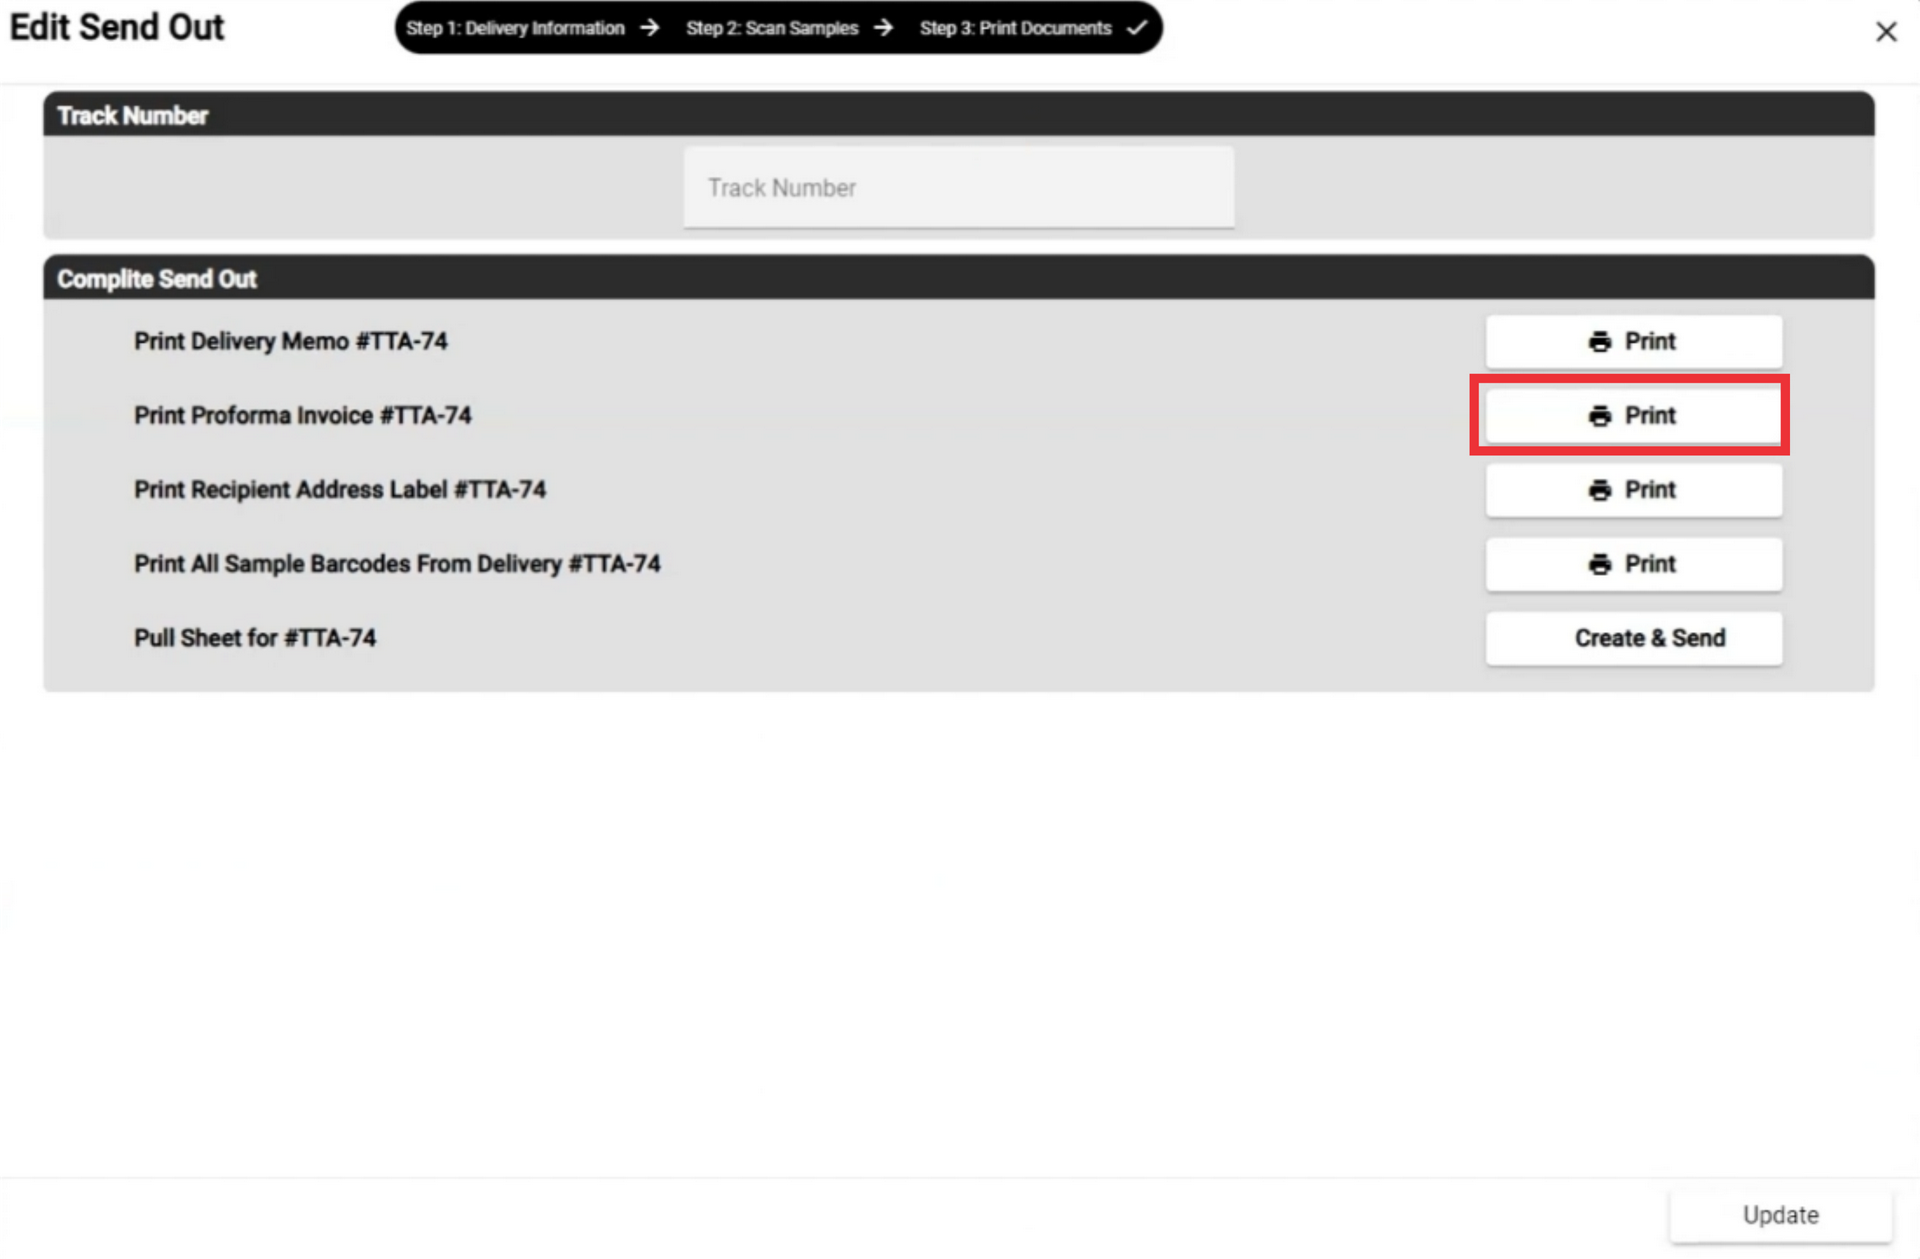
69. Click the Print button to view, send by email, Export and print proforma invoice document.
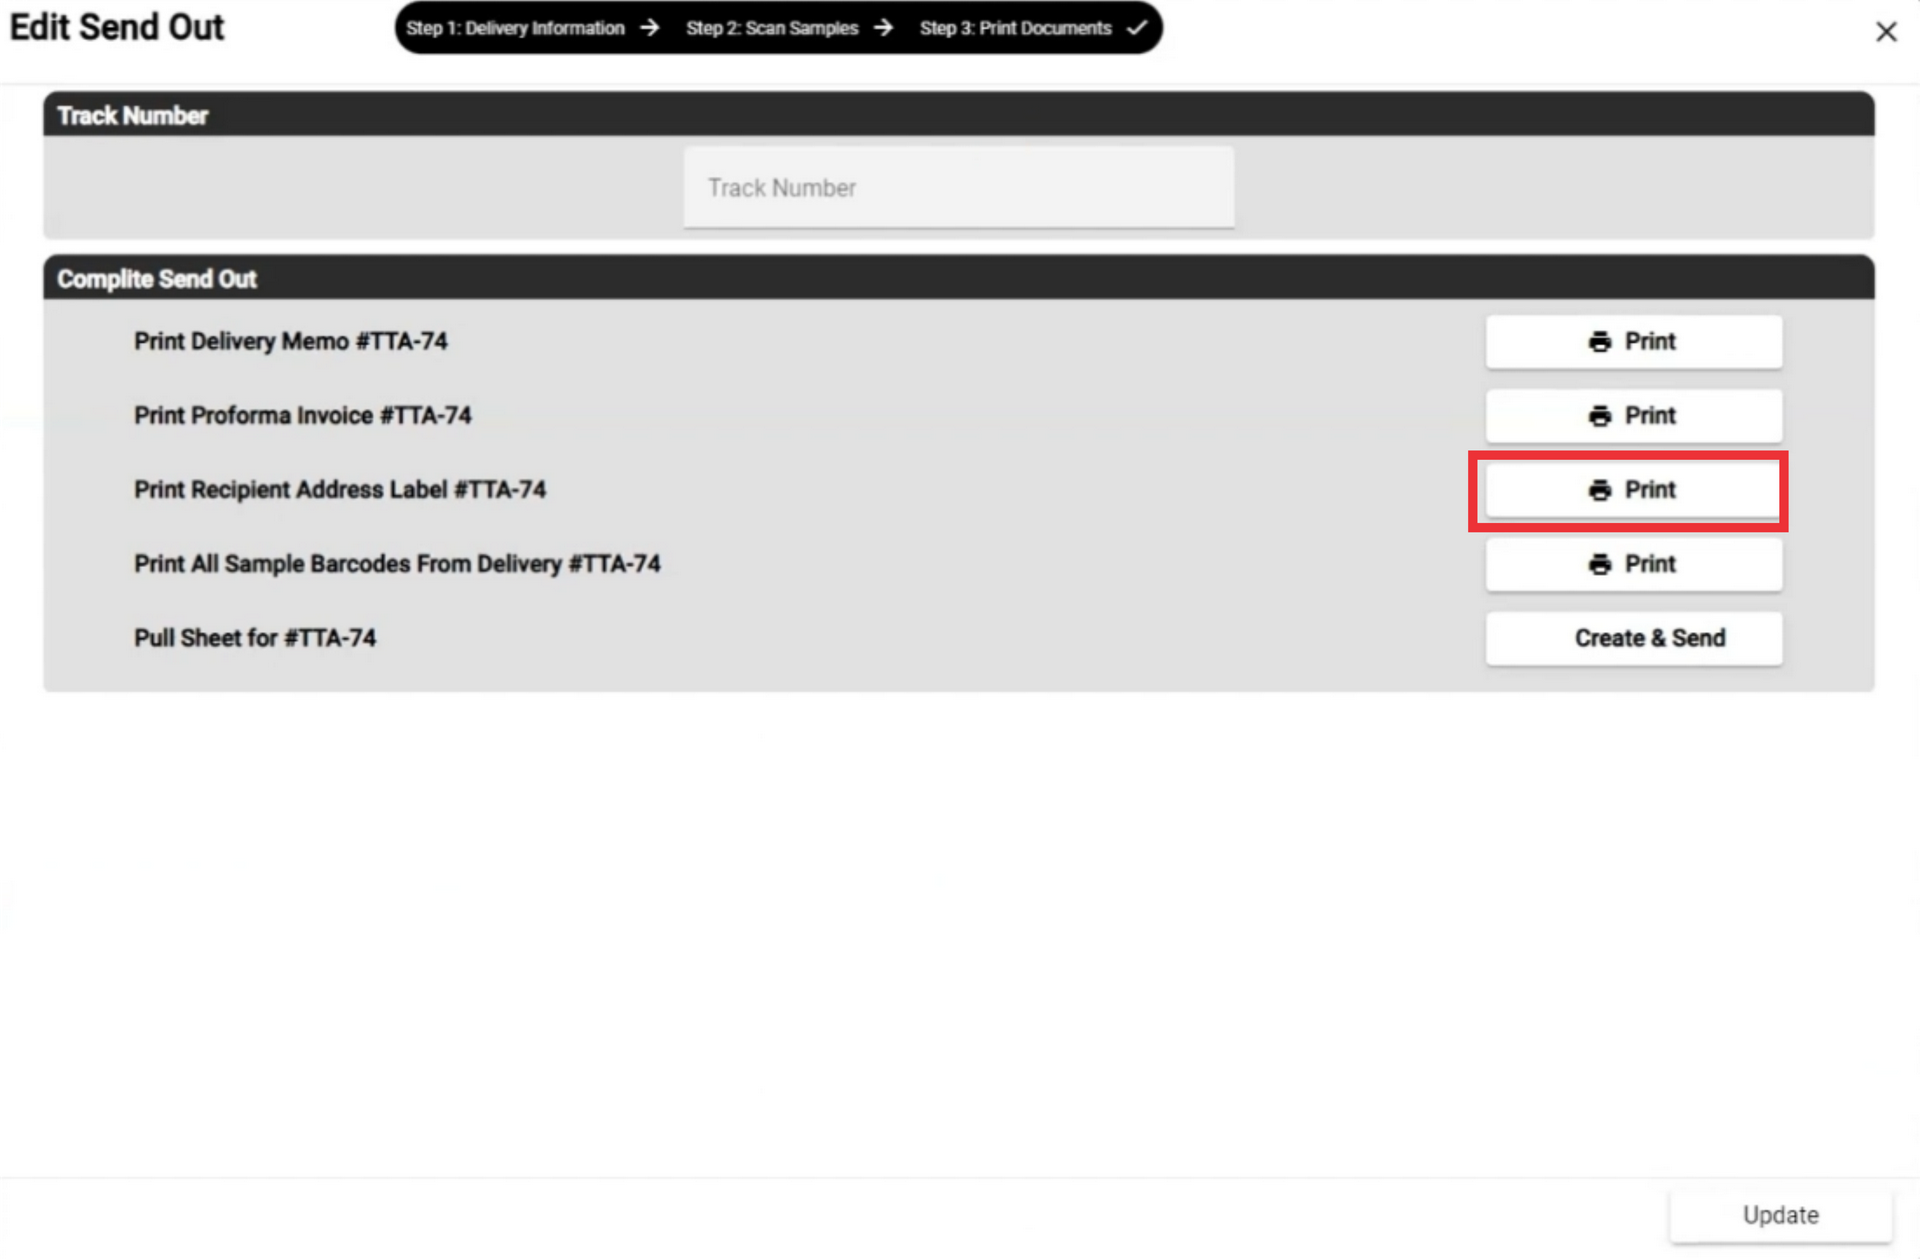
70. Click the Print button to view, send by email, Export and print address Label.
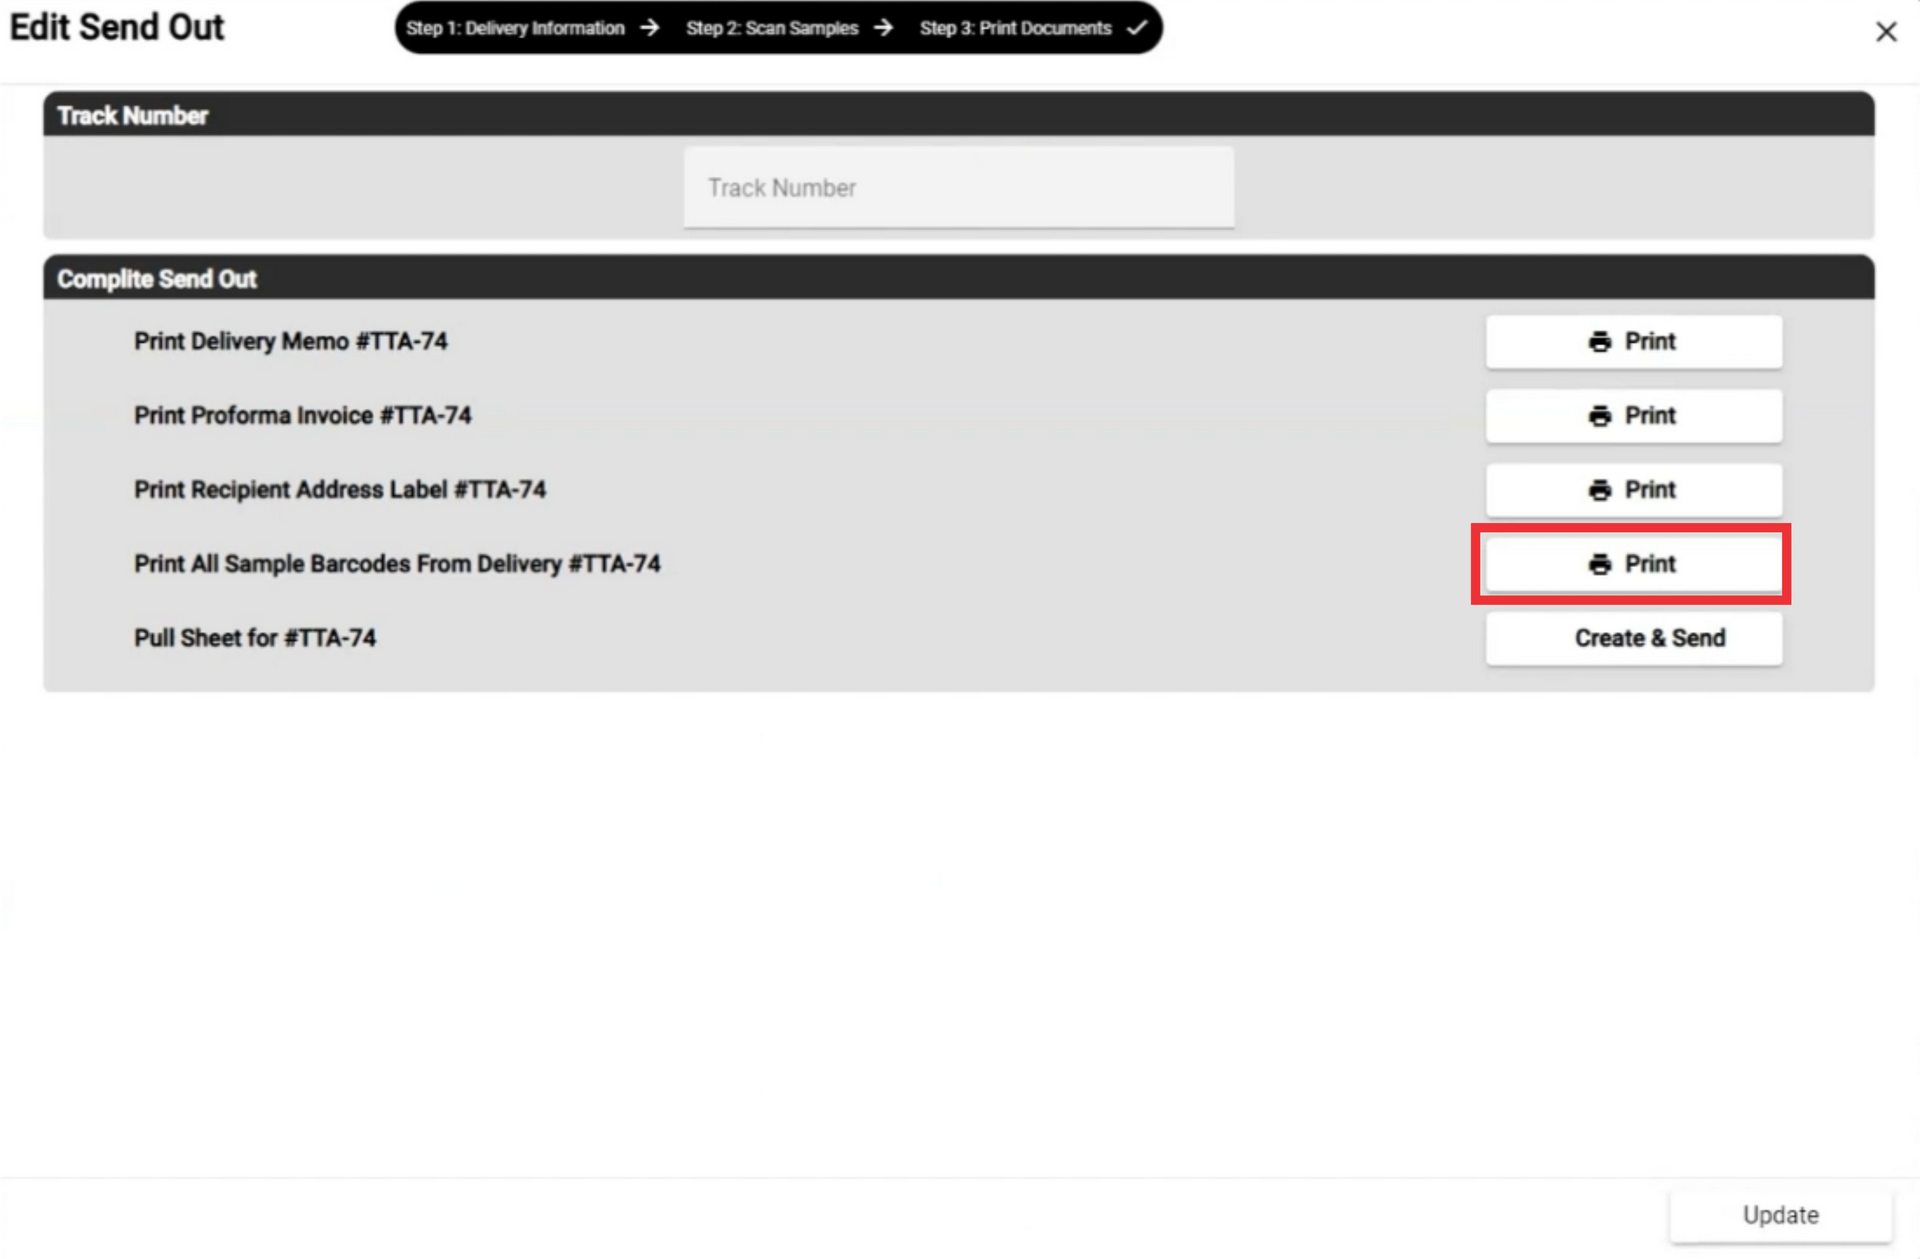
71. Click the Print button to view and print sampe barcodes from delivery.
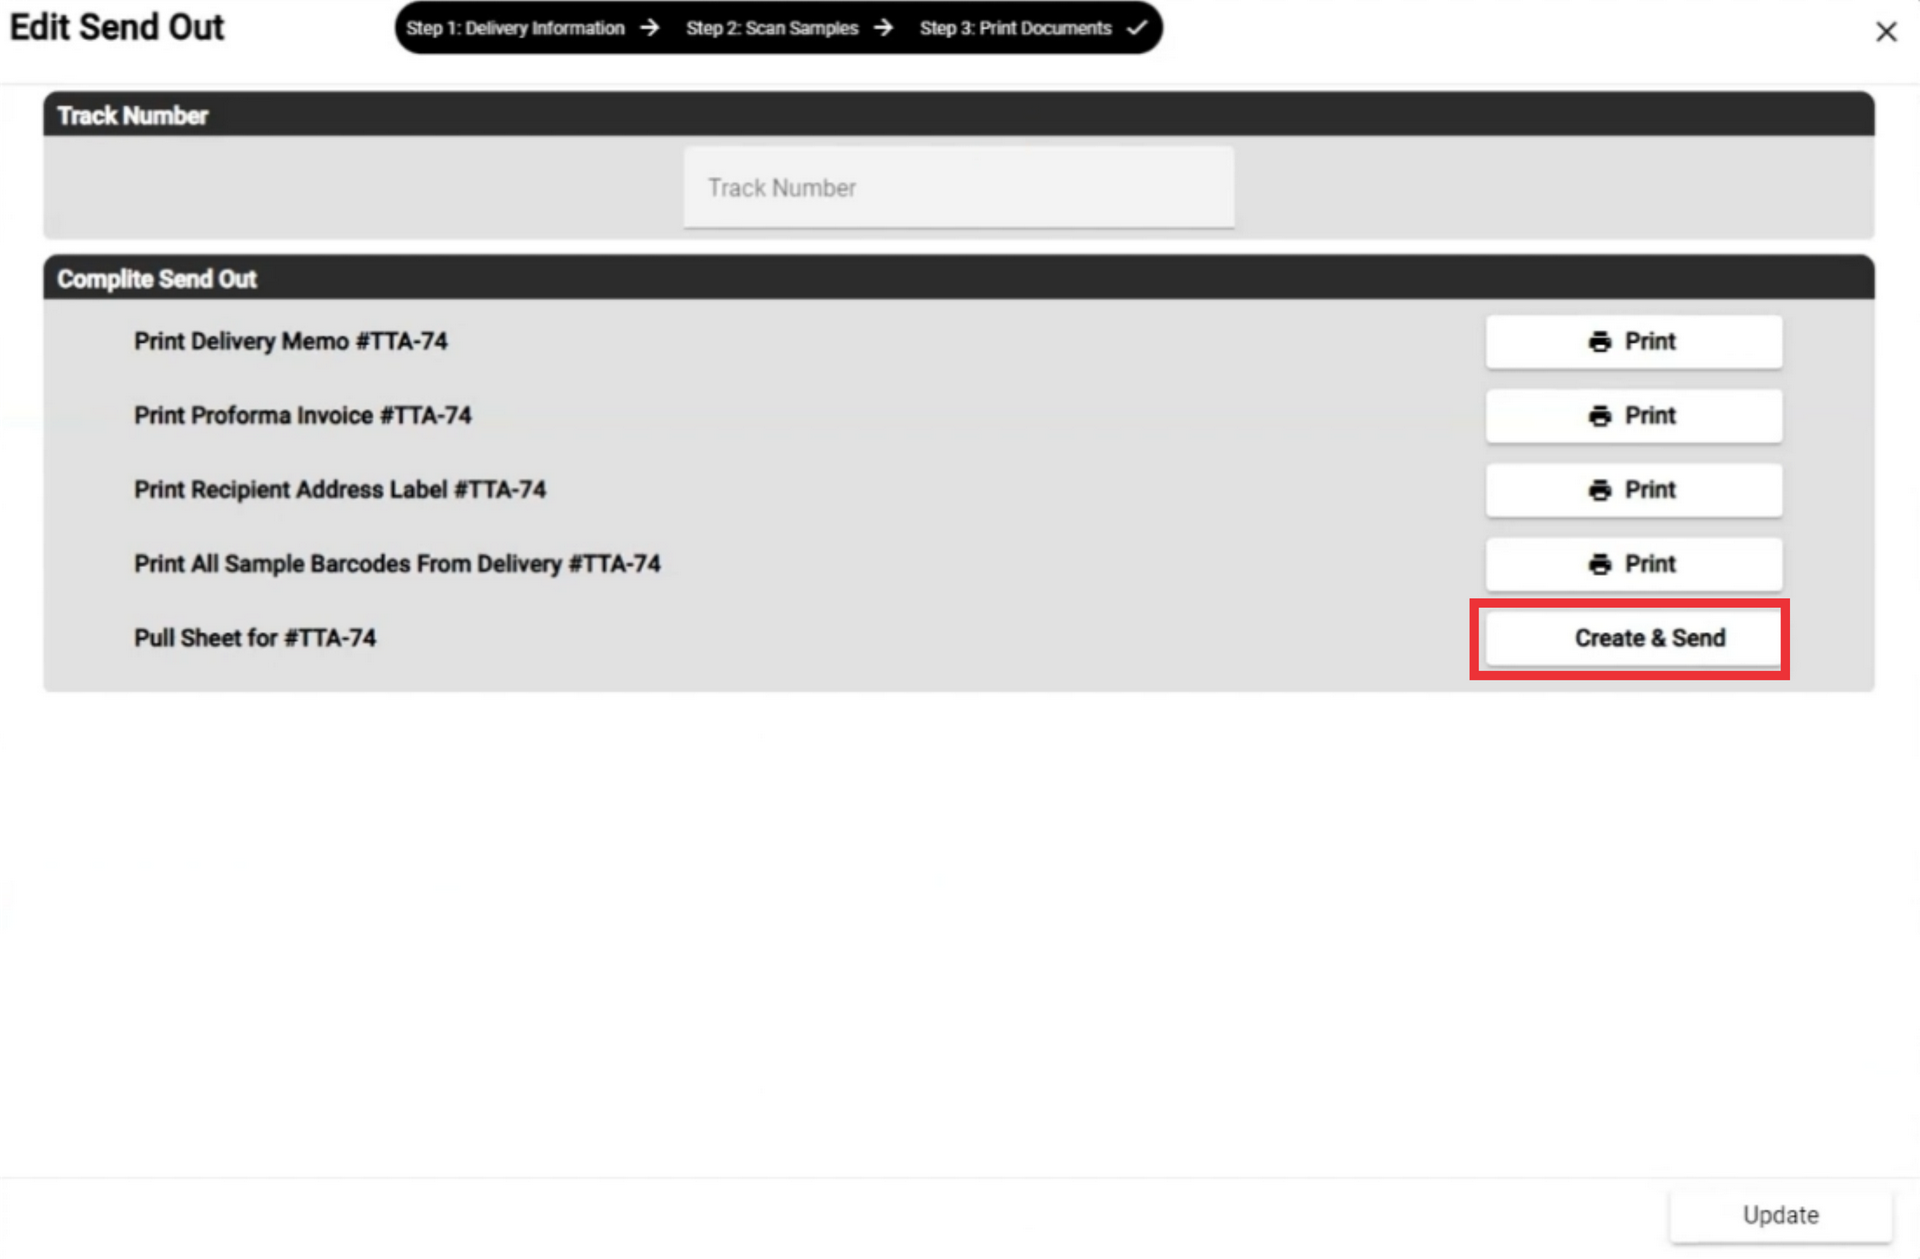
72. Click the Create and send button to create and send by email the pull sheet document.
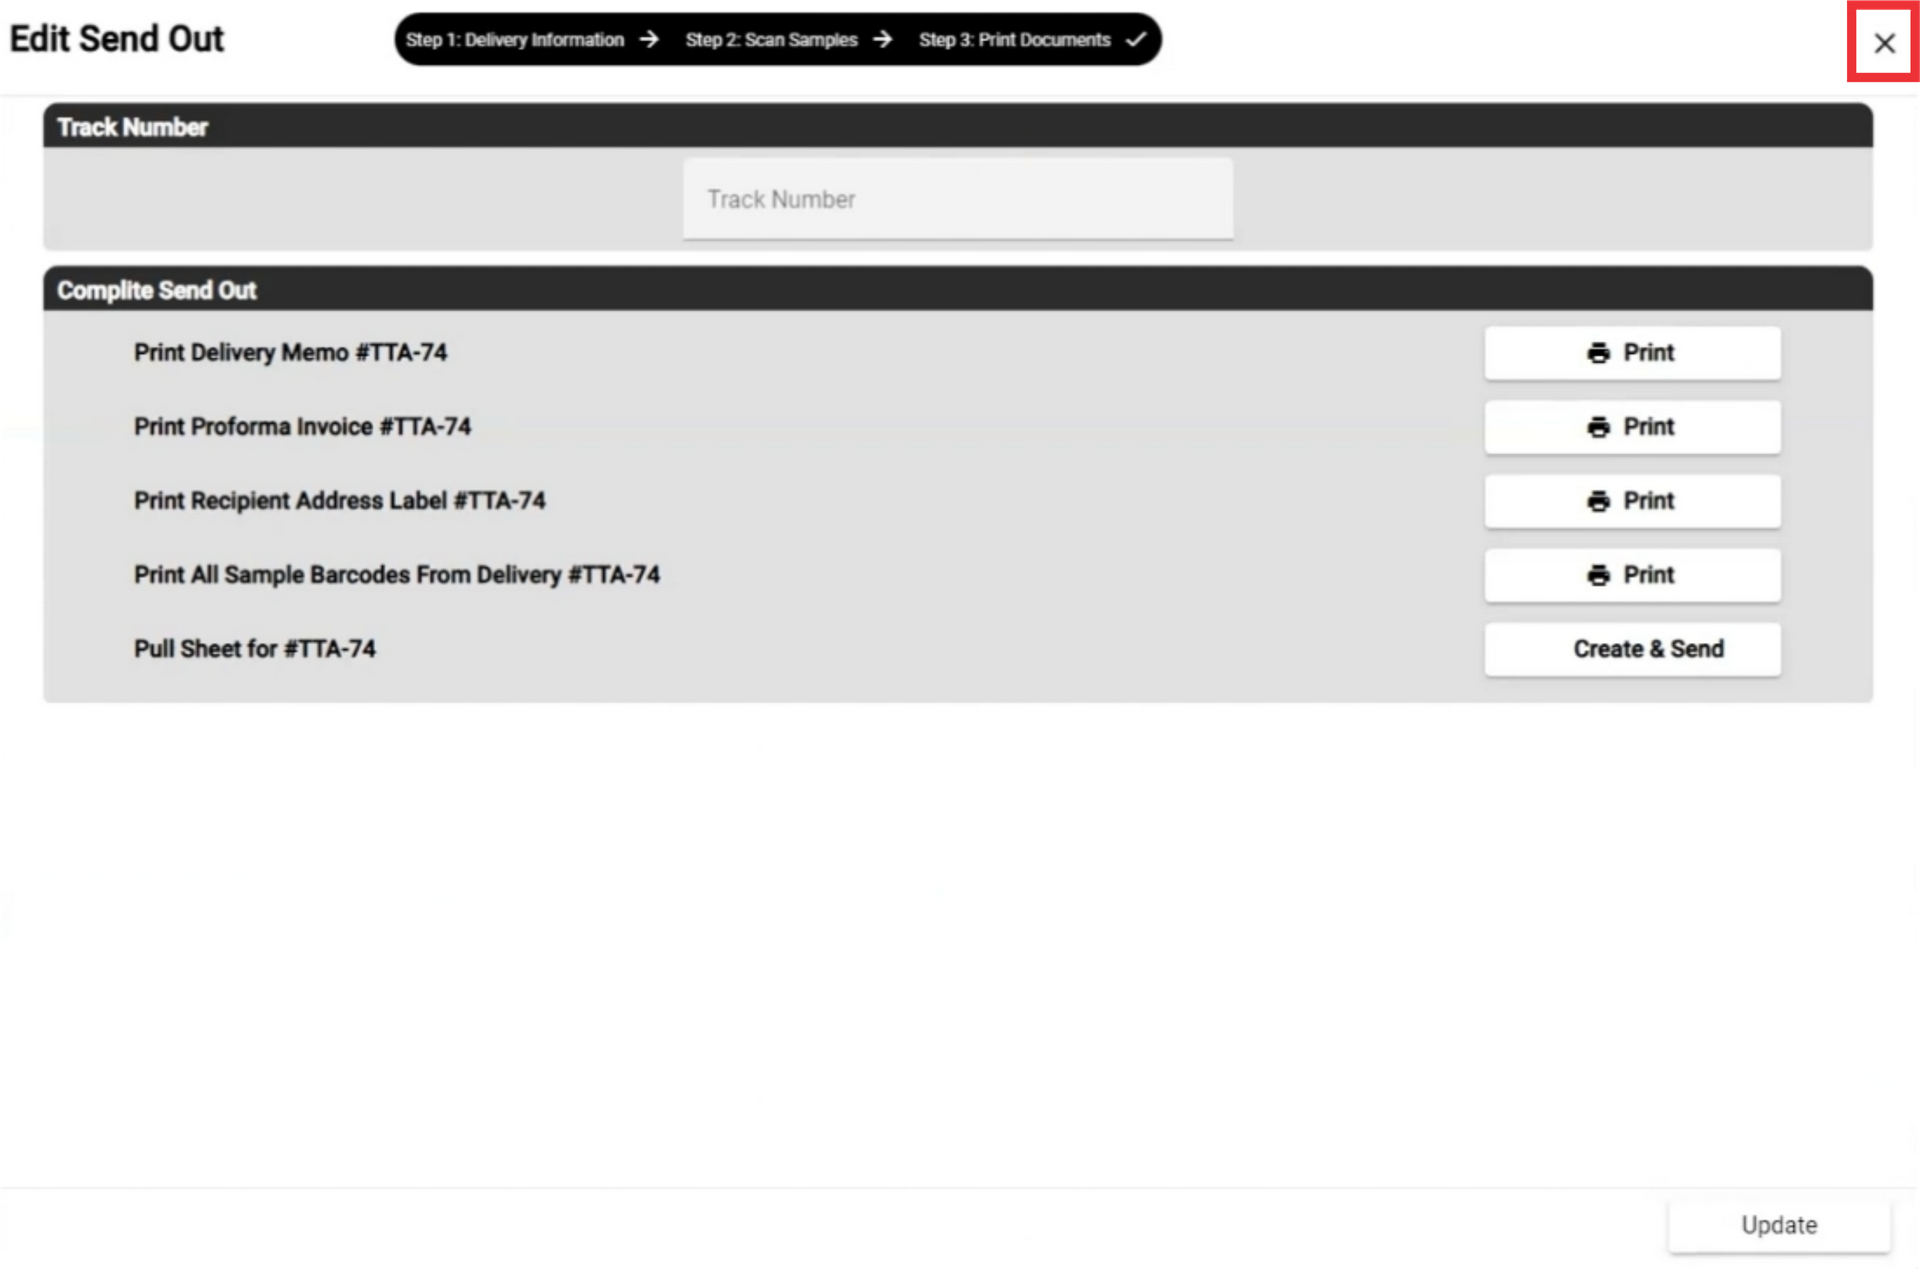
73. Click the "X" button to close this window.
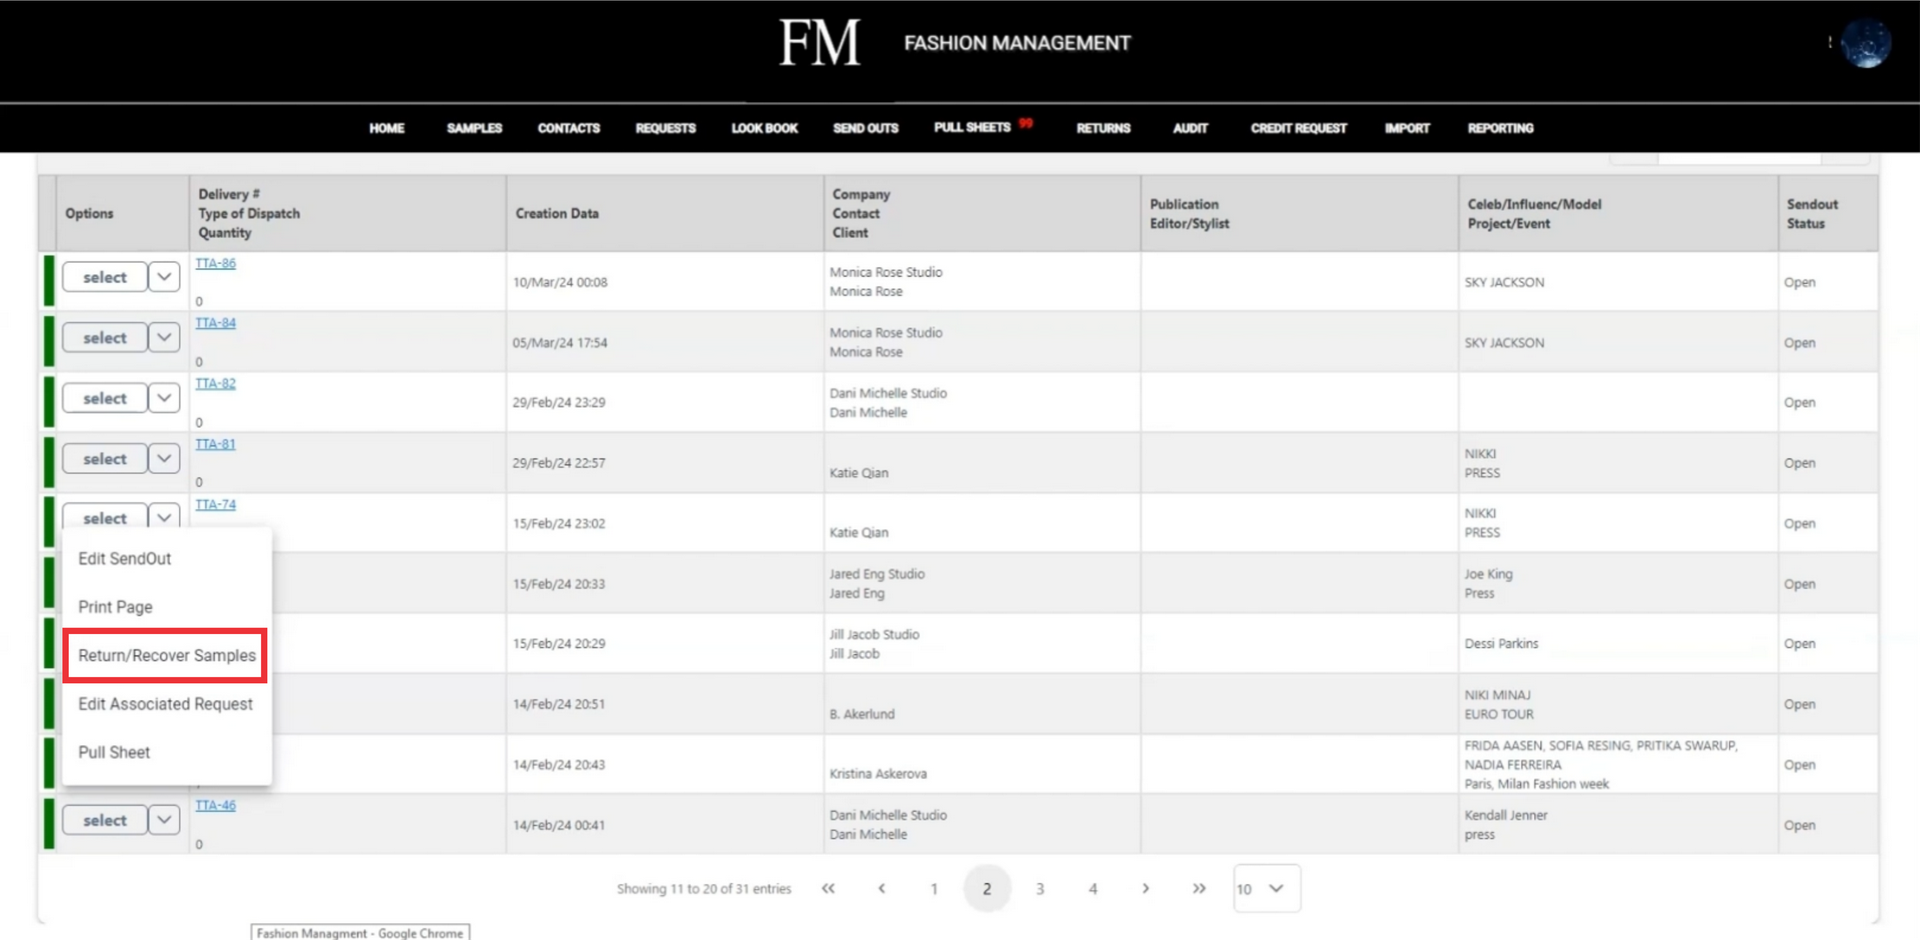
74. Click the "Select" button to open the send out document option menu.
75. Click the Returm and recover samples button.
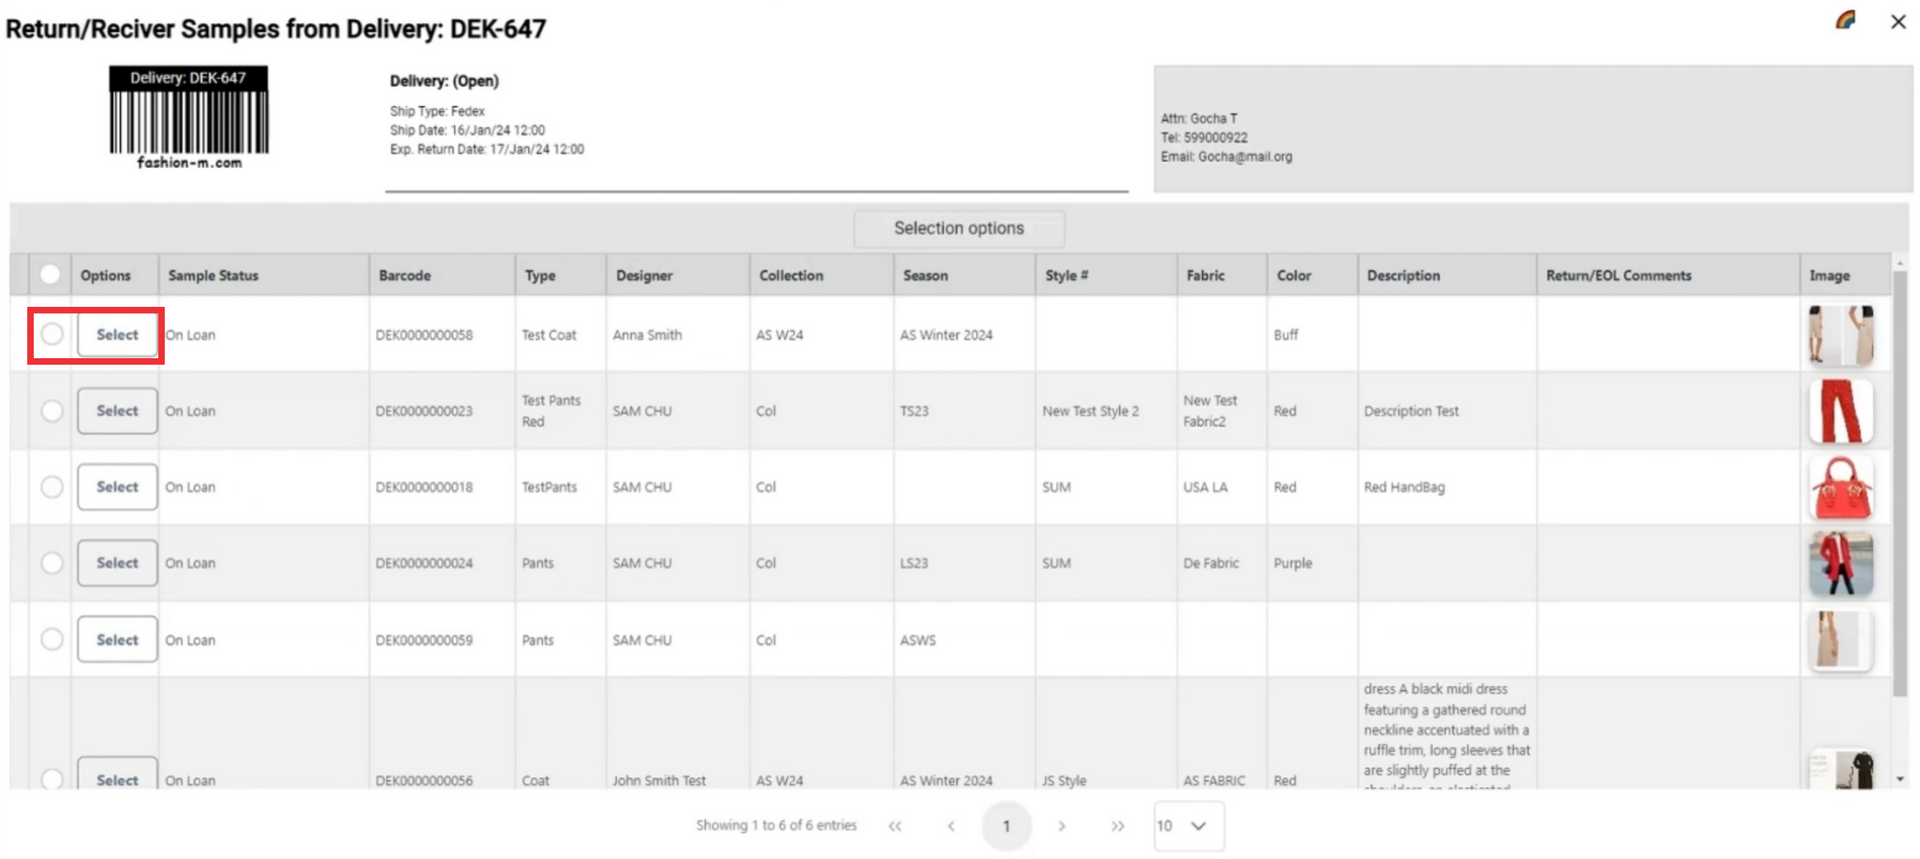
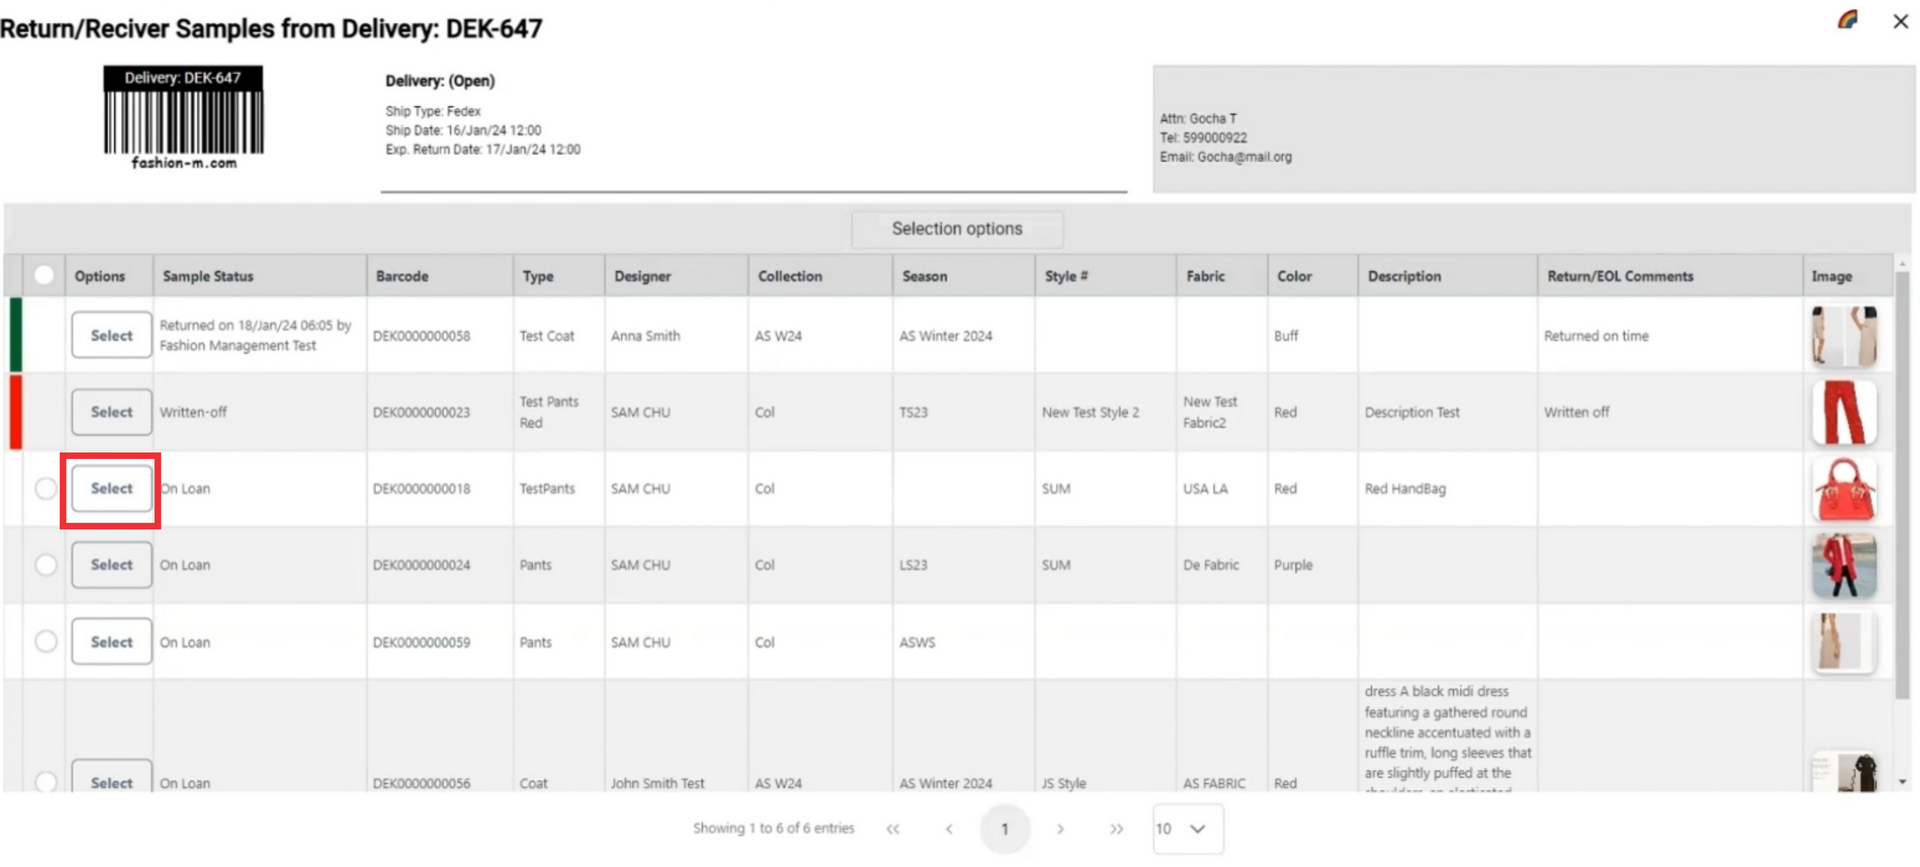
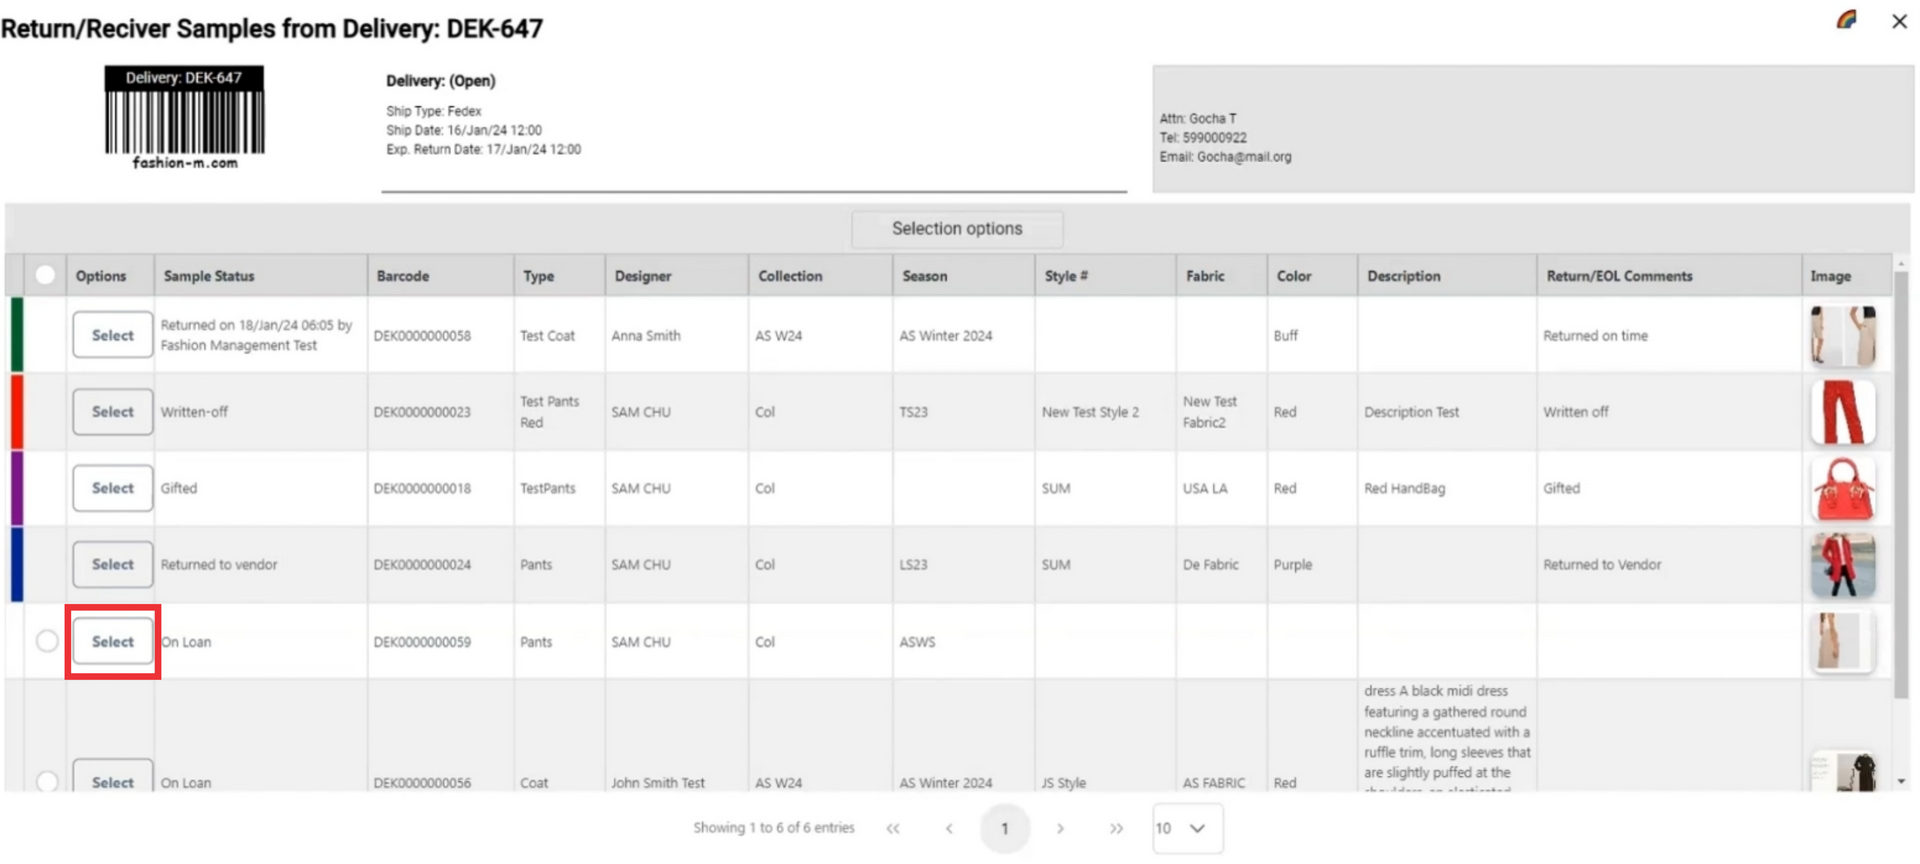
76. For the view sample option menu click the "Select" button.
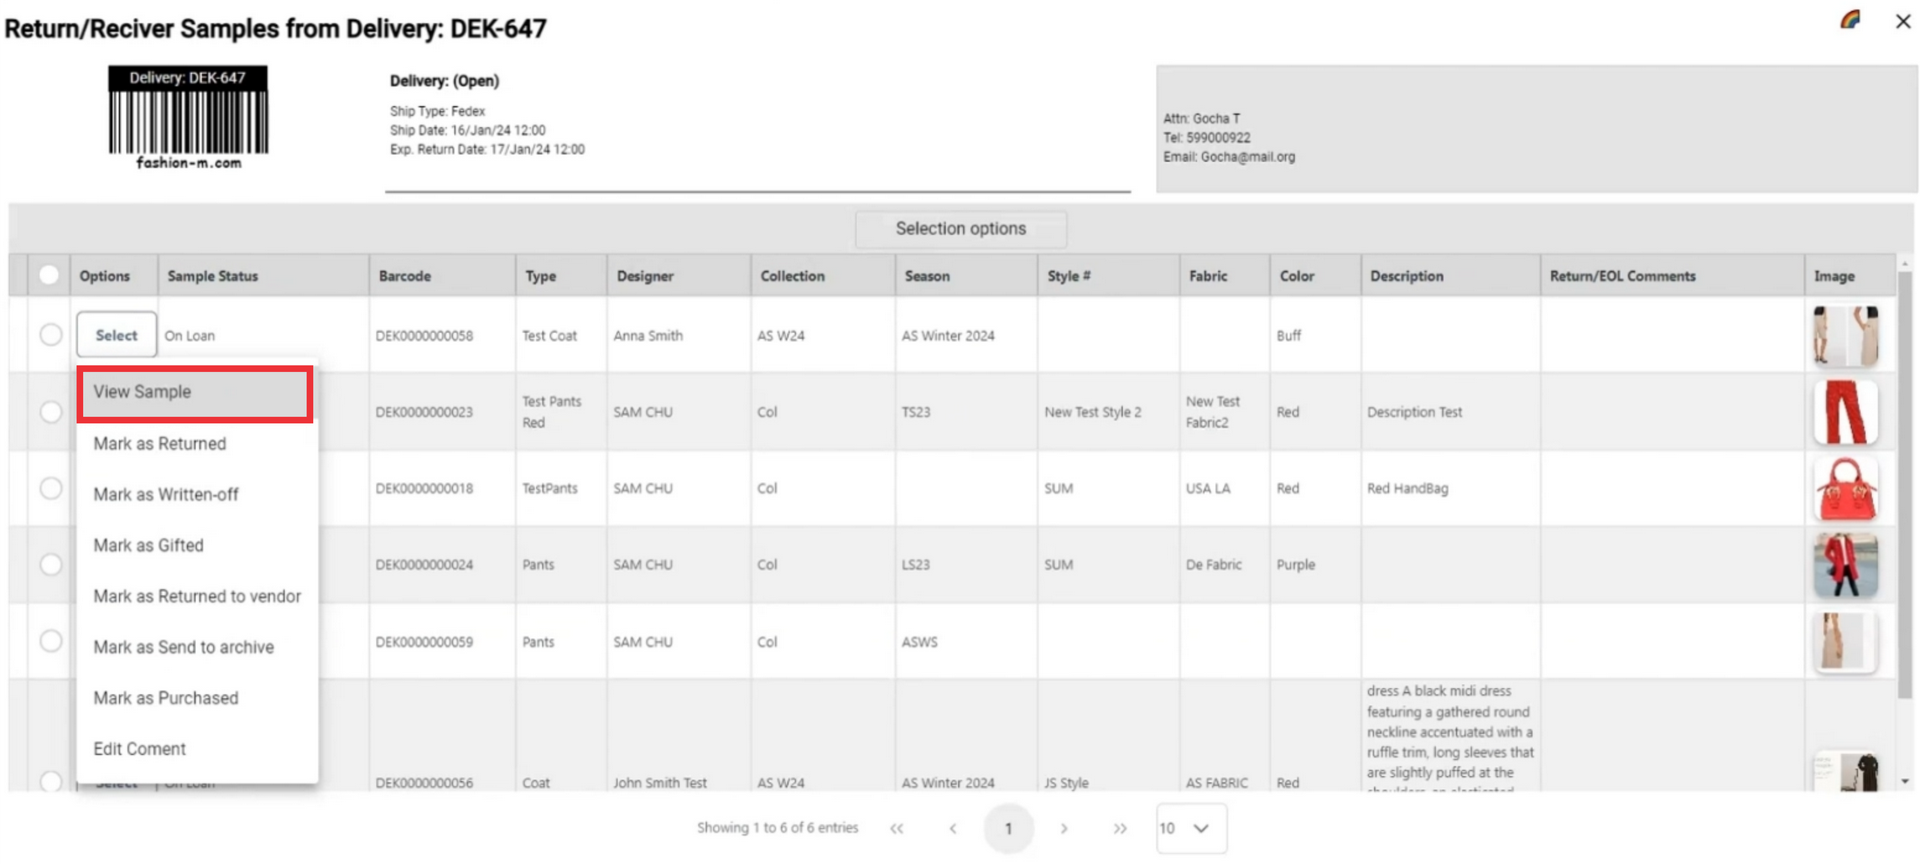
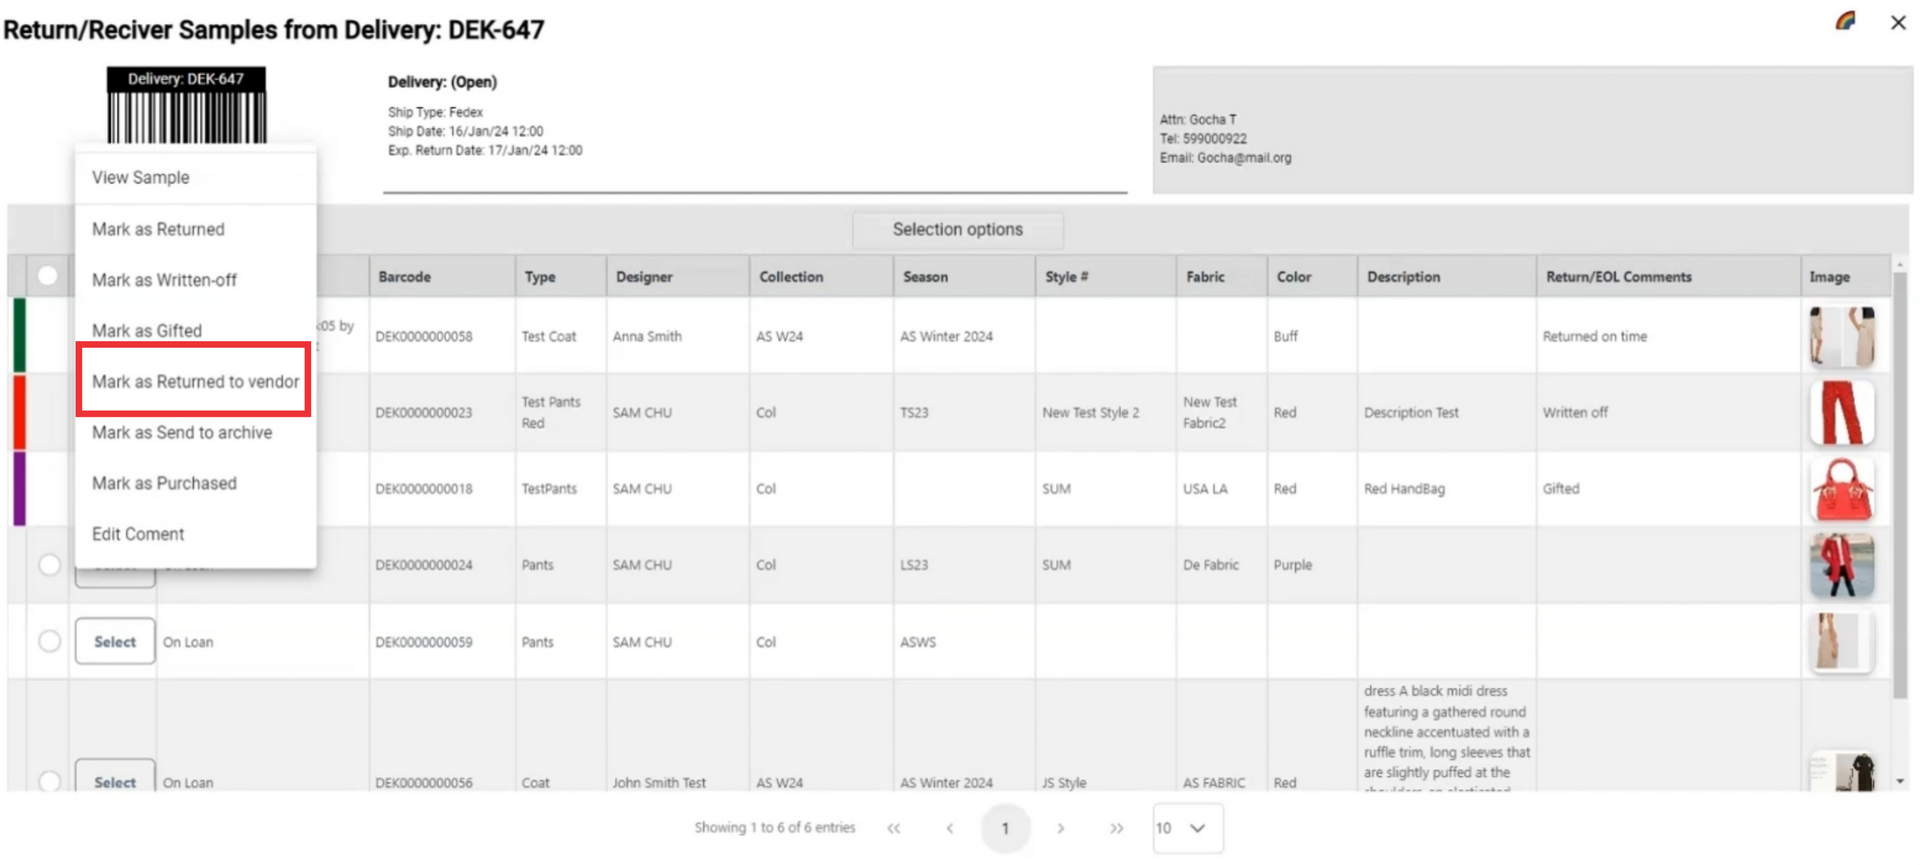
77. For the view sample click the "View Sample" button.
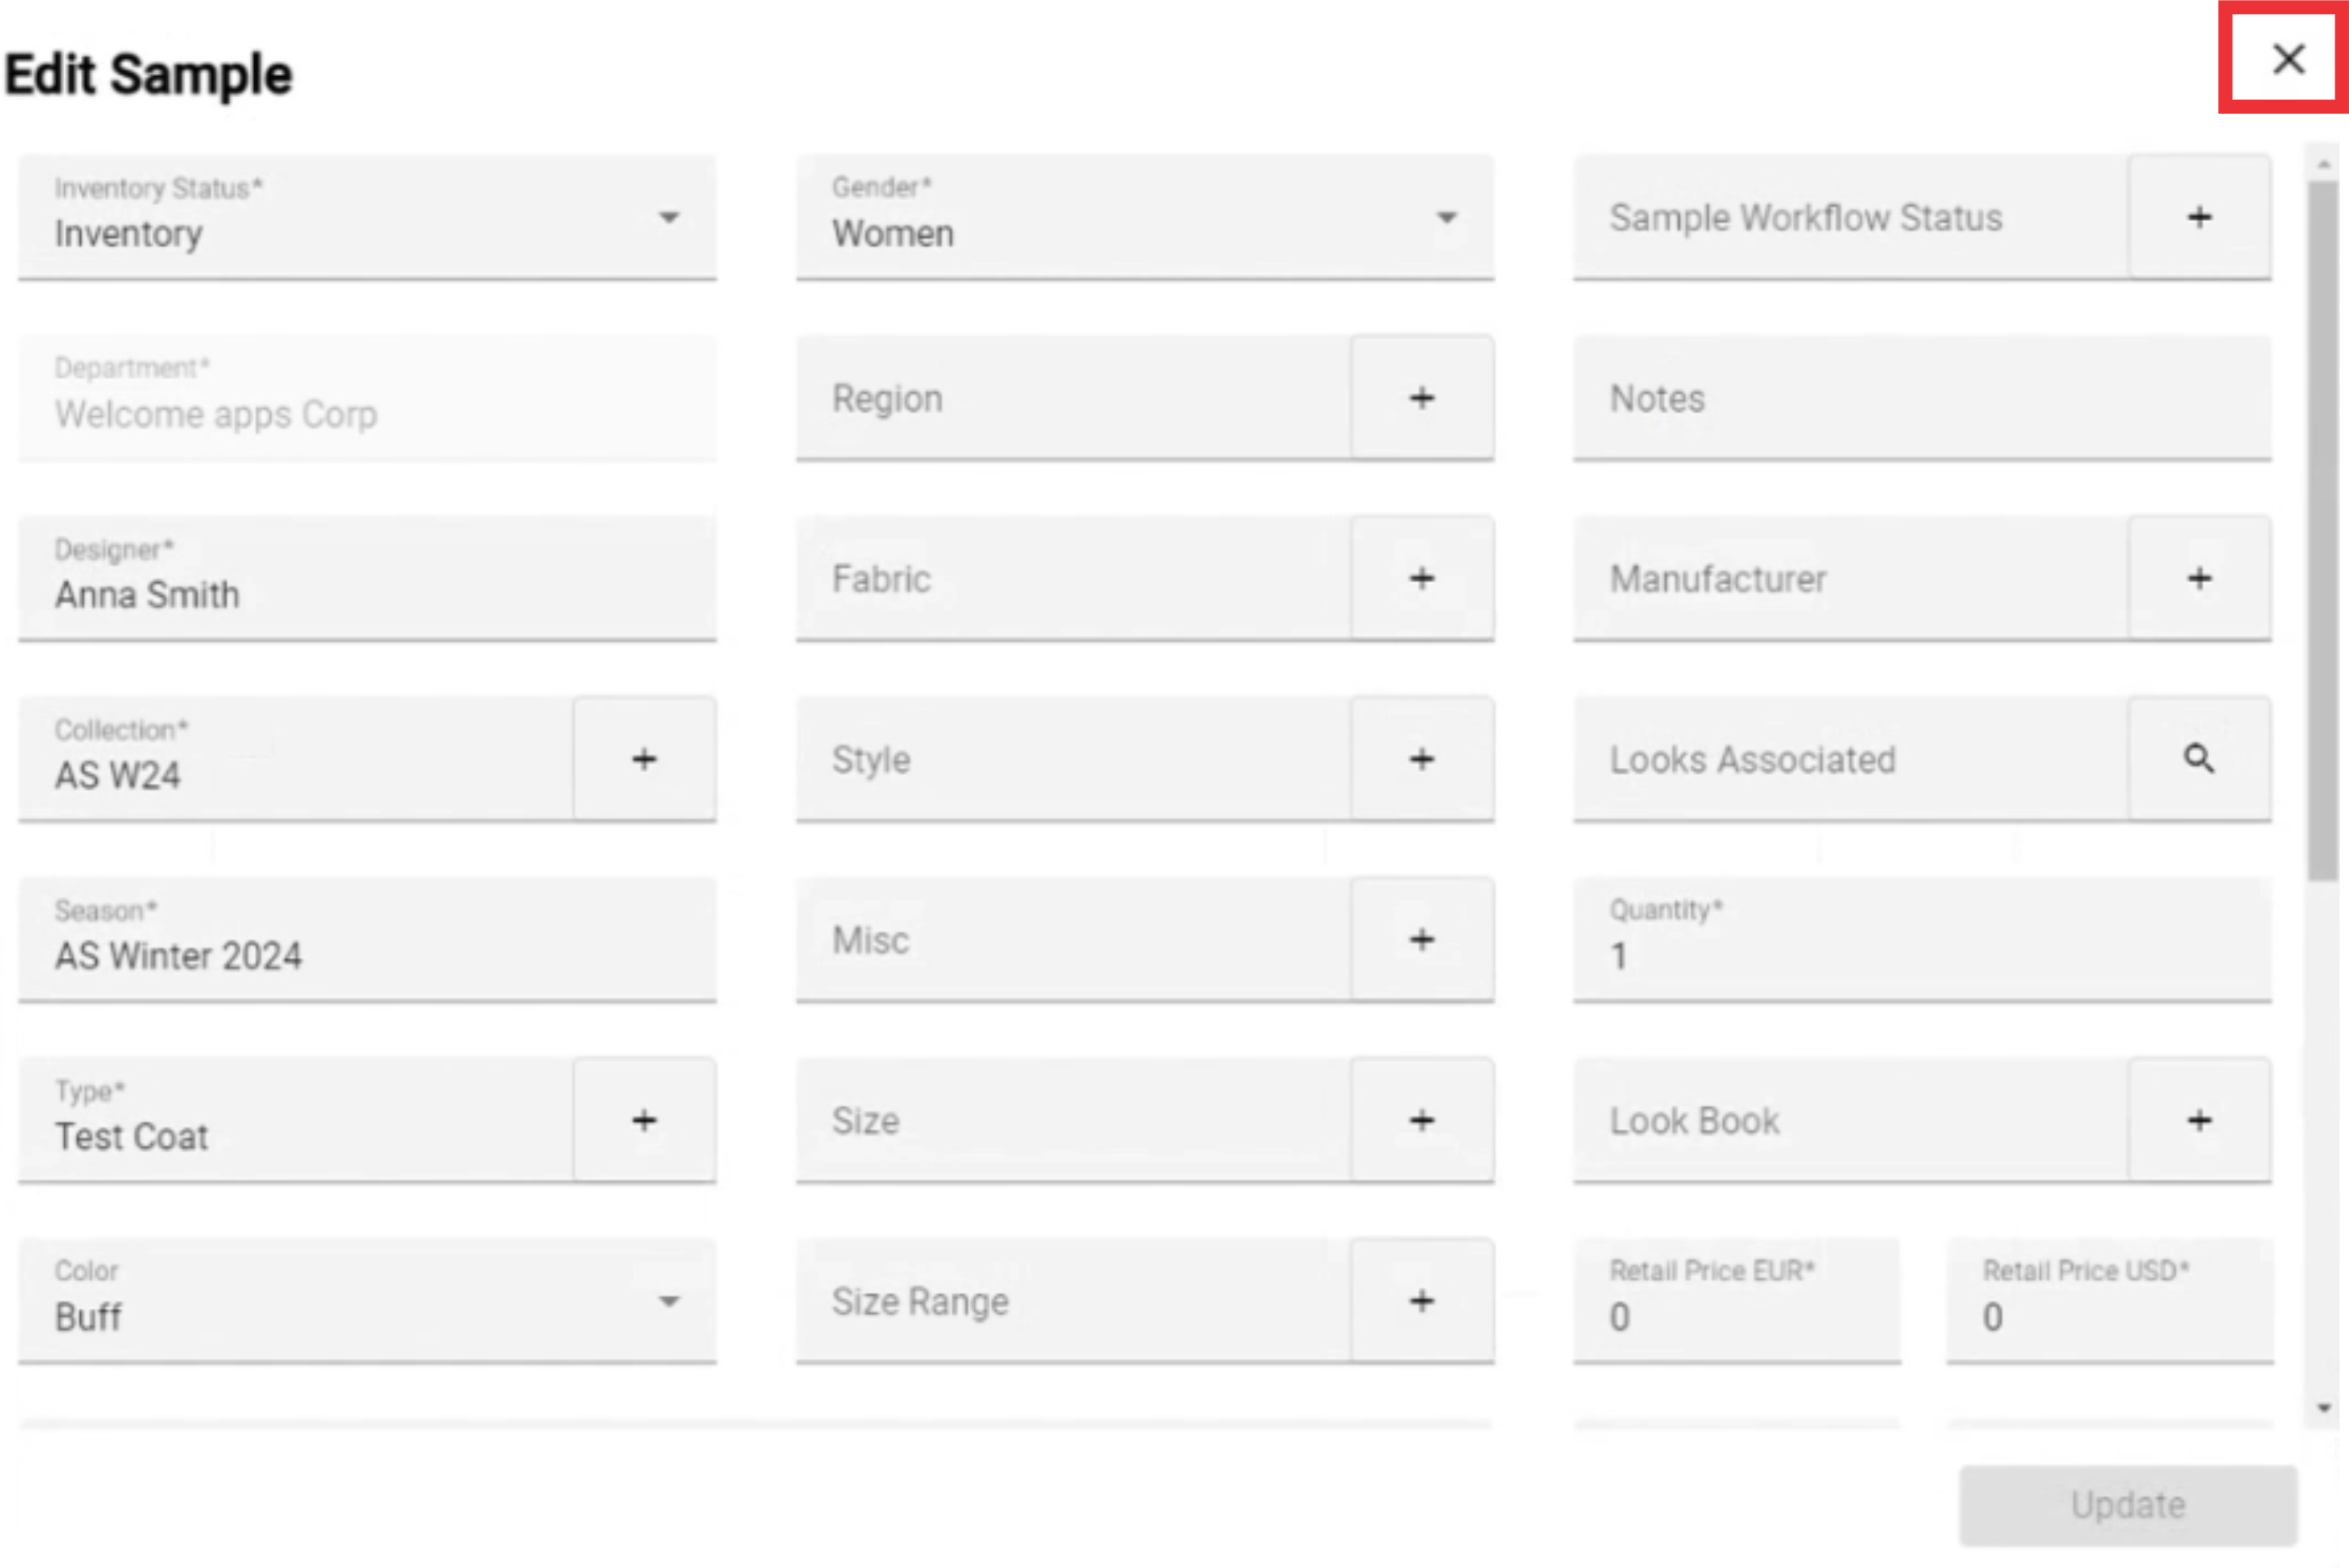
78. To close this window click the "X" button.
79. For the view sample option menu click the "Select" button.
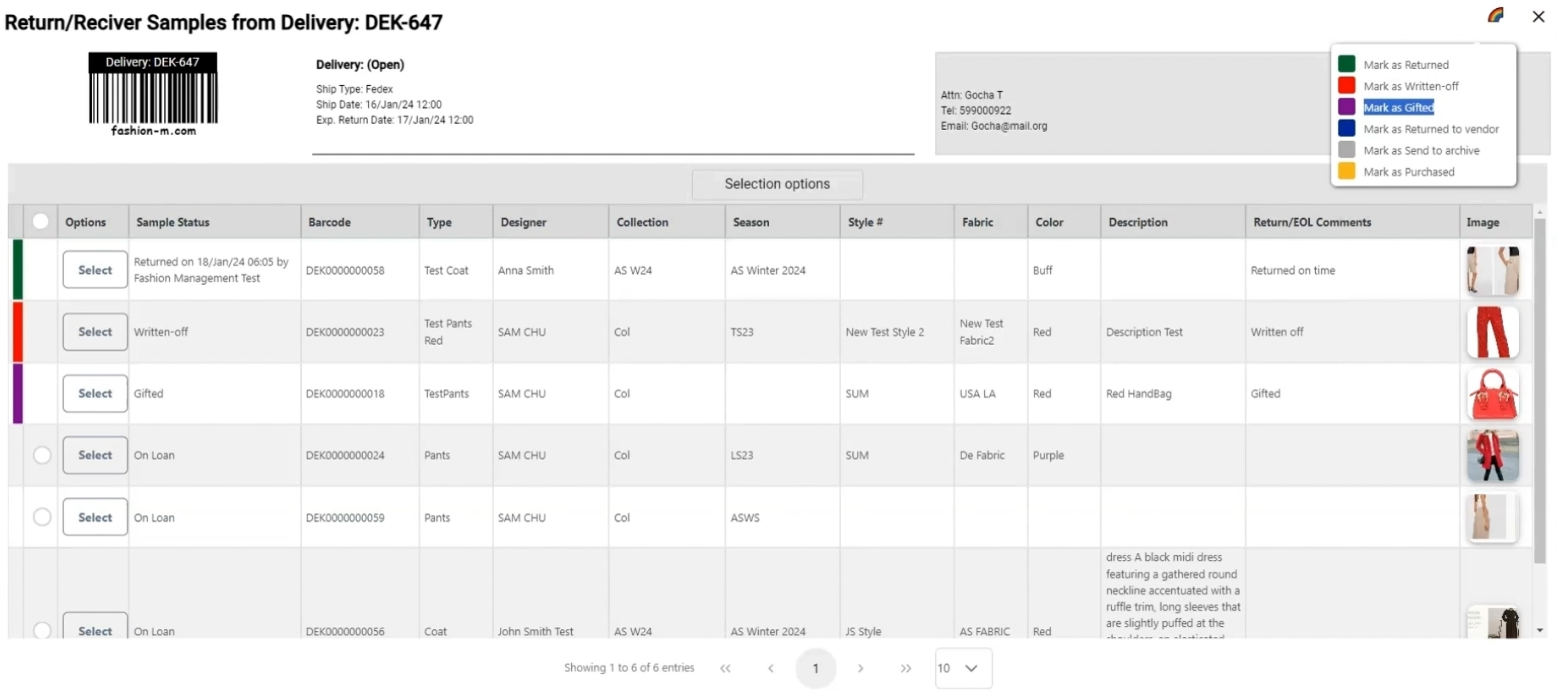
80. If a sample from this send out has been returned ans you want to change status to Retuned click the "Mark as returned" button.

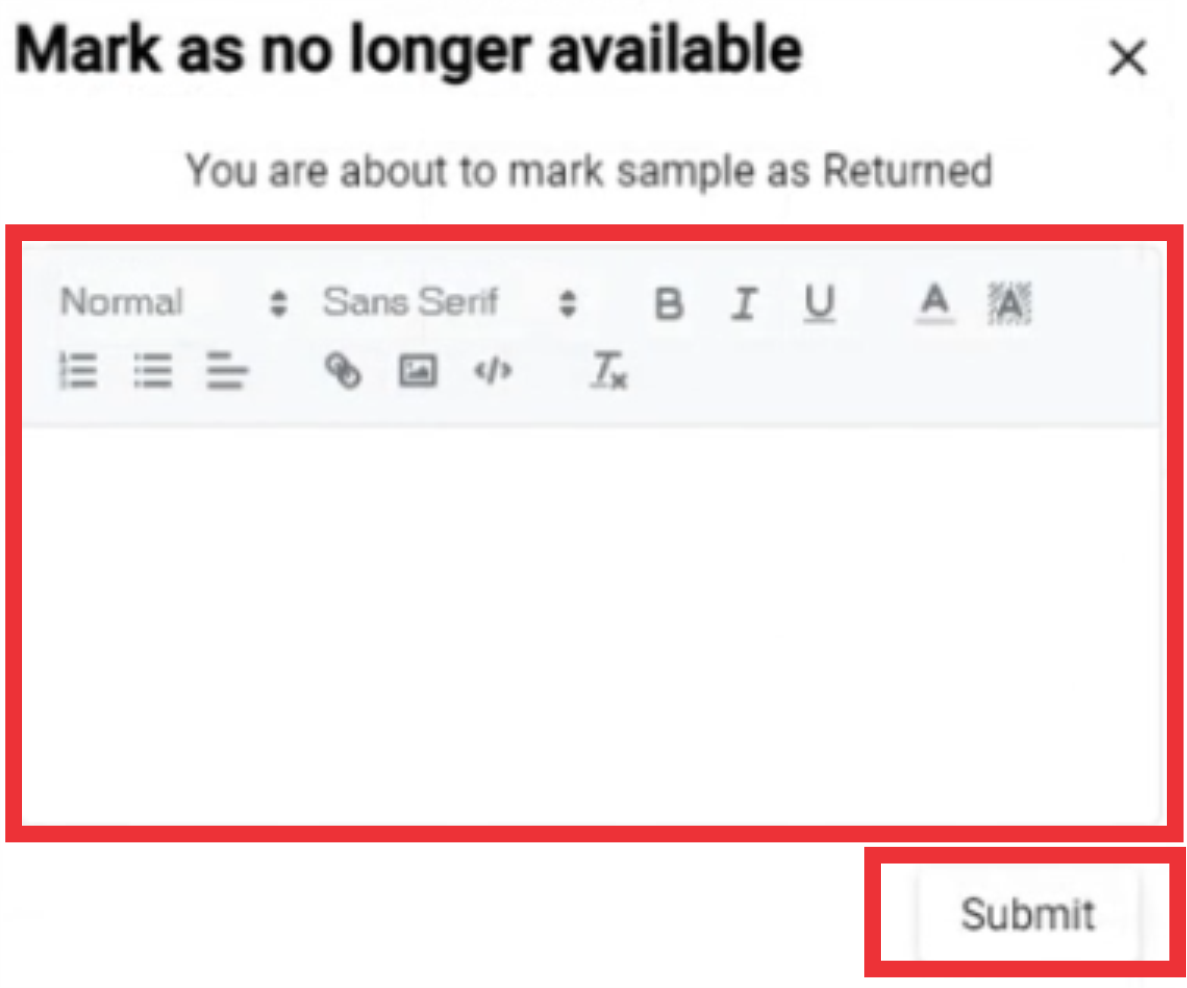
81. Write the comment in the field and click the Submit button to save the data.
82. A message will appear at the top of the screen tjat your sample status has been changed and marked as returned.
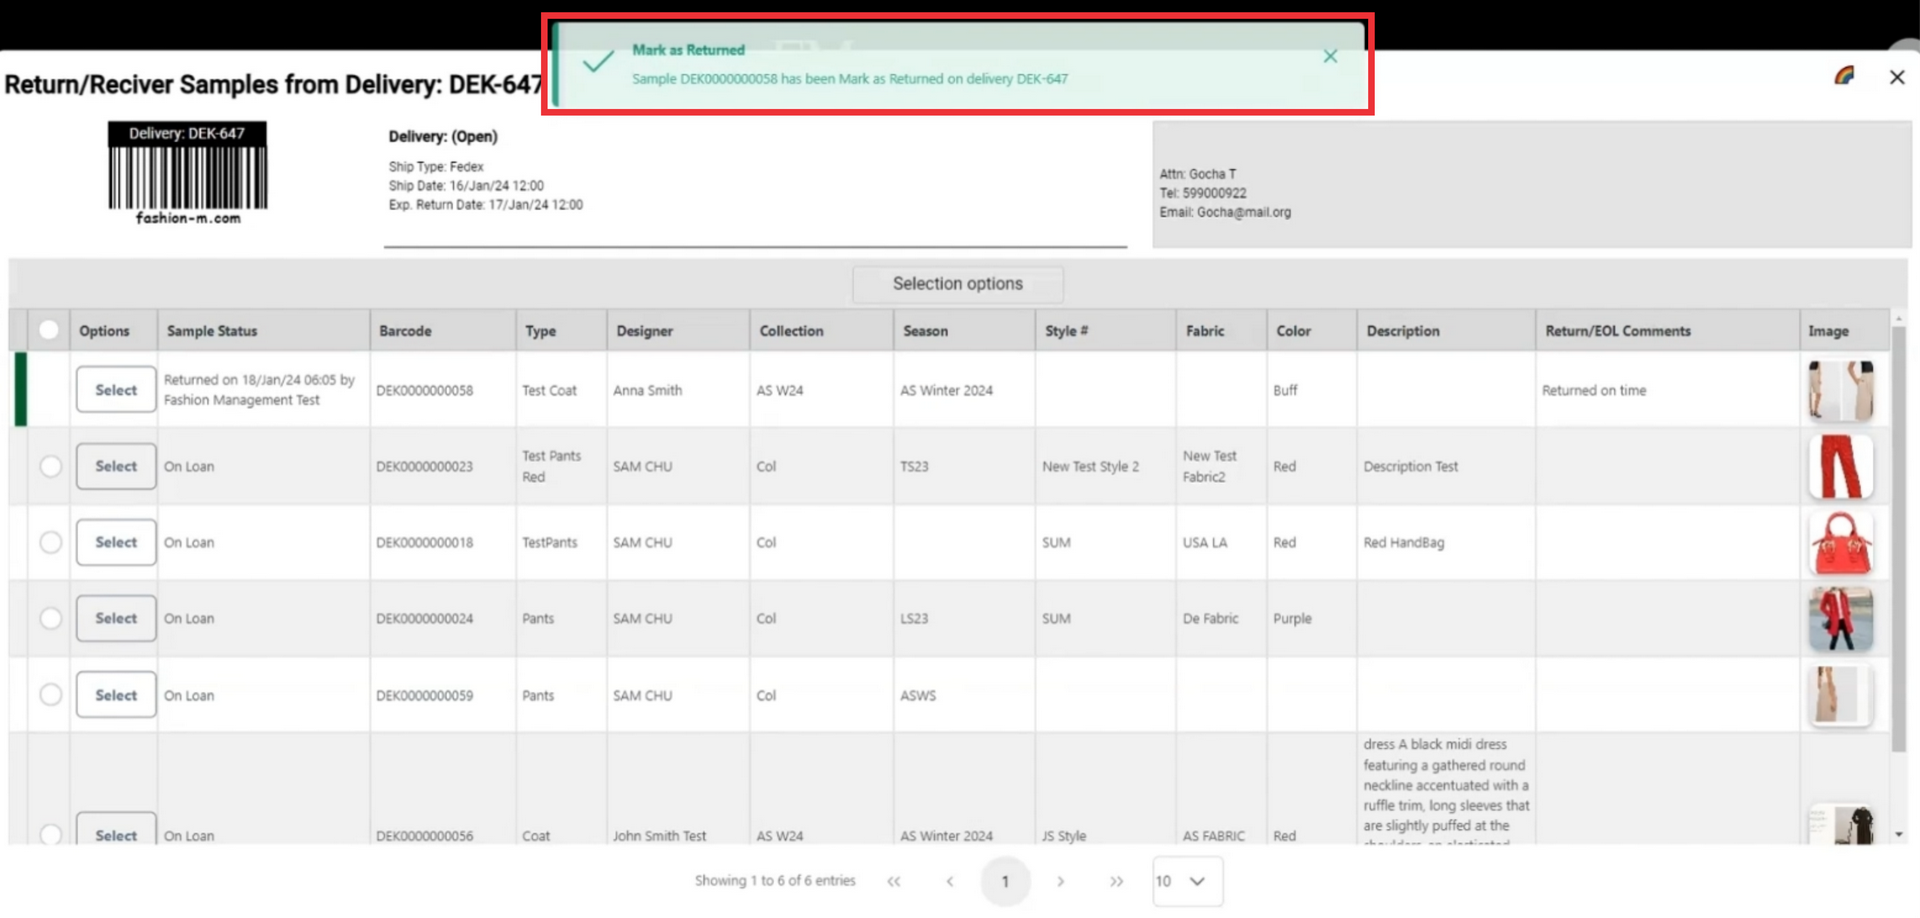
83. A comment will also added to samples comment field.
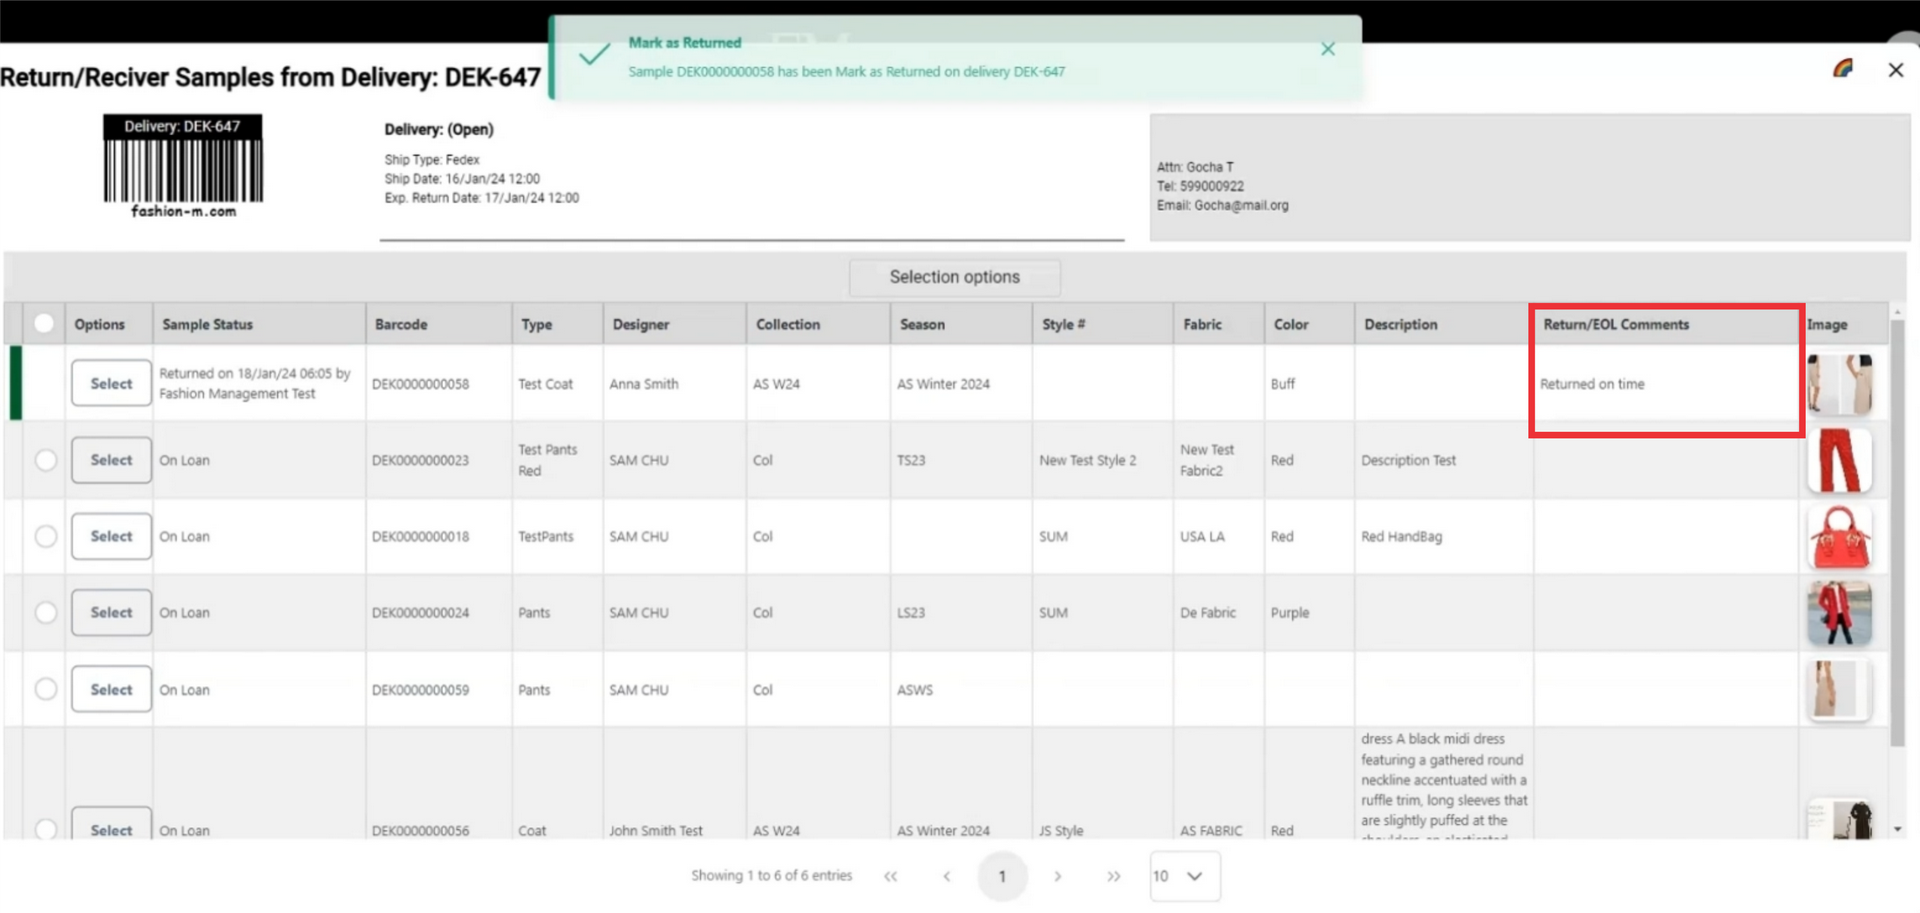
84. After marking as returned the sample will be highlitghted in green color.
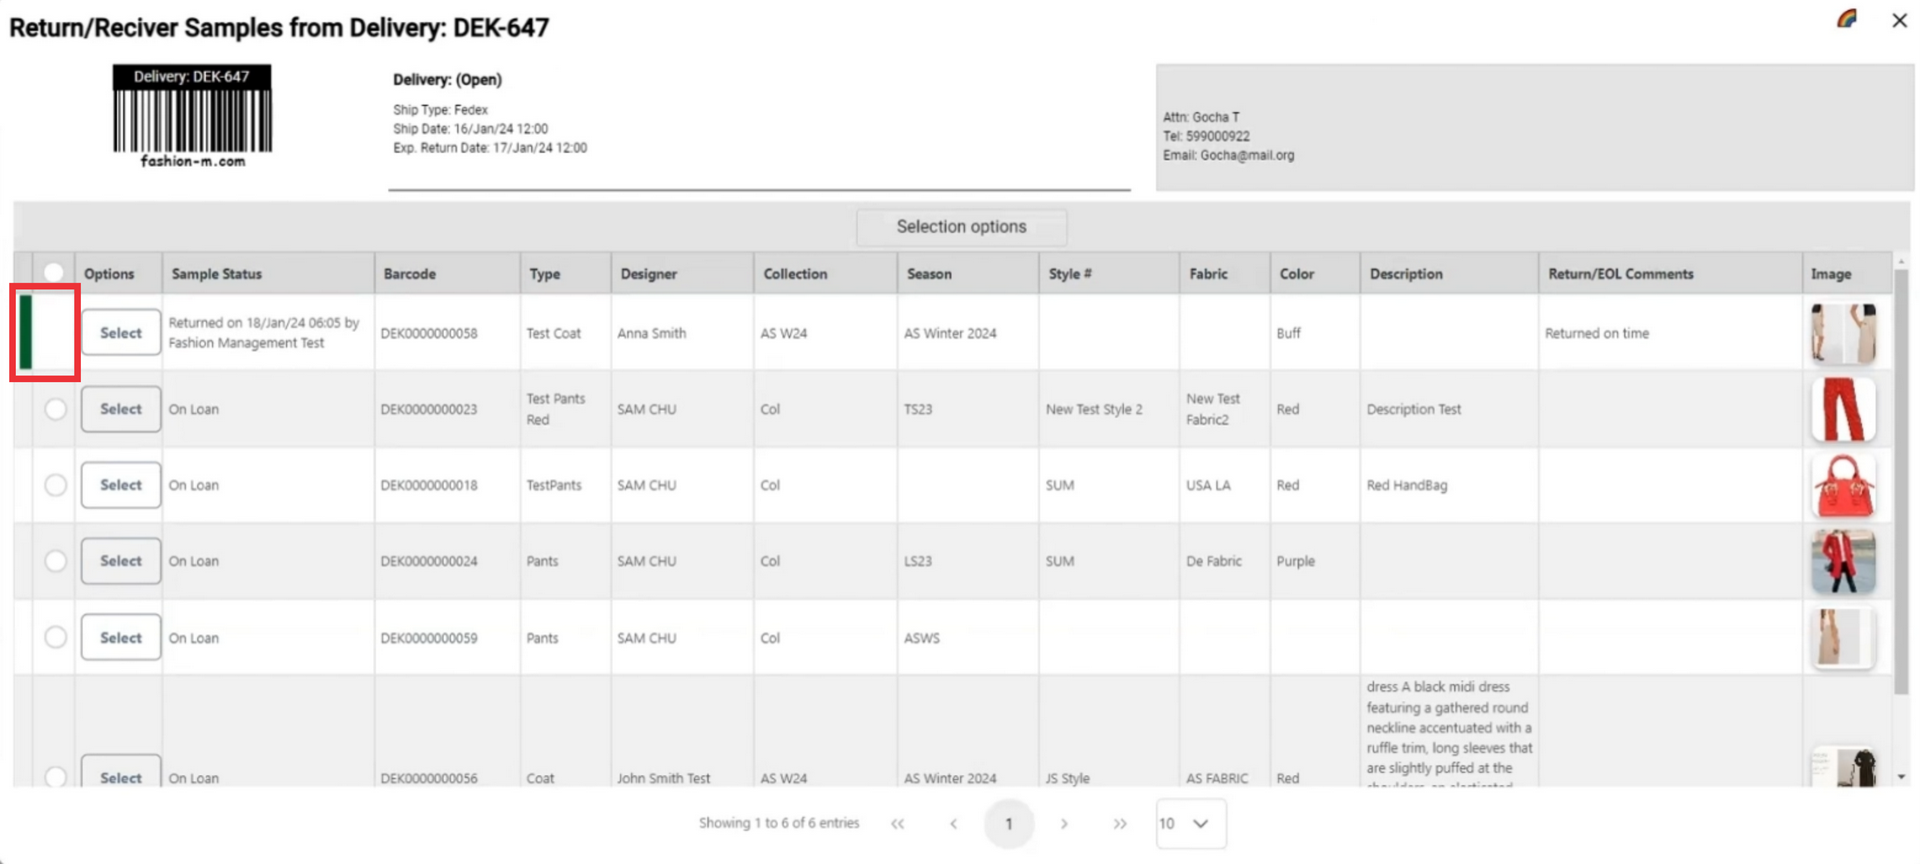
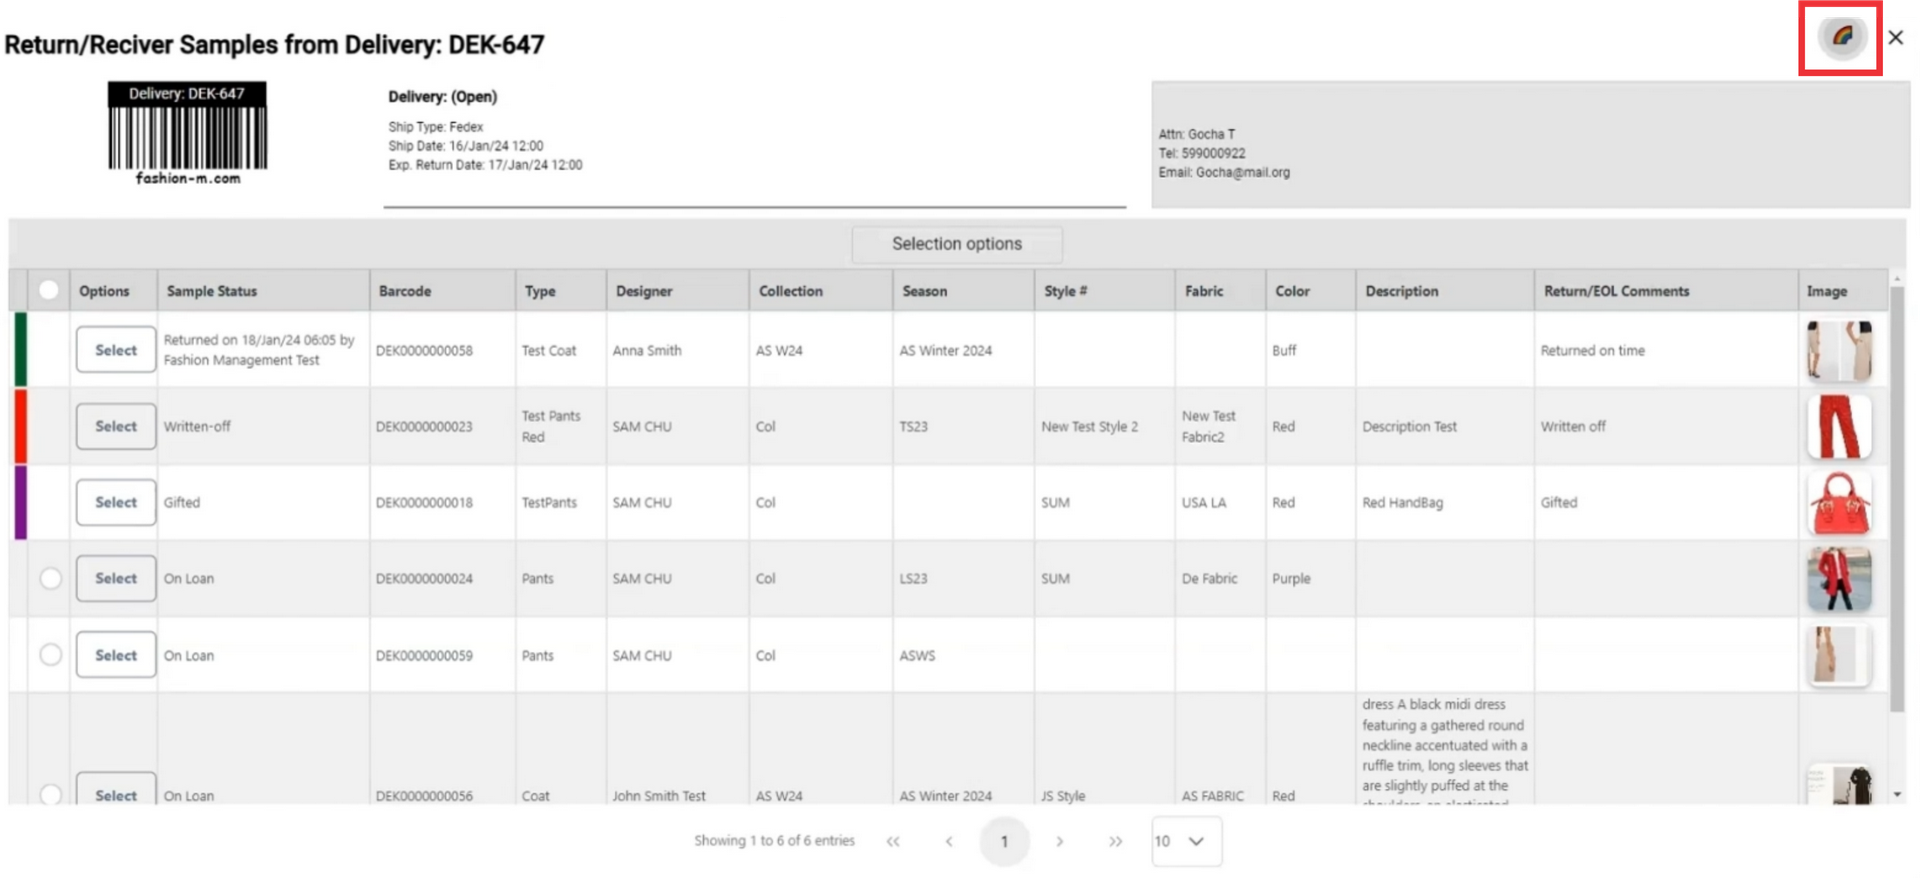
85. Click on the color button in the upper right corner to see definiton and meaning of the colors.
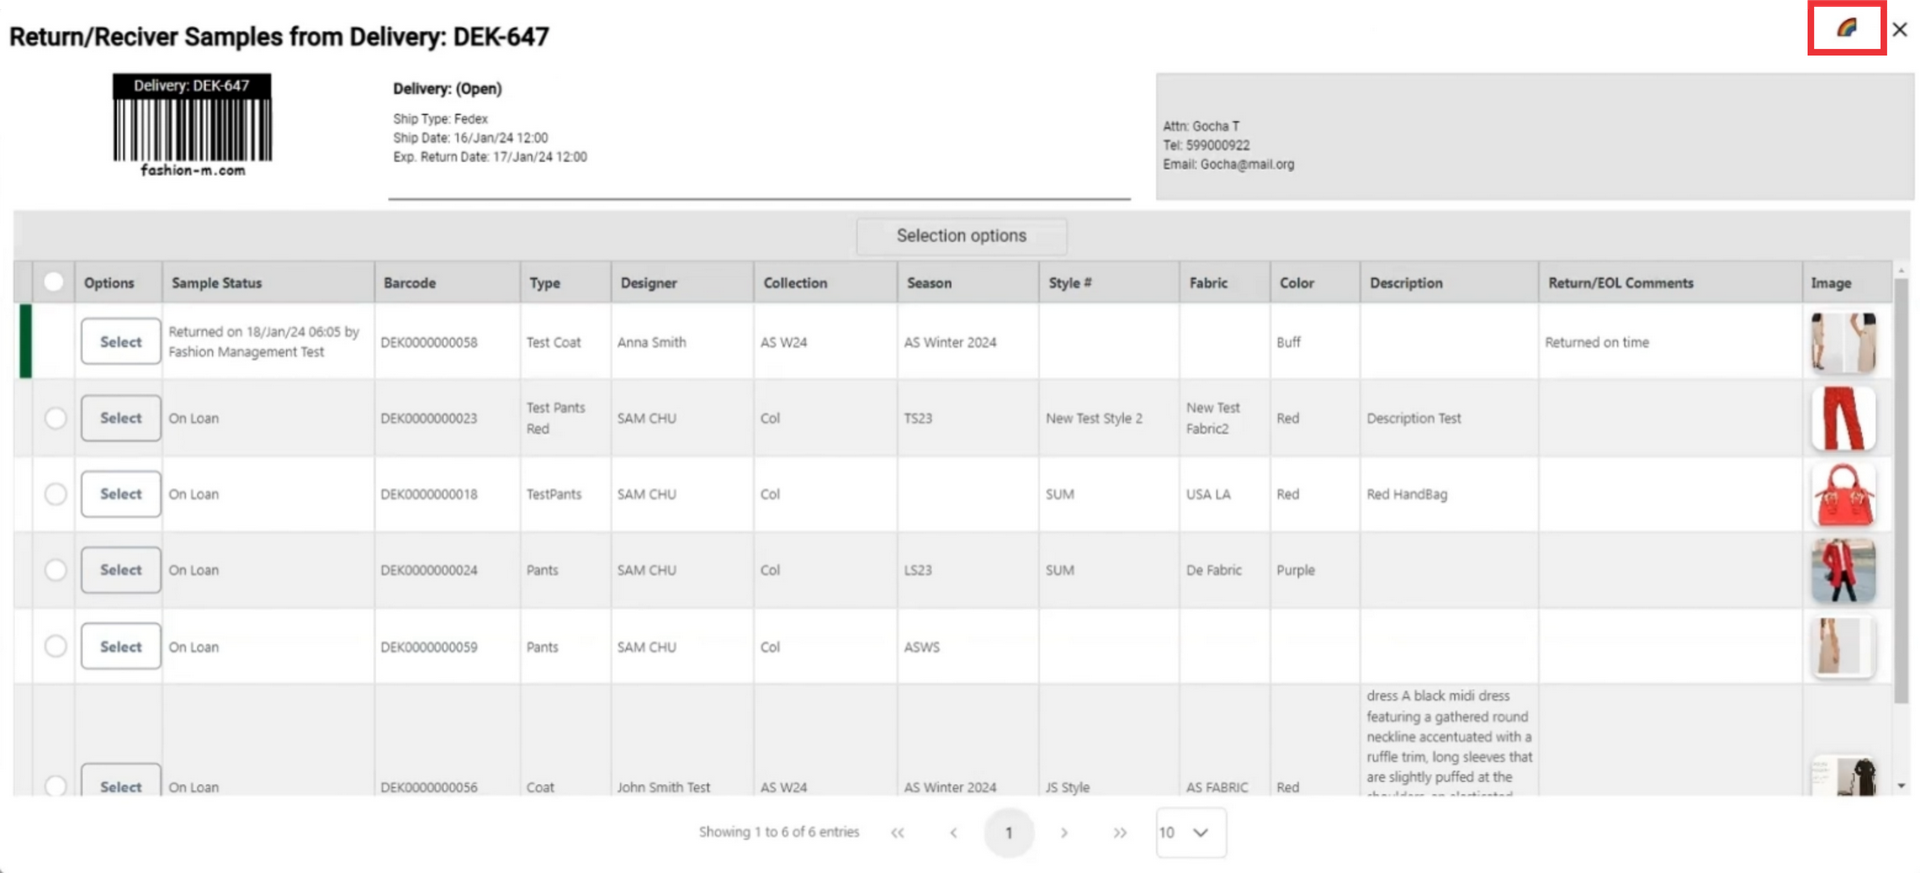
86. Green color means the sample is marked as returned.

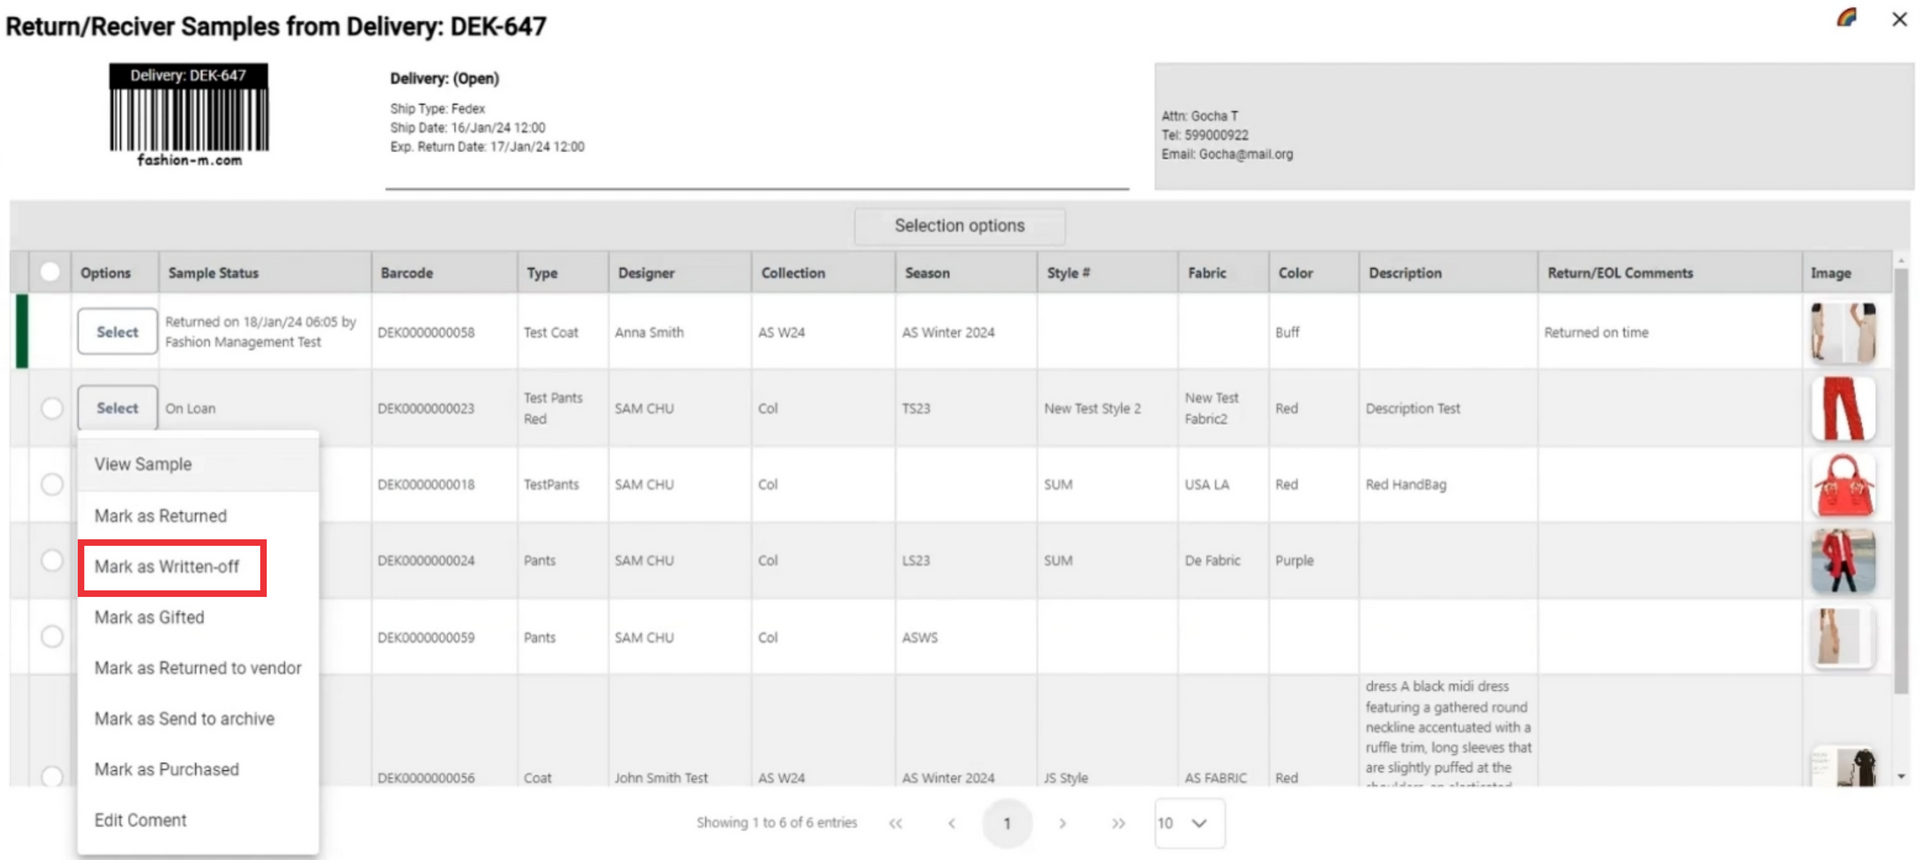
87. Click the select button to open sample option menu.
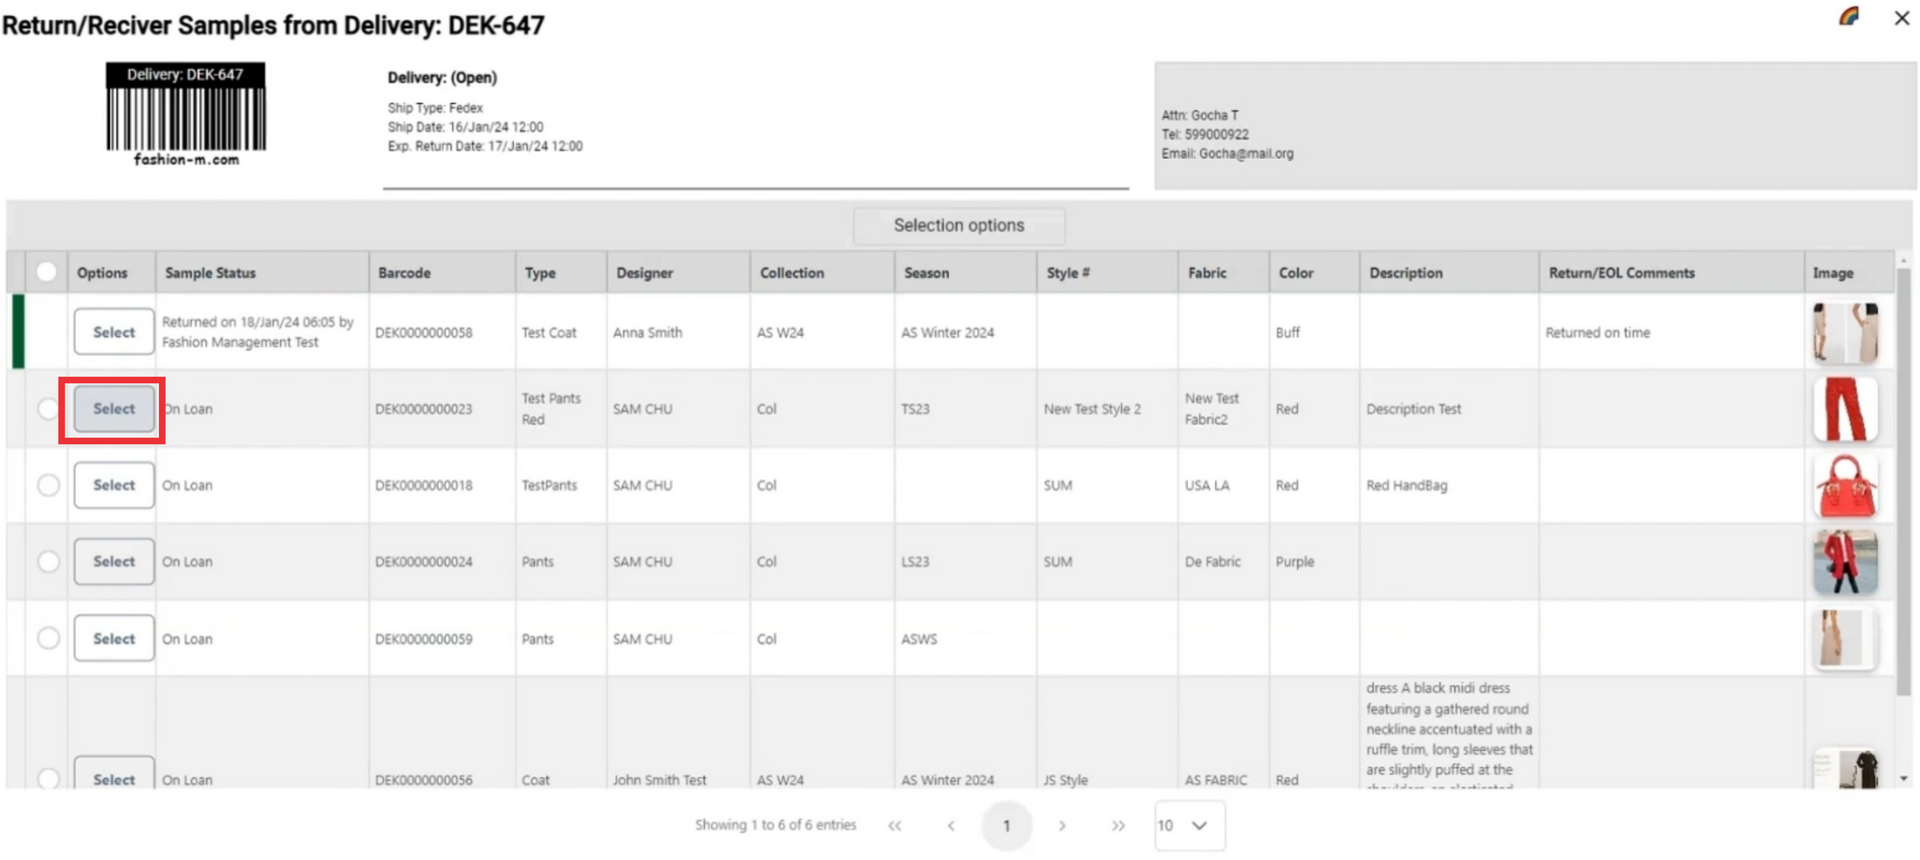
88. If a sample from this send out has been written off and you want to change status to written off click the "Mark as written off" button.
89. Enter comment in the field and click the submit button to confirm.
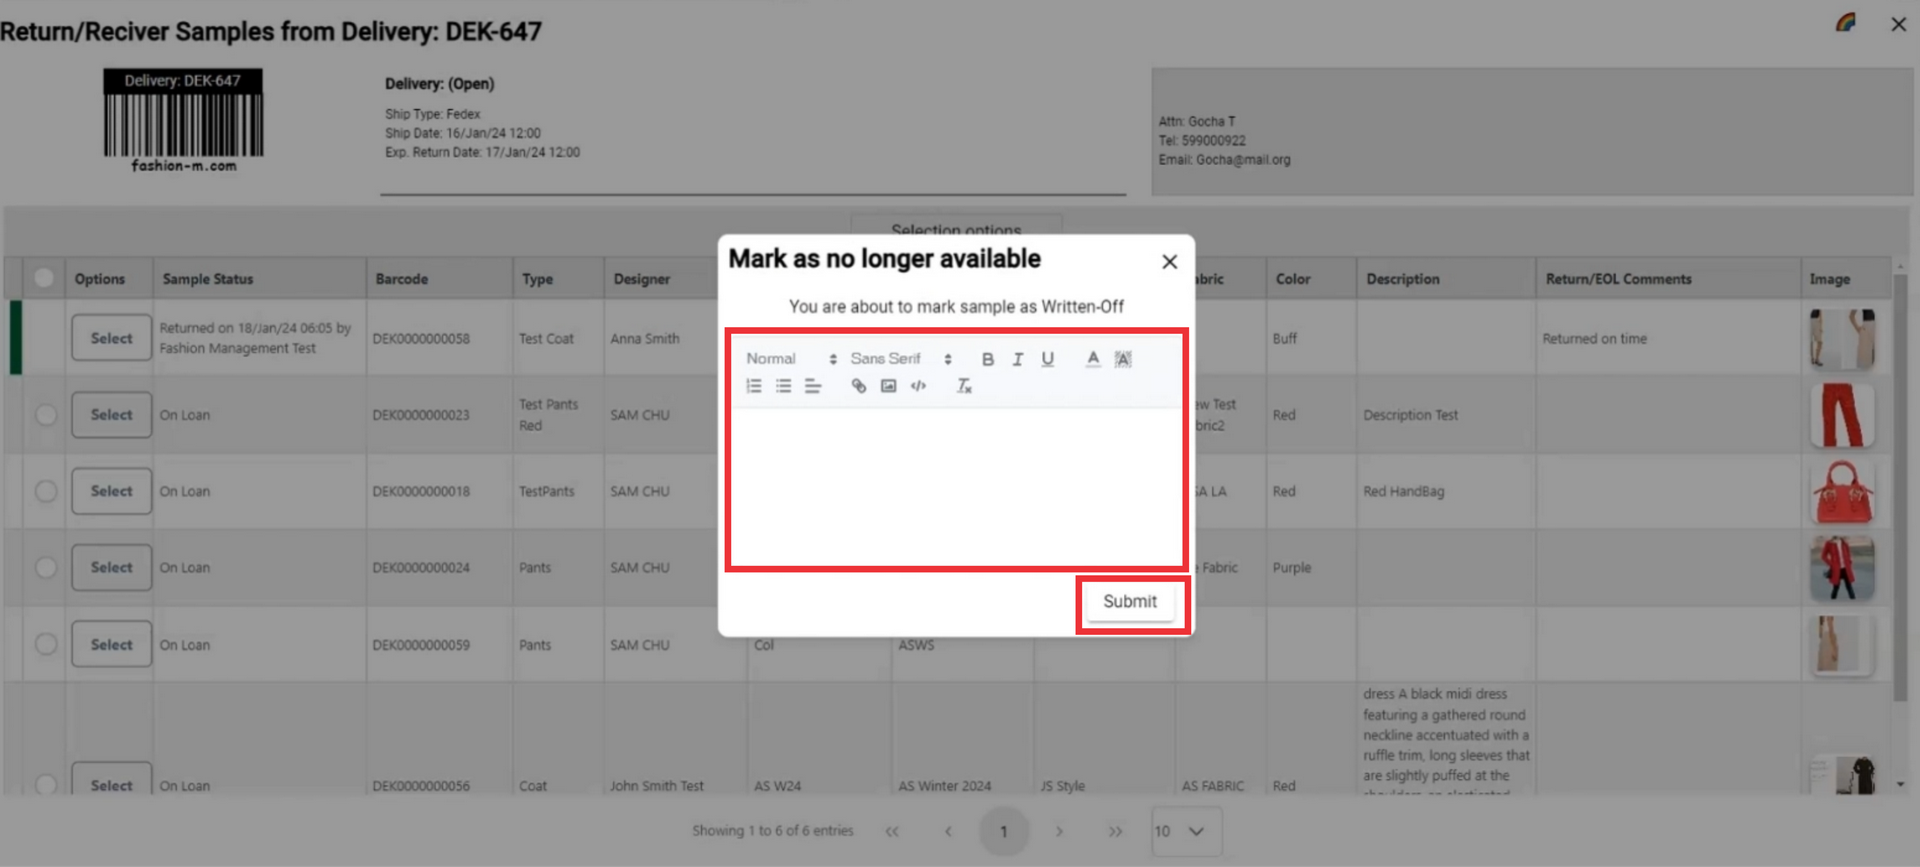
90. A message will appear at the top of the screen that your sample status has been changed and marked as written off.
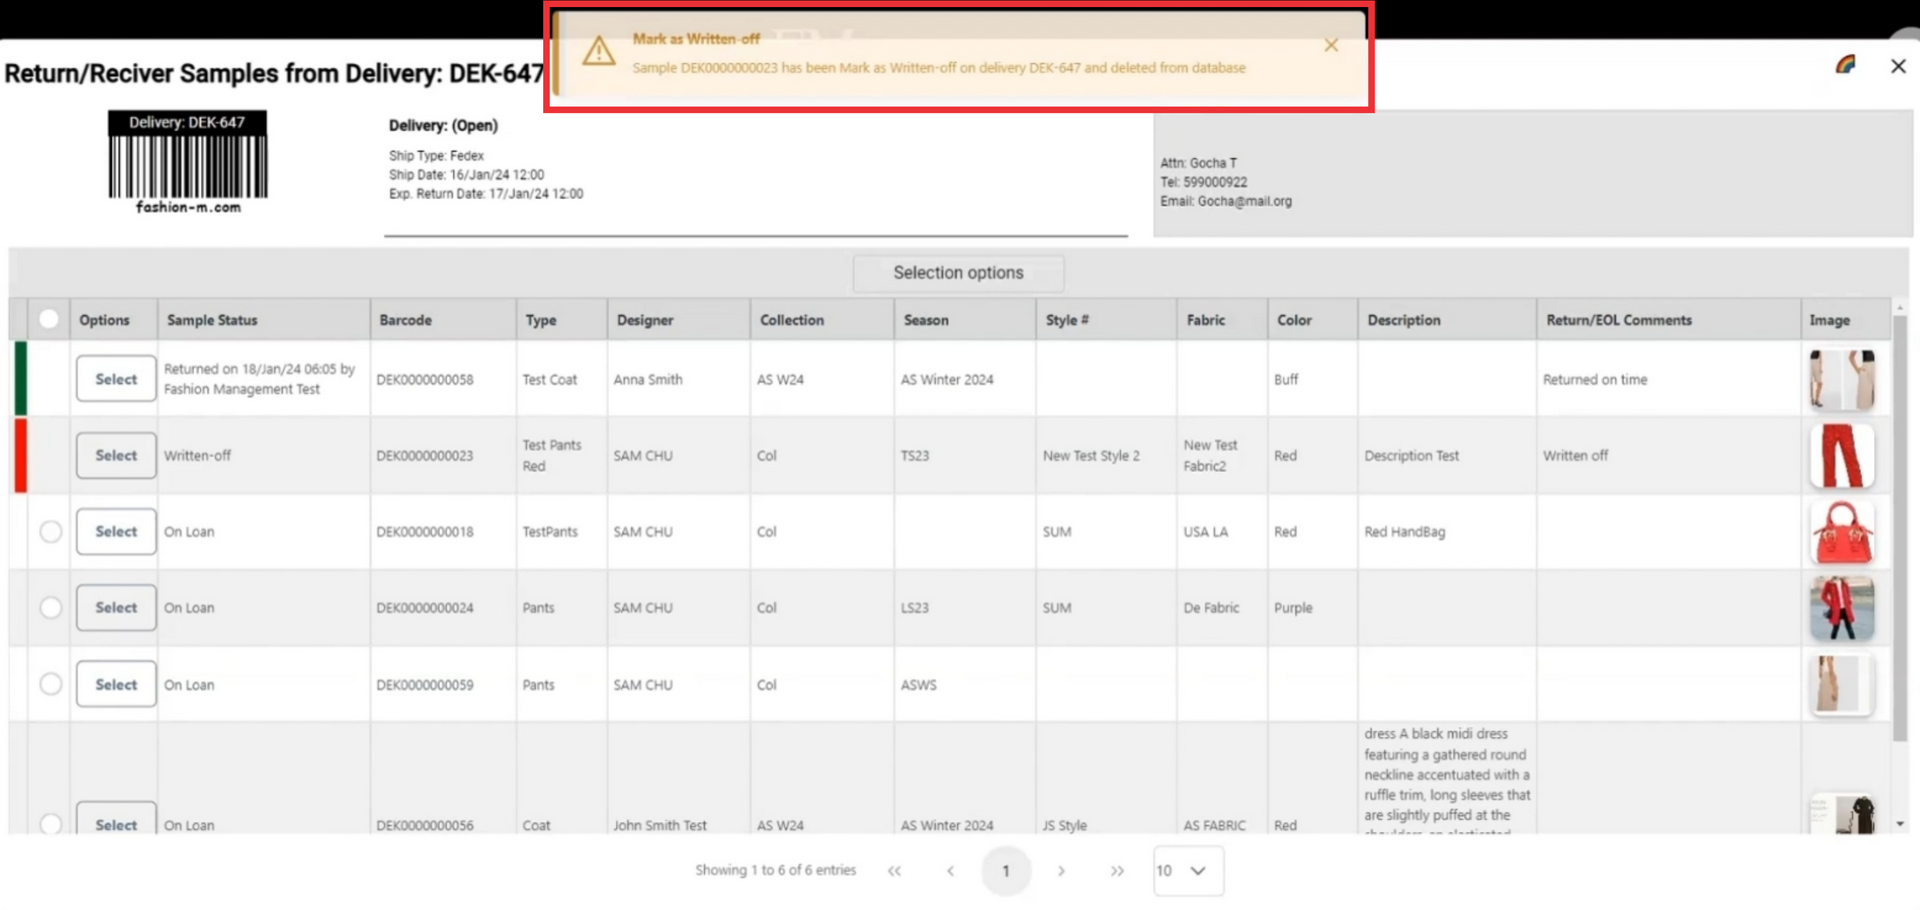
91. A comment will also added to samples comment field.

92. After marking as written off the sample will be highlitghted in red color.
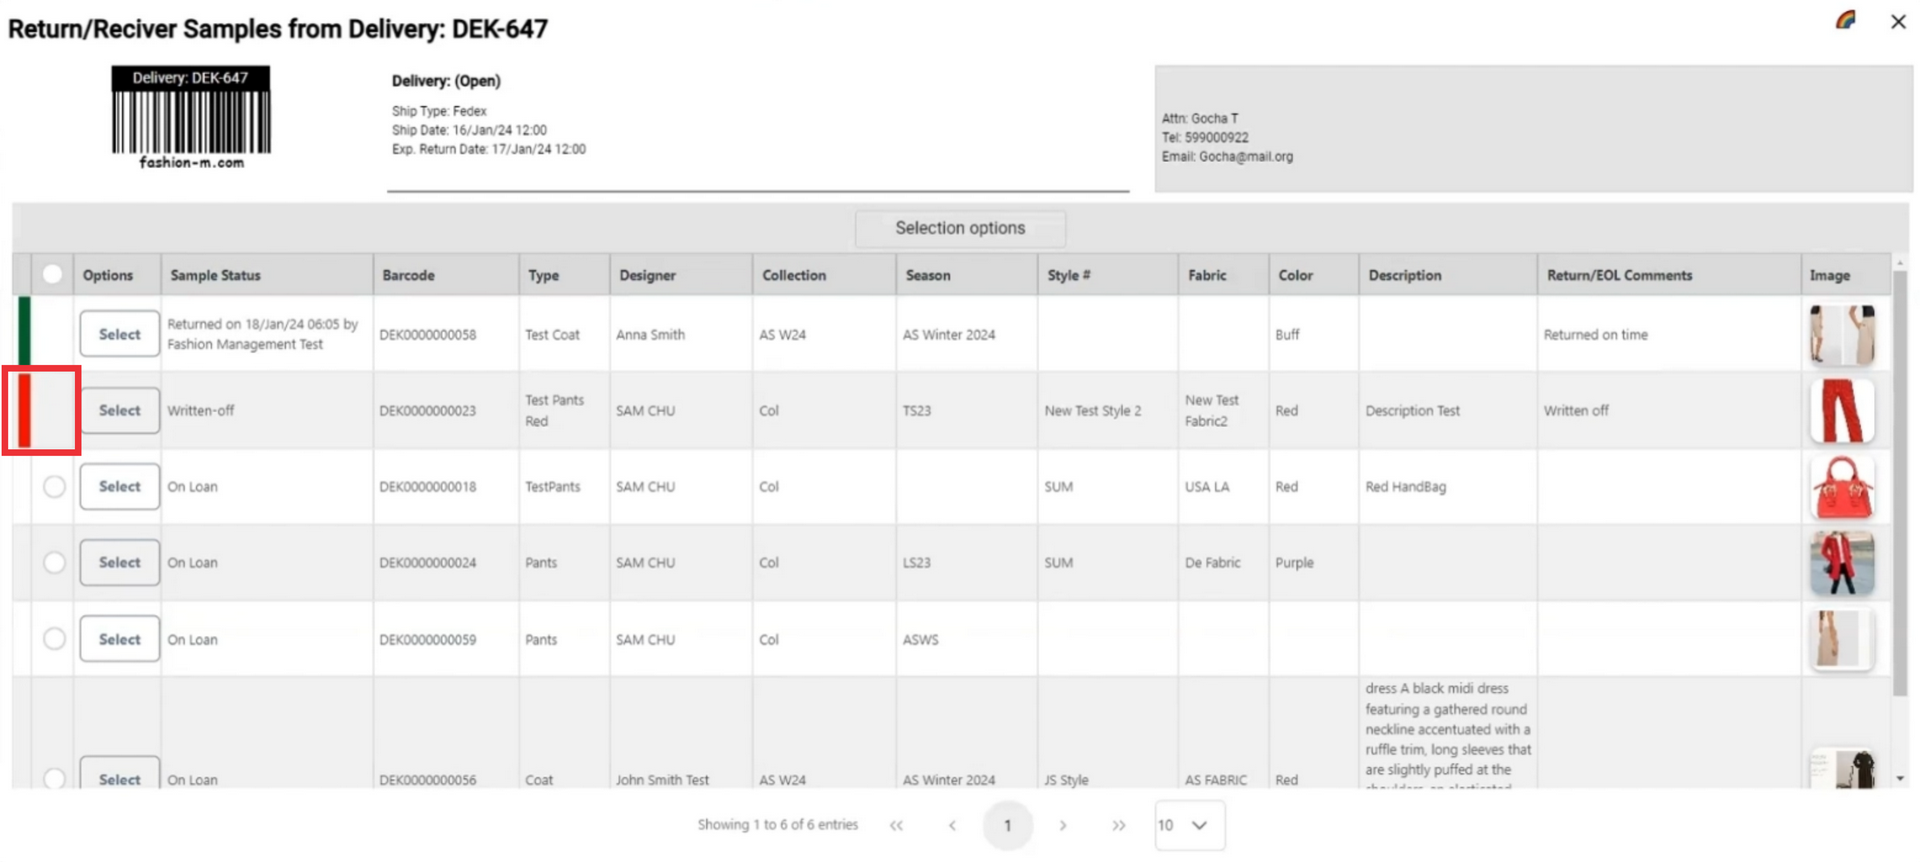
93. Click on the color button in the upper right corner to see definiton and meaning of the colors.
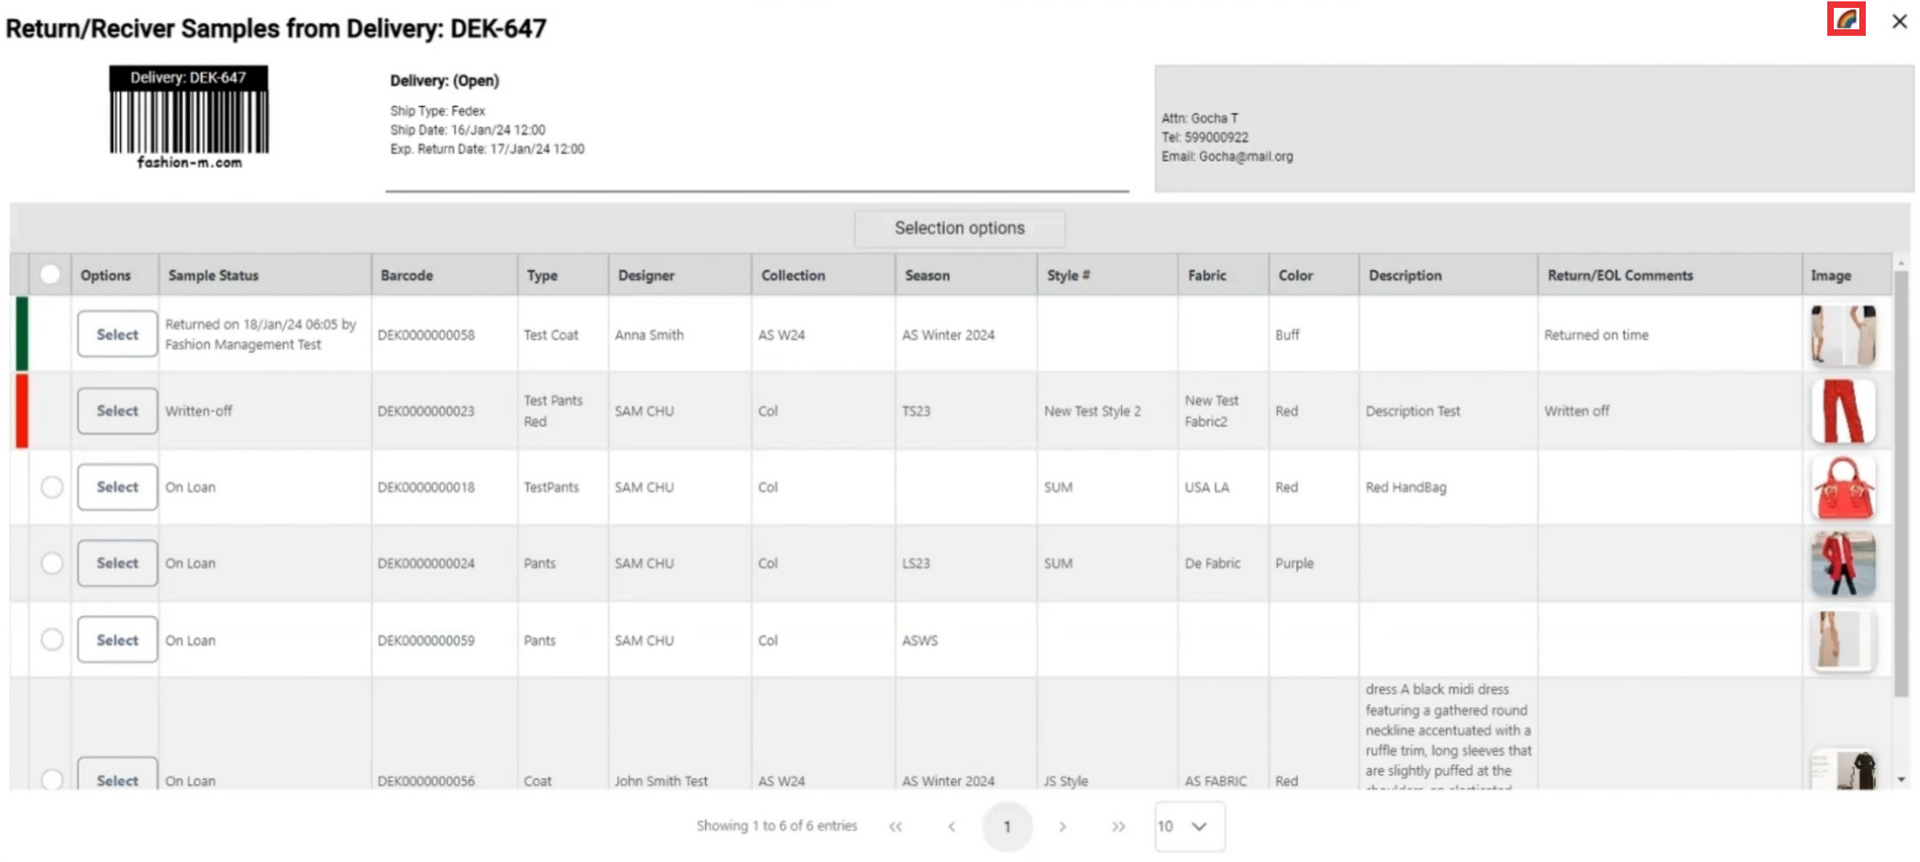
94. Red color means the sample is marked as written off.

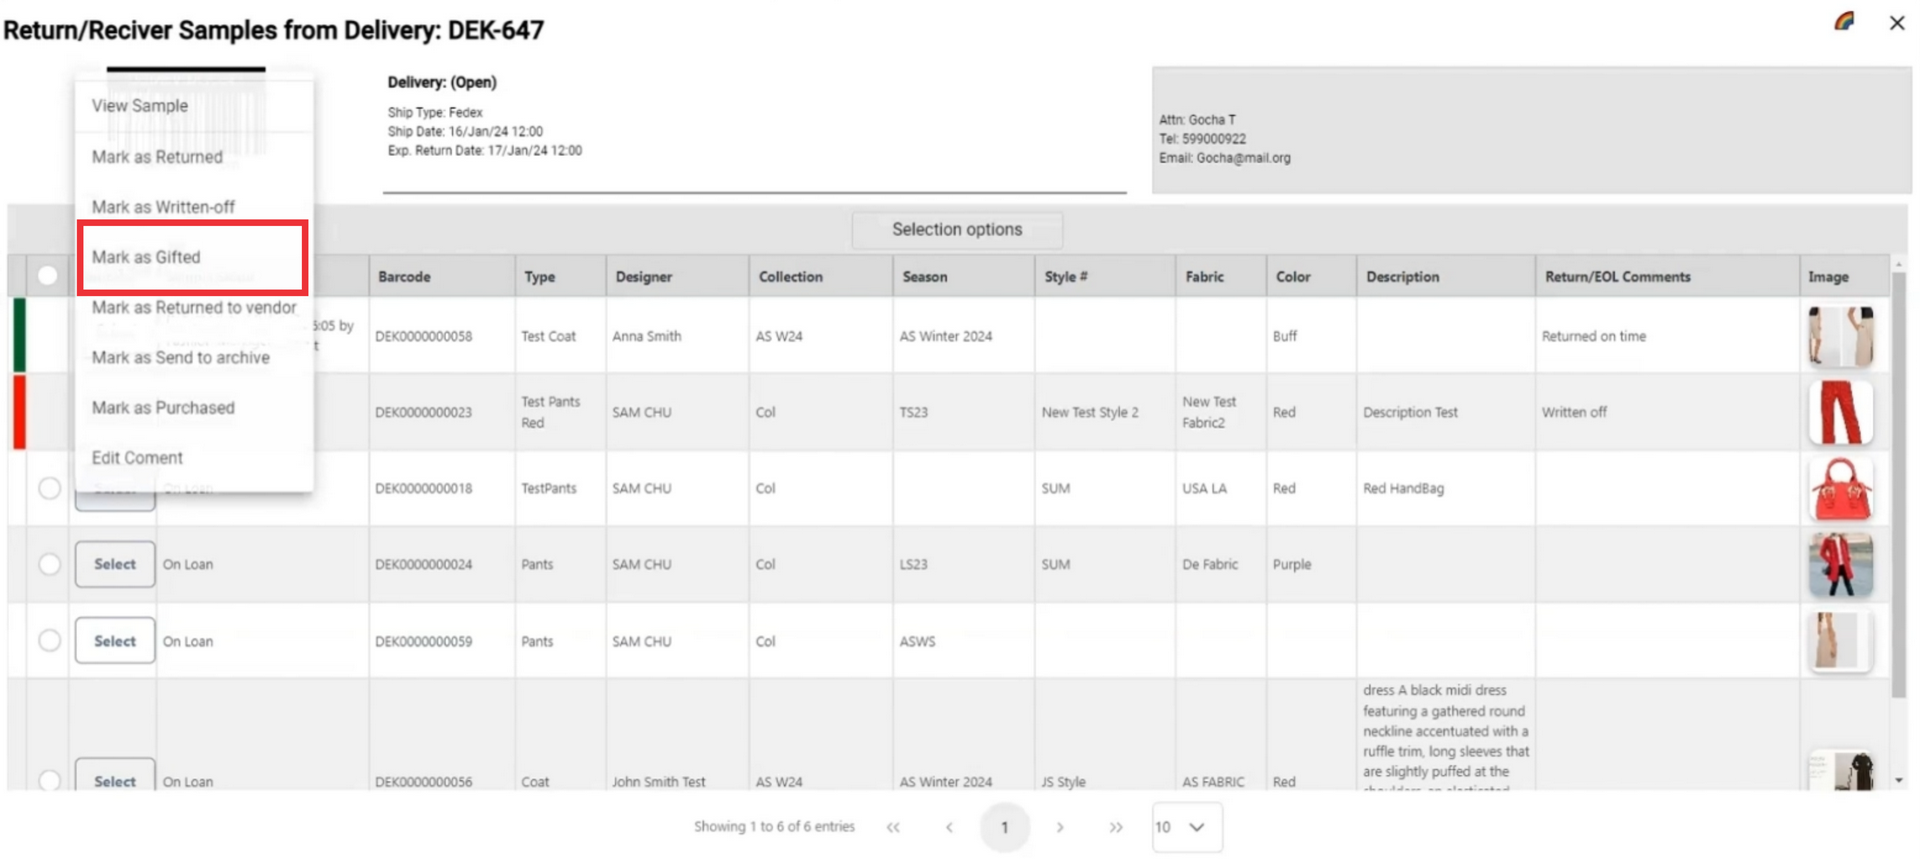
95. Click the select button to open sample option menu.
96. If a sample from this send out has been gifted and you want to change status to gifted click the "Mark as gifted" button.
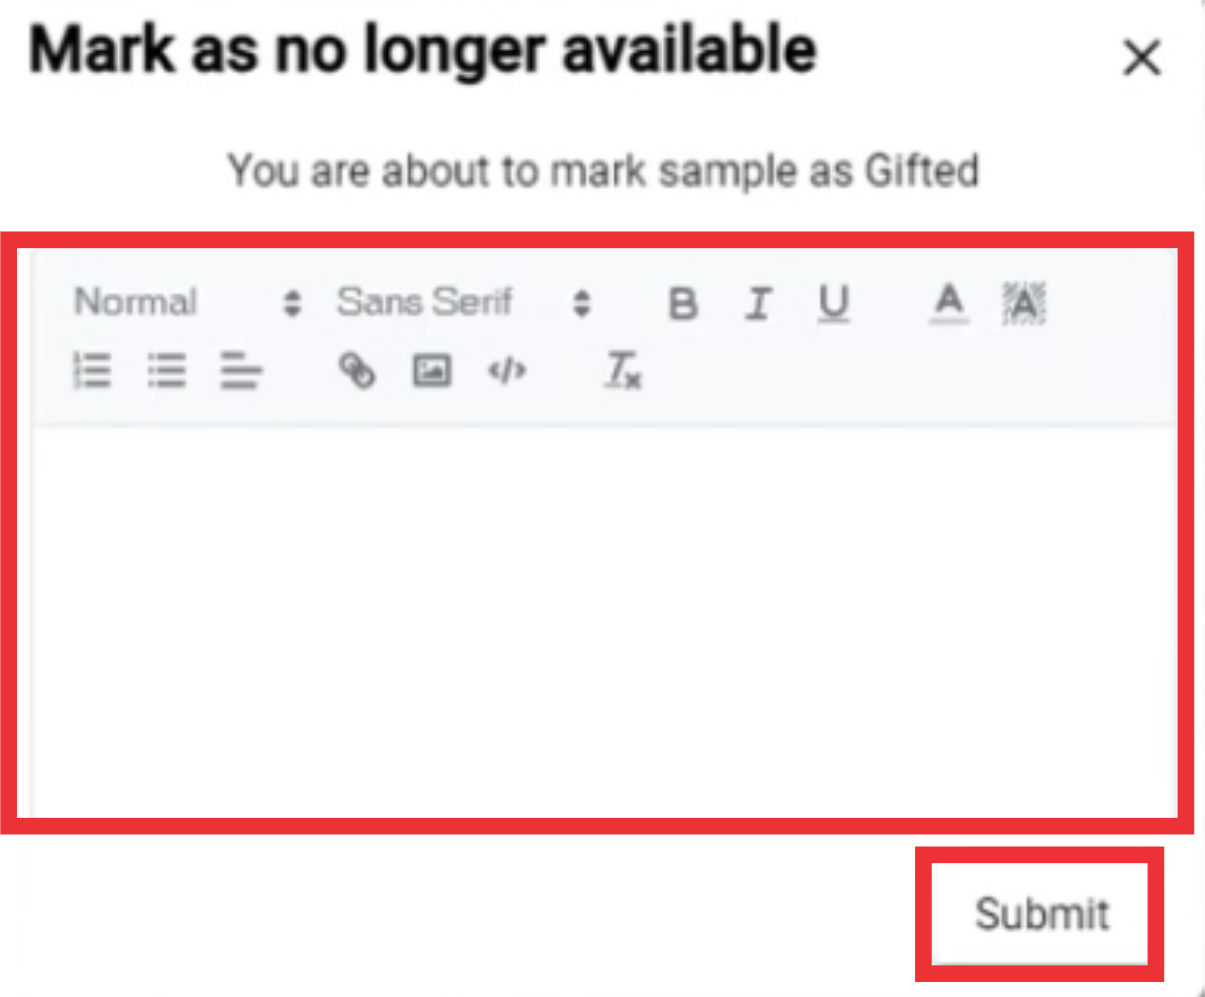
97. Enter comment in the field and click the submit button to confirm.
98. A message will appear at the top of the screen that your sample status has been changed and marked as gifted.
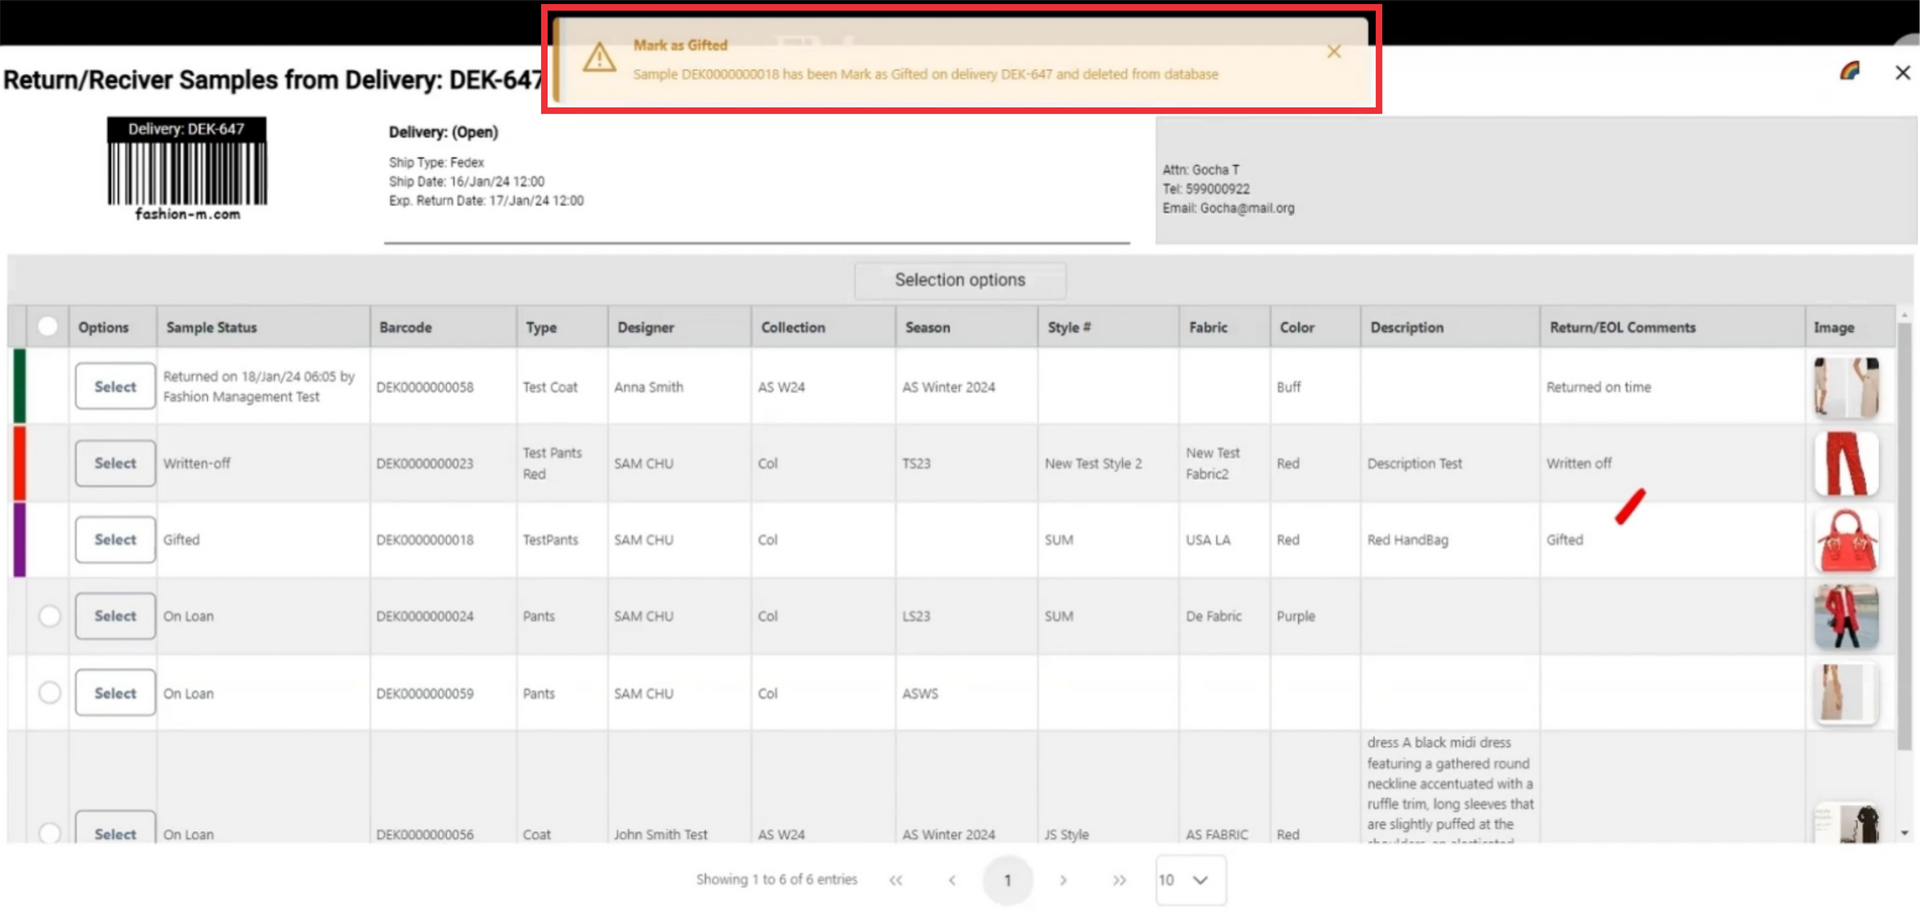
99. A comment will also added to samples comment field.

100. After marking as gifted the sample will be highlitghted in purple color.
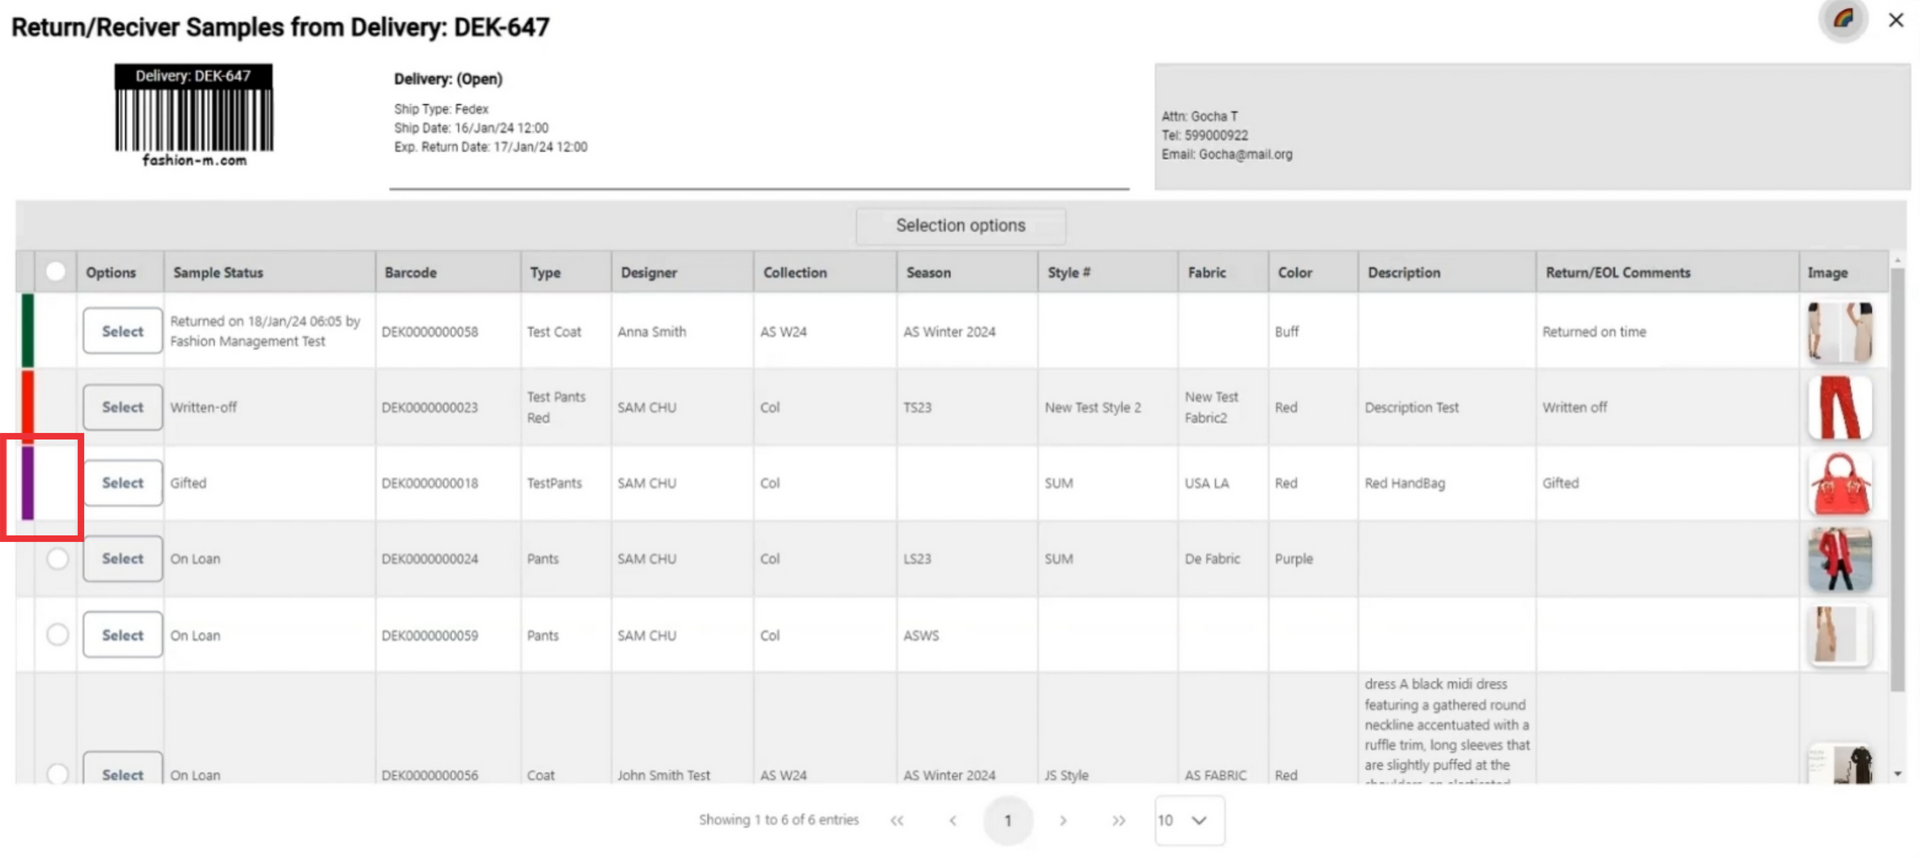
101. Click on the color button in the upper right corner to see definiton and meaning of the colors.
102. Purple color means the sample is marked as gifted.
103. Click the select button to open sample option menu.

104. If a sample from this send out has been returned to vendor and you want to change status to returned to vendor click the "returned to vendor" button.
105. Enter comment in the field and click the submit button to confirm.
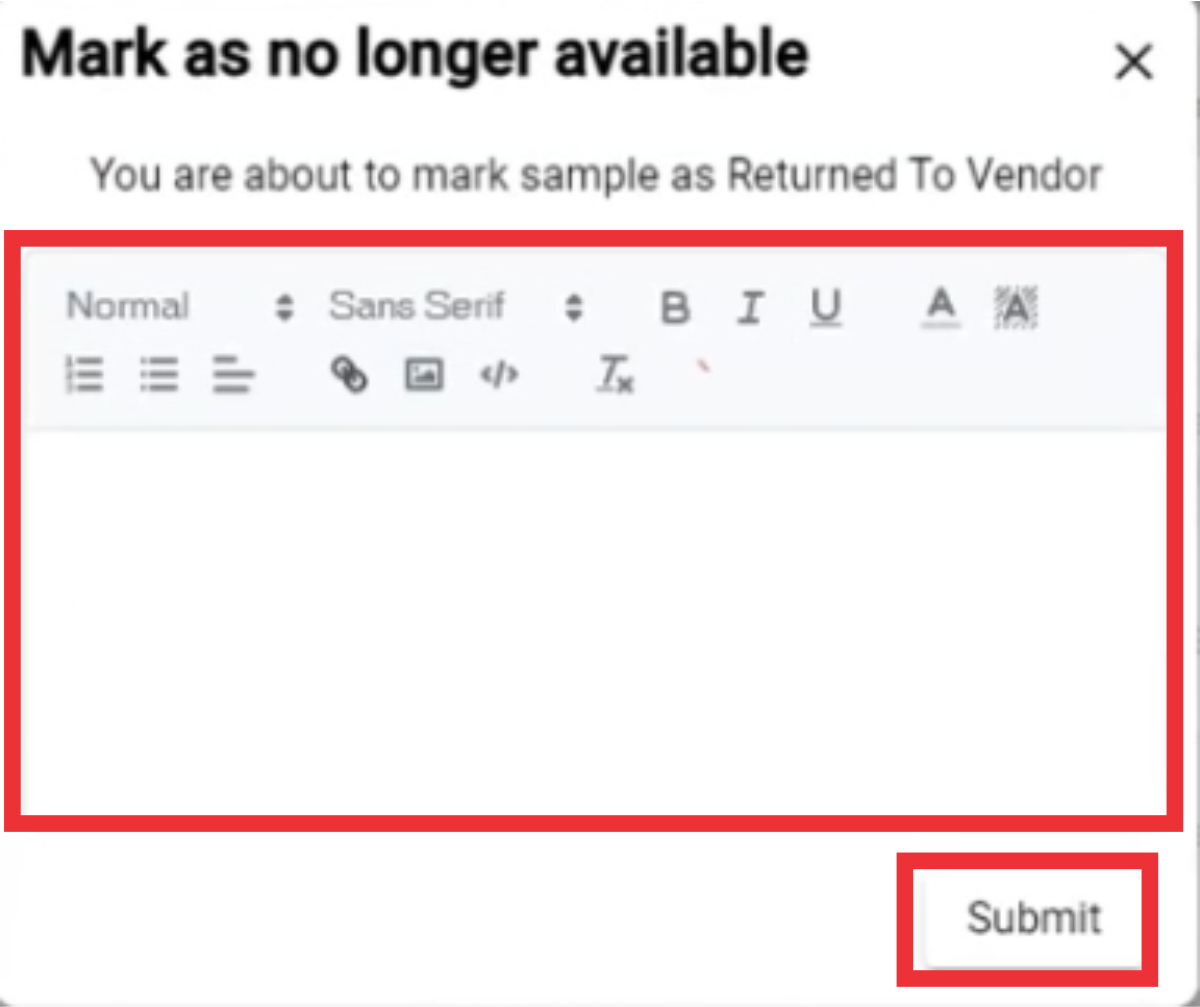
106. A message will appear at the top of the screen that your sample status has been changed and returned to vendor.
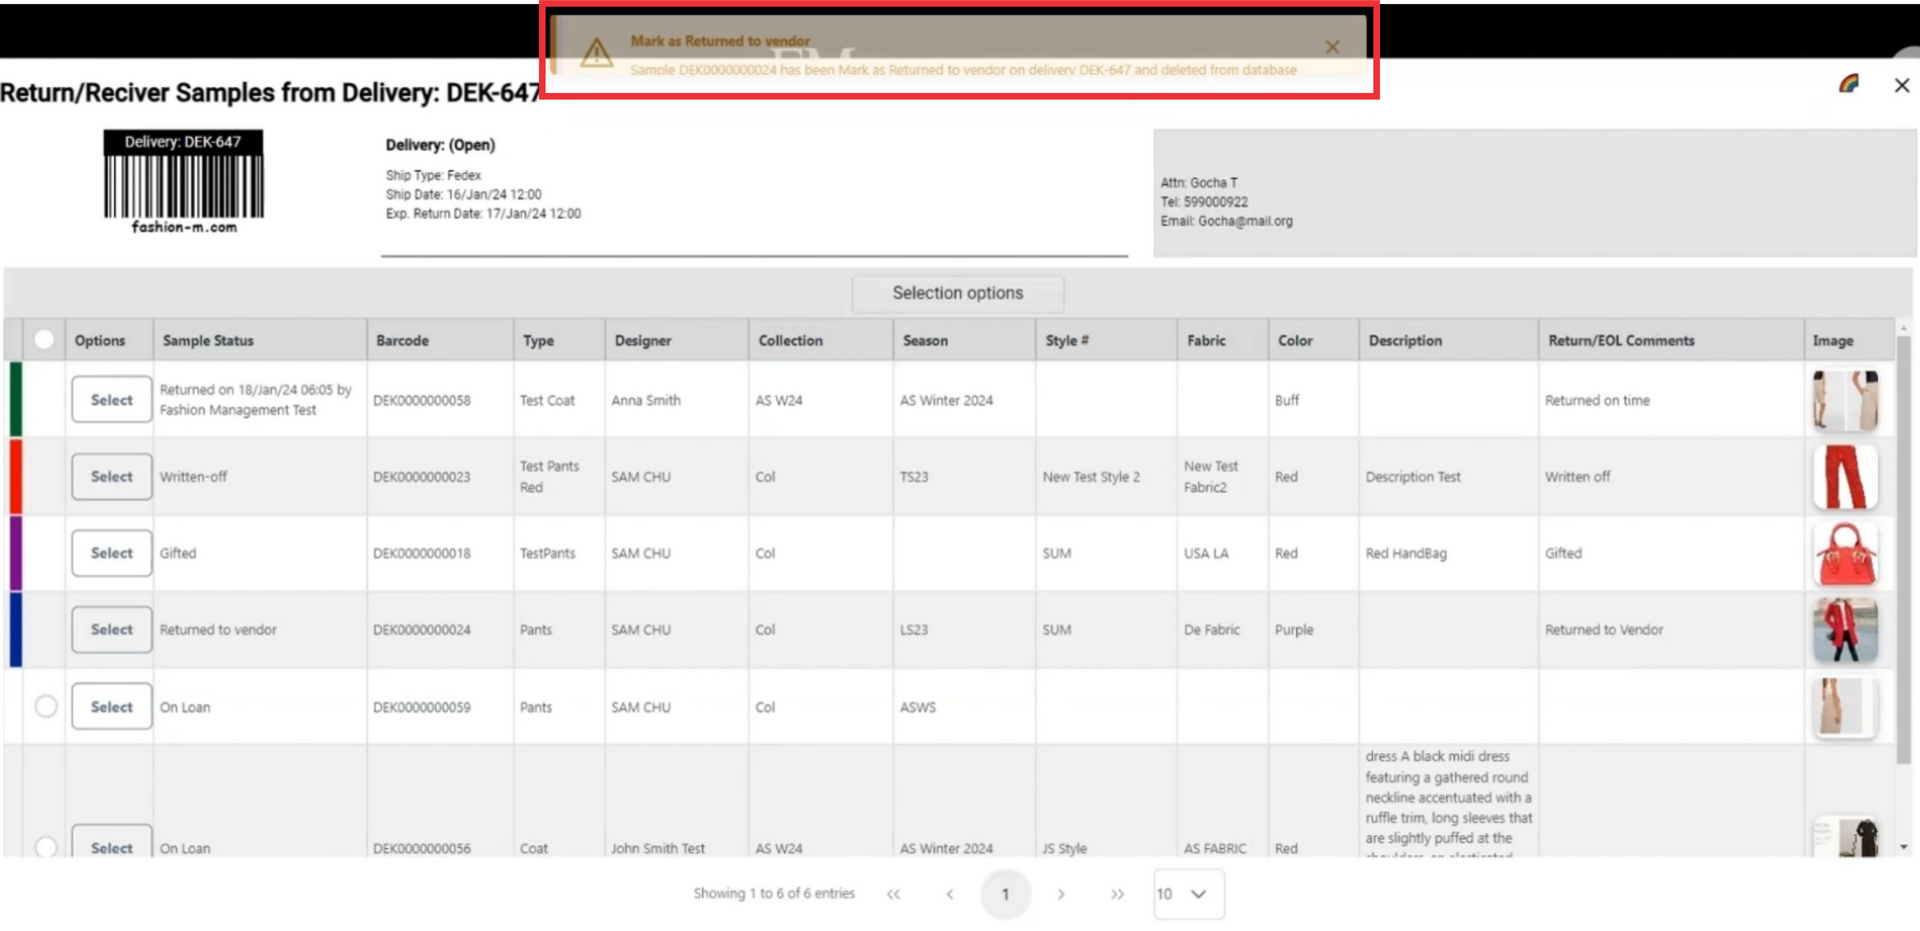
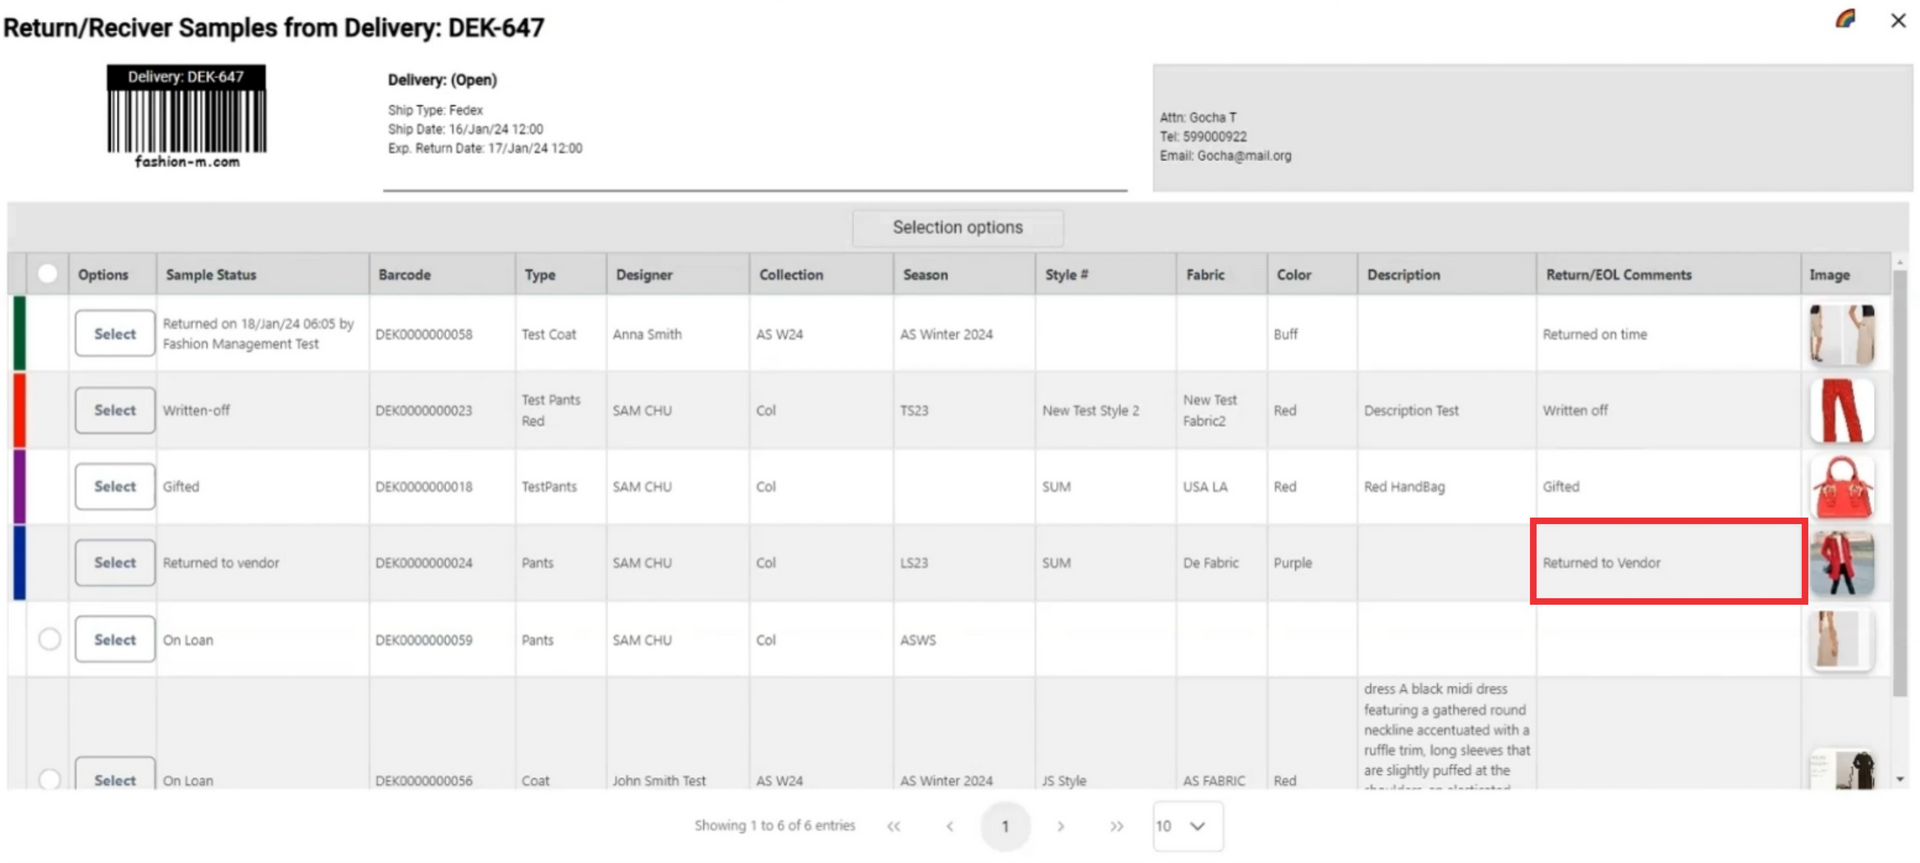
107. A comment will also added to samples comment field.
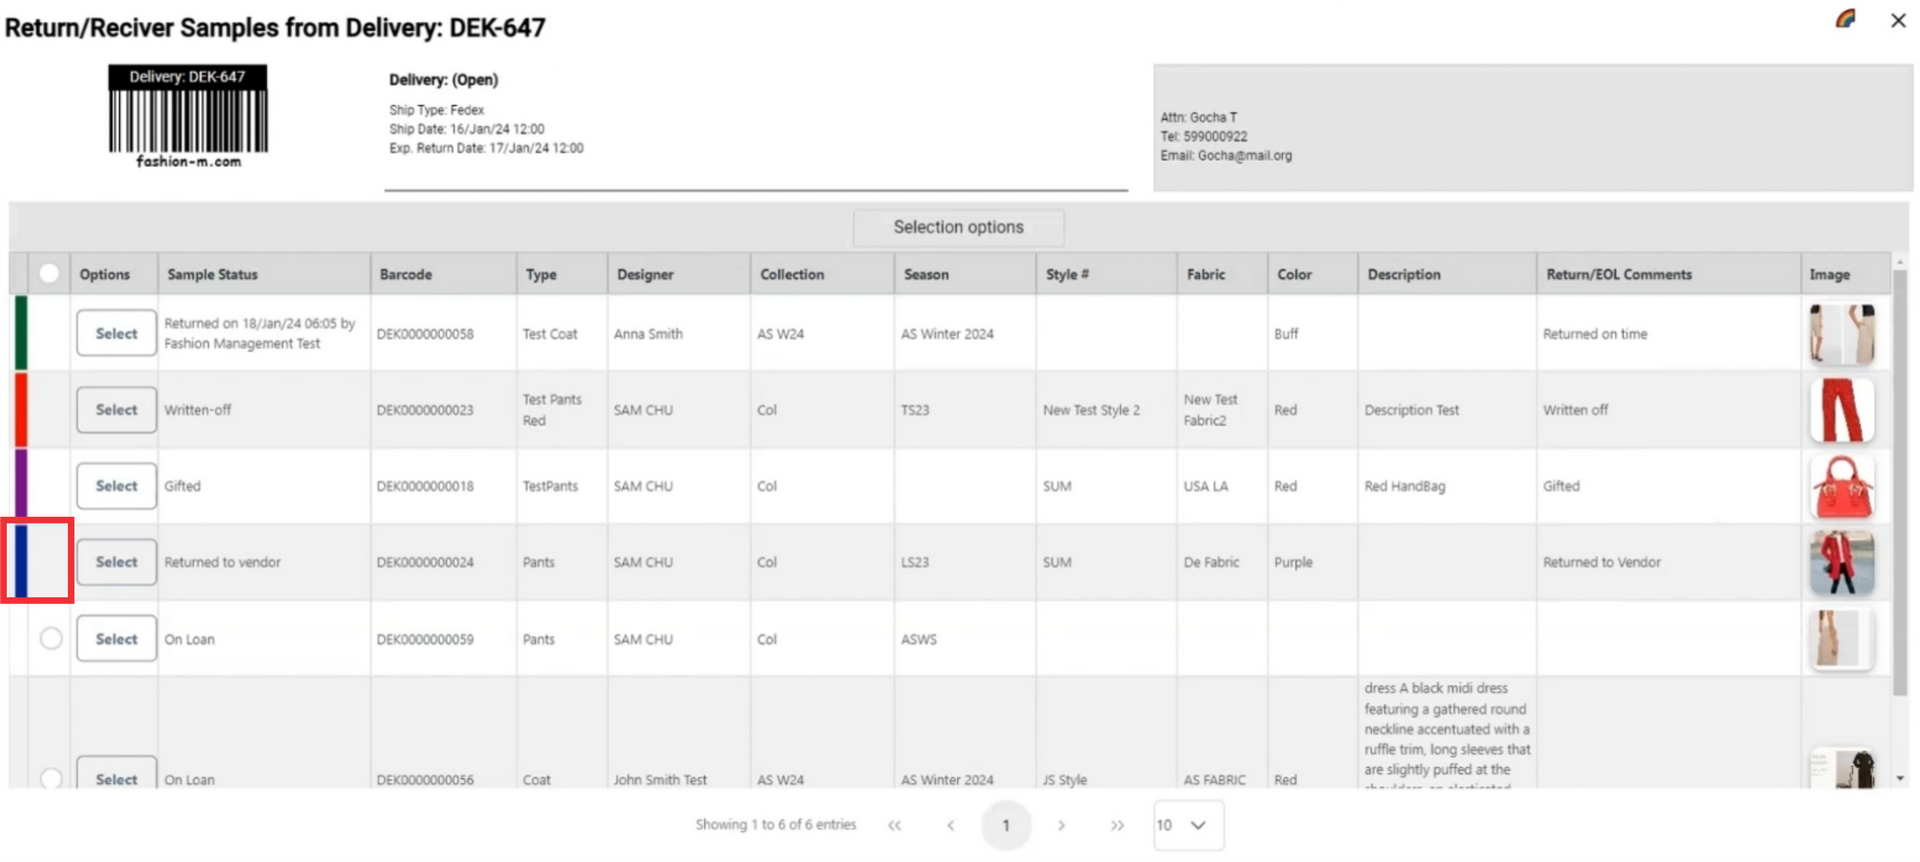
108. After marking as returned to vendor the sample will be highlitghted in blue color.
109. Click on the color button in the upper right corner to see definiton and meaning of the colors.
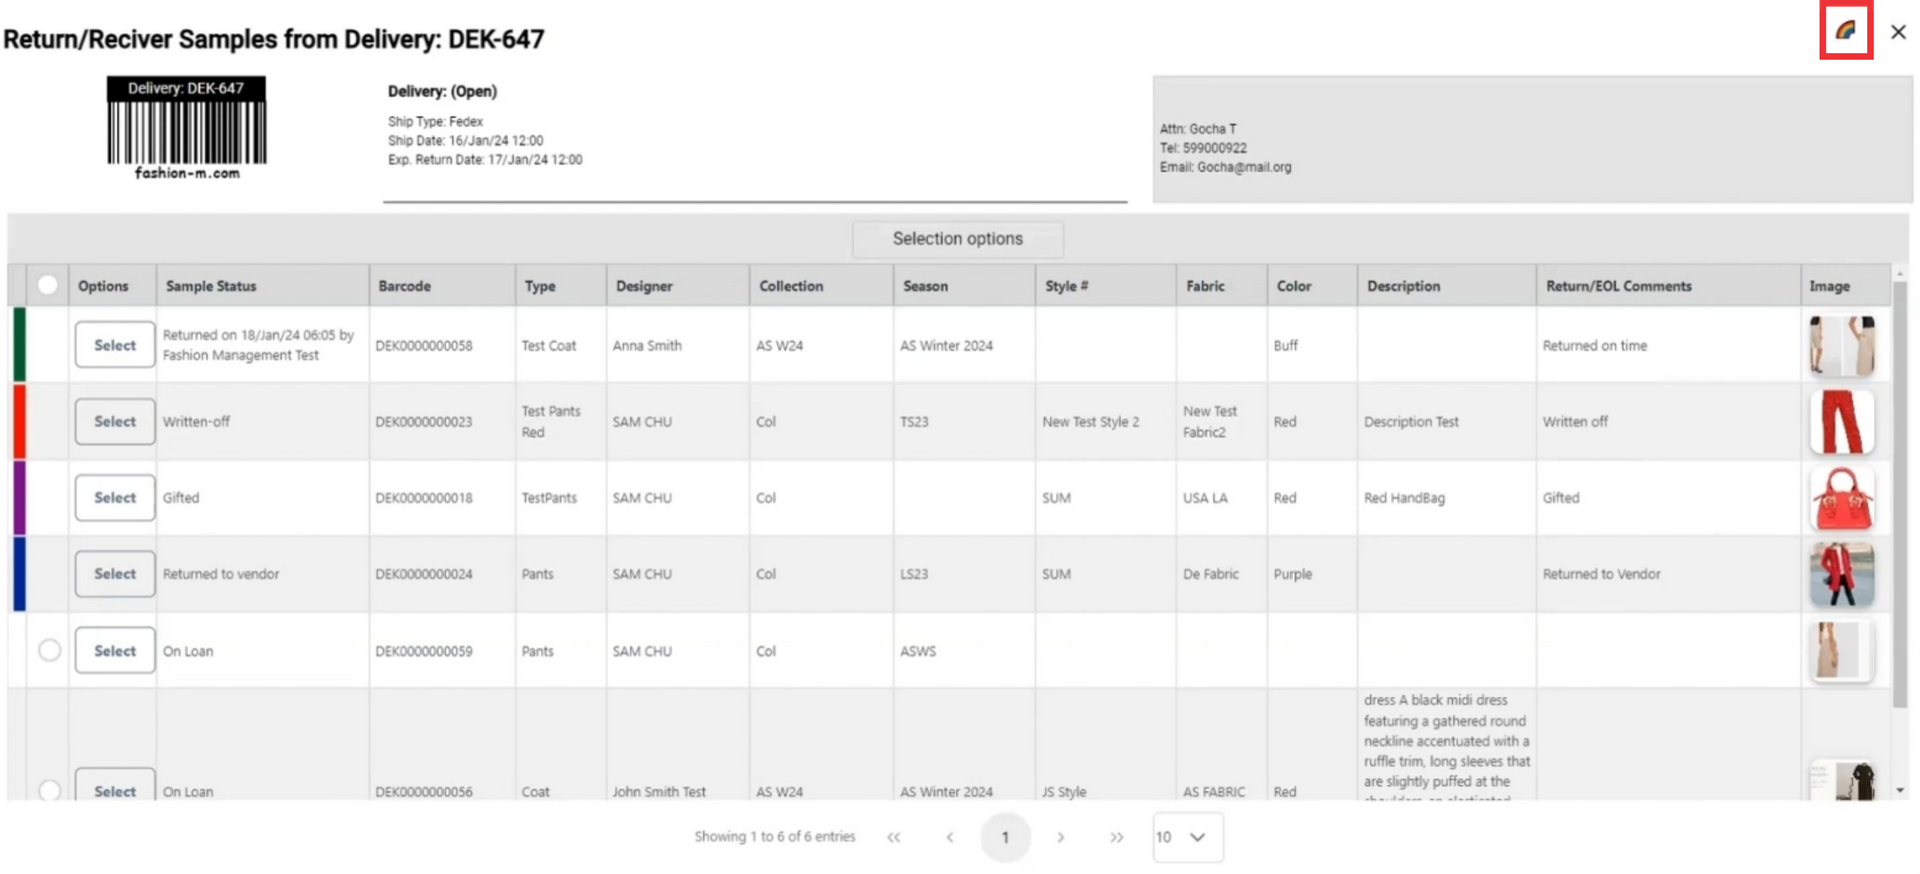
110. Blue color means the sample is marked as returned to vendor.
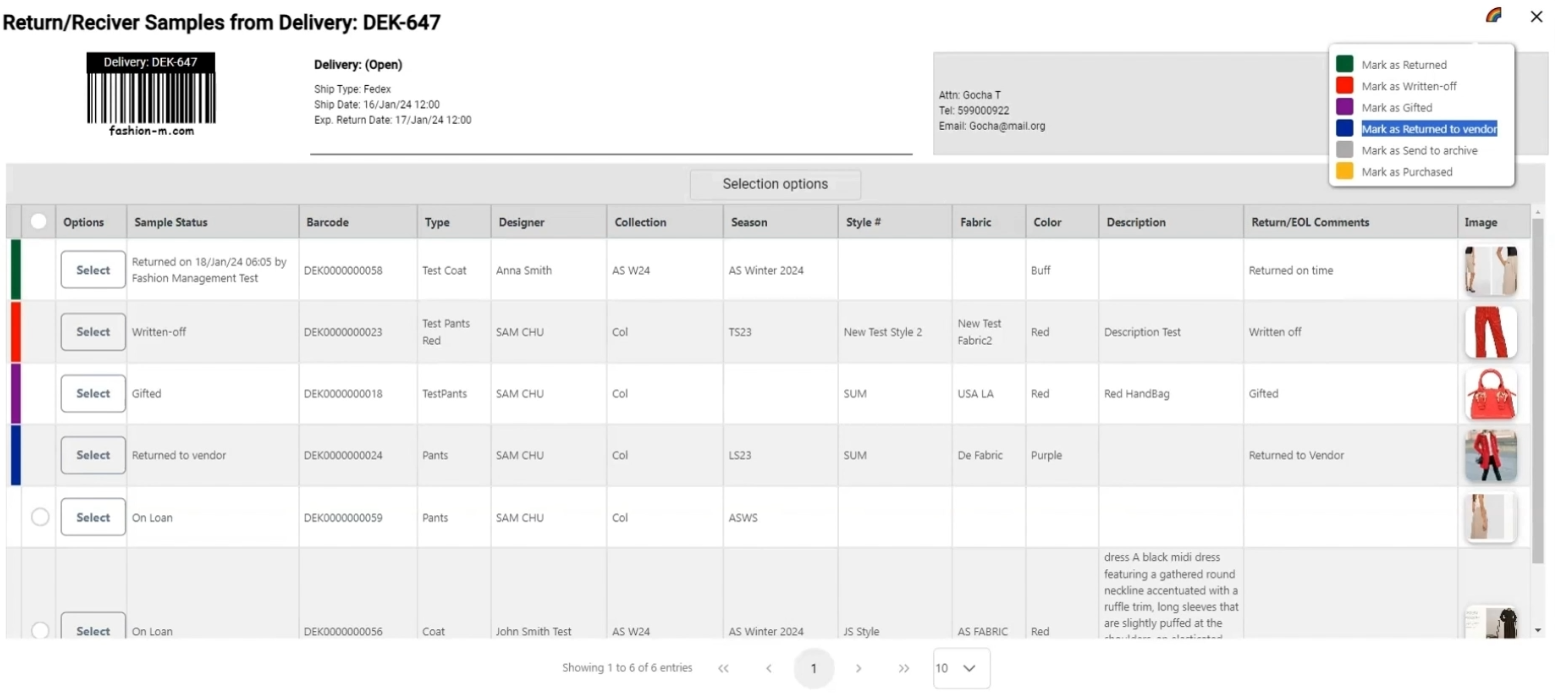
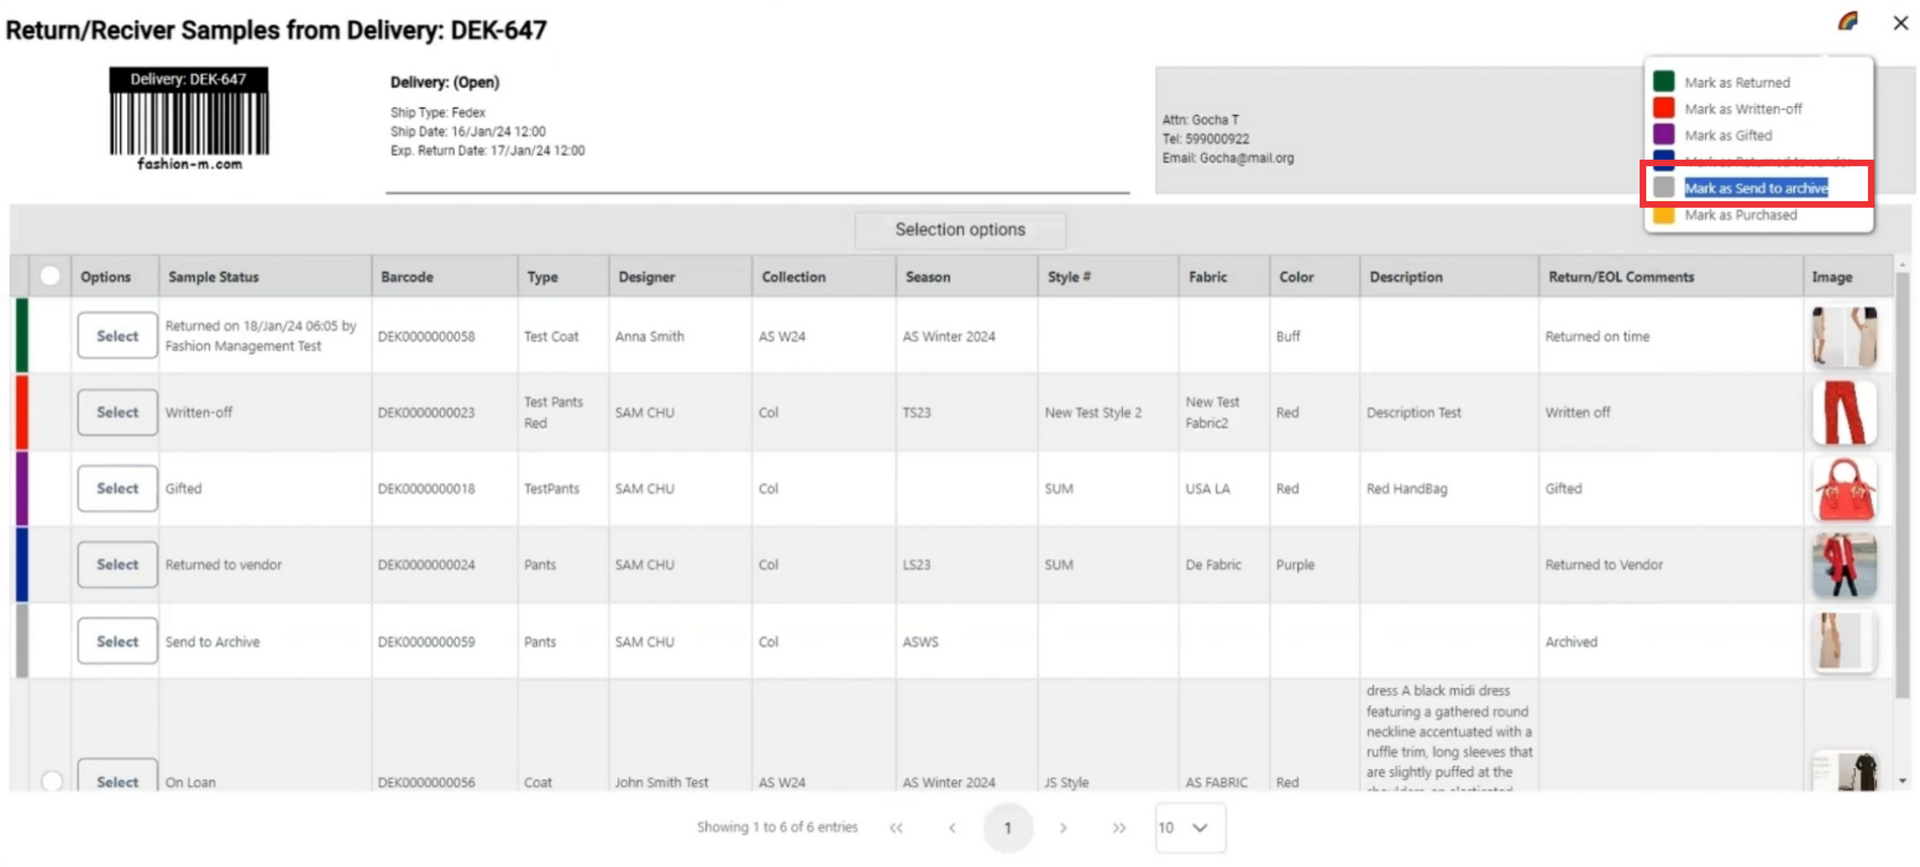
111. Click the select button to open sample option menu.
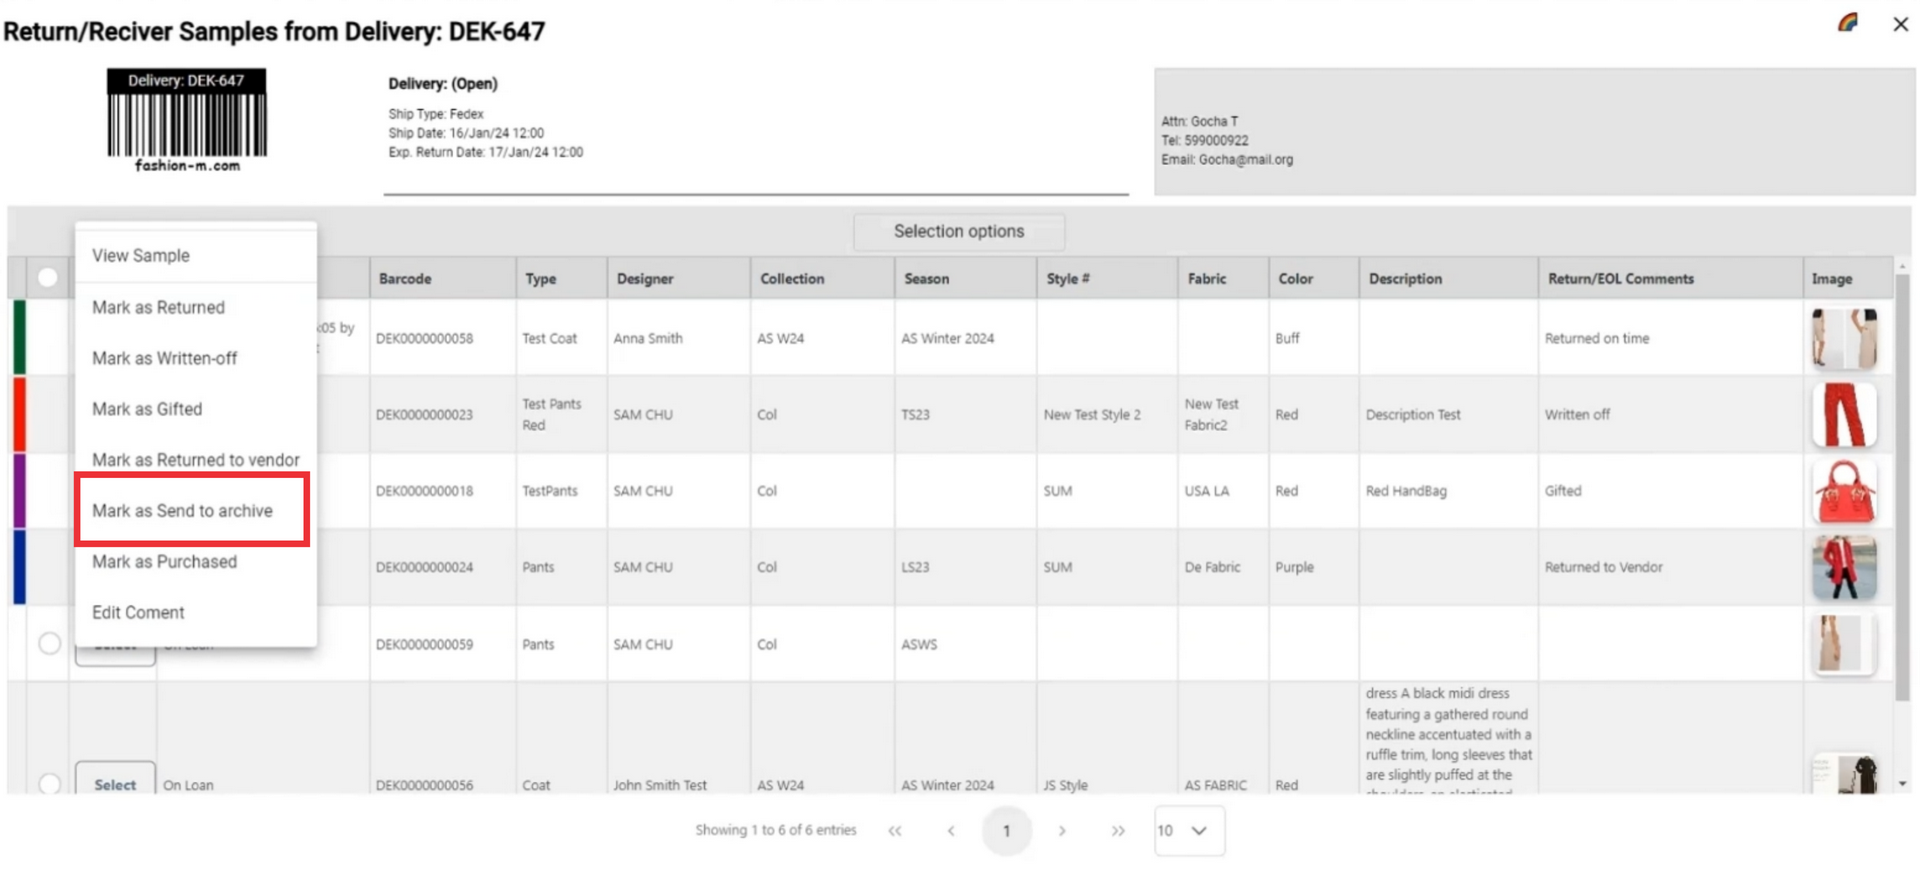
112. If a sample from this send out has been send to archive and you want to change status to archived click the "Send to archive" button.
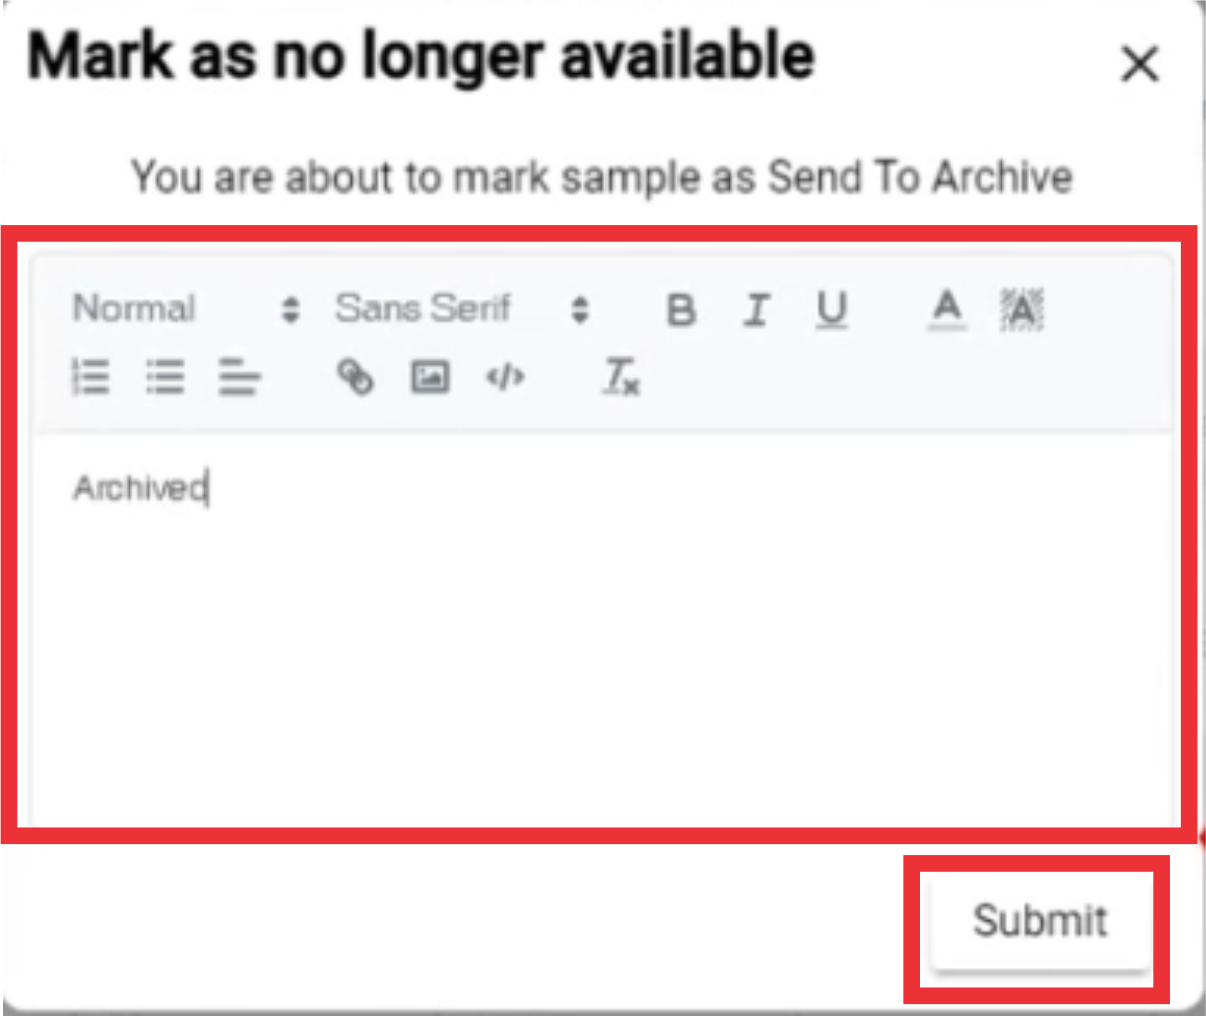
113. Enter comment in the field and click the submit button to confirm.
114. A message will appear at the top of the screen that your sample status has been changed and send to archive.
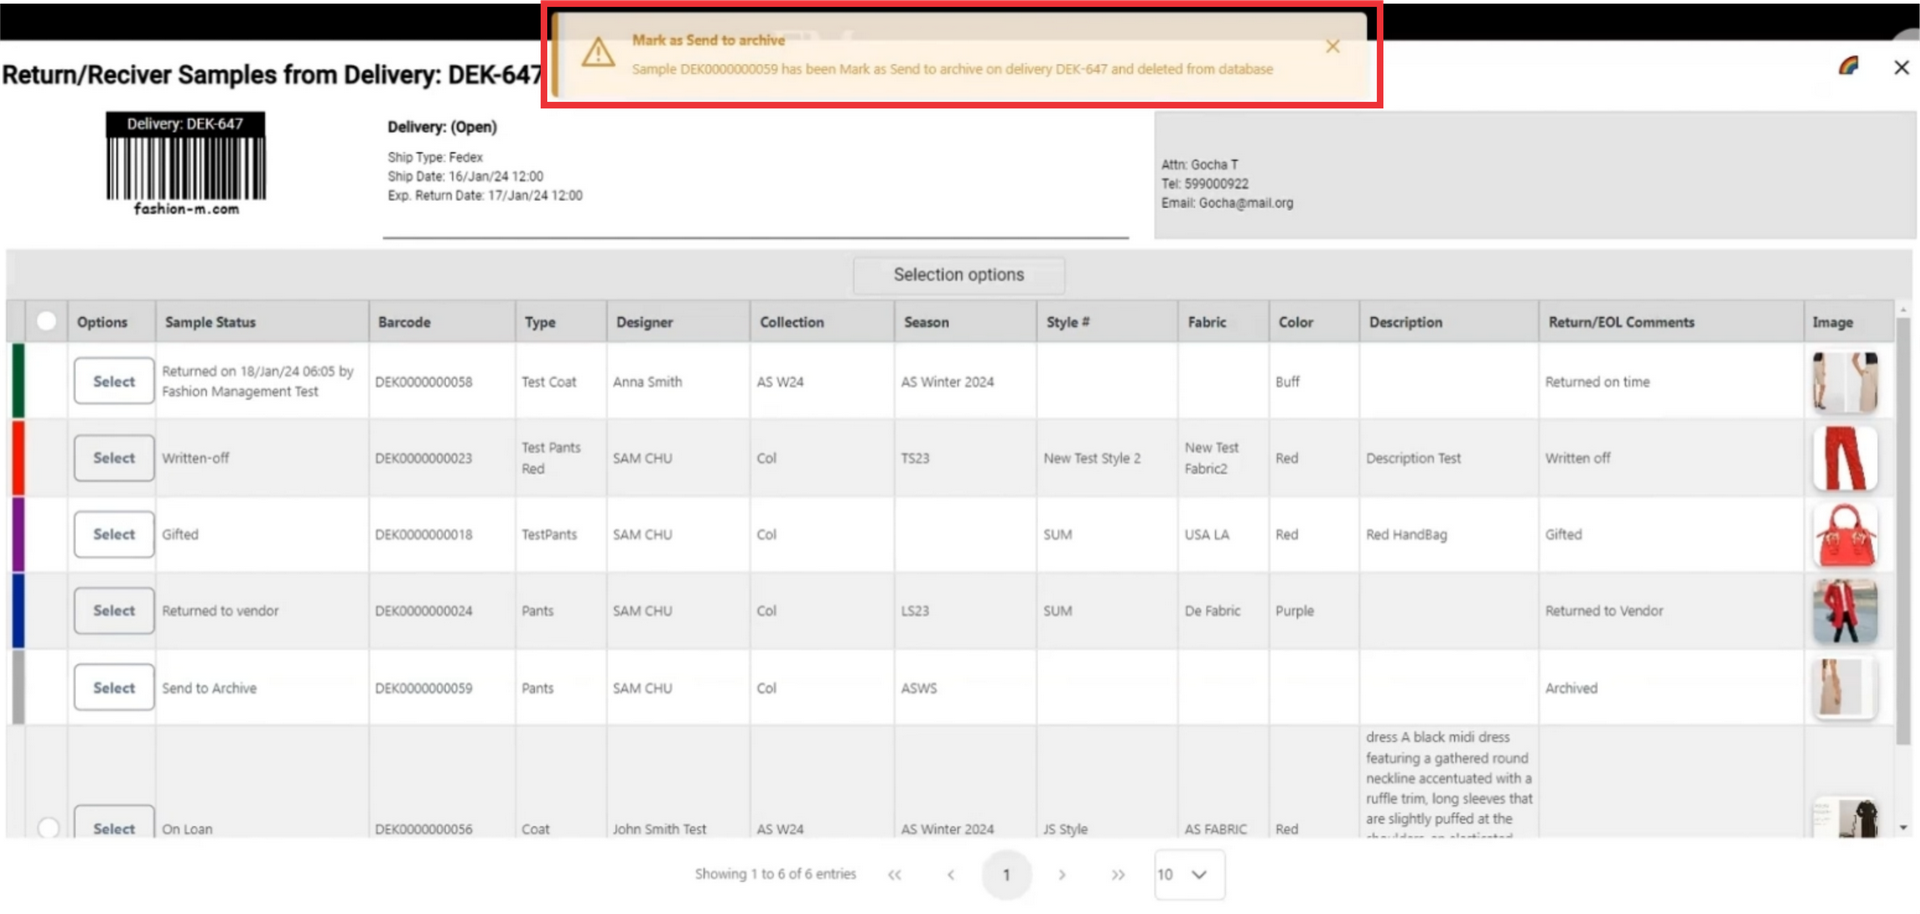
115. A comment will also added to samples comment field.
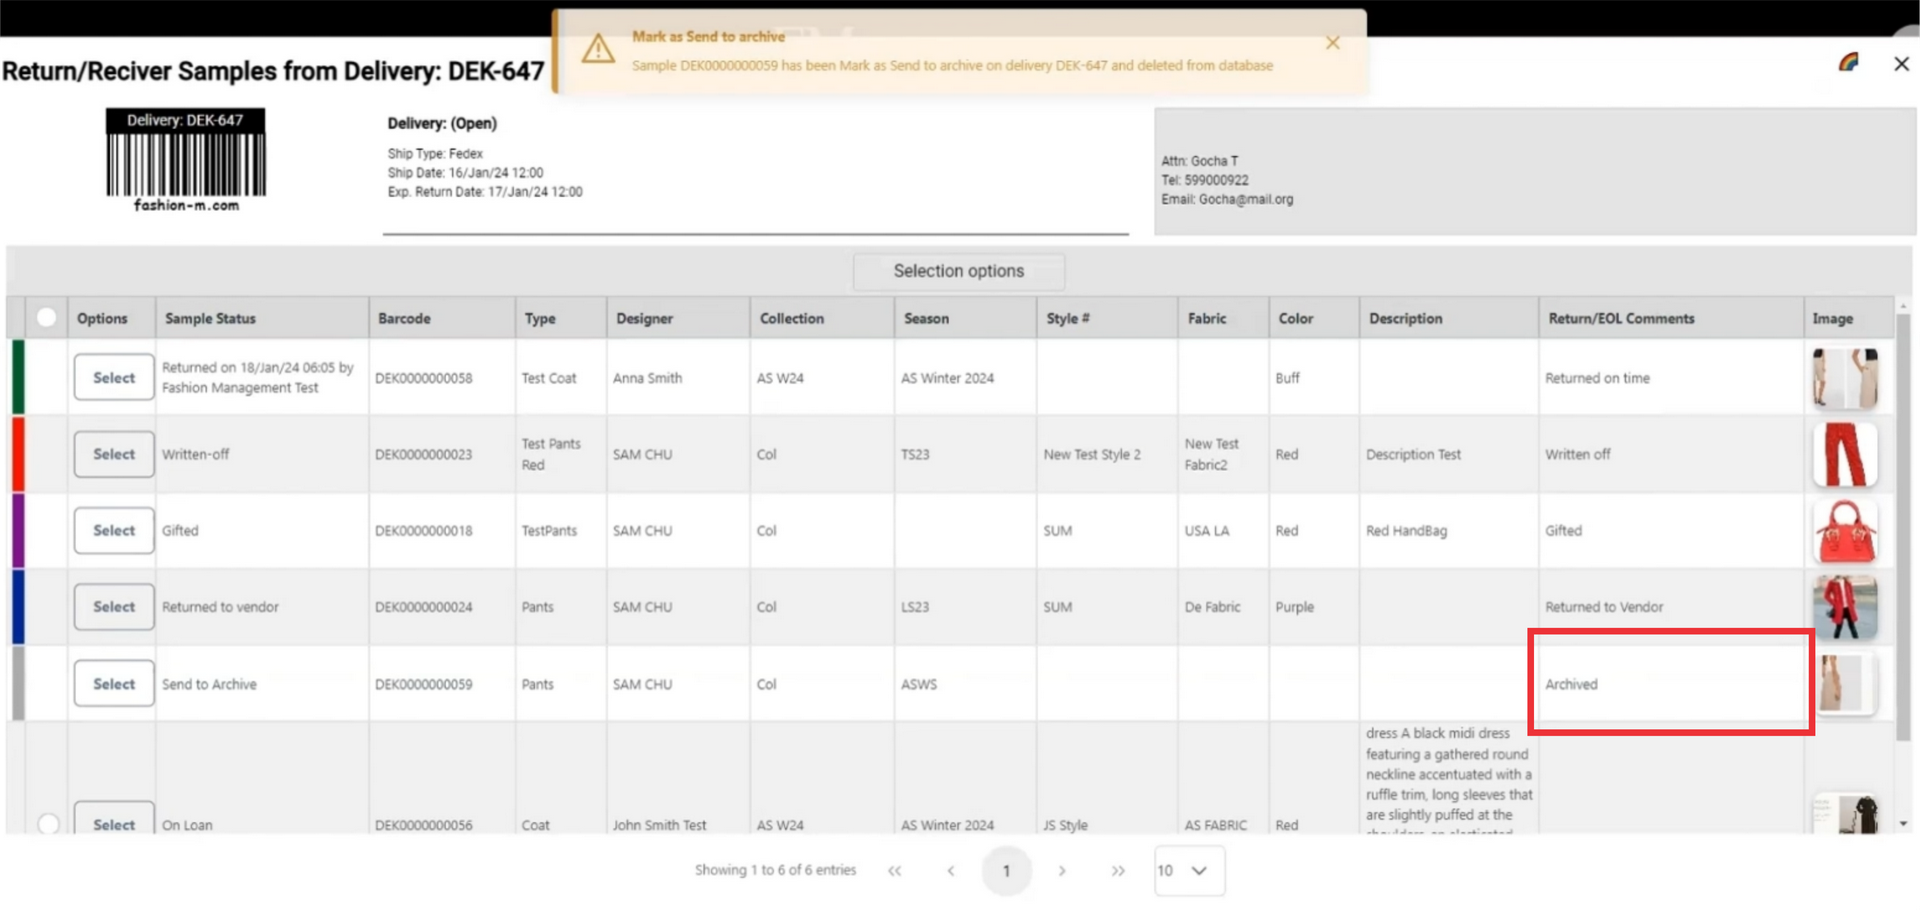
116. After marking as returned to vendor the sample will be highlitghted in grey color.

117. Click on the color button in the upper right corner to see definiton and meaning of the colors.
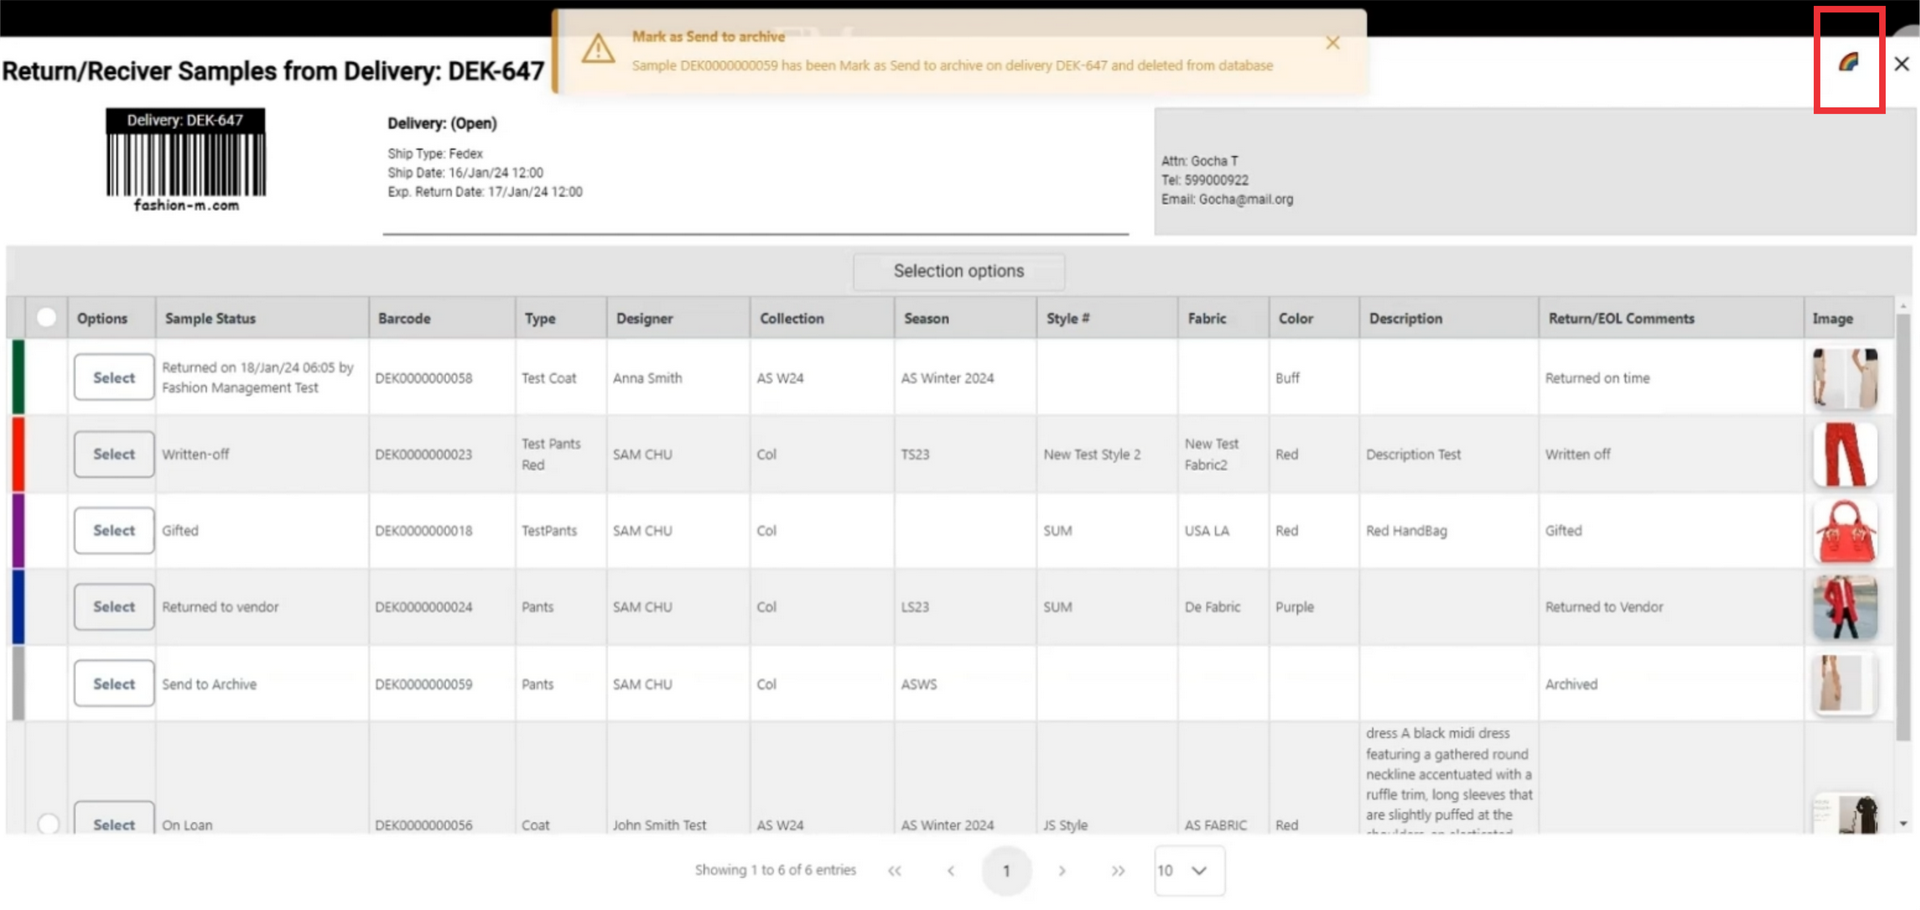
118. Grey color means the sample is marked as send to archive.
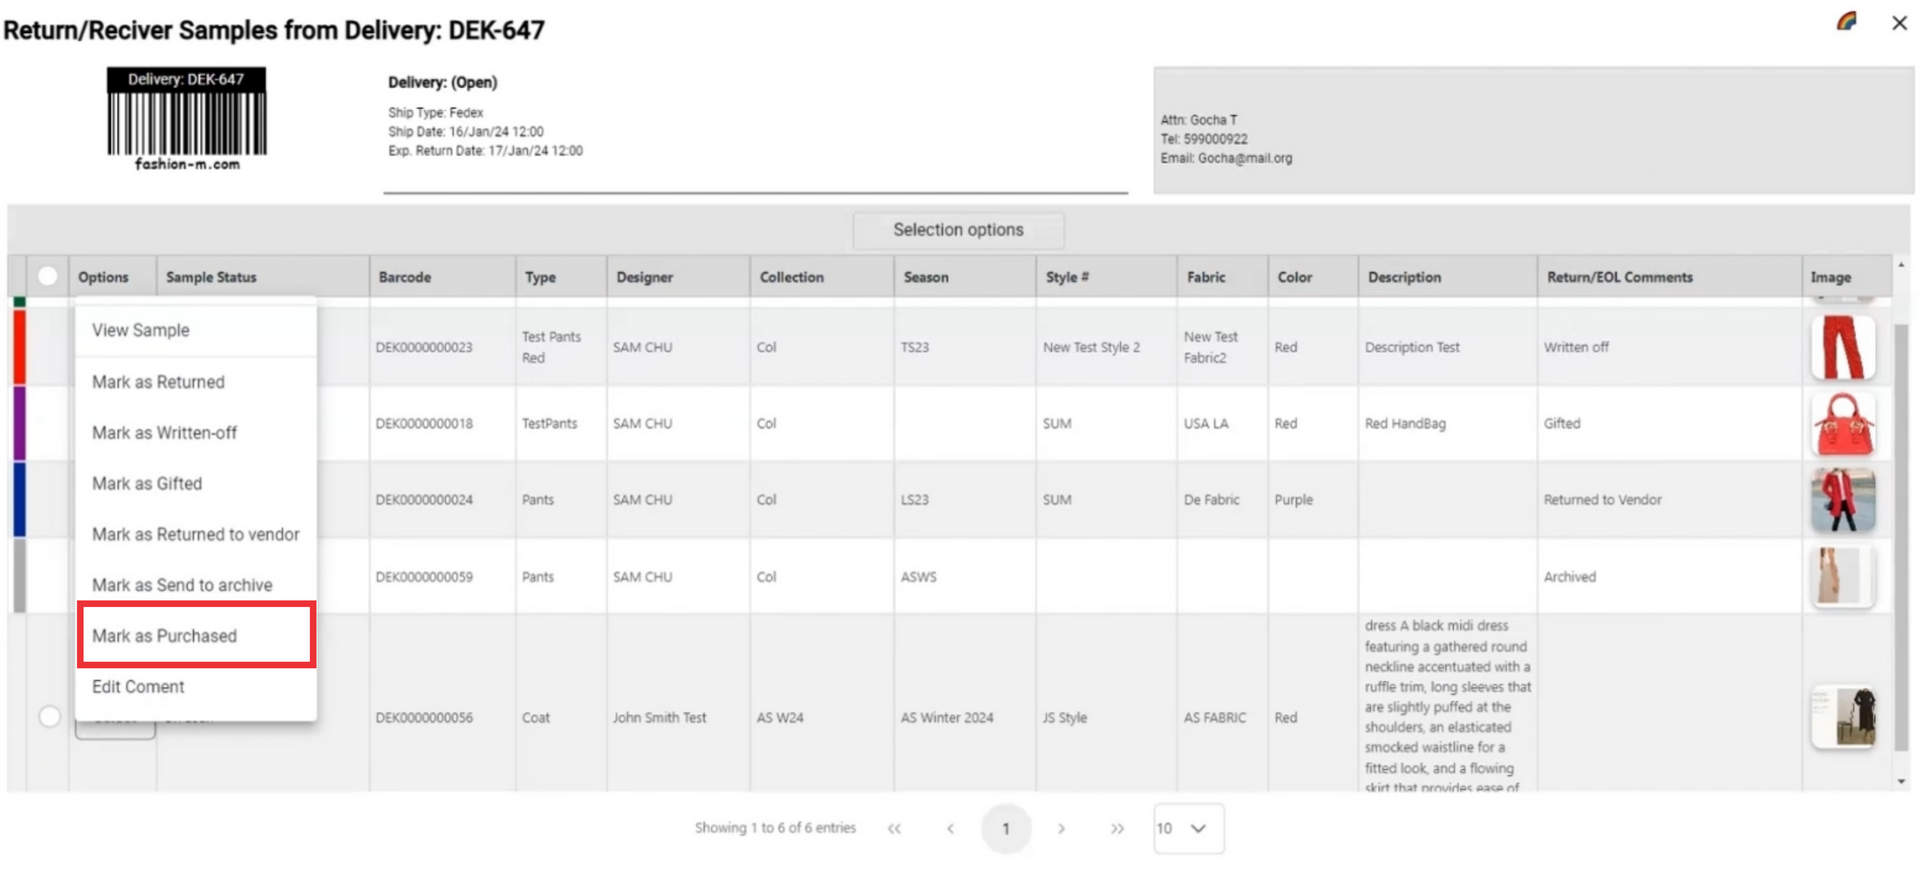
119. Click the select button to open sample option menu.
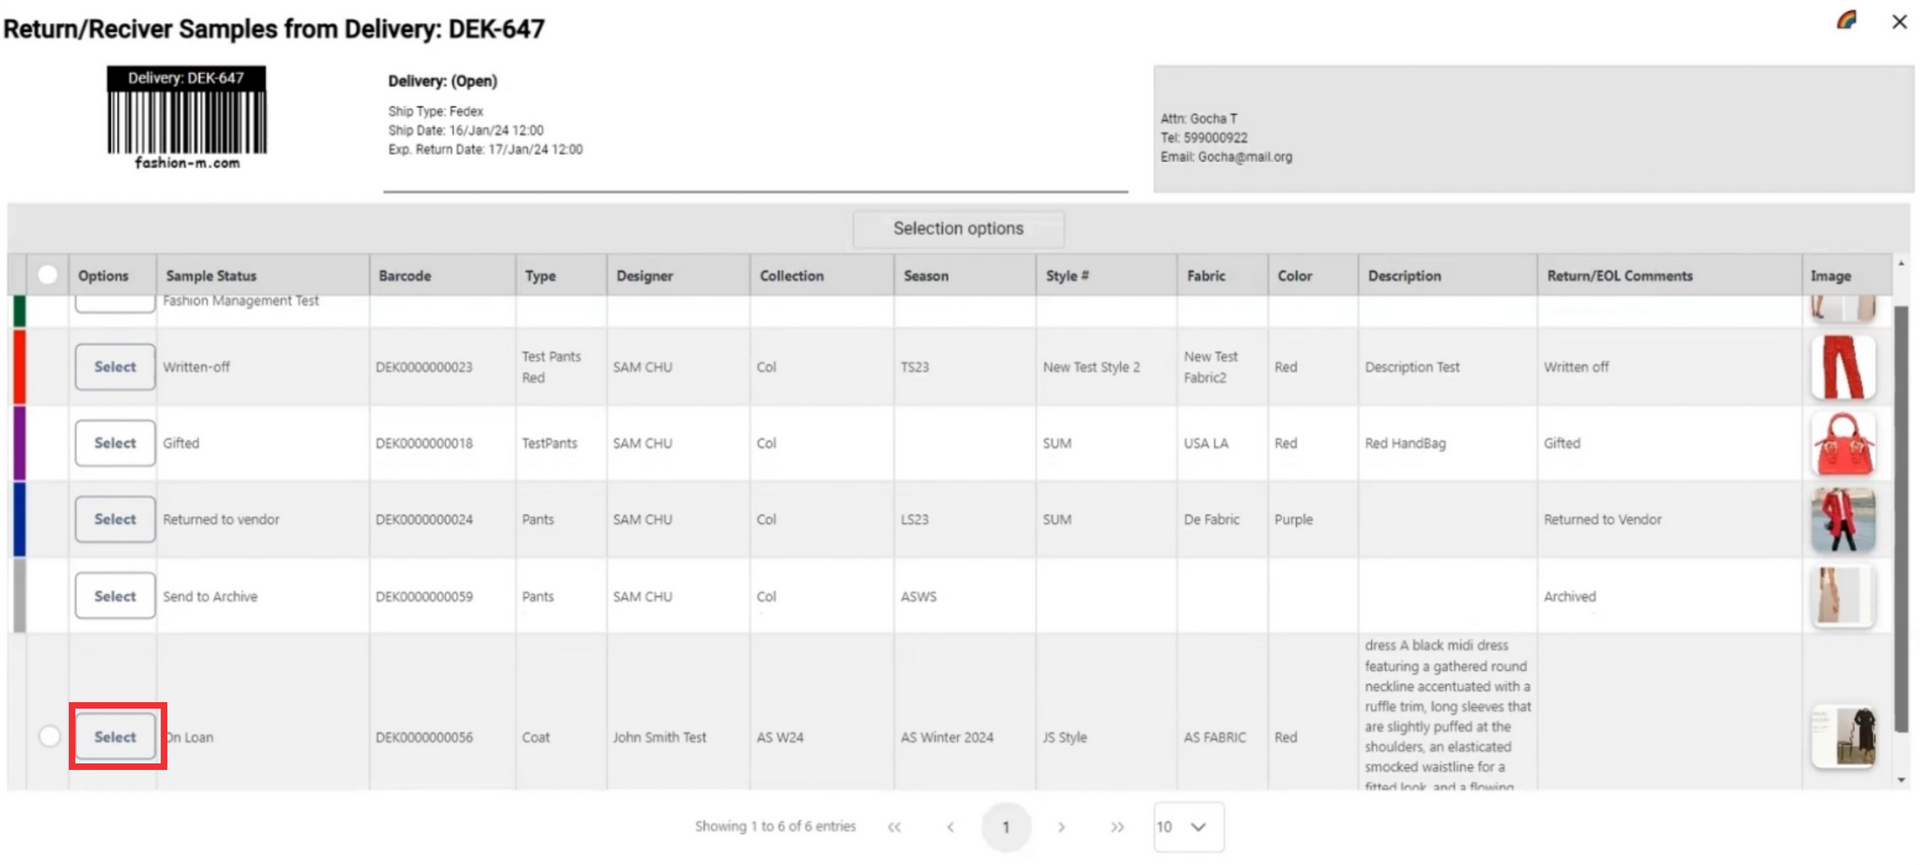
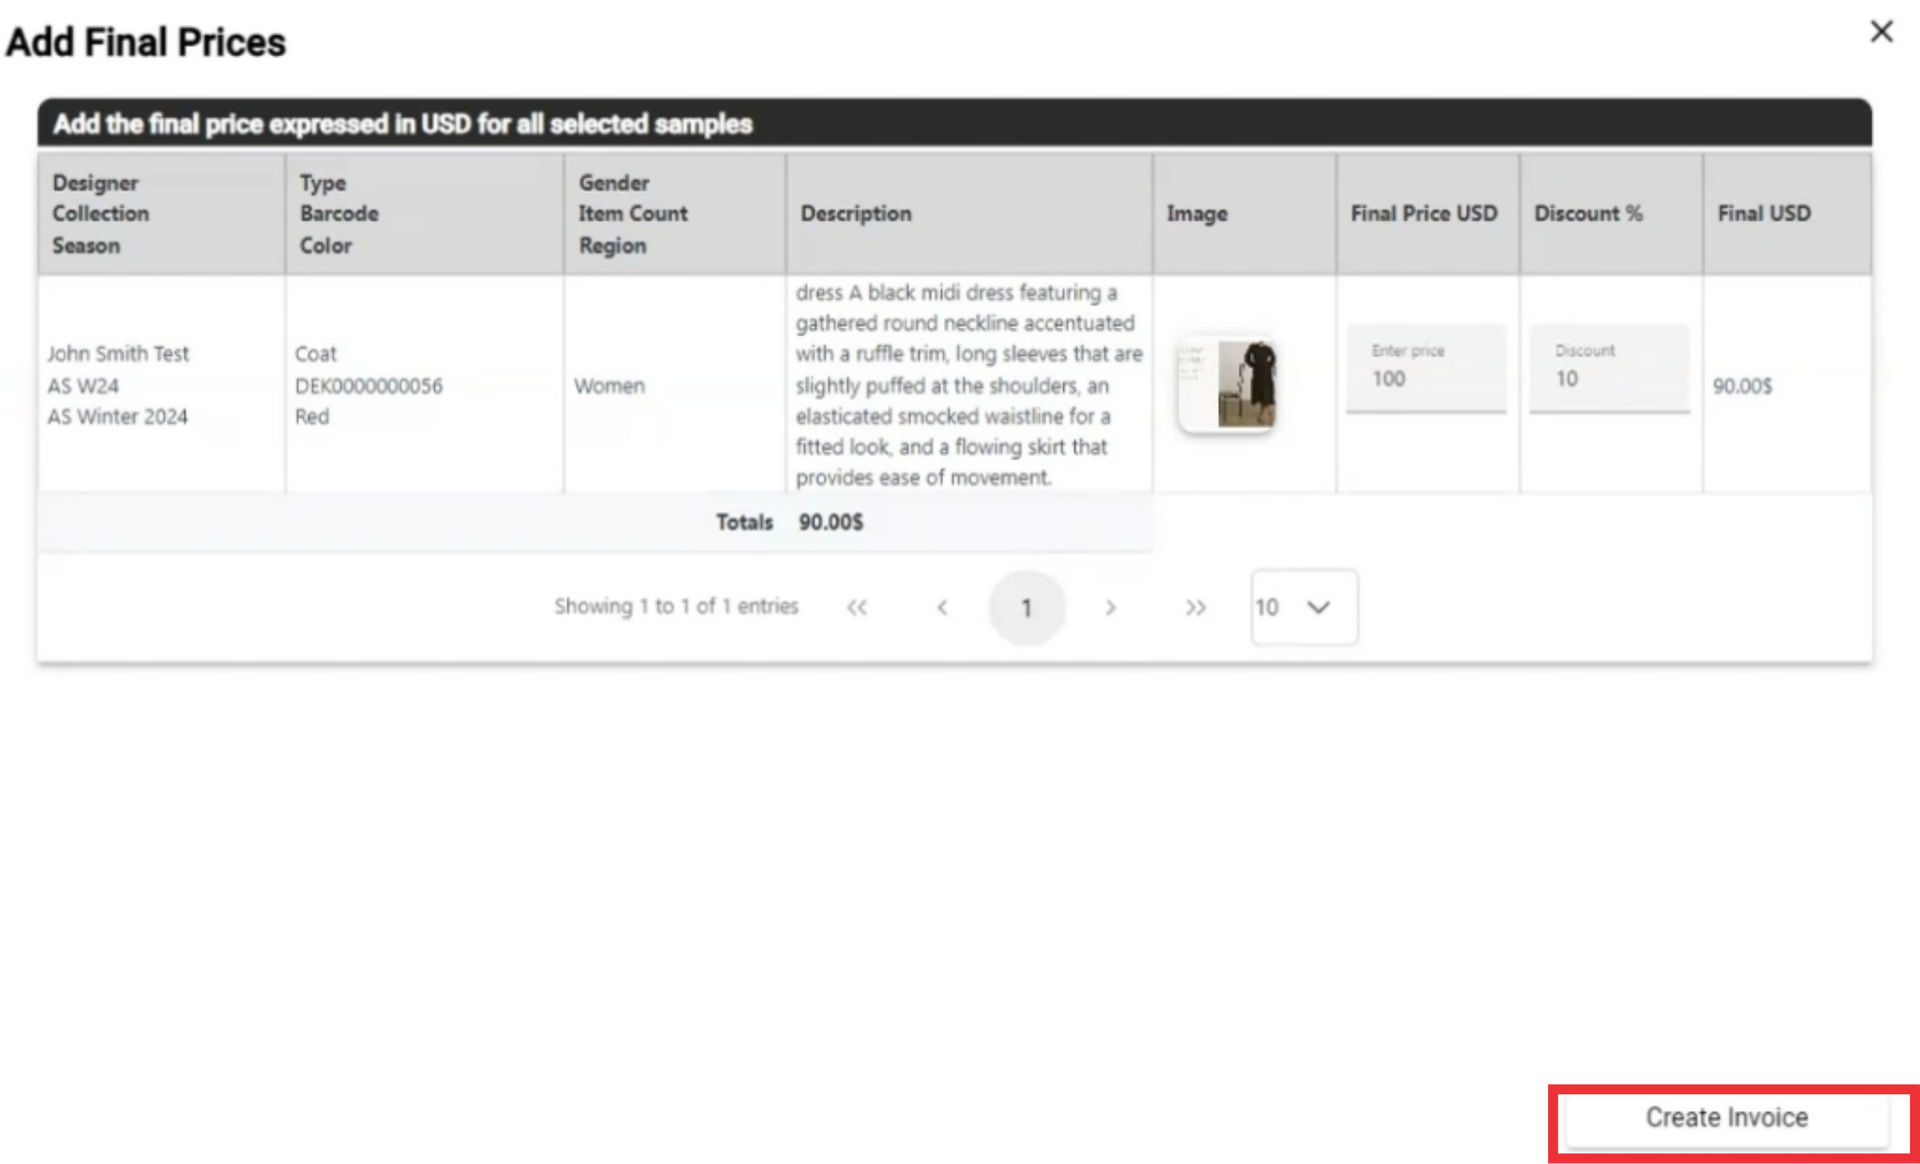
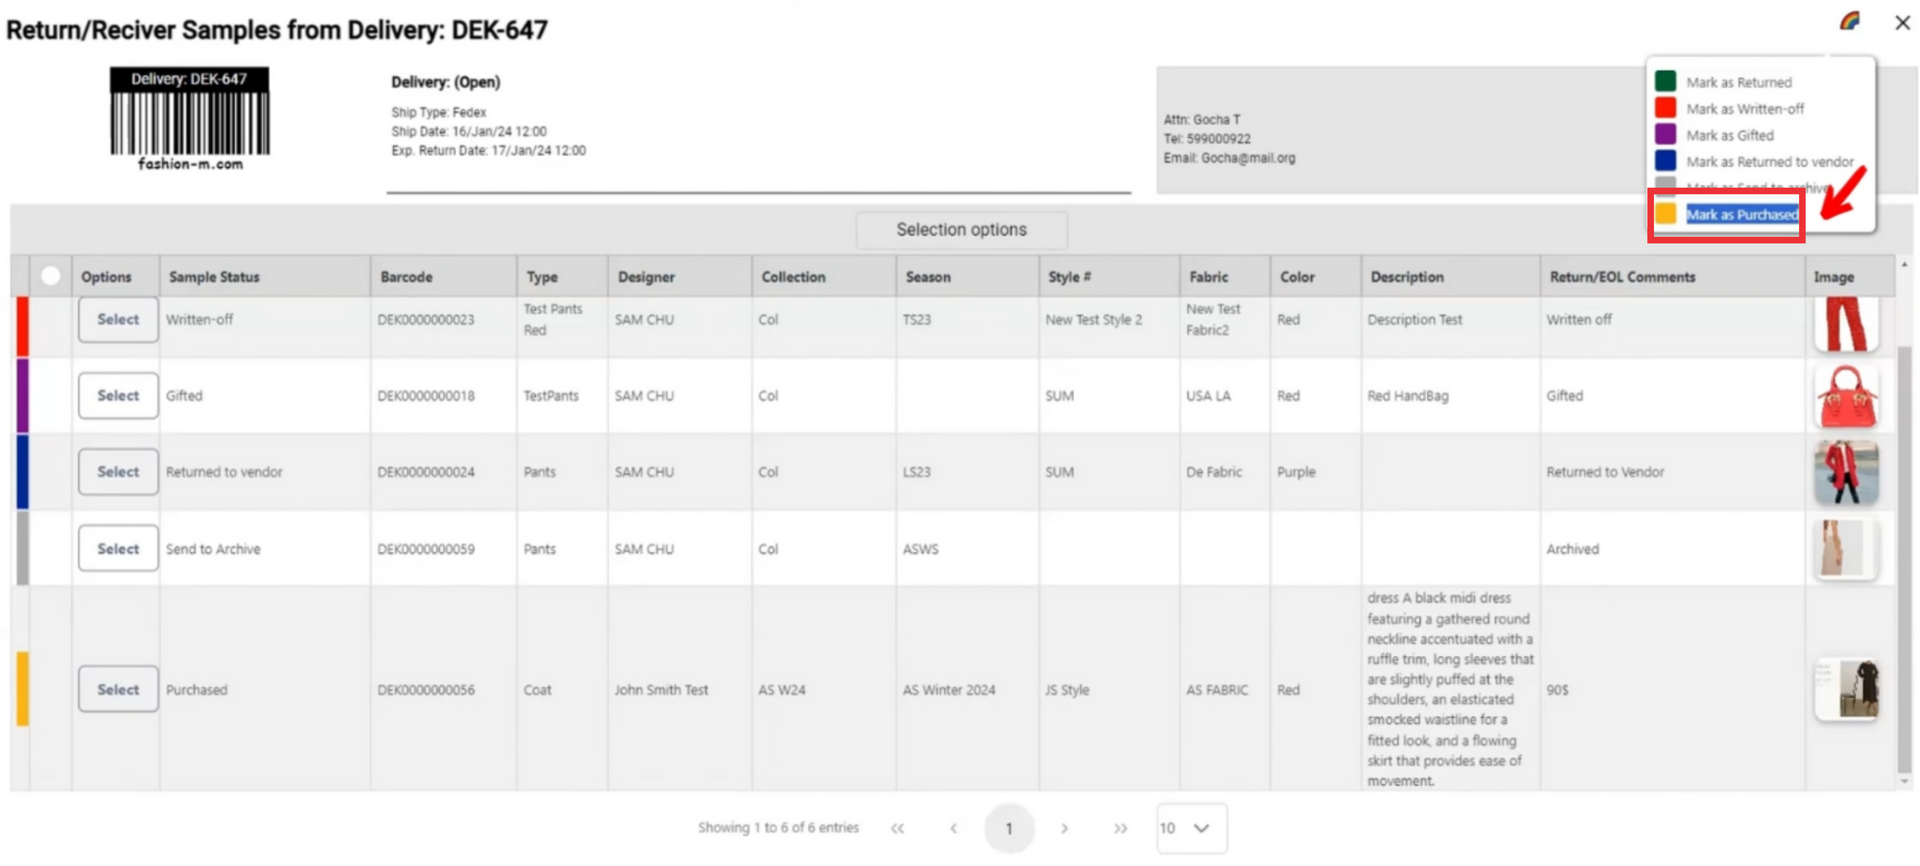
120. If a sample from this send out has been purchased and you want to change status mark as purchased click the "mark as purchased" button.
121. Enter the price in the field.
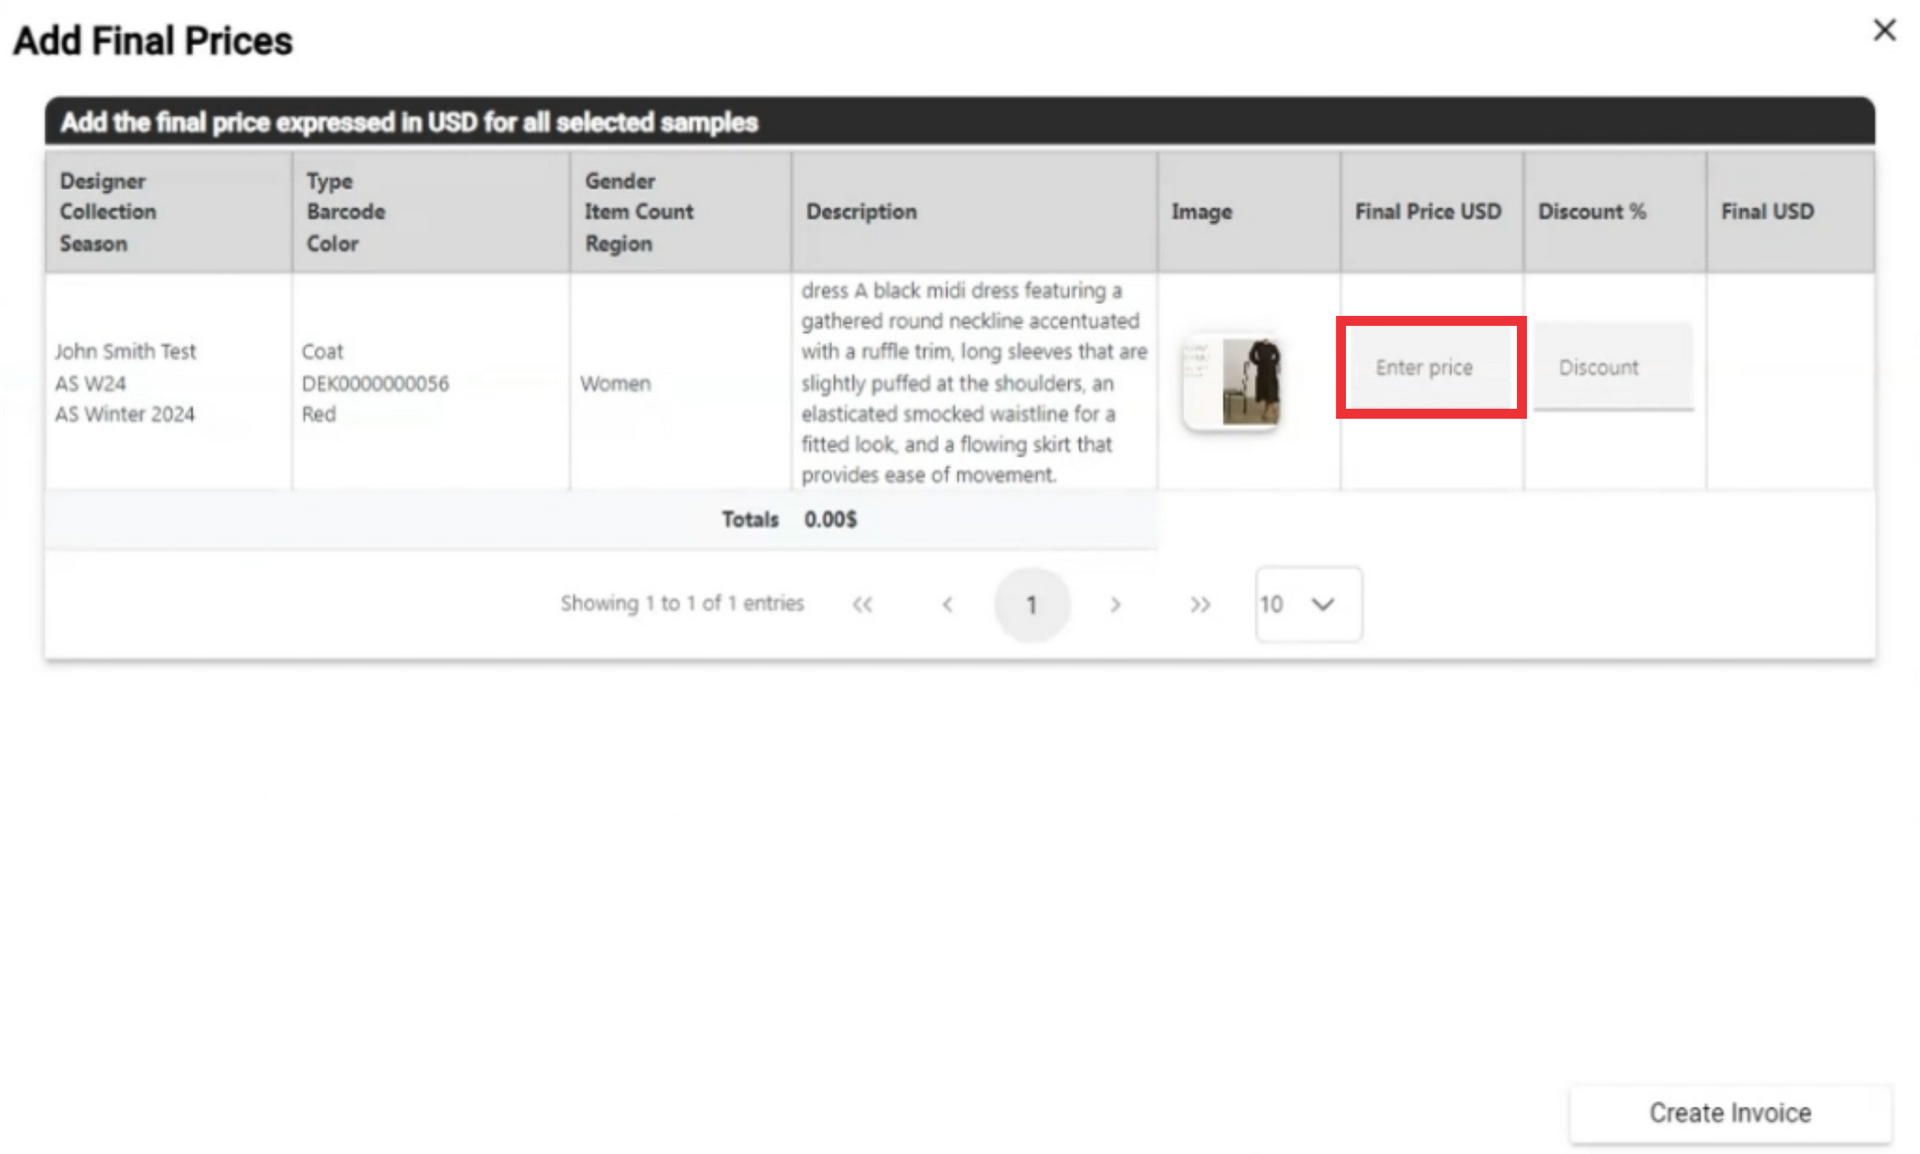
122. If desired enter the percentage of discount in the field.

123. Final price will automatically calculated in the field.
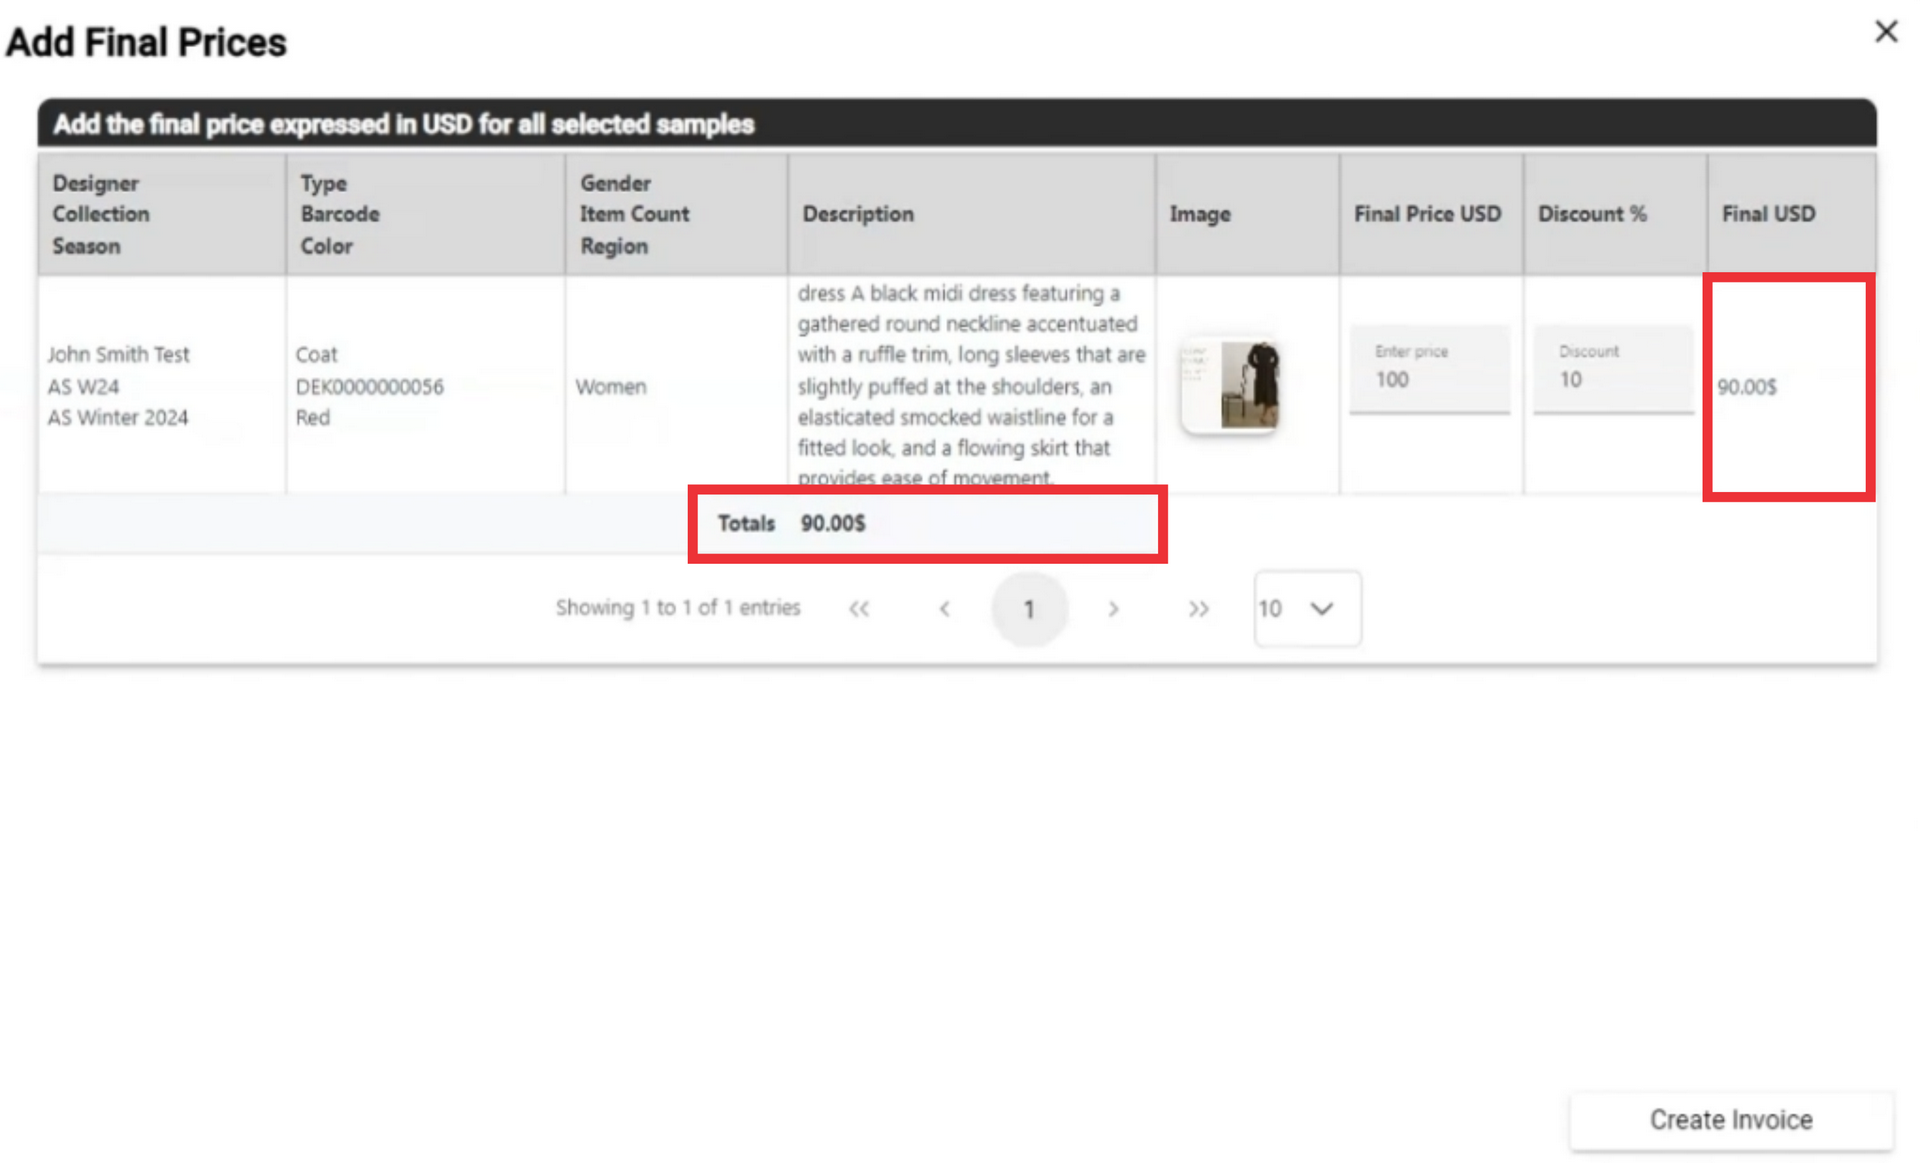
124. Click the Create invoice button to confirm.
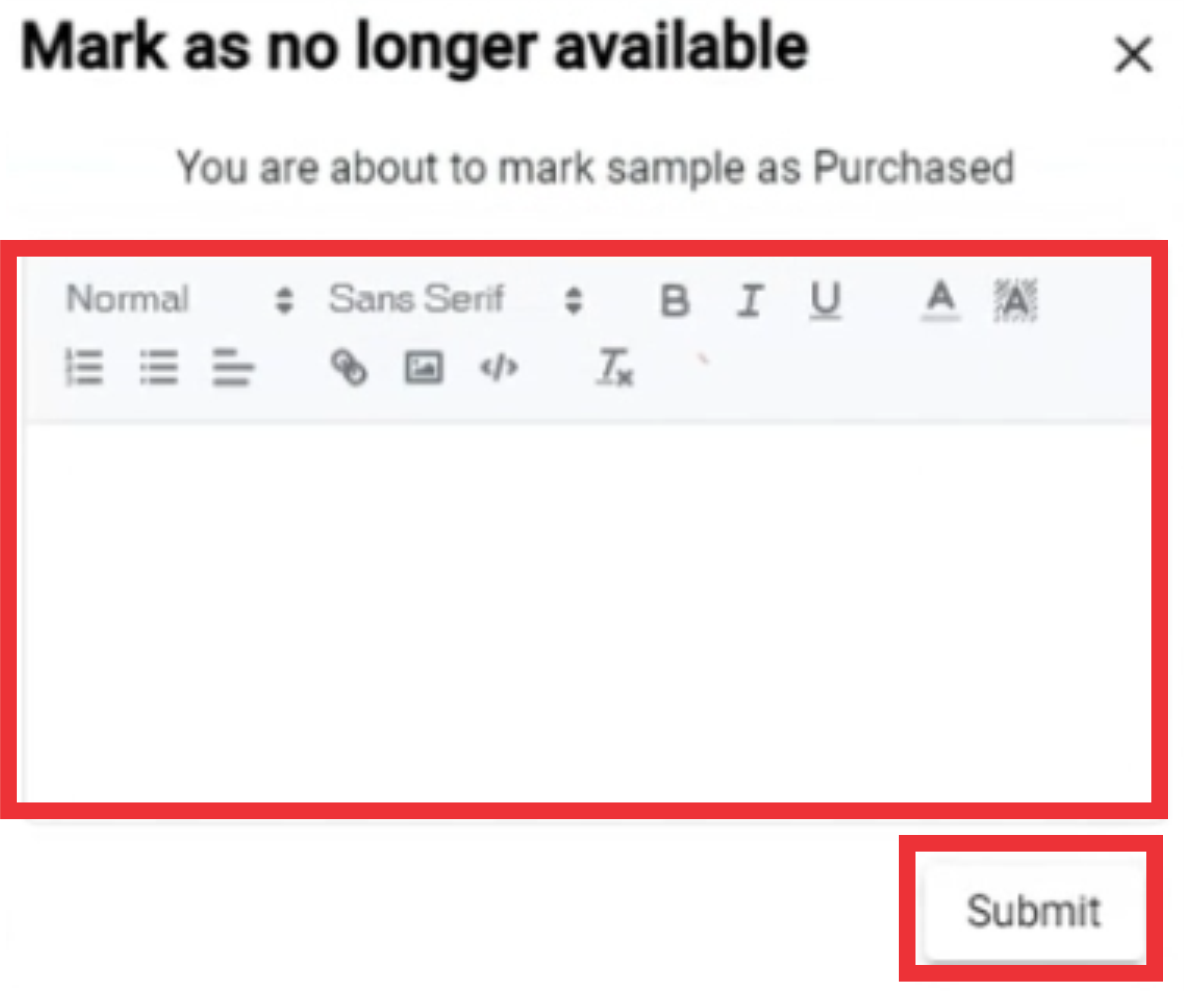
125. Enter comment in the field and click the submit button to confirm.
126. A message will appear at the top of the screen that your sample status has been changed purchased.
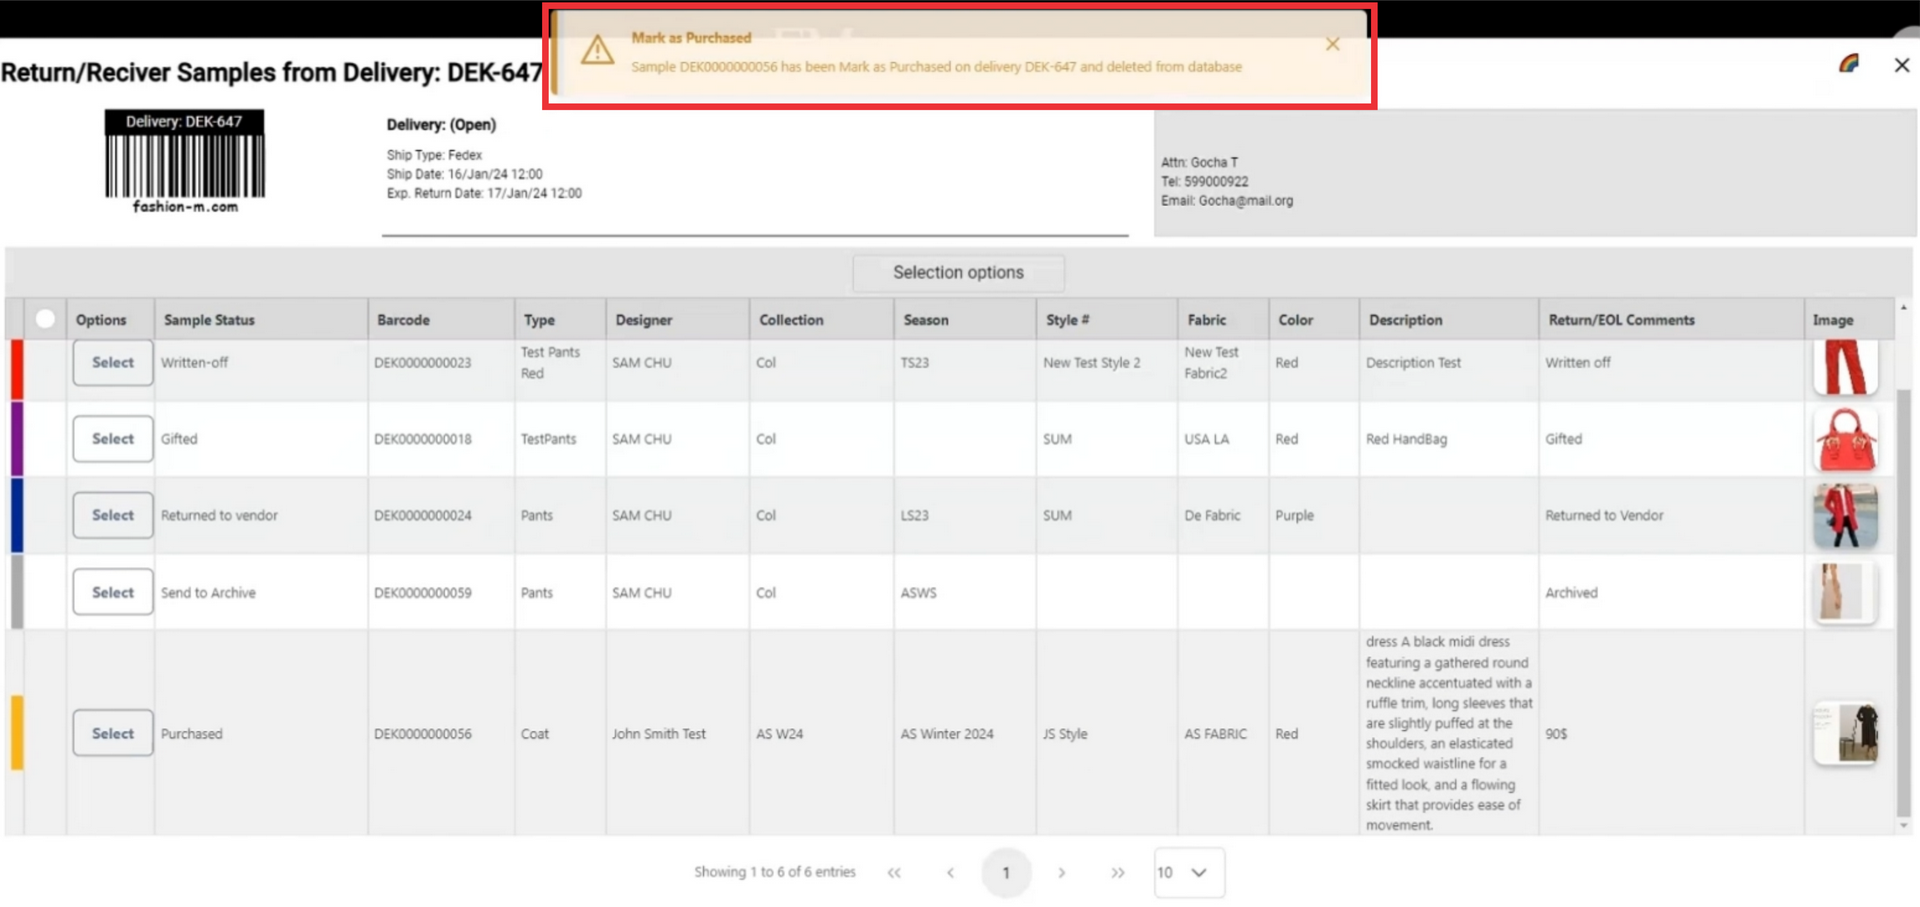
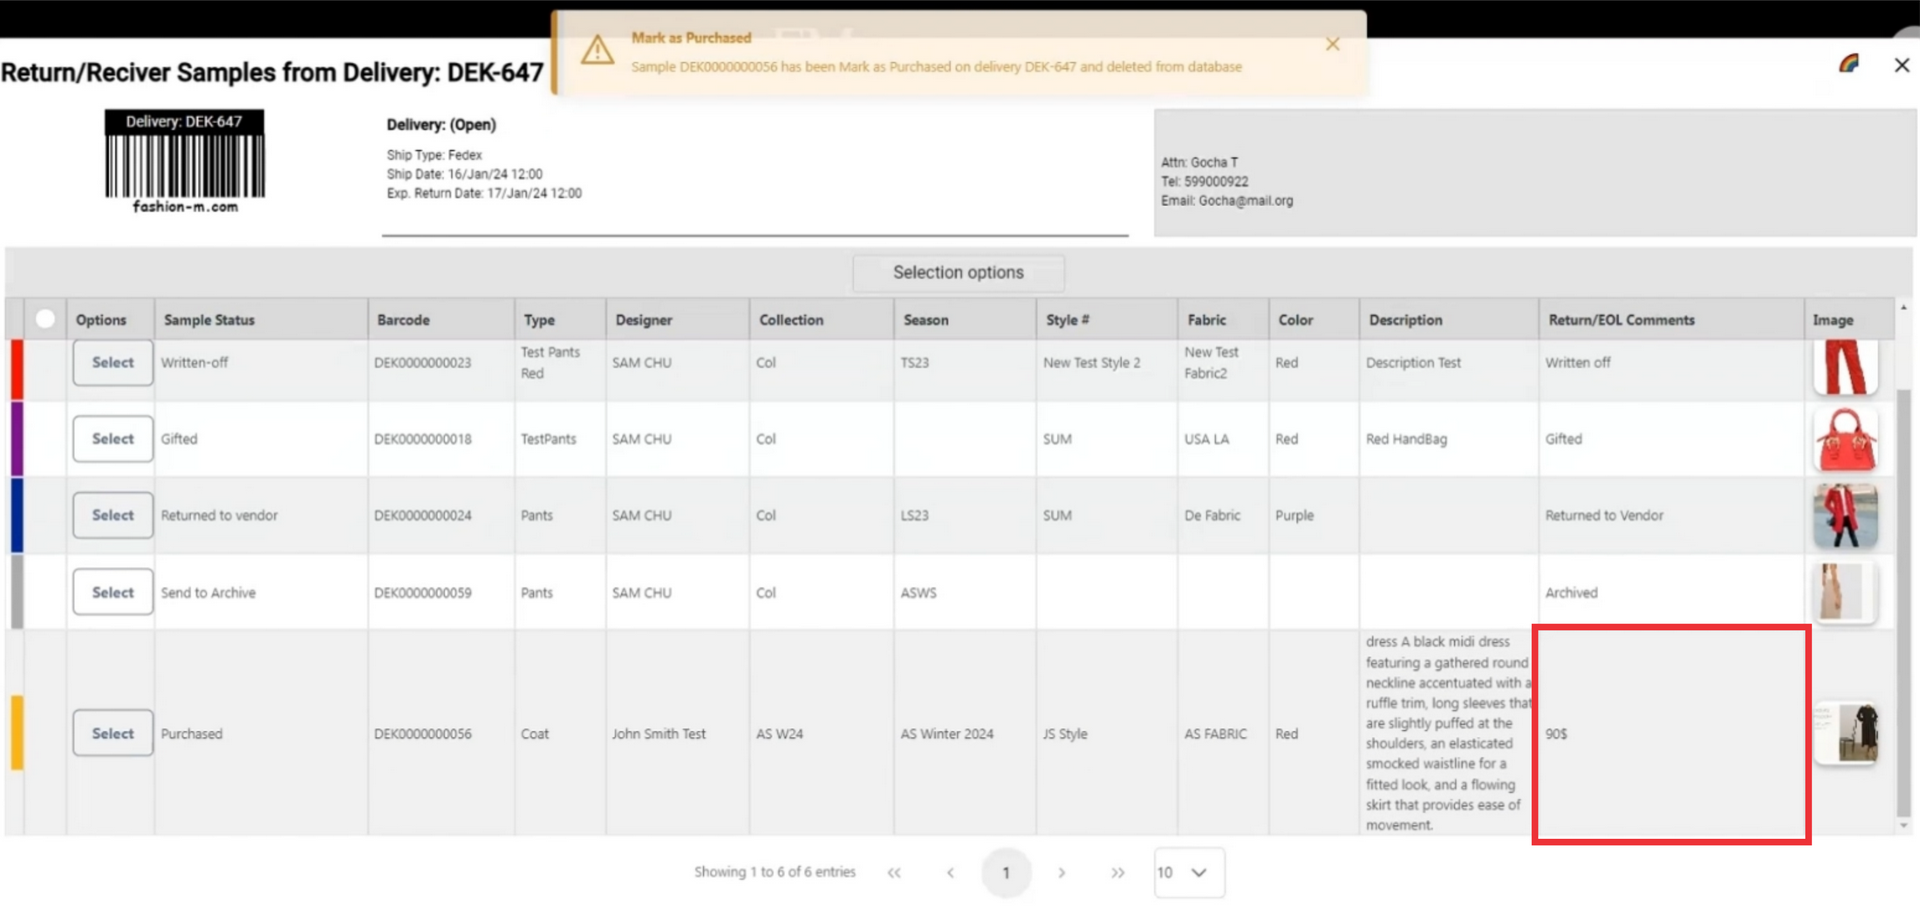
127. A comment and price will also added to samples comment field.
128. After marking as returned to vendor the sample will be highlitghted in yellow color.
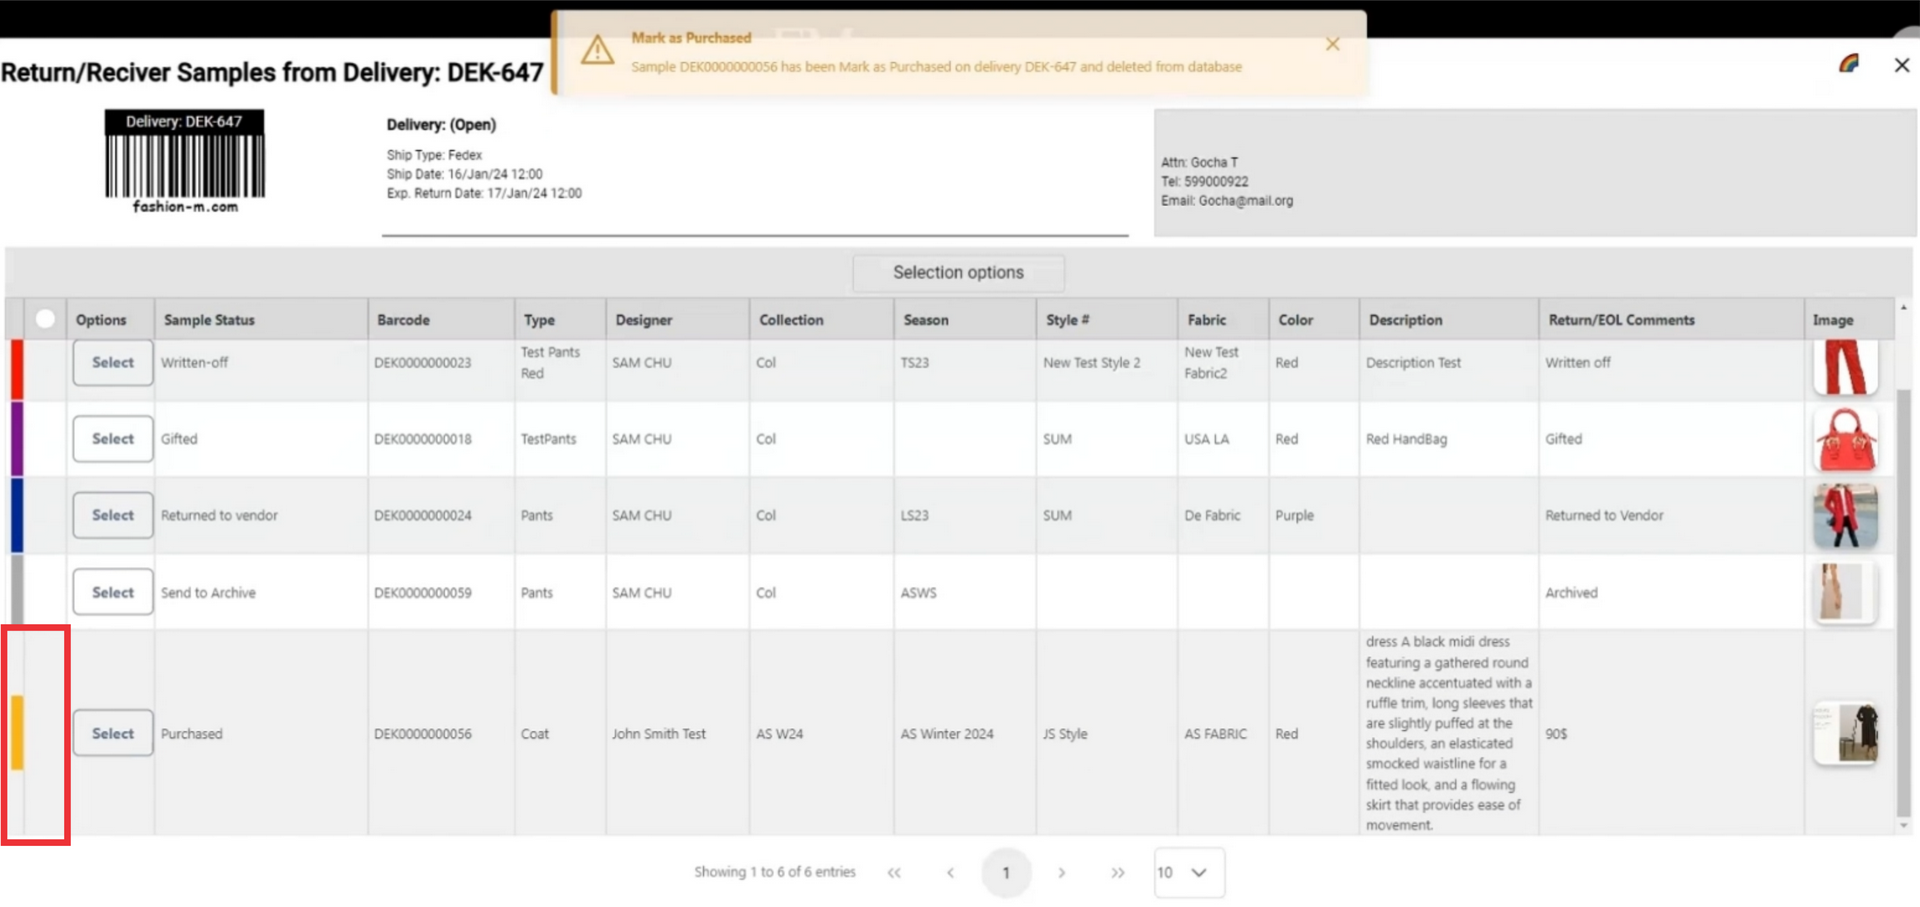
129. Click on the color button in the upper right corner to see definiton and meaning of the colors.
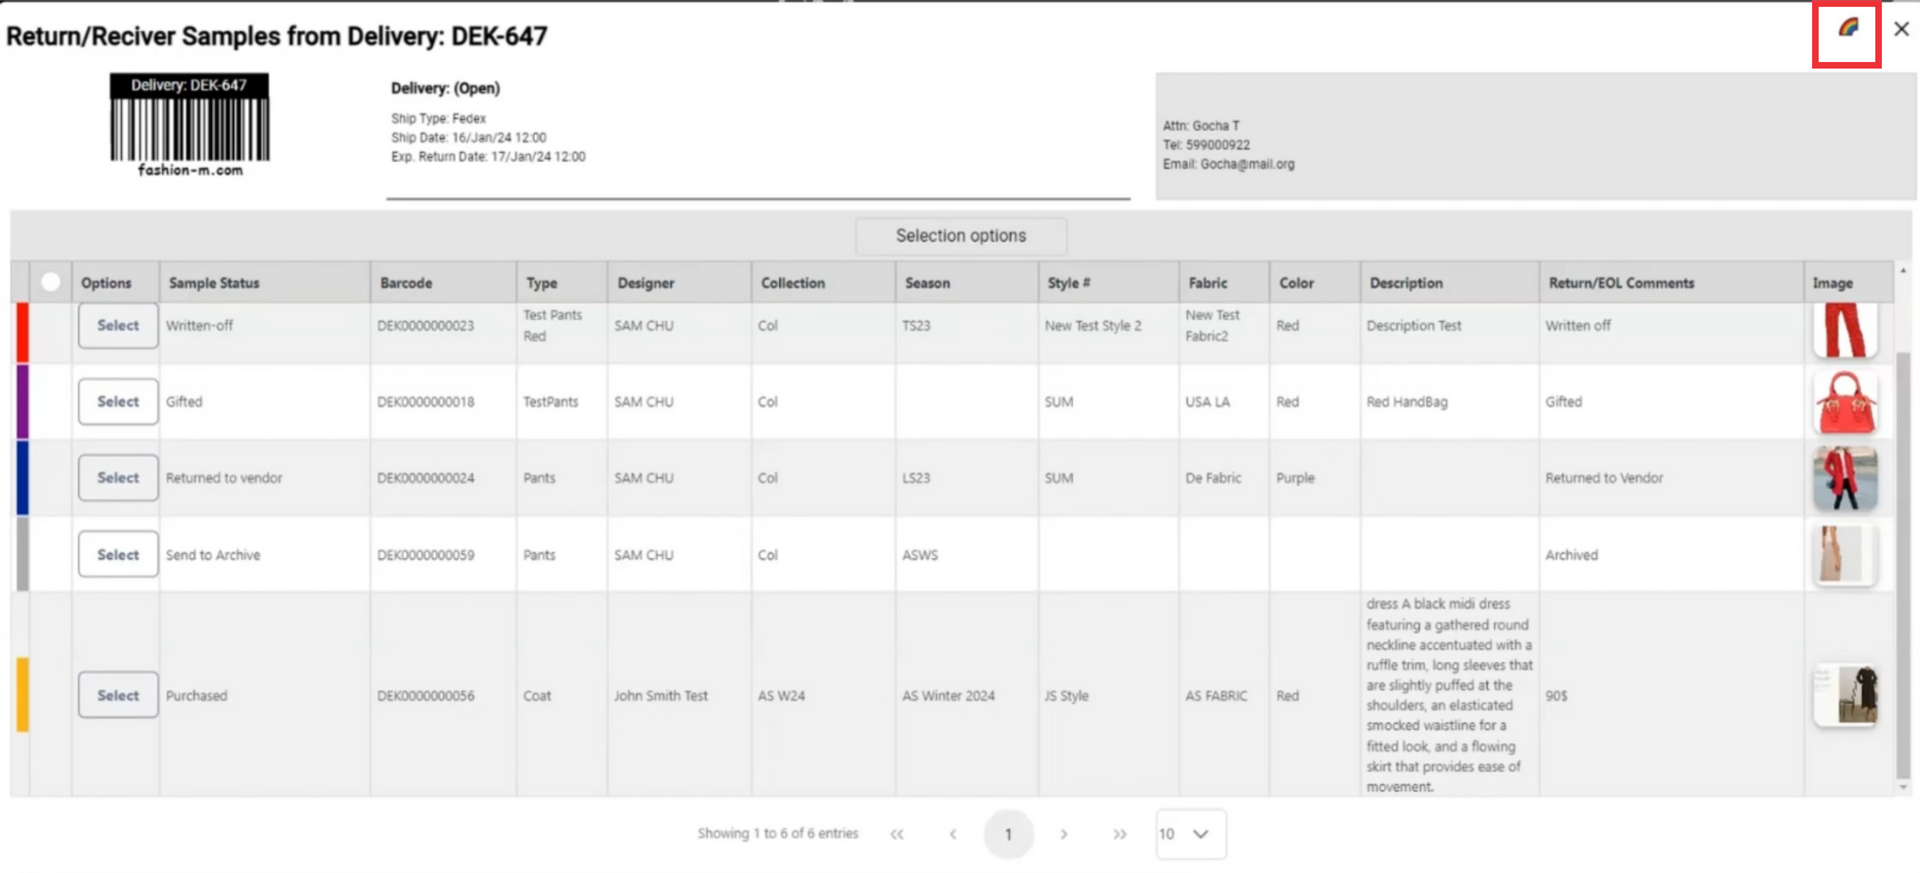
130. yellow color means the sample is marked as purchased.
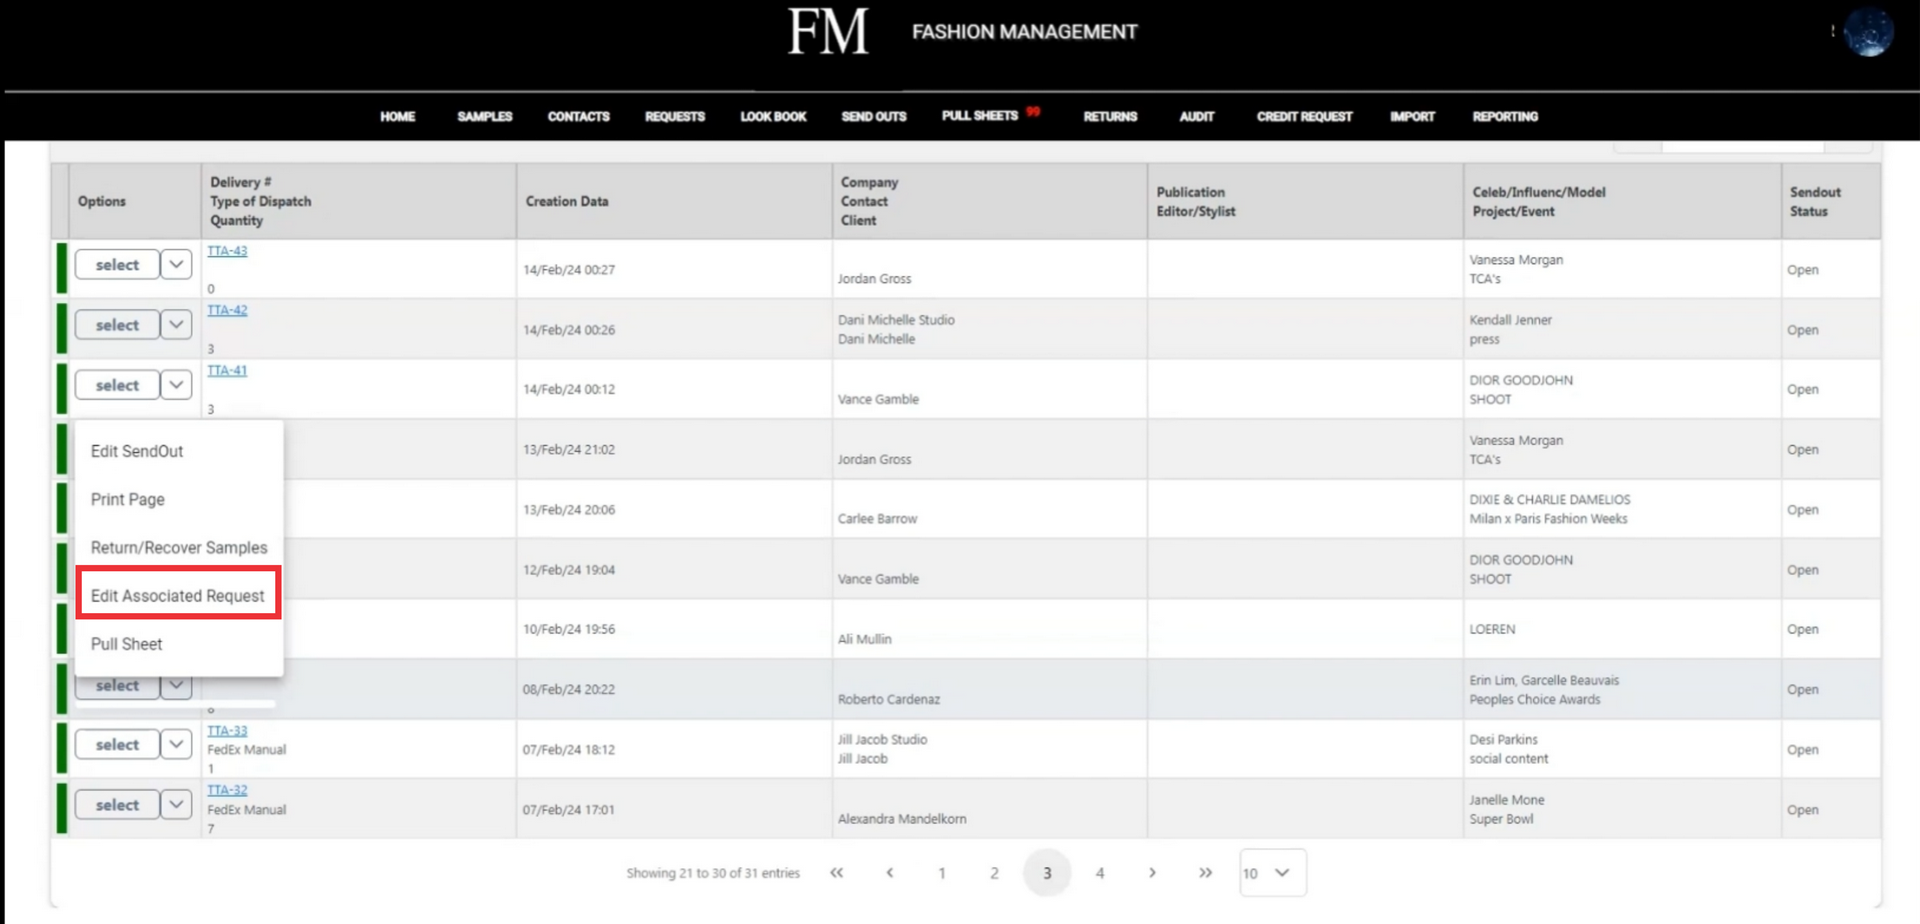
131. Click the "Select" button to open the Send out menu.
132. If desired Edit associated request.
133. Click the yes button to confirm.
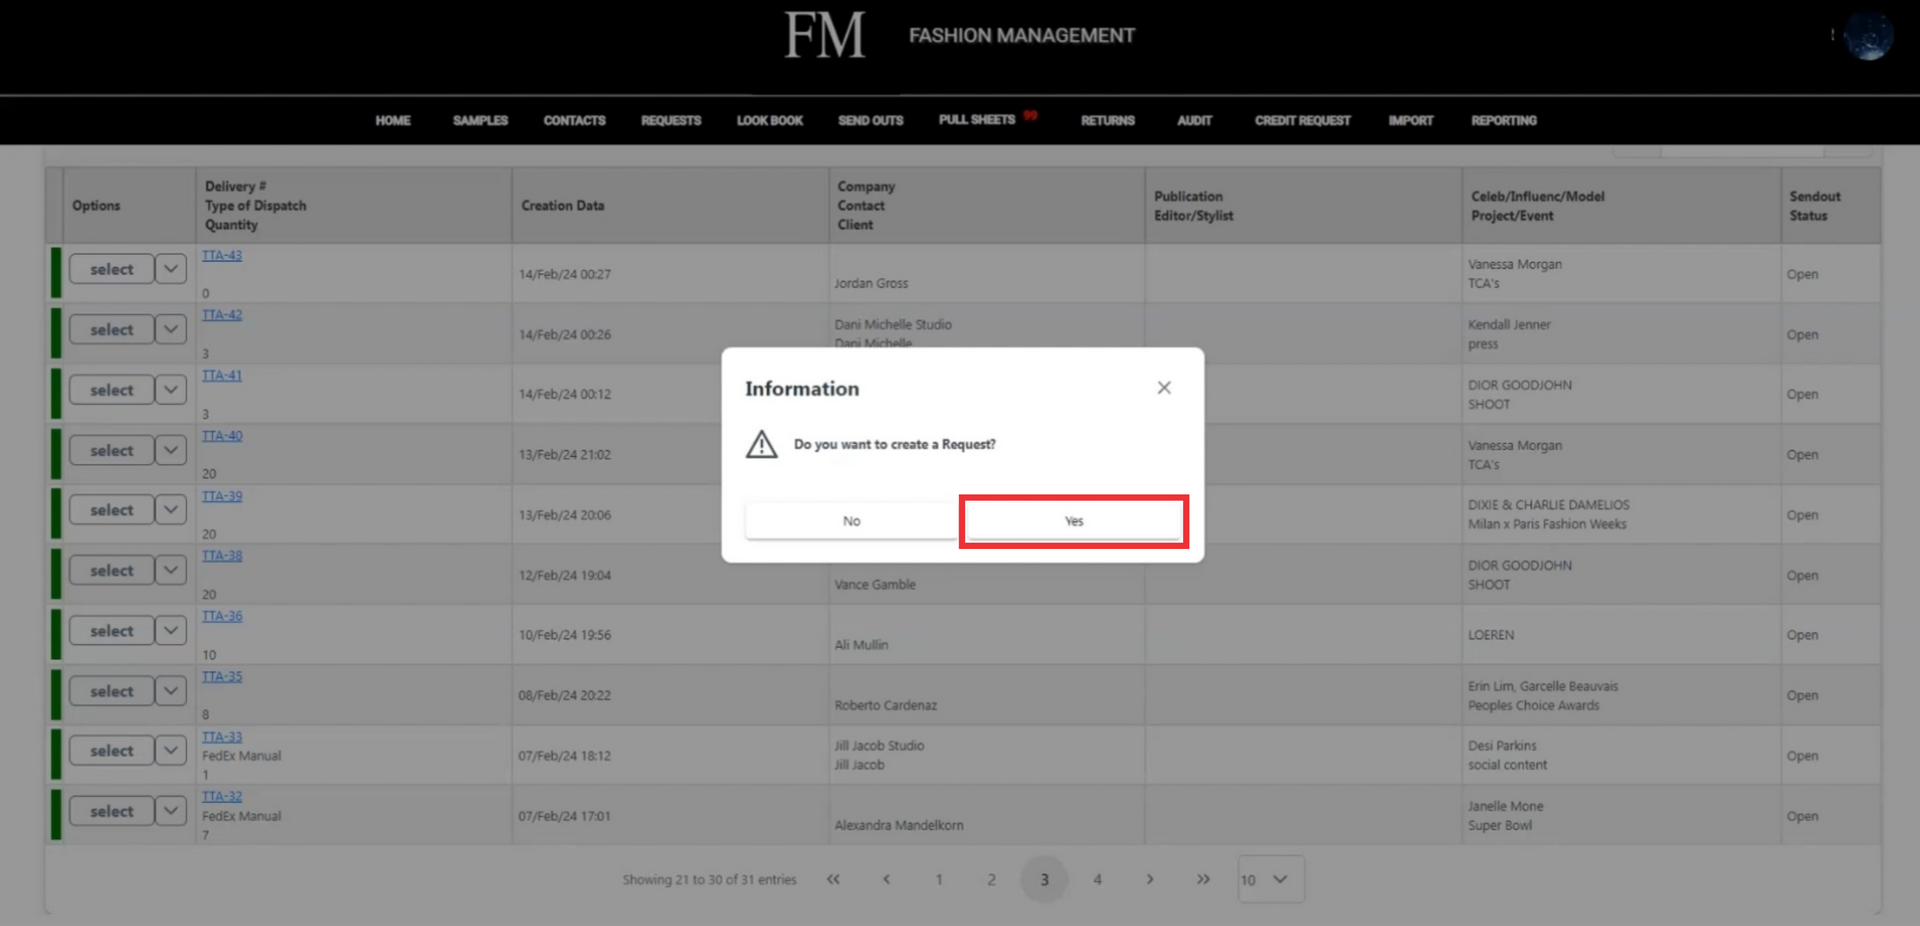
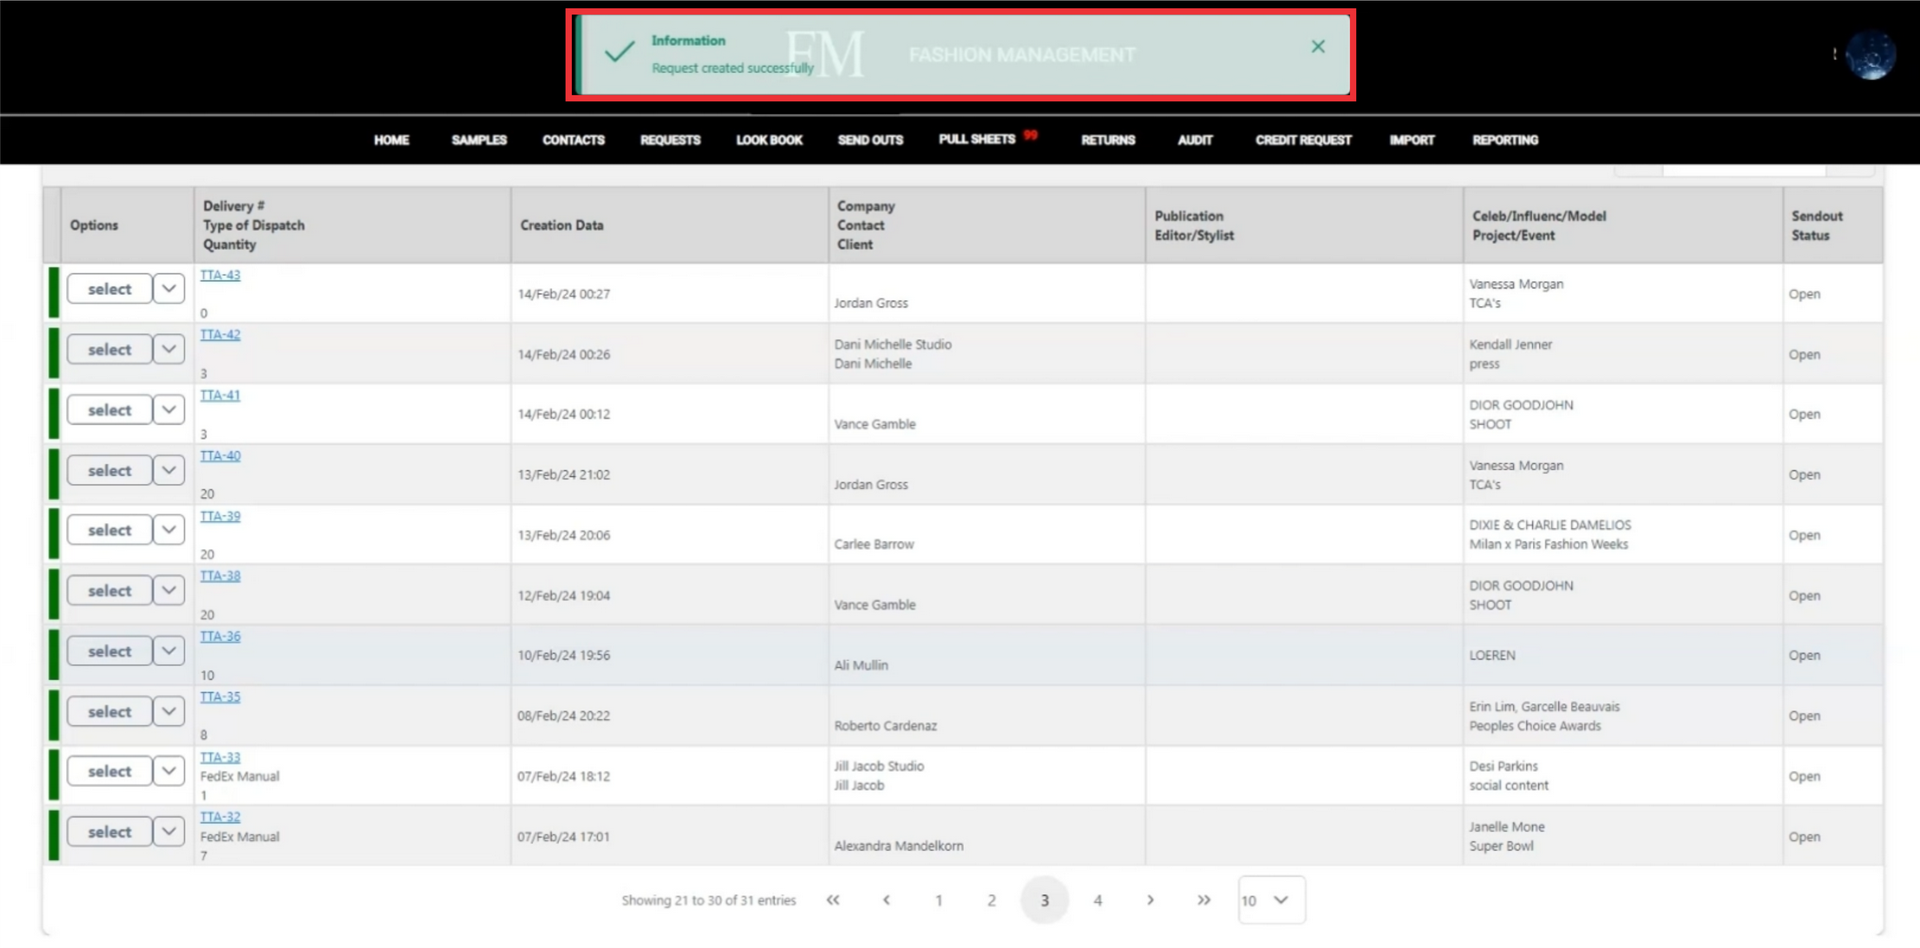
134. A confirmation message about creating succesfully request creating will apeer in the middle upper screen.
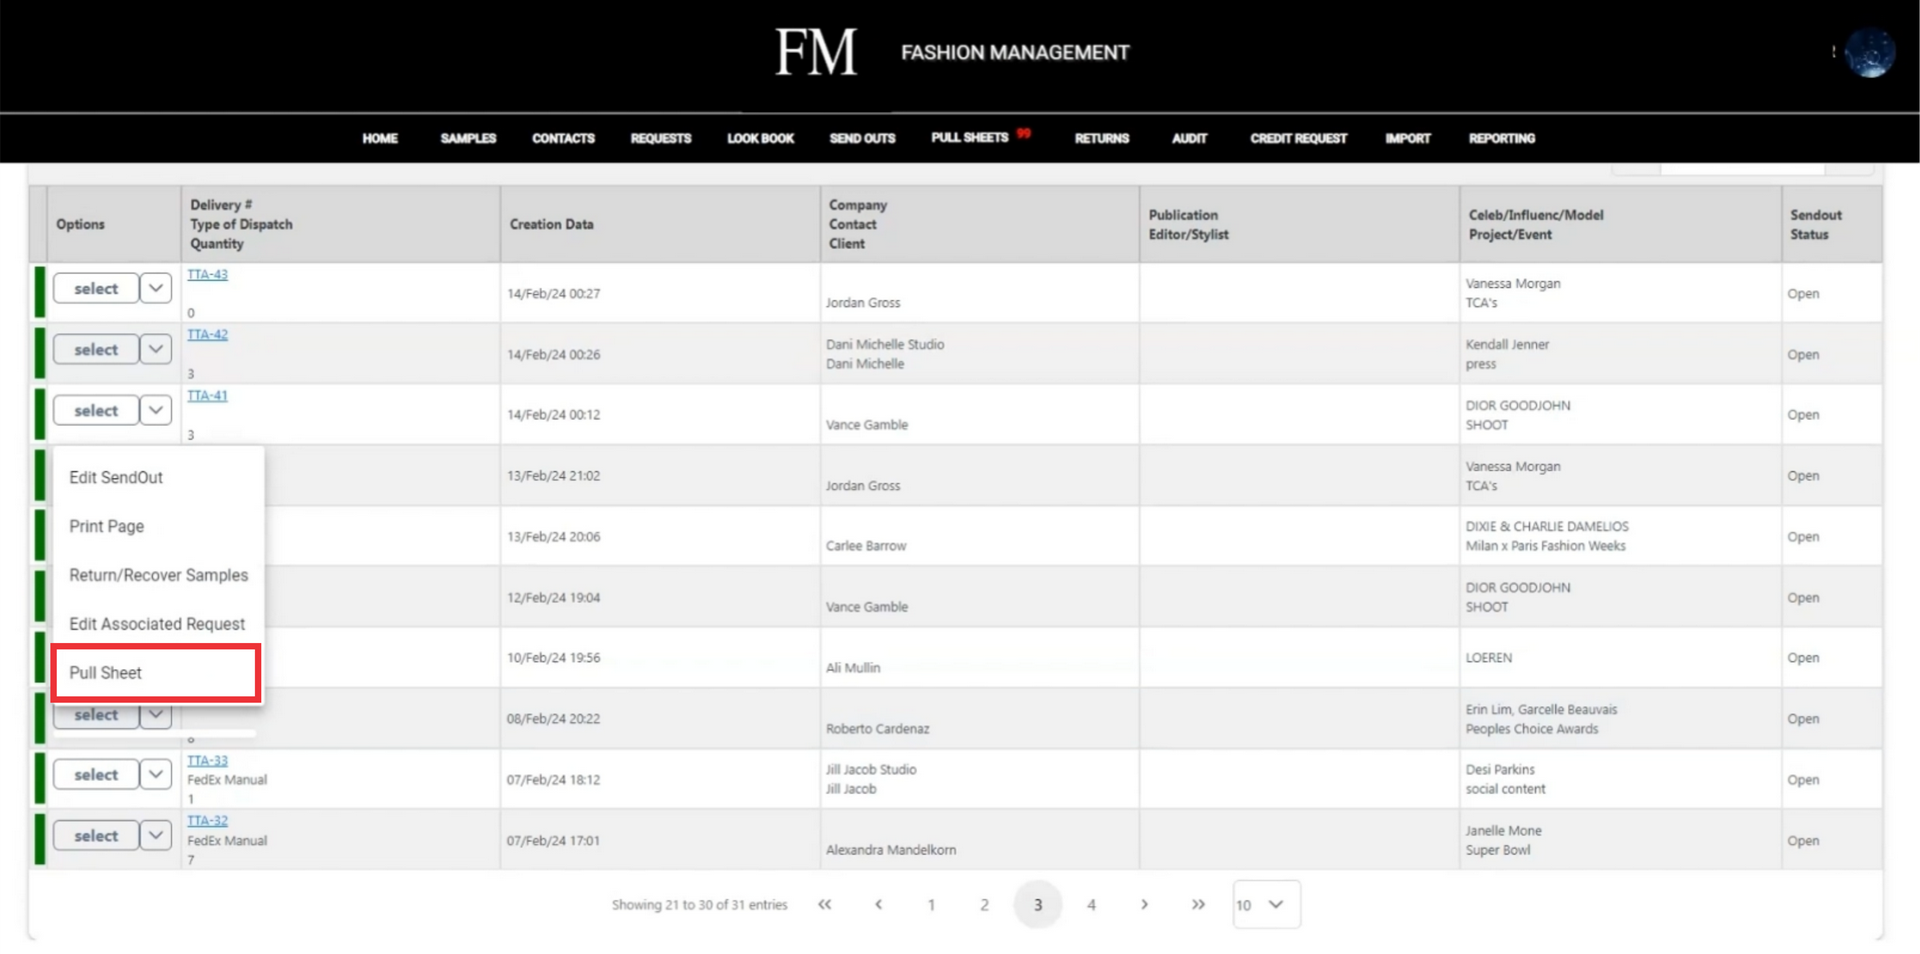
135. Click the "Select" button to open the Send out menu.
136. To create and send pull sheet document by email click the Pull sheet button.
137. Enter Email address in the field.
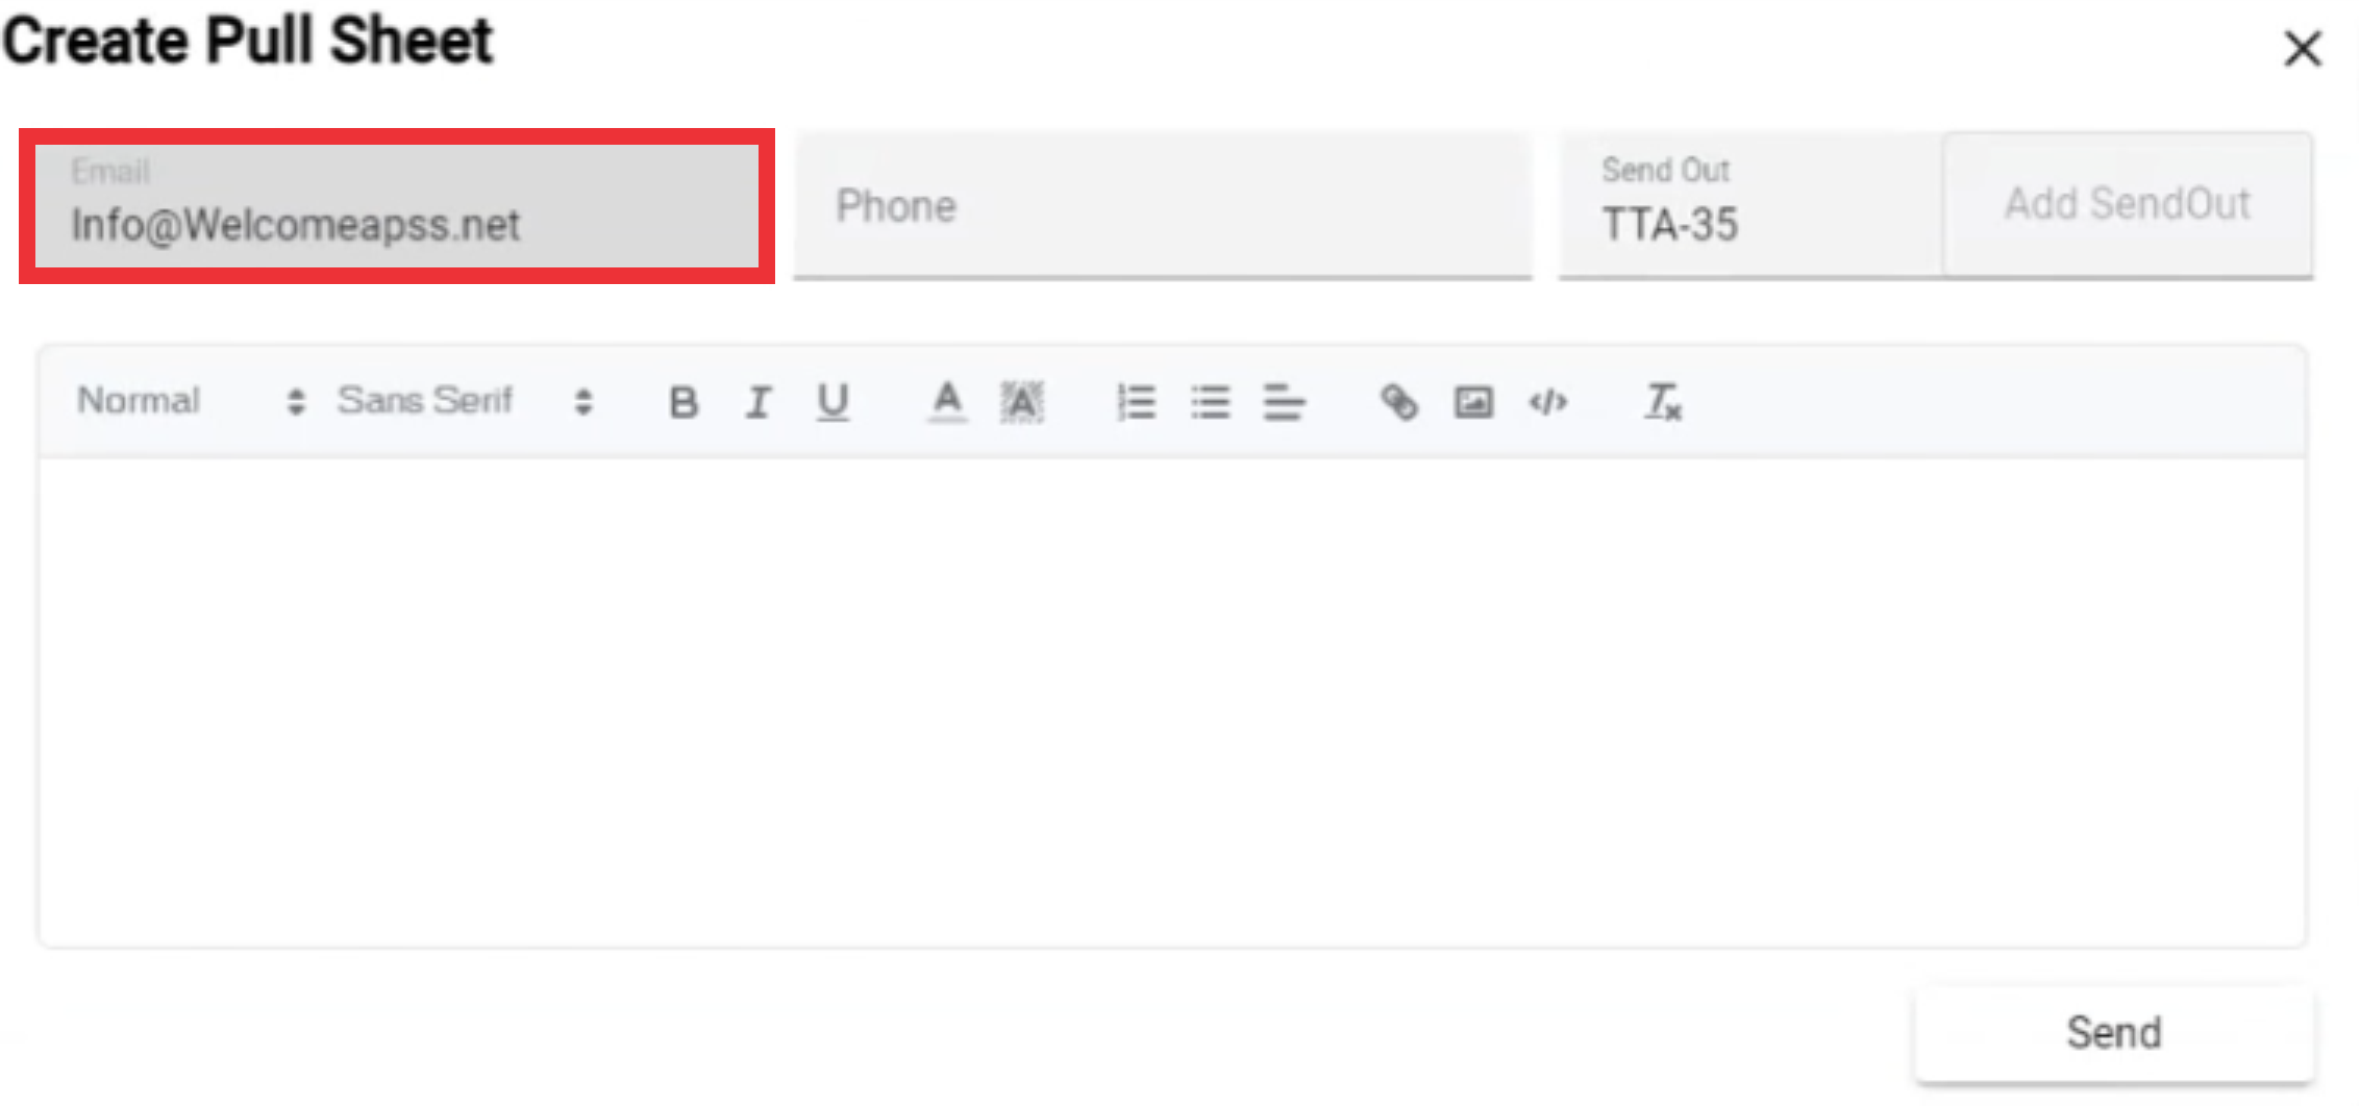
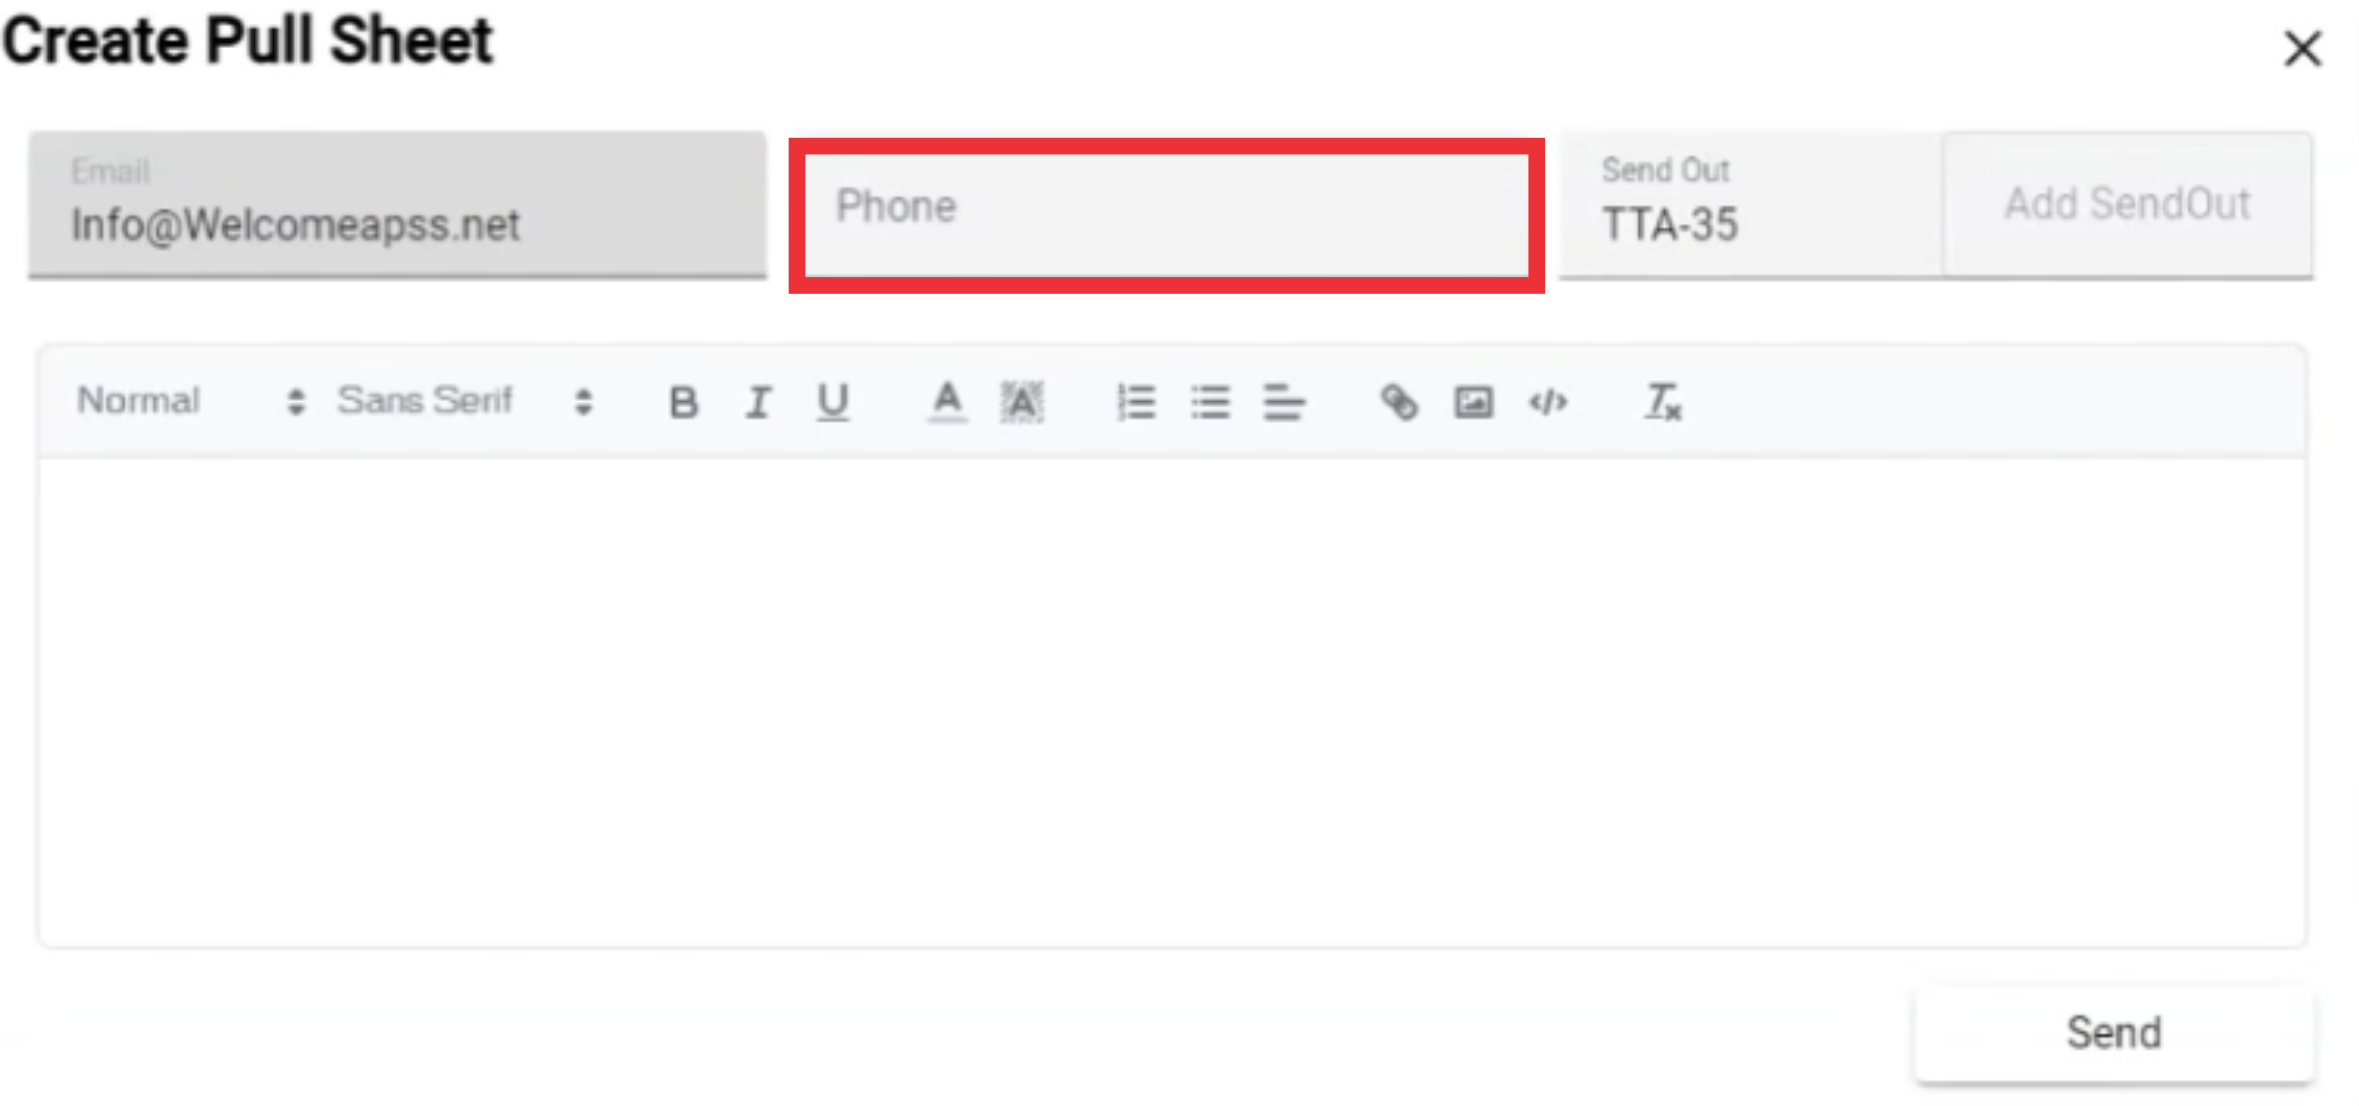
138. Enter Phone number in the field.
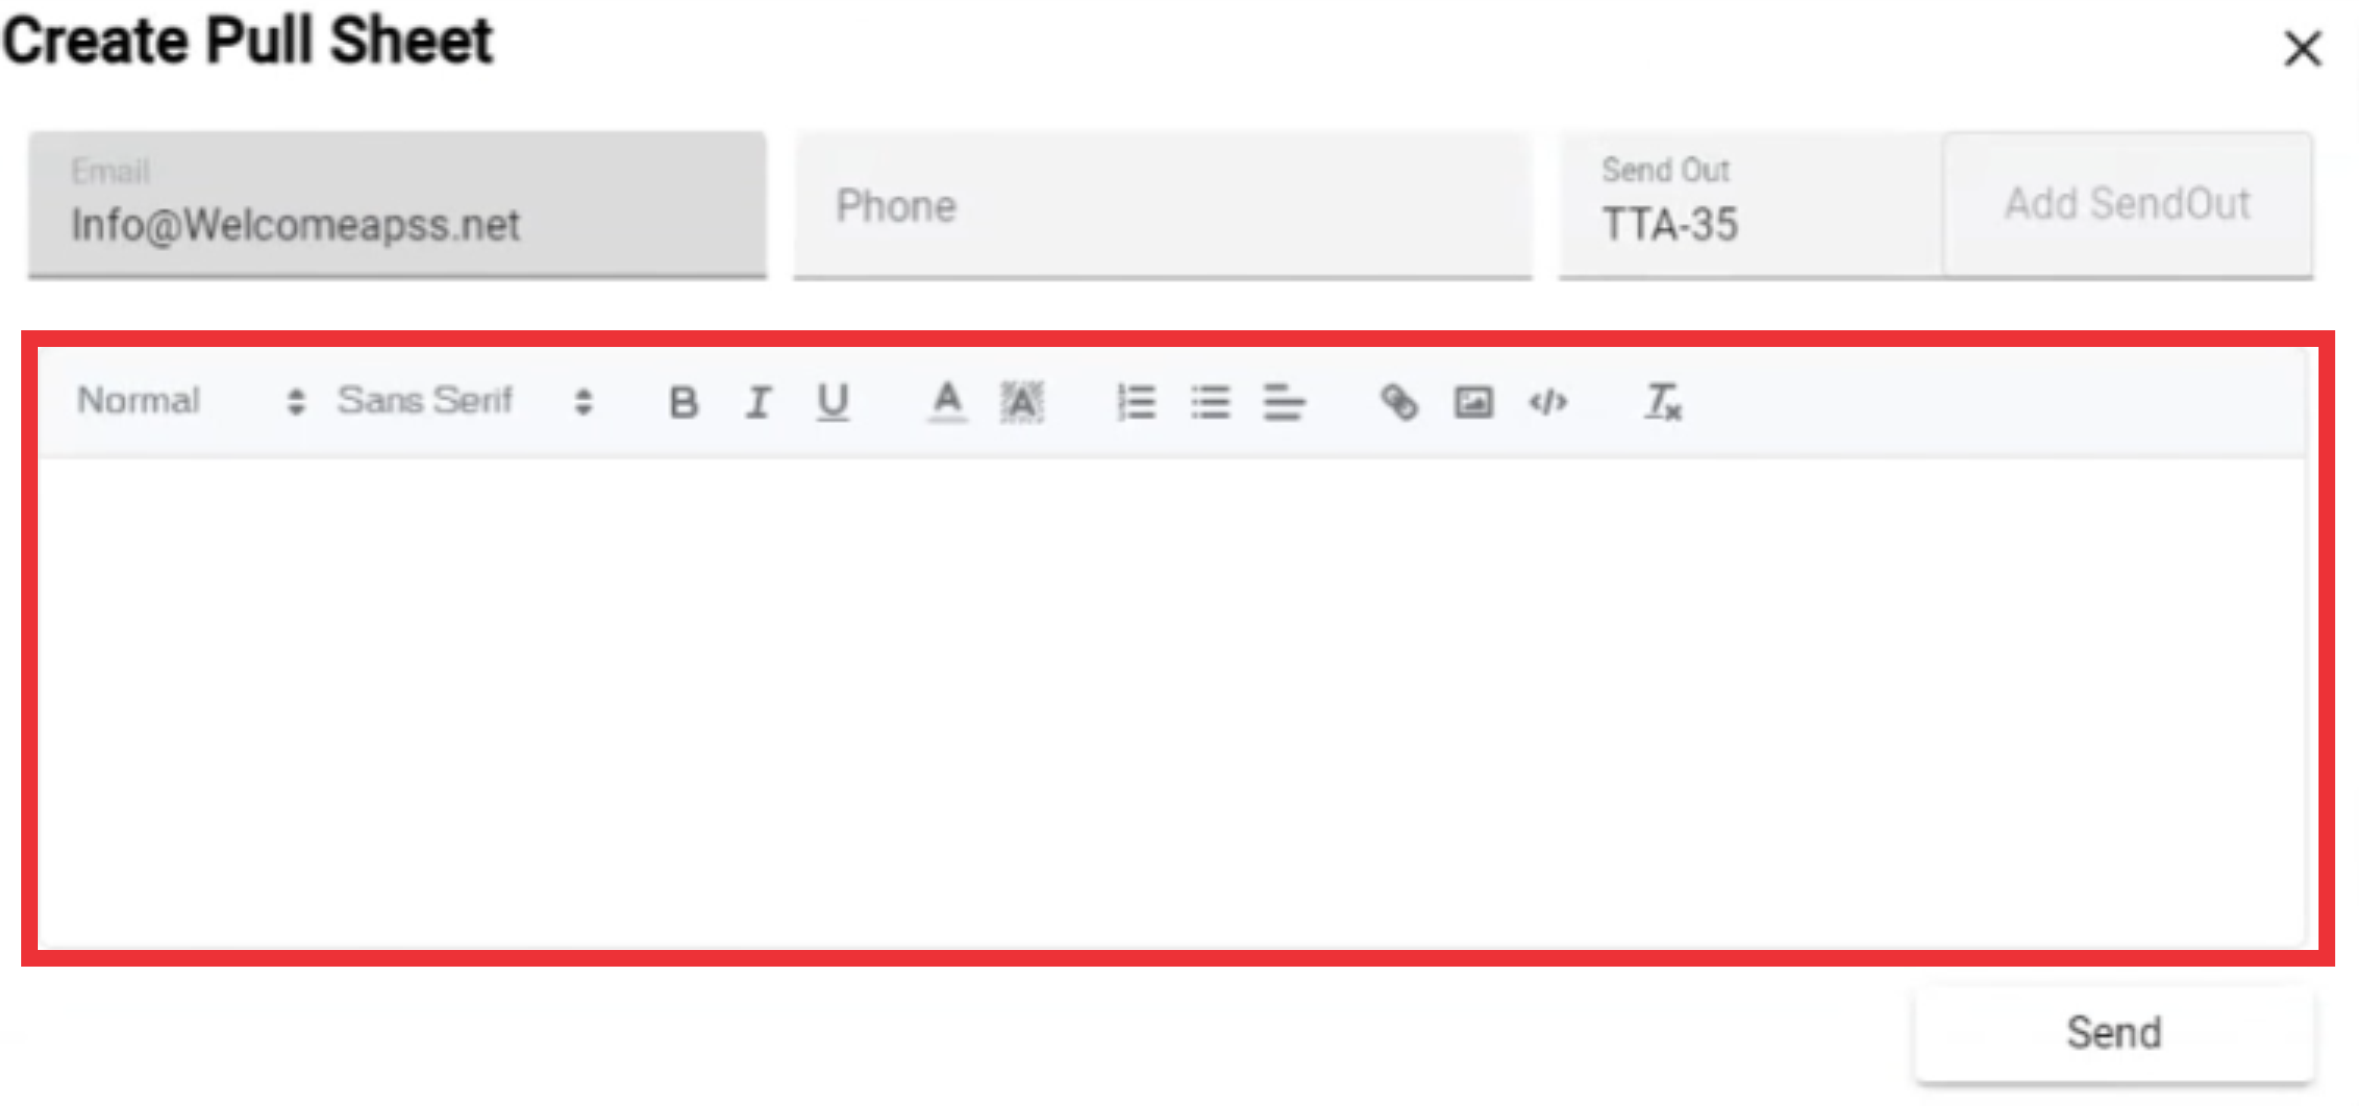
139. Enteremail text in the field.
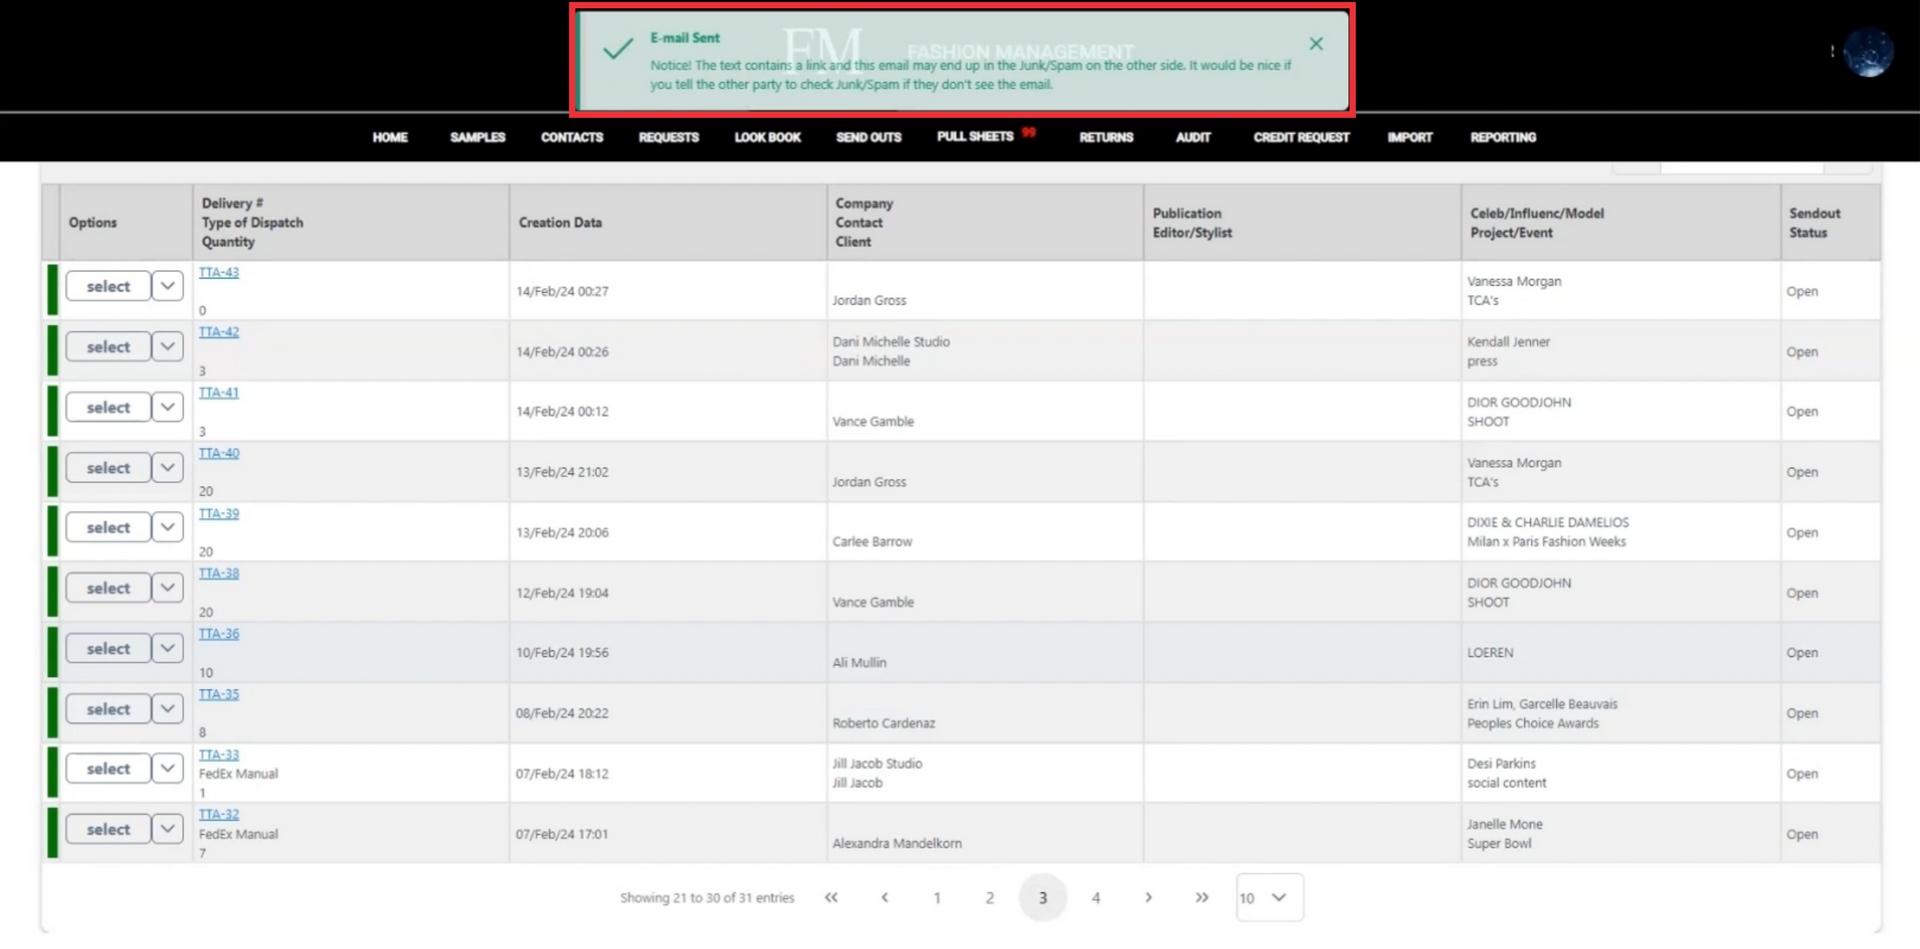
140. Click the Send button.
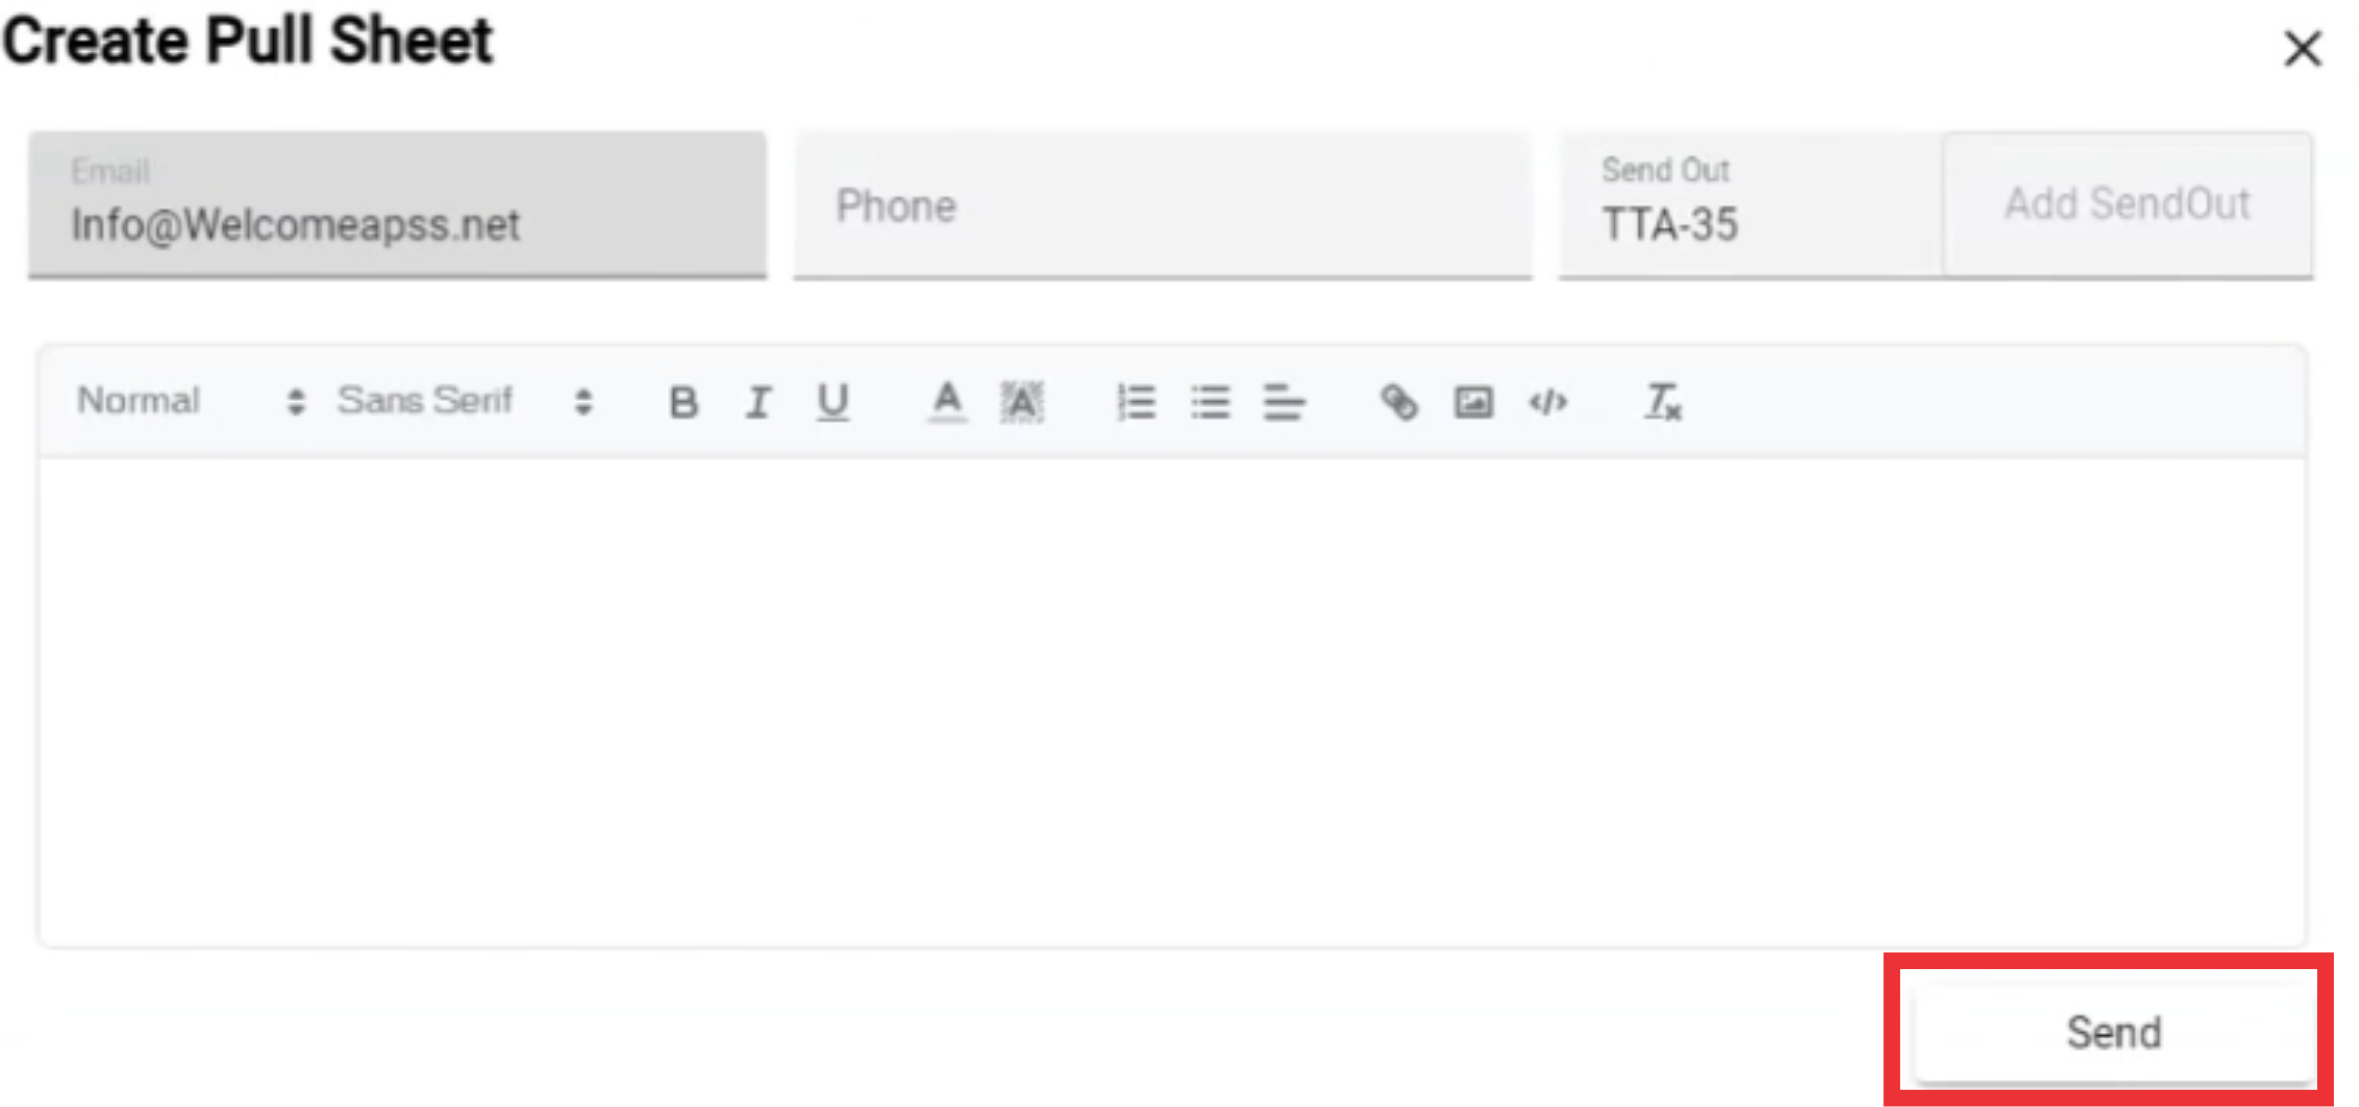
141. A message about email sending wil apper in the middle upper screen. (Notice! the text contains a link and this email may end up in the JUnk/Spam folder on other side. It would be nice if you tell the other party check Junk/Spam folder if they don`t see the email.